


文章目录
Vue 实战
十、Axios 基本使用
1、引言
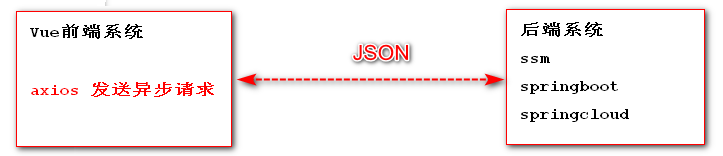
Axios:是一个异步请求技术,核心作用就是用来在页面中发送异步请求,并获取对应数据在页面进行渲染 。
页面局部更新技术 类似jQuery、Ajax技术。
Axios 用来在页面发起异步请求到后端服务,并将后端服务响应数据渲染到页面上。
jQuery 推荐 ajax技术 vue里面并不推荐在使用jQuery框架 vue推荐使用axios 异步请求库。
axiox总结:用来在前端页面发起一个异步请求,请求之后页面不动,响应回来刷新页面局部
官方定义:axios异步请求库,并不是vue官方库,第三方异步请求库 在vue中推荐使用axios。
易用、简洁且高效的http库===>发送http异步请求
特性
- 从浏览器中创建 XMLHttpRequests
- 从 node.js 创建 http 请求
- 支持 Promise API
- 拦截请求和响应
- 转换请求数据和响应数据
- 取消请求
- 自动转换 JSON 数据
- 客户端支持防御 XSRF
2、Axios 第一个程序
(1)搭建后端服务
(1)创建maven工程 vue_day02_back,在pom.xml文件中引入依赖坐标
<?xml version="1.0" encoding="UTF-8"?>
<project xmlns="http://maven.apache.org/POM/4.0.0"
         xmlns:xsi="http://www.w3.org/2001/XMLSchema-instance"
         xsi:schemaLocation="http://maven.apache.org/POM/4.0.0 http://maven.apache.org/xsd/maven-4.0.0.xsd">
    <modelVersion>4.0.0</modelVersion>

    <groupId>com.baizhi</groupId>
    <artifactId>vue_day02_back</artifactId>
    <version>1.0-SNAPSHOT</version>

    <parent>
        <groupId>org.springframework.boot</groupId>
        <artifactId>spring-boot-starter-parent</artifactId>
        <version>2.2.5.RELEASE</version>
    </parent>

    <dependencies>
        <!--web-->
        <dependency>
            <groupId>org.springframework.boot</groupId>
            <artifactId>spring-boot-starter-web</artifactId>
        </dependency>
    </dependencies>
</project>
(2)在项目的resources目录下新建application.properties
server.port=8081
(3)创建包结构,入口类函数、controller视图层、实体类
- 入口类函数
package com.baizhi;

import org.springframework.boot.SpringApplication;
import org.springframework.boot.autoconfigure.SpringBootApplication;

@SpringBootApplication
public class VueDay2BackApplication {
    public static void main(String[] args) {
        SpringApplication.run(VueDay2BackApplication.class, args);
    }
}
- controller
package com.baizhi.controller;

import com.baizhi.entity.User;
import org.slf4j.Logger;
import org.slf4j.LoggerFactory;
import org.springframework.web.bind.annotation.*;

@RestController
@CrossOrigin //用来解决跨域
public class DemoController {

    private static final Logger log = LoggerFactory.getLogger(DemoController.class);

    @GetMapping("/demo")
    public String demo(@RequestParam("id") String id, @RequestParam("name") String name) {
        log.info("demo ok...");
        log.info("id:{} name:{}", id, name);
        // int n = 1 / 0;
        return "demo ok...";
    }

    @PostMapping("/test")
    public String test(@RequestBody User user) {
        log.info("test ok...");
        log.info("id:{} name:{}", user.getId(), user.getName());
        return "test ok ";
    }

    @PutMapping("/test1")
    public String test1(@RequestBody User user) {
        log.info("test1 ok...");
        log.info("id:{} name:{}", user.getId(), user.getName());
        return "test1 ok ";
    }
}
- 实体类
package com.baizhi.entity;

public class User {
    private String id;
    private String name;

    public String getId() {
        return id;
    }

    public void setId(String id) {
        this.id = id;
    }

    public String getName() {
        return name;
    }

    public void setName(String name) {
        this.name = name;
    }
}
(2)GET方式请求
- 后端代码
@RestController
@CrossOrigin //用来解决跨域
public class DemoController {

    private static final Logger log = LoggerFactory.getLogger(DemoController.class);

    @GetMapping("/demo")
    public String demo(@RequestParam("id") String id, @RequestParam("name") String name) {
        log.info("demo ok...");
        log.info("id:{} name:{}", id, name);
        // int n = 1 / 0;
        return "demo ok...";
    }
}
- 前端代码
<!DOCTYPE html>
<html lang="en">
<head>
    <meta charset="UTF-8"/>
    <title>Vue系列课程</title>
</head>
<body>
<div id="app">
    <h1>Axios的基本使用</h1>
</div>
</body>
</html>
<script src="js/axios.min.js"></script>
<script>
    //发送axios的get方式请求
    axios.get("http://localhost:8081/demo?id=21&name=xiaozhu").then(function (response) {
        console.log(response);
        console.log(response.data);//响应结果
    }).catch(function (error) {
        console.log(error);
    })
</script>
- 测试

(3)POST方式请求
- 后端代码
@RestController
@CrossOrigin //用来解决跨域
public class DemoController {

    private static final Logger log = LoggerFactory.getLogger(DemoController.class);

    @PostMapping("/test")
    public String test(@RequestBody User user) {
        log.info("test ok...");
        log.info("id:{} name:{}", user.getId(), user.getName());
        return "test ok ";
    }
}
- 前端代码
<!DOCTYPE html>
<html lang="en">
<head>
    <meta charset="UTF-8"/>
    <title>Vue系列课程</title>
</head>
<body>
<div id="app">
    <h1>Axios的基本使用</h1>
</div>
</body>
</html>
<script src="js/axios.min.js"></script>
<script>
    //发送一个post方式请求
    axios.post("http://localhost:8081/test", {id: 21, name: "xiaozhu"}).then(function (response) {
        console.log(response);
        console.log(response.data);//响应结果
    }).catch(function (error) {
        console.log(error);
    })
</script>
- 测试

(4)put 方式请求
- 后端代码
@RestController
@CrossOrigin //用来解决跨域
public class DemoController {

    private static final Logger log = LoggerFactory.getLogger(DemoController.class);

    @PutMapping("/test1")
    public String test1(@RequestBody User user) {
        log.info("test1 ok...");
        log.info("id:{} name:{}", user.getId(), user.getName());
        return "test1 ok ";
    }
}
- 前端代码
<!DOCTYPE html>
<html lang="en">
<head>
    <meta charset="UTF-8"/>
    <title>Vue系列课程</title>
</head>
<body>
<div id="app">
    <h1>Axios的基本使用</h1>
</div>
</body>
</html>
<script src="js/axios.min.js"></script>
<script>
    //发送put方式请求
    axios.put("http://localhost:8081/test1", {id: 22, name: "xiaoli"}).then(function (response) {
        console.log(response);
        console.log(response.data);//响应结果
    }).catch(function (error) {
        console.log(error);
    })
</script>
- 测试

(5)axios并发请求
并发请求:将多个请求在同一时刻发送到后端服务接口,最后再集中处理你每个请求的响应结果
<!DOCTYPE html>
<html lang="en">
<head>
    <meta charset="UTF-8"/>
    <title>Vue系列课程</title>
</head>
<body>
<div id="app">
    <h1>Axios的基本使用</h1>
</div>
</body>
</html>
<script src="js/axios.min.js"></script>
<script>
    //并发请求
    function getDemoMethod() {
        return axios.get("http://localhost:8081/demo?id=33&name=xiaoxiao")
    }

    function getTestMethod() {
        return axios.post("http://localhost:8081/test", {id: 44, name: "xiaowu"});
    }

    axios.all([getDemoMethod(), getTestMethod()]).then(axios.spread(function (acct, perms) {
        //两个请求现在都执行完成
        console.log(acct); //acct: 第一个请求后端响应的结果
        console.log(perms); //perms: 第二请求后端响应的结果
    }))
</script>
- 测试

(6)创建实例 axios.create([config])
- 可以使用自定义配置新建一个
axios实例发送请求
<!DOCTYPE html>
<html lang="en">
<head>
    <meta charset="UTF-8"/>
    <title>Vue系列课程</title>
</head>
<body>
<div id="app">
    <h1>Axios的基本使用</h1>
</div>
</body>
</html>
<script src="js/axios.min.js"></script>
<script>
    //创建axios的配置对象(实例)
    var instance = axios.create({
        baseURL: "http://localhost:8081/",
        timeout: 5000,
    })

    //发送get方式请求
    instance.get("/demo?id=23&name=xiaozhang").then(function (response) {
        console.log(response);
        console.log(response.data);
    }).catch(function (error) {
        console.log(error);
    })

    //发送post方式请求
    instance.post("/test", {id: 12, name: "xiaowang"}).then(function (response) {
        console.log(response);
        console.log(response.data);
    }).catch(function (error) {
        console.log(error);
    })
</script>
(7)拦截器
在请求或响应被 then 或 catch 处理前拦截它们
作用:用来将axios中共有参数,响应的公共处理 交给拦截器处理,减少axios发送请求时代码冗余

// 添加请求拦截器
axios.interceptors.request.use(function (config) {
    // 在发送请求之前做些什么
    return config;
}, function (error) {
    // 对请求错误做些什么
    return Promise.reject(error);
});

// 添加响应拦截器
axios.interceptors.response.use(function (response) {
    // 对响应数据做点什么
    return response;
}, function (error) {
    // 对响应错误做点什么
    return Promise.reject(error);
});
- 代码示例
<!DOCTYPE html>
<html lang="en">
<head>
    <meta charset="UTF-8"/>
    <title>Vue系列课程</title>
</head>
<body>
<div id="app">
    <h1>Axios的基本使用</h1>
</div>
</body>
</html>
<script src="js/axios.min.js"></script>
<script>
    //创建axios的配置对象(实例)
    var instance = axios.create({
        baseURL: "http://localhost:8081/",
        timeout: 5000,
    })

    //请求拦截器
    instance.interceptors.request.use(function (config) {
        if (config.url.indexOf("?") == -1) {
            config.url += "?token=1234"
        } else {
            config.url += "&token=1234"
        }
        return config;
    })

    //响应拦截器
    instance.interceptors.response.use(function (response) {
        console.log(response);
        //response.data = "xxxx";
        if (response.status == 500) {
            alert("服务器出现错误!")
            return response;
        }
    })

    //发送get方式请求
    instance.get("/demo?id=23&name=xiaozhang").then(function (response) {
        console.log(response);
        console.log(response.data);
    }).catch(function (error) {
        console.log(error);
    })

    //发送post方式请求
    instance.post("/test", {id: 12, name: "xiaowang"}).then(function (response) {
        console.log(response);
        console.log(response.data);
    }).catch(function (error) {
        console.log(error);
    })
</script>
- 测试


 3万+
3万+


 被折叠的 条评论
为什么被折叠?
被折叠的 条评论
为什么被折叠?
 到【灌水乐园】发言


