


1.搭建MySQL数据库并导入初始数据
使用版本:mysql-8.0.29-linux-glibc2.12-x86_64.tar
1.将安装包上传至Linux服务器
2.解压tar包
tar -xvf mysql-8.0.29-linux-glibc2.12-x86_64.tar
####3.重命名并移动到合适的路径
   mv  mysql-8.0.29-linux-glibc2.12-x86_64.tar mysql   #重命名
   mv  mysql /usr/local   #将mysql移动到/usr/local路径下
   cd /usr/local   #进入/usr/local
   groupadd mysql   #创建用户组
   useradd -r -g mysql mysql #进mysql目录添加mysql用户组mysql用户
   chown -R mysql:mysql ./ # 将当前目录下文件 用户用户组设置为mysql
4.在/usr/local/mysql下创建data文件夹
mkdir data
5.初始化数据库,自动生成密码 需记录 等下要用
bin/mysqld --initialize --user=mysql --basedir=/usr/local/mysql --datadir=/usr/local/mysql/data
6.修改/usr/local/mysql 当前目录的用户
chown -R root:root ./
chown -R mysql:mysql data  #
7.复制my-default.cnf这个文件到etc/my.cnf去
# cd support-files/   #进入support-files 目录
# touch my-default.cnf   #创建/如果文件存在则更新,my-default.cnf
# chmod 777 ./my-default.cnf   #该文件赋777权限
# cd ../ #返回上级
# cp support-files/my-default.cnf /etc/my.cnf #拷贝my-default.cnf文件到etc
8.完了之后配置my.cnf
vim /etc/my.cnf #编辑 my.cnf文件
my.cnf文件
[mysqld]

# Remove leading # and set to the amount of RAM for the most important data
# cache in MySQL. Start at 70% of total RAM for dedicated server, else 10%.
# innodb_buffer_pool_size = 128M

# Remove leading # to turn on a very important data integrity option: logging
# changes to the binary log between backups.
# log_bin

# These are commonly set, remove the # and set as required.
basedir = /usr/local/mysql
datadir = /usr/local/mysql/data
socket = /tmp/mysql.sock
log-error = /usr/local/mysql/data/error.log
pid-file = /usr/local/mysql/data/mysql.pid
tmpdir = /tmp
port = 5186
#lower_case_table_names = 1
# server_id = .....
# socket = .....
#lower_case_table_names = 1
max_allowed_packet=32M
default-authentication-plugin = mysql_native_password
#lower_case_file_system = on
#lower_case_table_names = 1
log_bin_trust_function_creators = ON
# Remove leading # to set options mainly useful for reporting servers.
# The server defaults are faster for transactions and fast SELECTs.
# Adjust sizes as needed, experiment to find the optimal values.
# join_buffer_size = 128M
# sort_buffer_size = 2M
# read_rnd_buffer_size = 2M

sql_mode=NO_ENGINE_SUBSTITUTION,STRICT_TRANS_TABLES
9.开机自启,进入/usr/local/mysql/support-files进行设置
# cd support-files/
# cp mysql.server /etc/init.d/mysql
# chmod +x /etc/init.d/mysql
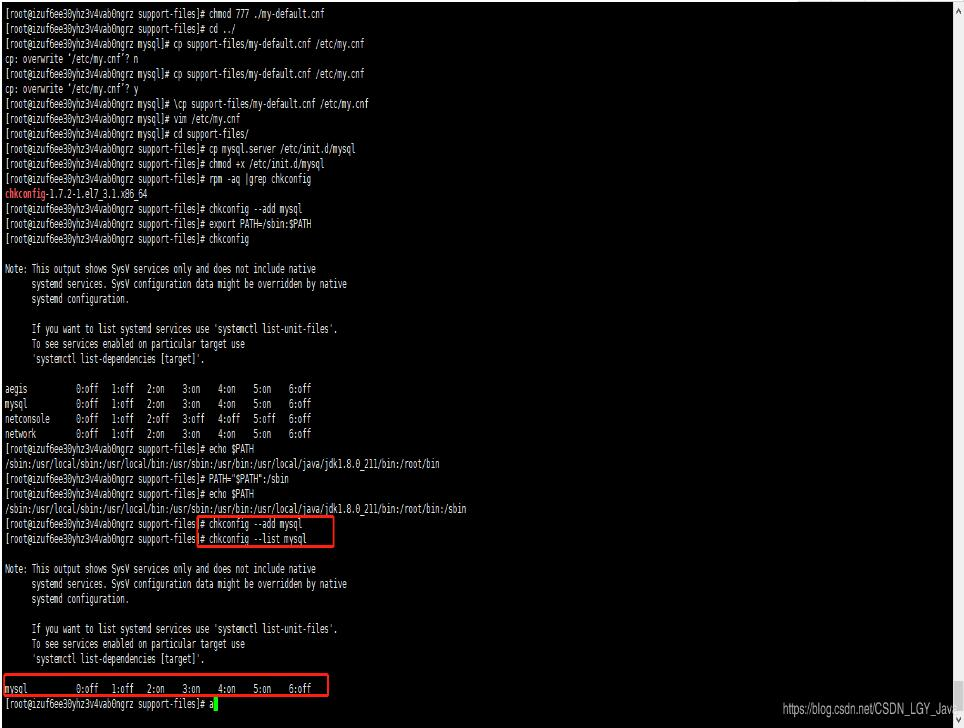
10.注册服务
#chkconfig --add mysql
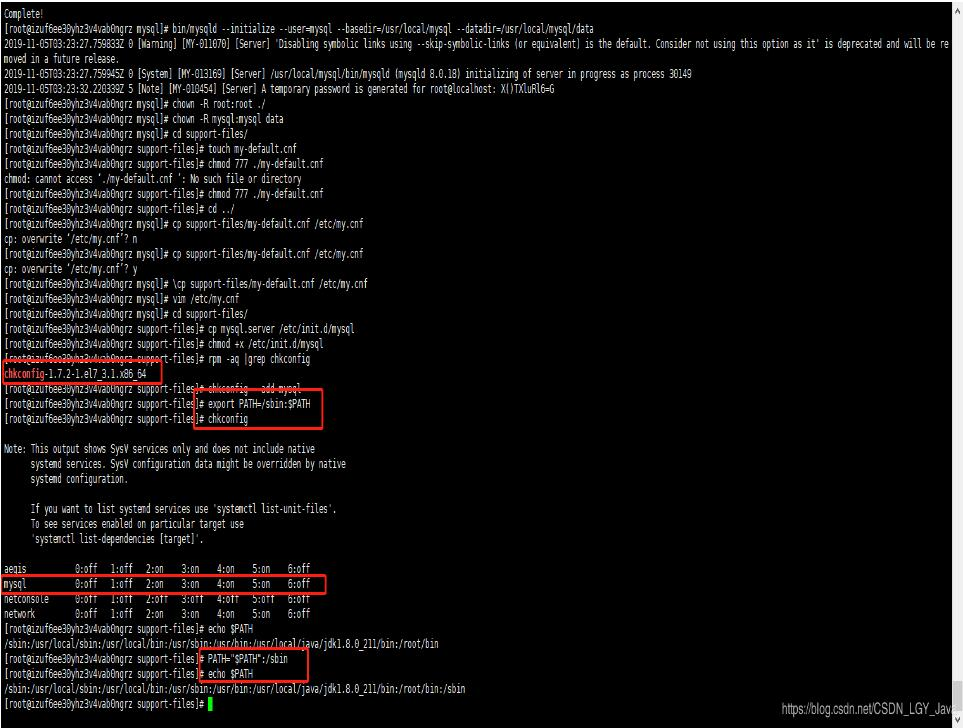
11.查看是否成功
12.etc/ld.so.conf要配置路径,不然报错
   # vim /etc/ld.so.conf
   添加如下内容
/usr/local/mysql/lib
13…配置环境变量
# vim /etc/profile #进入 profile文件
   添加如下配置
#MYSQL ENVIRONMENT
export PATH=$PATH:/usr/local/mysql/bin:/usr/local/mysql/lib

# source /etc/profile   #刷新shell环境使之生效
14.登录 需要用到上面的生成的密码 (忘记重置密码 https://www.csdn.net/tags/MtTaMg4sMzk1MDgtYmxvZwO0O0OO0O0O.html )
#启动mysql服务
[root@localhost bin]# service mysql start
Starting MySQL.Logging to '/usr/local/mysql/data/error.log'.
.. SUCCESS!
[root@localhost bin]#

#修改mysql密码
mysql> alter user 'root'@'localhost' identified by '123456';
Query OK, 0 rows affected (0.02 sec)
mysql>
说明:
A.错误日志输出 log-error = /usr/local/mysql/data/error.log目录下直接查看错误日志
2.新建数据库用户
inux中mysql创建用户
Linux Mysql创建新用户并允许远程连接
第一步 登陆mysql:
mysql  -u 数据库用户名 -h 数据库IP -p
根据提示 输入数据库密码
第二步:
GRANT ALL PRIVILEGES ON *.* TO '自定义用户名'@'%' IDENTIFIED BY '自定义密码' WITH GRANT OPTION;
例:
GRANT ALL PRIVILEGES ON *.* TO 'ctsi_nacos'@'%' IDENTIFIED BY 'nacosProd!@#0' WITH GRANT OPTION;

刷新:
flush privileges;

第三步 查看数据:

SELECT DISTINCT CONCAT('User: ''',user,'''@''',host,''';') AS query FROM mysql.user;

第四步:

可以使用本地的数据库管理工具连接了
远程连接
mysql -h 服务器ip地址 -P 3306 -u root -p
2.导入数据
无数据库可视化工具时的操作:
A.将脚本上传到服务器
B.连接数据库 :mysql -u用户名 -p密码
C.新建一个我们要导入的数据库 create database nacos;
D.查看数据库 show databases;
E.使用这个空数据库 use nacos
F.执行数据库脚本 source nacos.sql
G.查看数据库表 show tables;


 1983
1983


 被折叠的 条评论
为什么被折叠?
被折叠的 条评论
为什么被折叠?
 到【灌水乐园】发言


