


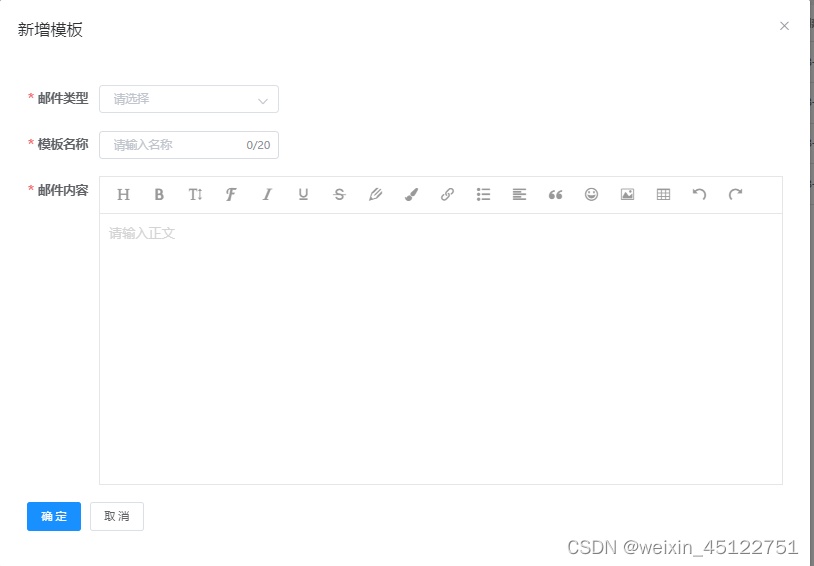
在做后台管理项目时常常会用到富文本编辑器,在这里推荐大家使用wangEditor,亲测好用
话不多说先上图
第一步安装
npm wangeditor --save
第二步在项目中使用 先建立一个wangEditor.vue
<template lang="html">
  <div class="wangeditor">
    <div ref="toolbar" class="toolbar"></div>
    <div ref="wangeditor" class="text"></div>
  </div>
</template>

<script>
  import E from "wangeditor";
  import {EmailUpload} from "@/api/business/email-temp";

  export default {
    data() {
      return {
        wangEditor: null,
        wangEditorInfo: null
      };
    },
    model: {
      prop: "value",
      event: "change"
    },
    props: {
      value: {
        type: String,
        default: ""
      },
      isClear: {
        type: Boolean,
        default: false
      }
    },
    watch: {
      isClear(val) {
        // 触发清除文本域内容
        if (val) {
          this.wangEditor.config.text.clear();
          this.wangEditorInfo = null;
        }
      },
      value: function (value) {
        if (value !== this.wangEditor.txt.html()) {
          this.isClear = false;
          this.wangEditor.config.text.html(this.value)//value为编辑框输入的内容,这里我监听了一下值,当父组件调用得时候,如果给value赋值了,子组件将会显示父组件赋给的值
        }
      }
    },
    mounted() {
      this.initEditor();
      this.wangEditor.txt.html(this.value);
    },
    methods: {
      initEditor() {
        this.wangEditor = new E(this.$refs.toolbar, this.$refs.wangeditor);
        this.wangEditor.config.uploadImgShowBase64 = true; // base64存储图片(推荐)
        this.wangEditor.config.showLinkImg = false  //   禁止上传网络图片
        // this.wangEditor.config.uploadImgServer = process.env.VUE_APP_BASE_API + '/api/v1/email-upload/editor/image'; // 配置服务器端地址(不推荐)
        this.wangEditor.config.uploadFileName = "file"; // 后端接受上传文件的参数名
        this.wangEditor.config.uploadImgMaxSize = 2 * 1024 * 1024; // 将图片大小限制为(默认最大支持2M)
        this.wangEditor.config.uploadImgMaxLength = 6; // 限制一次最多上传6张图片
        this.wangEditor.config.uploadImgTimeout = 1 * 60 * 1000; // 设置超时时间(默认1分钟)
        this.wangEditor.config.uploadImgHeaders = {'Content-Type': 'multipart/form-data'}// 自定义 header  上传文件格式为file文件,用form-data格式

        // 配置菜单
        this.wangEditor.config.menus = [
          "head", // 标题
          "bold", // 粗体
          "fontSize", // 字号
          "fontName", // 字体
          "italic", // 斜体
          "underline", // 下划线
          "strikeThrough", // 删除线
          "foreColor", // 文字颜色
          "backColor", // 背景颜色
          "link", // 插入链接
          "list", // 列表
          "justify", // 对齐方式
          "quote", // 引用
          "emoticon", // 表情
          "image", // 插入图片
          "table", // 表格
          //"video", // 插入视频
          //"code", // 插入代码
          "undo", // 撤销
          "redo", // 重复
          "fullscreen" // 全屏
        ];
        this.wangEditor.config.uploadImgHooks = {
          fail: (xhr, editor, result) => {
            // 插入图片失败回调
          },
          success: (xhr, editor, result) => {
            // 图片上传成功回调
          },
          timeout: (xhr, editor) => {
            // 网络超时的回调
          },
          error: (xhr, editor) => {
            // 图片上传错误的回调
          },
          customInsert: (insertImg, result, editor) => {
            // 图片上传成功,插入图片的回调(不推荐)
            insertImg(result.url);
          }
        };

        this.wangEditor.config.customUploadImg = (files, insertImgFn) => {
        // 这一块是调用后台接口处理图片,把图片先上传到服务器上后,拿到服务器的地址再插入到文本中
          EmailUpload(files).then(data => {
            if (data.msg == 'OK') {
              for (var j = 0; j < data.data.data.length; j++) {
                insertImgFn(data.data.data[j])
              }
            }

          })

        };

        this.wangEditor.config.onchange = html => {
          this.wangEditorInfo = html;
          this.$emit("change", this.wangEditorInfo); // 将内容同步到父组件中
        };
        // 创建富文本编辑器
        this.wangEditor.create();
      }
    }
  };
</script>

<style lang="scss">
  .wangeditor {
    border: 1px solid #e6e6e6;
    box-sizing: border-box;

    .toolbar {
      border-bottom: 1px solid #e6e6e6;
      box-sizing: border-box;
    }

    .text {
      min-height: 300px;
    }
  }
</style>
后端代码
    @PostMapping(value = "/editor/image")
    @ApiOperation(value = "文件上传")
    @ApiImplicitParams({
            @ApiImplicitParam(name = "file", value = "文件", paramType = "form", dataType = "__file"),
            @ApiImplicitParam(name = "bucket", value = "桶", paramType = "query", dataType = "string")
    })
    public ResultModel<ImageResult> upload1(
            @RequestParam(value = "file") MultipartFile file,
            @RequestParam(value = "bucket", required = false) String bucket,
            @RequestParam(value = "keepOrgFn", required = false, defaultValue = "false") Boolean keepOrgFn
    ) {
        try {
            String object = LocalDateUtil.format(LocalDate.now(), LocalDateUtil.DEFAULT_DATE_FORMAT_SHORT_PATTERN);
            if (keepOrgFn) {
                object += "/" + file.getOriginalFilename();
            } else {
                object += "/" + MinioUtil.toTimestampFn(file.getOriginalFilename());
            }
            String url = minioService.putObject(bucket, object, file.getInputStream());
            List<String> list = new ArrayList<>();
            list.add(url);
            return ResultModel.success(new ImageResult(0, list));
        } catch (Exception e) {
            throw new BizException(e.getMessage());
        }
    }
// server 接口返回格式,重要!!!
//接口要返回 application/json 格式,格式要求如下:
    @Data
    @NoArgsConstructor
    @AllArgsConstructor
    class ImageResult implements Serializable {
        private int errno;
        private Object data;
    }
js 代码
export function EmailUpload(data) {
  let fd = new FormData()
  for (var i = 0; i < data.length; i++) {
    fd.append("file", data[i], data[i].name);
  }
  return request({
    headers: {
      'Content-Type': 'multipart/form-data'
    },
    url: '/crm-biz/api/v1/email-upload/editor/image',
    method: 'post',
    data: fd
  })
}
父级引用
下面展示一些 内联代码片。
<template>
  <div class="app-container">
    <el-form ref="form" :model="form" :rules="rules" label-width="80px">
      <el-form-item label="邮件类型" prop="typeId">
        <el-select v-model="form.typeId" placeholder="请选择" clearable style="width: 200px;">
          <el-option v-for="(item, index) in emailTypeOptions" :key="index" :label="item.name" :value="item.id"/>
        </el-select>
      </el-form-item>
      <el-form-item label="模板名称" prop="name">
        <el-input v-model="form.name" maxlength="20" show-word-limit placeholder="请输入名称"
                  style="width: 200px;"></el-input>
      </el-form-item>
      <el-form-item label="邮件内容" class="layer-box" prop="content">
        <wangEditor v-model="form.content" :isClear="isClear" @change="wangEditorChange"></wangEditor>
      </el-form-item>
    </el-form>
    <div slot="footer" class="dialog-footer">
      <el-button type="primary" @click="handleSubmit">确 定</el-button>
      <el-button @click="closeDialog">取 消</el-button>
    </div>
  </div>
</template>
<script>

  import {mapState} from "vuex";
  import {create, detail, update} from "@/api/business/email-temp";
  import wangEditor from './wangEditor'

  export default {
    name: 'EmailTempDetail',
    components: {
      wangEditor
    },
    props: {
      detail: {
        type: Object,
        default: function () {
          return {}
        }
      },
      emailTypeOptions: {
        type: Array,
        default: []
      },
      form: {
        type: Object,
        default: function () {
          return {
            typeId: null,
            name: '',
            content: ''
          }
        }
      }
    },
    data() {

      return {
        currCursorIndex: 0,
        rules: {
          name: [
            {required: true, message: '请输入模板名称', trigger: 'blur'}
          ],
          typeId: [
            {required: true, message: '请选择邮件类型', trigger: 'change'}
          ],
          content: [
            {required: true, message: '请输入模板内容', trigger: 'blur'}
          ],
        },
        isClear: false,//设置为true的时候,这个可以用this.wangEditorDetail=''来替代
        wangEditorDetail: ""

      }
    },
    computed: {
      ...mapState('settings', {
        'smsSign': state => state.smsSign,
        'smsLength': state => state.smsLength,
      })
    },
    created() {
    },
    mounted() {
      this.wangEditorDetail = "wangEditorDetail默认值"; //设置富文本框默认显示内容
    },
    methods: {
      closeDialog() {
        this.$emit('close')
      },
      handleSubmit: function () {
        this.$refs['form'].validate(valid => {
          if (valid) {
            const id = this.form.id
            if (id !== undefined) {
              update(this.form).then(() => {
                this.$message.success('修改成功')
                this.$emit('close')
              })
            } else {
              create(this.form).then(() => {
                this.$message.success('新增成功')
                this.$emit('close')
              })
            }
          }
        })
      },
      wangEditorChange(val) {
        console.log(val);
      }

    },
    watch: {}
  }
</script>

<style scoped lang="scss">
  /*// 给文本内容加高度,滚动条
  .quill-editor /deep/ .ql-container {
    min-height: 220px;
  }

  .ql-container {
    min-height: 230px;
  }*/


</style>
通过以上方式就可以实现一个富文本的功能。喜欢的点个赞


 1233
1233


 被折叠的 条评论
为什么被折叠?
被折叠的 条评论
为什么被折叠?
 到【灌水乐园】发言


