


1.将MarkDown文件放入resources/static/ediormd中
2.编辑实现,将css依赖和默认的包导入,分为 和底部
<head>
<link rel="stylesheet" th:href="@{/editormd/css/editormd.min.css}"  />
    <link rel="shortcut icon" href="https://pandao.github.io/editor.md/favicon.ico" type="image/x-icon" />
    <link rel="stylesheet" href="https://cdn.jsdelivr.net/npm/bootstrap@3.3.7/dist/css/bootstrap.min.css" integrity="sha384-BVYiiSIFeK1dGmJRAkycuHAHRg32OmUcww7on3RYdg4Va+PmSTsz/K68vbdEjh4u" crossorigin="anonymous">
    <script src="https://ajax.aspnetcdn.com/ajax/jquery/jquery-3.5.1.min.js"></script>
    <script src="https://cdn.jsdelivr.net/npm/bootstrap@3.3.7/dist/js/bootstrap.min.js" integrity="sha384-Tc5IQib027qvyjSMfHjOMaLkfuWVxZxUPnCJA7l2mCWNIpG9mGCD8wGNIcPD7Txa" crossorigin="anonymous"></script>
<head/>
<script th:src="@{/editormd/editormd.min.js}" ></script>


<script type="text/javascript">
    var testEditor;

    //window.onload = function(){ }
    $(function() {
        testEditor = editormd("article-content", {
            width : "100%",
            height : 400,
            syncScrolling : "single",
            path : "../../editormd/lib/",
            // 自定义的增强配置!
            saveHTMLToTextarea : true,    // 保存 HTML 到 Textarea
            emoji: true, // 开启表情的功能! 图片的本地配置!
            // theme: "light",//工具栏主题
            // previewTheme: "dark",//预览主题
            // editorTheme: "pastel-on-dark",//编辑主题
            // markdown的配置!
            tex : true,                   // 开启科学公式TeX语言支持,默认关闭
            flowChart : true,             // 开启流程图支持,默认关闭
            sequenceDiagram : true,       // 开启时序/序列图支持,默认关闭,
            //图片上传
            imageUpload    : true,
            imageFormats   : ["jpg", "jpeg", "gif", "png", "bmp", "webp"],
            imageUploadURL : "/file/uploads",

            onload : function() {
                console.log('onload', this);
            },
            /*指定需要显示的功能按钮*/
            toolbarIcons : function() {
                return ["undo","redo","|",
                    "bold","del","italic","quote","ucwords","uppercase","lowercase","|",
                    // "h1","h2","h3","h4","h5","h6","|",
                    "list-ul","list-ol","hr","|",
                    "link","reference-link","image","code","preformatted-text",
                    "code-block","table","datetime","emoji","html-entities","pagebreak","|",
                    "goto-line","watch","preview","fullscreen","clear","search","|",
                    //"help","info",
                    "releaseIcon", "index"]
            },
            // 这里的自定义功能就好比,Vue 组件

            /*自定义功能按钮,下面我自定义了2个,一个是发布,一个是返回首页*/
            toolbarIconTexts : {
                releaseIcon : "<span bgcolor=\"gray\">发布</span>",
                index : "<span bgcolor=\"red\">返回首页</span>",
            },

            /*给自定义按钮指定回调函数*/
            toolbarHandlers:{
                releaseIcon : function(cm, icon, cursor, selection) {
                    //表单提交
                    mdEditorForm.method = "post";
                    mdEditorForm.action = "/article/Insertarticle";//提交至服务器的路径
                    mdEditorForm.submit();
                },
                index : function(){
                    window.location.href = '/';
                },
            }
        });
    });
</script>
3.撰写图片上传的Controller
import com.alibaba.fastjson.JSONObject;
import org.springframework.stereotype.Controller;
import org.springframework.web.bind.annotation.RequestMapping;
import org.springframework.web.bind.annotation.RequestParam;
import org.springframework.web.bind.annotation.ResponseBody;
import org.springframework.web.multipart.MultipartFile;
import javax.servlet.http.HttpServletRequest;
import java.io.File;
import java.io.IOException;
import java.util.Calendar;
import java.util.UUID;
@Controller
public class FileUploadController {
    @RequestMapping("/file/uploads")
    @ResponseBody
    public JSONObject fileUpload(@RequestParam(value = "editormd-image-file", required = true) MultipartFile file, HttpServletRequest request) throws IOException {
        //上传路径保存设置
        //获得SpringBoot当前项目的路径:System.getProperty("user.dir")
        String path = System.getProperty("user.dir")+"/upload/";

        //按照月份进行分类:
        Calendar instance = Calendar.getInstance();
        String month = (instance.get(Calendar.MONTH) + 1)+"month";
        path = path+month;

        File realPath = new File(path);
        if (!realPath.exists()){
            realPath.mkdirs();
        }

        //上传文件地址
        System.out.println("上传文件保存地址:"+realPath);

        //解决文件名字问题:我们使用uuid;
        String filename = "ks-"+ UUID.randomUUID().toString().replaceAll("-", "")+".jpg";
        //通过CommonsMultipartFile的方法直接写文件(注意这个时候)
        file.transferTo(new File(realPath +"/"+ filename));

        //给editormd进行回调
        JSONObject res = new JSONObject();
        res.put("url","/upload/"+month+"/"+ filename);
        res.put("success", 1);
        res.put("message", "upload success!");

        return res;
    }

}
4.撰写Controller类
@Controller
@RequestMapping("/article")
public class ArticleController {
    @PostMapping("/Insertarticle")
    //假如不添加,会出现模板引擎找不到
    private String InsertArticle(ArticleDto articleDto, @AuthenticationPrincipal UserDetails user){

        User users = UserService.getUserByUserName(user.getUsername());
        Article article=Article.builder().content(articleDto.getContent())
                .title(articleDto.getTitle())
                .title_picture(articleDto.getTitle_picture())
                .user_id(users.getUser_id())
                .build();

        articleService.insertArticle(article);
        return "redirect:/article/addarticleview";
    }
}
5 获取服务数据到前端页面显示markdown
<link rel="stylesheet" href="https://cdn.jsdelivr.net/npm/bootstrap@3.3.7/dist/css/bootstrap.min.css" integrity="sha384-BVYiiSIFeK1dGmJRAkycuHAHRg32OmUcww7on3RYdg4Va+PmSTsz/K68vbdEjh4u" crossorigin="anonymous">
<script src="https://cdn.jsdelivr.net/npm/bootstrap@3.3.7/dist/js/bootstrap.min.js" integrity="sha384-Tc5IQib027qvyjSMfHjOMaLkfuWVxZxUPnCJA7l2mCWNIpG9mGCD8wGNIcPD7Txa" crossorigin="anonymous"></script>
<!--固定editormd依赖! -->
<script type="text/javascript"src="http://code.jquery.com/jquery-1.4.1.min.js"></script>
<script th:src="@{/editormd/editormd.min.js}" ></script>
<script th:src="@{/editormd/lib/marked.min.js}" ></script>
<script th:src="@{/editormd/lib/prettify.min.js}"></script>
<script src="//unpkg.com/layui@2.6.4/dist/layui.js"></script>
<script type="text/javascript">

        $(function() {
            var testView = editormd.markdownToHTML("test-markdown-view", {
                // markdown : "[TOC]\n### Hello world!\n## Heading 2", // Also, you can dynamic set Markdown text
                // htmlDecode : true,  // Enable / disable HTML tag encode.
                // htmlDecode : "style,script,iframe",  // Note: If enabled, you should filter some dangerous HTML tags for website security.
                htmlDecode: "style,script,iframe",
                emoji: true,
                taskList: true,
                tocm: true,
                tex: true, // 默认不解析
                // flowChart: true, // 默认不解析
                // sequenceDiagram: true, // 默认不解析
                codeFold: true


            });
        });
</script>
前端页面
  <div class="card">
                    <div class="card-body">
                        <div class="row">
                            <div class="page-header"  style="padding-left:30px">
                                <h1 th:text="${article.title}"><small></small></h1>
                            </div>
                        </div>
                        <div id="test-markdown-view">
                            <!-- Server-side output Markdown text -->
                            <textarea style="display:none;" th:text="${article.content}"></textarea>
                        </div>
                    </div>
                </div>
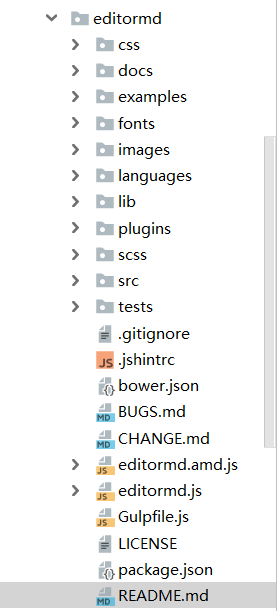
6 markdown编辑器可以在文件下查看,在readme中查看参数
markdown的目录
7.下载地址
https://github.com/pandao/editor.md
8 总结
假如导入的时候发生页面空白,极大可能为css和sript导入的时候出错,可以自行下载源css和script。


 253
253


 被折叠的 条评论
为什么被折叠?
被折叠的 条评论
为什么被折叠?
 到【灌水乐园】发言


