


实验环境如下
一台centos7纯净,配置好yum源,IP为192.168.1.11,关闭防火墙
一.源码安装httpd服务
安装服务不是本次重点,这里就安装一下就可以
下面是apache的软件包,上传至服务器
链接:https://pan.baidu.com/s/1WI4th9jijqpCn5H7wMiWtQ
提取码:whvt
1)安装上apache服务
[root@apache ~]# tar -zxvf httpd-2.4.38.tar.gz
[root@apache ~]# yum -y install gcc gcc-c++ apr apr-devel cyrus-sasl-devel expat-devel libdb-devel openldap-devel apr-util-devel apr-util pcre-devel pcre openssl*
[root@apache ~]# cd httpd-2.4.38/
[root@apache httpd-2.4.38]# ./configure --prefix=/usr/local/httpd --enable-so --enable-rewrite --enable-charset-lite --enable-cgi --enable-ssl --enable-mpms-shared=all
[root@apache httpd-2.4.38]# make && make install
2)启动脚本
[root@apache ~]# cp /usr/local/httpd/bin/apachectl /etc/init.d/apache
[root@apache ~]# vim /etc/init.d/apache
在第一行后添加两行内容,如下#号也要写上,注意格式要一致,空格都要一致,不然会报错
#chkconfig: 2345 11 88
# despriction:httpd apache server

[root@apache ~]# chkconfig --add apache
3)修改一下ServerName并启动服务
[root@apache ~]# vim /usr/local/httpd/conf/httpd.conf
我这里主机名是apache,你们写你们的主机名即可,然后保存退出即可

[root@apache ~]# /etc/init.d/apache start
[root@apache ~]# netstat -anpt | grep 80
tcp6 0 0 :::80 :::* LISTEN 50482/httpd
二.设置错误页面
当用户访问出现错误的时候,默认服务器返回的错误信息很不友好,这里以404错误为例,设置错误显示页面
有两种方式,分别介绍
第一种方式,原始网站
1.需要关闭虚拟主机功能,我这里没有开启
必须关闭虚拟主机,不然一会访问会报错,一会再开启
[root@apache ~]# vim /usr/local/httpd/conf/httpd.conf
找到大概180多行行,前面加上#号,我这里原来没开,就不重启服务了

2.修改关于错误页面配置
[root@apache ~]# vim /usr/local/httpd/conf/httpd.conf
大概在250多行,有Require all granted 这个上面,添加如下一句,我后面有打好的可以复制

ErrorDocument 404 /404error.html
3.创建刚刚配置文件中的指定的错误文件并重启服务
[root@apache ~]# cd /usr/local/httpd/htdocs/
[root@apache htdocs]# echo "<h1>Open Source</h1>" > 404error.html
[root@apache htdocs]# /etc/init.d/apache restart
4.测试一下错误页面
通过IP方式访问,我IP是192.168.1.11 ,404错误是找不到资源,触发很简单,随便在访问时候,添加一个不存在的即可
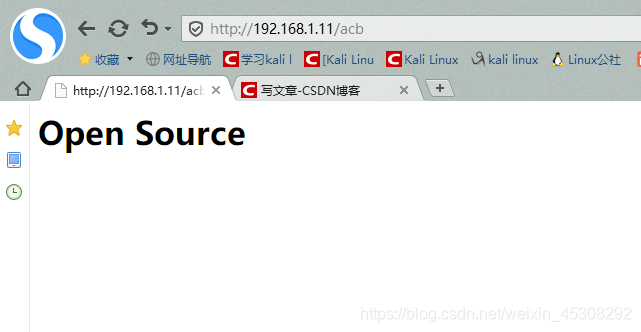
如下访问,acb我肯定没有创建,它返回的是我刚刚错误文件中的内容
http://192.168.1.11/acb
正常网页,也可正确访问
http://192.168.1.11/
第二种:虚拟主机
1.打开虚拟主机功能
[root@apache htdocs]# vim /usr/local/httpd/conf/httpd.conf

2.配置虚拟主机配置文件
先添加一个临时IP,做基于IP的虚拟主机
[root@apache htdocs]# ifconfig ens33:1 192.168.1.200
[root@apache htdocs]# ifconfig
ens33: flags=4163<UP,BROADCAST,RUNNING,MULTICAST>  mtu 1500
        inet 192.168.1.11  netmask 255.255.255.0  broadcast 192.168.1.255
        inet6 fe80::953c:64db:834f:b238  prefixlen 64  scopeid 0x20<link>
        ether 00:0c:29:ea:b3:4d  txqueuelen 1000  (Ethernet)
        RX packets 19144  bytes 19655160 (18.7 MiB)
        RX errors 0  dropped 0  overruns 0  frame 0
        TX packets 6760  bytes 1389924 (1.3 MiB)
        TX errors 0  dropped 0 overruns 0  carrier 0  collisions 0

ens33:1: flags=4163<UP,BROADCAST,RUNNING,MULTICAST>  mtu 1500
        inet 192.168.1.200  netmask 255.255.255.0  broadcast 192.168.1.255
        ether 00:0c:29:ea:b3:4d  txqueuelen 1000  (Ethernet)
[root@apache htdocs]# vim /usr/local/httpd/conf/extra/httpd-vhosts.conf
里面默认有两个例子,删掉最后一个例子,然后另一个例子,改为我下面这样
注意看ErrorDocument 后面,意思是如果出现404错误,就跳转到1.11的网站
<VirtualHost 192.168.1.200:80>
    ServerAdmin ajbn@root
    DocumentRoot "/www/htdocs"
    ServerName apache
    ErrorLog "logs/1.200-error_log"
    CustomLog "logs/1.200-access_log" common
     <Directory />
    ErrorDocument 404 http://192.168.1.11
    Require all granted
    </Directory>
</VirtualHost>
3.创建虚拟主机目录,与默认主页并重启服务
[root@apache htdocs]# mkdir -p /www/{htdocs,logs}
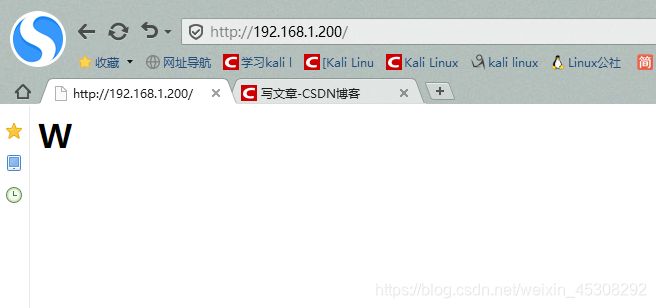
[root@apache htdocs]# echo "<h1>W</h1>" > /www/htdocs/index.html
[root@apache htdocs]# /etc/init.d/apache restart
4.测试
先访问正常的网页 http://192.168.1.200/
输入一个不存在的abc资源,模拟404错误,发现直接跳转到了http://192.168.1.11/
如下
http://192.168.1.200/abc
这种直接跳转的方式,也可以用在那个默认网站,不只是虚拟主机支持,相反虚拟主机也可用上面那种文件的方式
另外,现在默认网站的错误页面也生效,但是一开始做默认网站的错误页面时,必须关闭虚拟主机,不然会报错
三.网站压缩功能
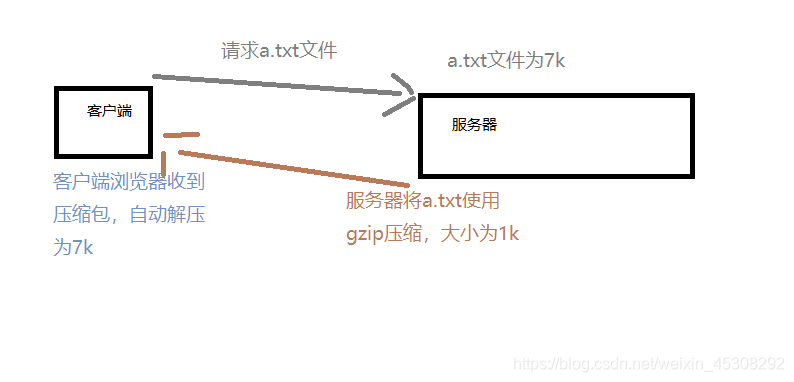
如下图就是一个例子,客户端请求资源,服务器在给客户端回应的时候,将资源进行压缩,将压缩过的文件进行传输,到了客户端,客户端浏览器会自动解压又成为原来大小,
这样优点是传输速度快,节省带宽,缺点是会增加服务器的CPU资源消耗,因为压缩的过程需要使用CPU
1)mod_deflate模块相关
压缩功能由mod_deflate模块实现,我们要开启这个模块
1.检查 apache是否安装mod_deflate模块
[root@apache htdocs]# ln -s /usr/local/httpd/bin/* /usr/local/bin/
上面是做一下软连接,一遍使用apache的命令
[root@apache htdocs]# apachectl -t -D DUMP_MODULES | grep deflate
这里什么都没有输出,是没有安装,如果输出以下,就是已经安装
deflate_module(static):编译时已经安装
deflate_modele(shared):后来用DSO方式安装,一会我们就用此方式安装
2.安装并查看mod_deflate模块
有两种方式
第一种是./configure编译的时候添加
一种是编译的时候–prefix 加上–enable-deflate,我们没有加,此方法用不了
第二种是DSO安装方式
DSO模块可以在实现动态扩展模块,也是以编译的方式进行,前提是apache服务在编译的时候添加了 --enable-so 我们这里已经加了 我们使用此方式安装
[root@apache htdocs]# apxs -c -i -a /root/httpd-2.4.38/modules/filters/mod_deflate.c
这里解释一下
-c:进行编译操作,类似make
-i:进行安装,基于上面的编译操作,类似make install
-a:自动去httpd.conf文件中添加的相关LoadModule行,如果有这行,则会自动去掉#号,启动此模块
后面的路径是我们的软件解压目录,在root下,这里指定此目录,就可以自动添加模块了,就类似单独编译安装这个功能一样,会自动找到httpd的安装目录
如下,已经自动安装上了,在modules目录下
[root@apache htdocs]# ls /usr/local/httpd/modules/mod_deflate.so
/usr/local/httpd/modules/mod_deflate.so
3.配置httpd.conf主配值文件,并启用对应模块
我们安装完后,需要在配置文件中启用,相反如果在配置文件中启动了功能,但不安装对应软件,也是不可以用的
找到如下行大概在106行左右,因为刚刚上面apxs加了-a,已经被启用,
LoadModule deflate_module modules/mod_deflate.so
在此行上面,注意必须是上面,添加一行如下语句,更改完后不要退出,还有要更改
LoadFile /usr/lib64/libz.so

继续往下滑,找到大概150多行,按照我图下添加,我后面有打好的,你可以直接复制
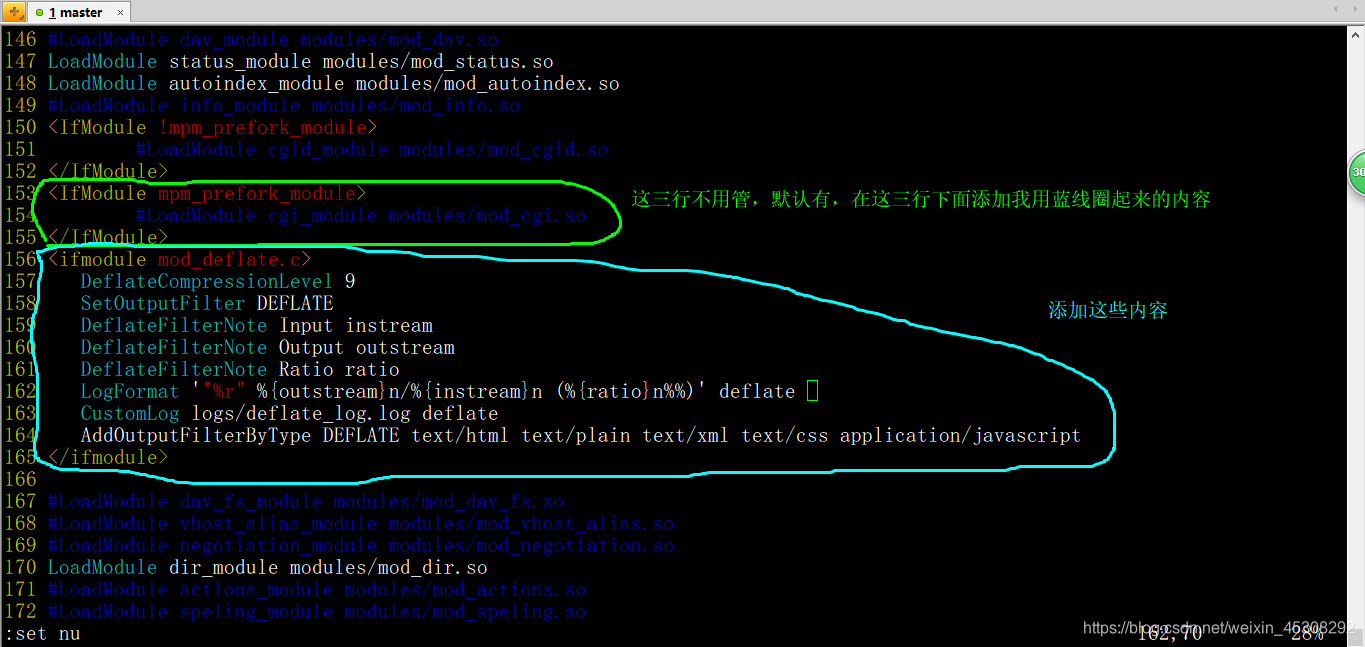
<ifmodule mod_deflate.c>
   DeflateCompressionLevel 9
   SetOutputFilter DEFLATE
   DeflateFilterNote Input instream
   DeflateFilterNote Output outstream
   DeflateFilterNote Ratio ratio
   LogFormat '"%r" %{outstream}n/%{instream}n (%{ratio}n%%)' deflate
   CustomLog logs/deflate_log.log deflate
   AddOutputFilterByType DEFLATE text/html text/plain text/xml text/css application/javascript
</ifmodule>
这里解释以下参数
DeflateCompressionLevel 9 :压缩等级,最高9级,就是压缩比例,越大压缩的越小,但是越大越消耗CPU资源
DeflateFilterNote Input instream :声名文件原来大小,在日志中记录
DeflateFilterNote Output outstream:声明压缩后大小,在日志中记录
LogFormat ‘"%r" %{outstream}n/%{instream}n (%{ratio}n%%)’ deflate :一种记录的格式,可以记录数据被压缩前与压缩后,和压缩百分百,一会验证的时候再看
CustomLog logs/deflate_log.log deflate :声名日志类型,和存放位置
AddOutputFilterByType DEFLATE text/html text/plain text/xml text/css application/javascript :可以压缩什么类型的文件,如html,css等,上面写的这些类型,,如果过不想压缩对应文件,去掉对应的即可
后面可跟如下这些类型
application/xhtml+xml application/xml application/rss+xml application/atom_xml application/x-javascript application/x-httpd-php image/svg+xml image/gif image/png image/jpe image/swf image/jpeg image/bmp
另外如果是虚拟主机,要在<VirtualHost*:80></VirtualHost>配置段中,添加上面<ifmodule mod_deflate.c> </ifmodule> 中的内容即可
一般图片,和视频不会去压缩,因为本身就是压缩格式,并且有些小的图片压了还会变大
4.重启服务并创建测试文件
[root@apache ~]# /etc/init.d/apache restart
[root@apache ~]# cp /etc/shadow /usr/local/httpd/htdocs/pass.html
[root@apache ~]# chmod 644 /usr/local/httpd/htdocs/pass.html
复制过去,保留文件原有权限,shadow文件原本没有读取权限,给与权限即可
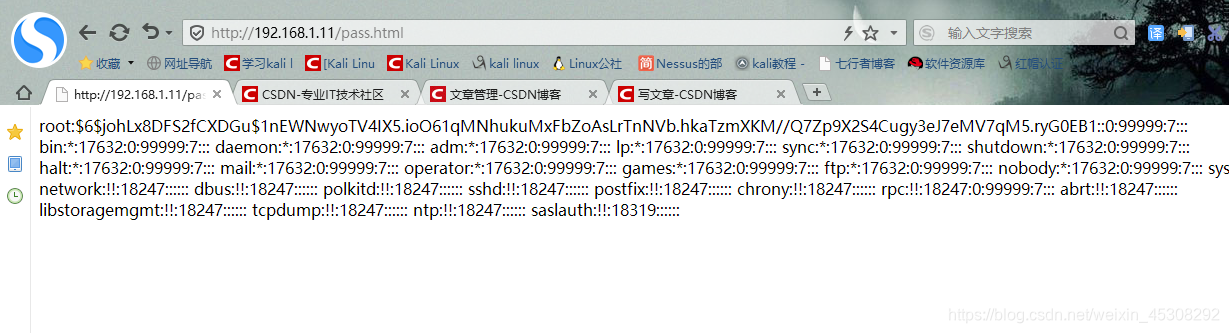
5.访问测试并查看日志
访问时候,刷新多次,方便看效果
http://192.168.1.11/pass.html
回到服务端,查看效果
[root@apache ~]# cd /usr/local/httpd/logs/
[root@apache logs]# cat deflate_log.log
如下结构表示有三次访问/pass.html,原来大小是727字节,压缩后发出是292字节大小,注意单位是字节,压缩率是40%
"GET /pass.html HTTP/1.1" 292/727 (40%)
"GET /pass.html HTTP/1.1" 292/727 (40%)
"GET /pass.html HTTP/1.1" 292/727 (40%)
四.缓存功能
由于技术的急速发展的网络,现在复杂好看的网页也多了起来,那与之对应代码量与图片视频等,客户端就会大量的请求,给与服务器的压力也会很大
可以通过开启缓存功能,让特定类型的文件,在客户端浏览器中缓存
当客户端浏览器第一次访问指定缓存资源时,客户端浏览器会缓存到本地,下一次访问同样资源时,就直接从本地调用,而不是再次请求服务器
通过apache的mod_expires模块实现
1)mod_expires模块检查并安装
[root@apache htdocs]# apachectl -t -D DUMP_MODULES | grep expires
我这里什么都没输出,就是没按照,其他情况如下
deflate_module(static):编译时已经安装
deflate_modele(shared):后来用DSO方式安装,一会我们就用此方式安装
安装方式也是两种,可以在apache编译的时候添加 --enable-expires
第二种是DSO,和那个mod_deflate安装方式一样
安装
[root@apache ~]# apxs -c -i -a /root/httpd-2.4.38/modules/metadata/mod_expires.c
查看
[root@apache ~]# ls /usr/local/httpd/modules/mod_expires.so
/usr/local/httpd/modules/mod_expires.so
2)修改配置文件并配置模块
1.激活配置项
如果你是编译apache就添加了这个模块,需要将如下语句前面的#号去掉,我们是后安装就,它会自动打开,就不用管
[root@apache ~]# vim /usr/local/httpd/conf/httpd.conf
LoadModule expires_module modules/mod_expires.so
2.配置缓存
有三种配置方式
全局:对所有服务器上所有资源,和所有虚拟主机生效
目录:针对指定目录下的资源生效,其他不生效
虚拟主机:针对指定的虚拟主机生效,其他不生效
我们做全局的缓存,其他的类型后面也会介绍
[root@apache ~]# vim /usr/local/httpd/conf/httpd.conf
在上一个模块配置信息下面,添加我用蓝线圈起来带的部分,我后面有打好的,可以复制
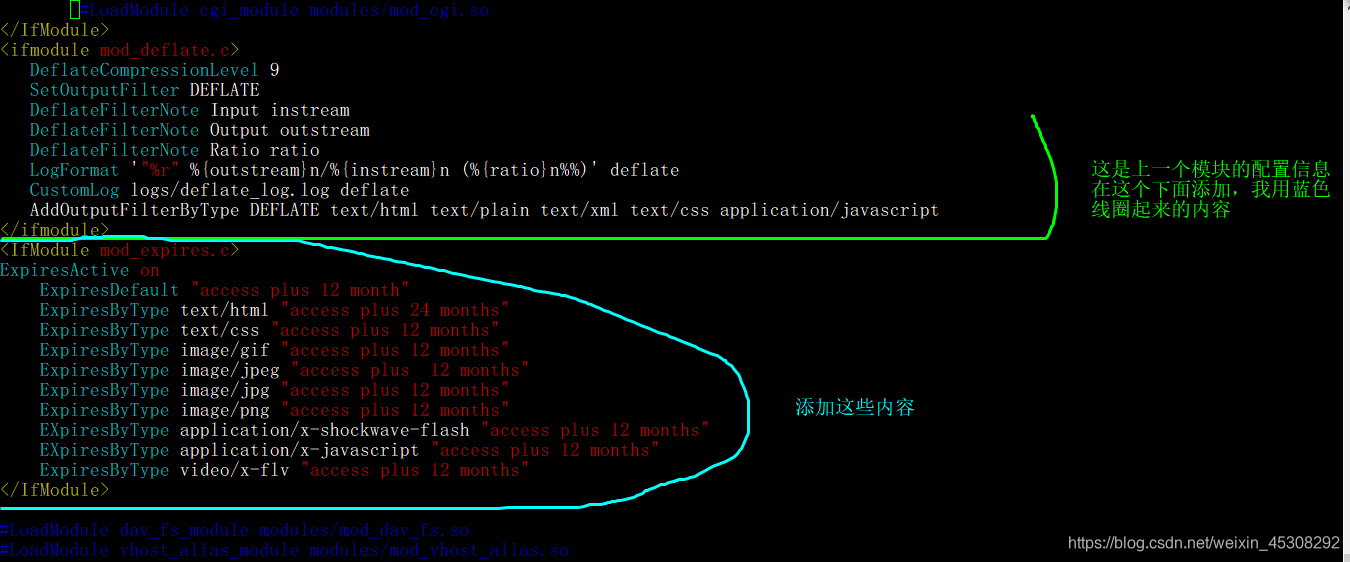
<IfModule mod_expires.c>
ExpiresActive on
    ExpiresDefault "access plus 12 month"
    ExpiresByType text/html "access plus 24 months"
    ExpiresByType text/css "access plus 12 months"
    ExpiresByType image/gif "access plus 12 months"
    ExpiresByType image/jpeg "access plus  12 months"
    ExpiresByType image/jpg "access plus 12 months"
    ExpiresByType image/png "access plus 12 months"
    EXpiresByType application/x-shockwave-flash "access plus 12 months"
    EXpiresByType application/x-javascript "access plus 12 months"
    ExpiresByType video/x-flv "access plus 12 months"
</IfModule>
解释参数
ExpiresActive on:开启缓存功能
ExpiresDefault “access plus 12 month” : 如果客户端访问下面ExpiresByType没有写类型的文件,缓存12个月
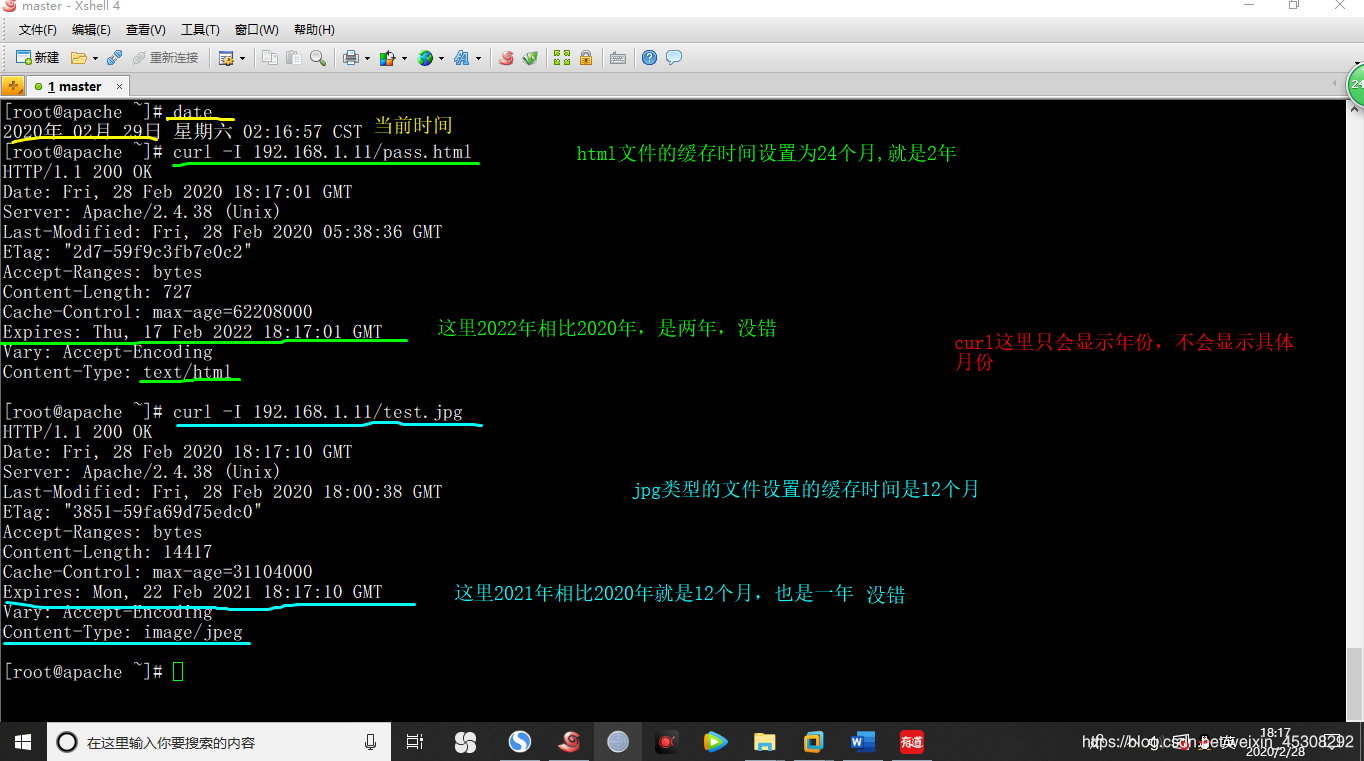
ExpiresByType text/html “access plus 24 months”:这个是设置html文件类型,缓存时间为24个月,后面以此类推,只是不同的文件类型而已
单位得类型有如下几种
years(年),months(月),weeks (周),days(天),hours (小时),minutes (分钟),seconds(秒)
3 )重启服务并验证结果
[root@apache ~]# /etc/init.d/apache restart
上传任意jpg格式一个图片,在windows中改名为test.jpg,上传到服务器 /usr/local/httpd/htdocs/路径下
验证,按照我下图一步一步验证即可
4)针对指定目录或虚拟主机
首先针对指定的目录
如果只想被客户机缓存指定目录下资源
将上面<IfModule mod_expires.c></IfModule>内容,添加到指定的<Directory ></Directory>中,如下面这种
DocumentRoot "/www/html"
<Directory "/www/html">
<IfModule mod_expires.c>
    ExpiresActive on
    ExpiresDefault "access plus 12 month"
    ExpiresByType text/html "access plus 24 months"
    ExpiresByType text/css "access plus 12 months"
    ExpiresByType image/gif "access plus 12 months"
    ExpiresByType image/jpeg "access plus  12 months"
    ExpiresByType image/jpg "access plus 12 months"
    ExpiresByType image/png "access plus 12 months"
    EXpiresByType application/x-shockwave-flash "access plus 12 months"
    EXpiresByType application/x-javascript "access plus 12 months"
    ExpiresByType video/x-flv "access plus 12 months"
</IfModule>
</Directory>
针对指定的虚拟主机
可以指定某一个虚拟主机上的资源被缓存,其他主机包括默认网站不会受影响
也是在虚拟主机配置文件中的<Directory /><Directory />中添加如下
<VirtualHost www.baidu.com:80>
...
<Directory />
Require all granted
<IfModule mod_expires.c>
  ExpiresActive on
  ExpiresDefault "access plus 12 month"
  ExpiresByType text/html "access plus 12 months"
  ExpiresByType text/css "access plus 12 months"
  ExpiresByType image/gif "access plus 12 months"
  ExpiresByType image/jpeg "access plus  12 months"
  ExpiresByType image/jpg "access plus 12 months"
  ExpiresByType image/png "access plus 12 months"
  EXpiresByType application/x-shockwave-flash "access plus 12 months"
  EXpiresByType application/x-javascript "access plus 12 months"
  ExpiresByType video/x-flv "access plus 12 months"
</IfModule>
</Directory>
</VirtualHost>
5)网站缓存的问题
如果网站更新了,客户端浏览器可能会读取本地的缓存而不会同步更新,导致访问是旧的资源
有以下两种方法,改变
1.新更新的内容的文件名字,不和原来一样,客户端便会重新读取并缓存
2.缓存时间设置为特短,比如一天,第二天缓存就失效,便会从新读取


 1185
1185


 被折叠的 条评论
为什么被折叠?
被折叠的 条评论
为什么被折叠?
 到【灌水乐园】发言


