


可以做的事情
代码转换、文件优化、代码分割、模块合并、自动刷新、代码校验、自动发布
最终目的
webpack的基本配置webpack的高级配置webpack的优化策略ast抽象语法树webpack的Tapable- 掌握
webpack的流程 手写webpack - 手写
webpack中常见的loader - 手写
webpack中常见的plugin
1. 安装webpack
webpack:提供了内置的东西 express pluginwebpack-cli: npx webpack- 服务:
webpack-dev-server:启动服务 proxy beforeapp- 不会真正的打包文件, 只会在内存中打包 运行命令
npx webpack-dev-server
- 不会真正的打包文件, 只会在内存中打包 运行命令
2.配置文件
let path = require("path");
let HtmlWebpackPlugin = require("html-webpack-plugin");
module.exports = {//webpack 是node中的一个模块 CommonJs
devServer: {//静态服务器的配置
port: 3000,
progress: true,//进度提哦啊
contentBase: "./dist",//静态资源路径
compress:true//是否压缩Gzip
},
mode: "production",//环境
entry: "./src/index.js",
output: {
filename: "bundle[hash:8].js",//设置hash之后会解决浏览器缓存问题
path: path.resolve(__dirname, "dist")//解析 会把相对路径解析成绝对路径
},
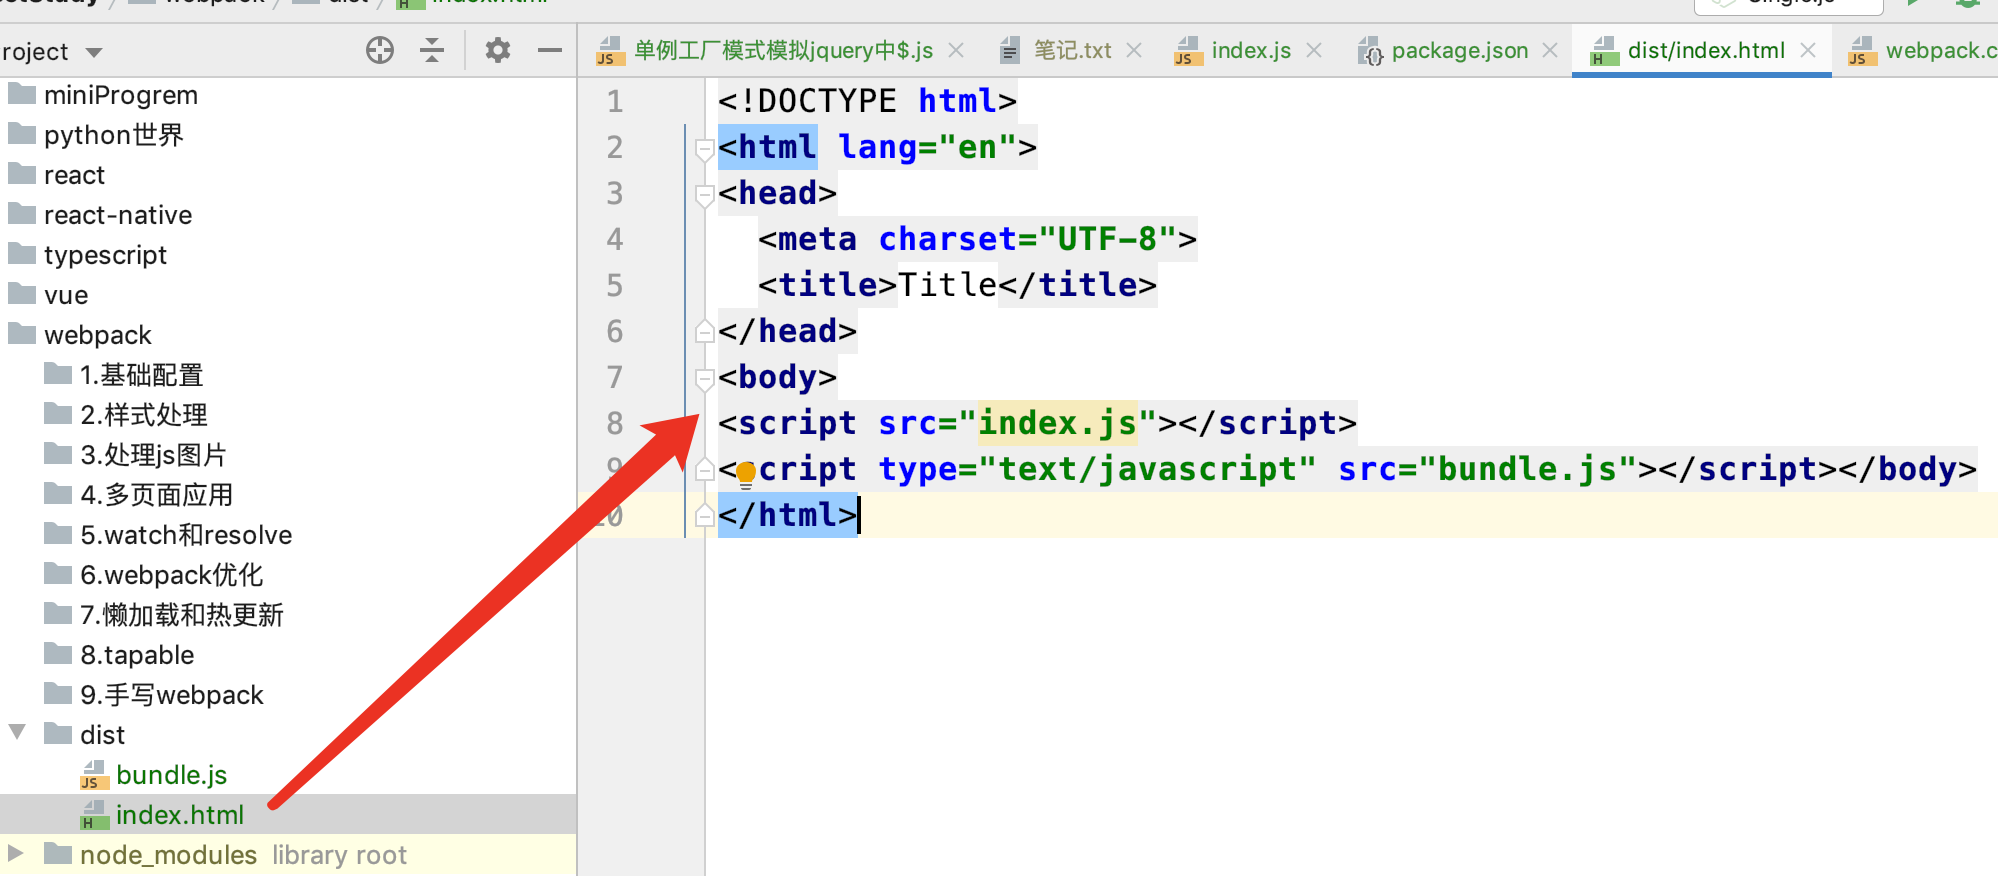
plugins: [
new HtmlWebpackPlugin({//打包的时候 自动把html打包到dist目录
template: "./src/index.html",
filename: "index.html",
minify:{
removeAttributeQuotes:true,//去除双引号
collapseWhitespace:true//单行压缩
},
hash:true//是否加hash后缀
})
]
};
- 思考1: 如何压缩
html文件 - 思考2: 如何实现命名的hash串
 plugins:[
    new HtmlWebpackPlugin({
      template: './src/index.html',
      filename: 'index.html',
      minify: {
        collapseWhitespace: true,
        removeAttributeQuotes: true
      },
      hash: true
    })
  ]
2.1 修改样式
2.2.1 loader配置
如果直接插入css文件会报一个这样的错误
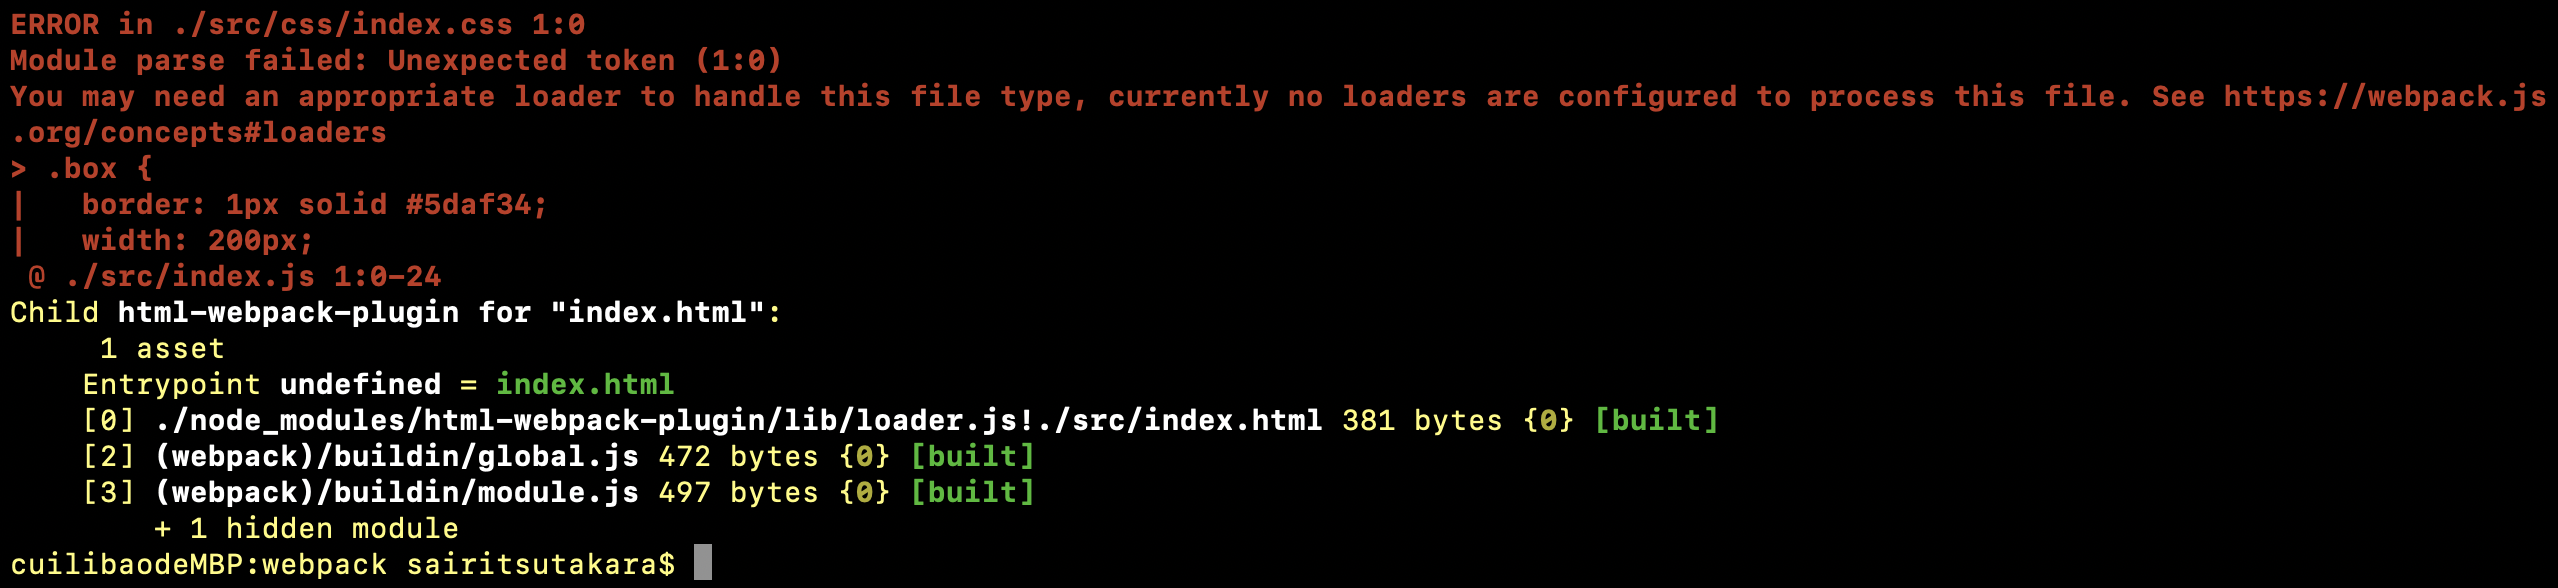
解决: 下载两个loader
  module: {//模块
    rules: [//规则
      {
        test: /\.css$/,
        use: [{
          loader: 'style-loader',//将css插入到head中
          options: {
            insert: 'top'//head/top foot
          }
        }, 'css-loader']
      },
      {
        test: /\.scss$/,
        use: ['style-loader','css-loader', 'sass-loader']
      }
    ],
  },
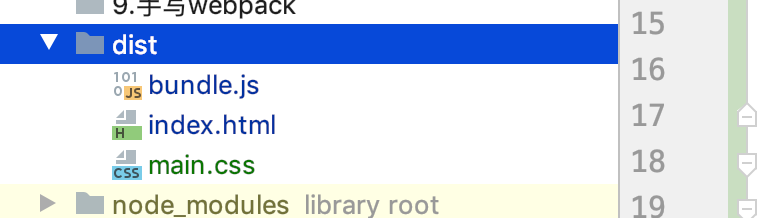
2.1.1 分离css
但是 此时 我们打包后发现 css是插入在js里面的

为了解决这个问题 接下来我们引入 mini-css-extract-plugin这个插件
let MiniCssExtractPlugin require('mini-css-extract-plugin')
 rules: [
      {
        test: /\.css$/,
        use: [{
          loader: MiniCssExtractPlugin.loader,
        }, 'css-loader']//loader顺序的规律
      },
      {
        test: /\.(sc|sa)ss$/,
        use: [{
          loader: MiniCssExtractPlugin.loader,
        }, 'css-loader', 'sass-loader']//loader顺序的规律
      }
    ]
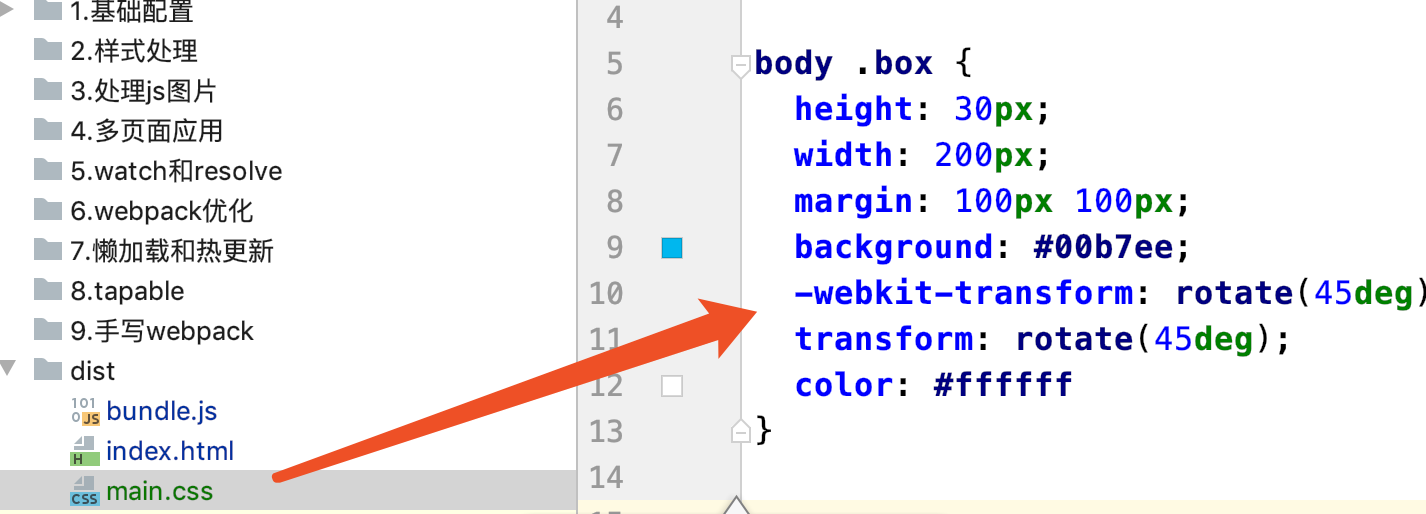
当我们加入css3之后 新的问题出现了 没有前缀
2.1.3 引入前缀
此时 我们需要下载一个包autoprefixer以及一个loader文件postcss-loader
{
        test: /\.css$/,
        use: [{
          loader: MiniCssExtractPlugin.loader,
        }, 'css-loader','postcss-loader']//loader顺序的规律
      },
- 创建一个配置文件
postcss.config.js
module.exports = {
  plugins: [require('autoprefixer')]
};
再次打包
需要注意的是 此设置项只能用早生产环境
mode: 'production',
2.1.4 压缩css文件
如何压缩文件呢
其中有个包 optimize-css-assets-webpack-plugin
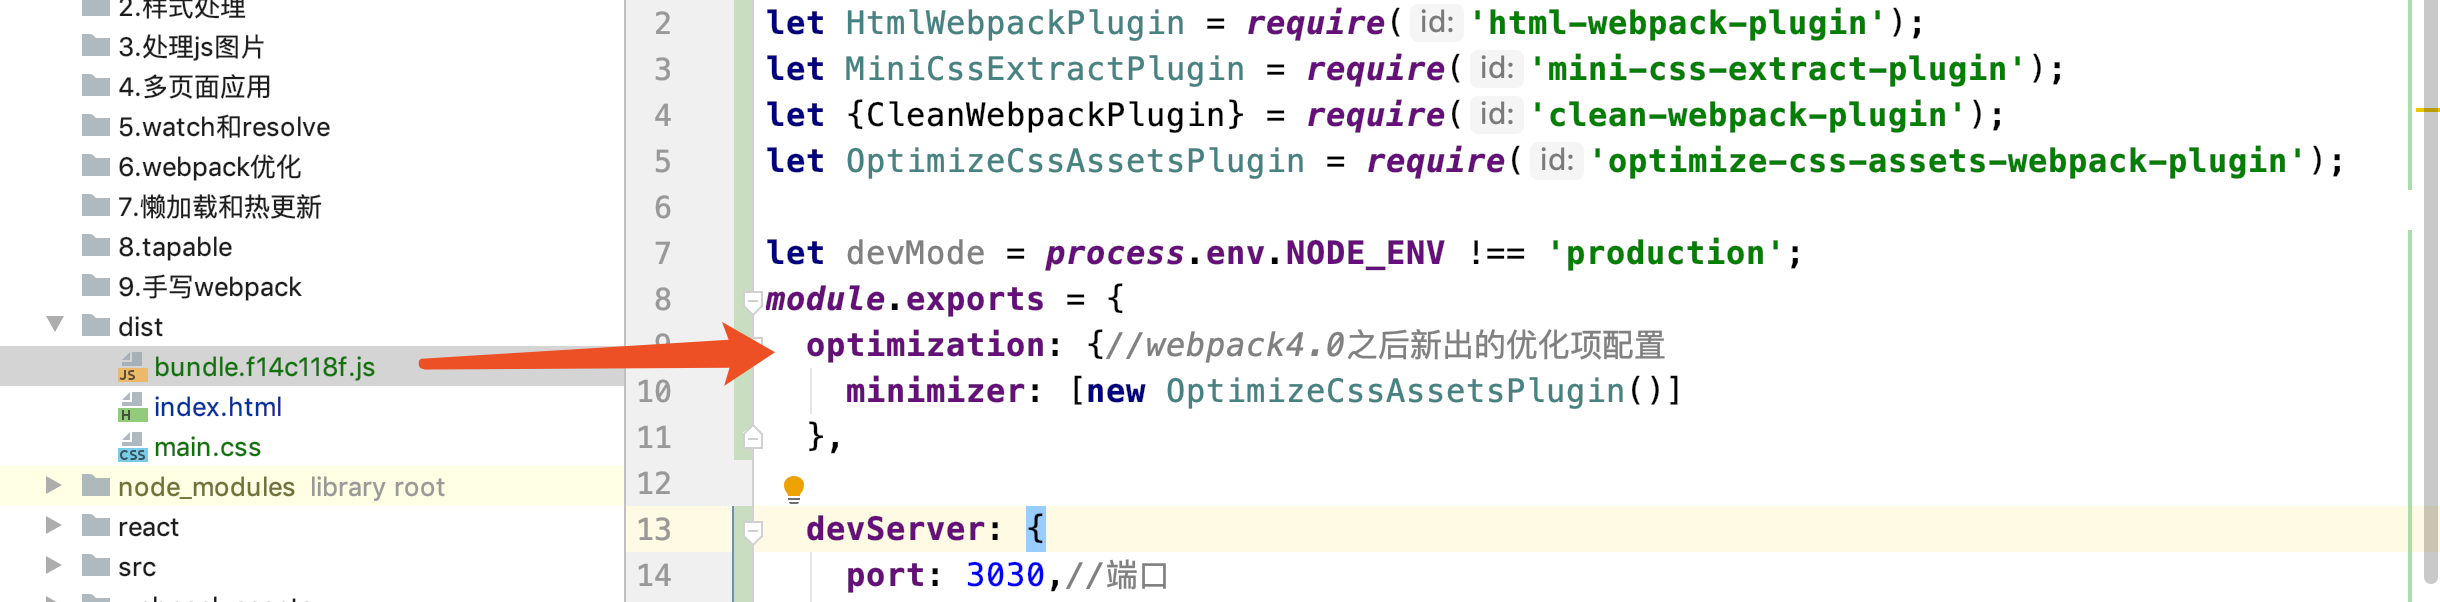
此包主要是用来压缩css的 但是 引入这个包后出现了js没被压缩的问题
怎么解决呢
按照官网配置需要使用TerserJSPlugin
https://www.npmjs.com/package/mini-css-extract-plugin
optimization: {//webpack4.0之后新出的优化项配置
  minimizer: [new TerserJSPlugin({}), new OptimizeCssAssetsPlugin({})]
},
TerserJSPlugin具体参数查看这个
interface TerserPluginOptions {
        test?: string | RegExp | Array<string | RegExp>;
        include?: string | RegExp | Array<string | RegExp>;
        exclude?: string | RegExp | Array<string | RegExp>;
        chunkFilter?: (chunk: webpack.compilation.Chunk) => boolean;
        cache?: boolean | string;
        cacheKeys?: (defaultCacheKeys: any, file: any) => object;
        parallel?: boolean | number;
        sourceMap?: boolean;
        minify?: (file: any, sourceMap: any) => MinifyResult;
        terserOptions?: MinifyOptions;
        extractComments?: boolean
        | string
        | RegExp
        | ExtractCommentFn
        | ExtractCommentOptions;
        warningsFilter?: (warning: any, source: any) => boolean;
    }
2.2 处理js文件
2.2.1 babel核心模块
当我们尝试对写了es6语法的代码进行打包时候
并没有变成es5
接下来执行命令 babel
yarn add babel-loader @babel/core @babel/preset-env
babel-loader:babel加载器@babel/core:babel的核心模块@babel/preset-env: 将es6转换成es5@babel/plugin-transform-runtime@babel/runtime@babel/polyfill
{
        test: /\.js$/,
        use: [
          {
            loader: 'babel-loader',
            options: {//预设
                  presets: ['@babel/preset-env']
            }
          }
        ]
 }
接下来 就是见证奇迹的时刻

2.2.2 处理箭头函数
@babel/preset-env
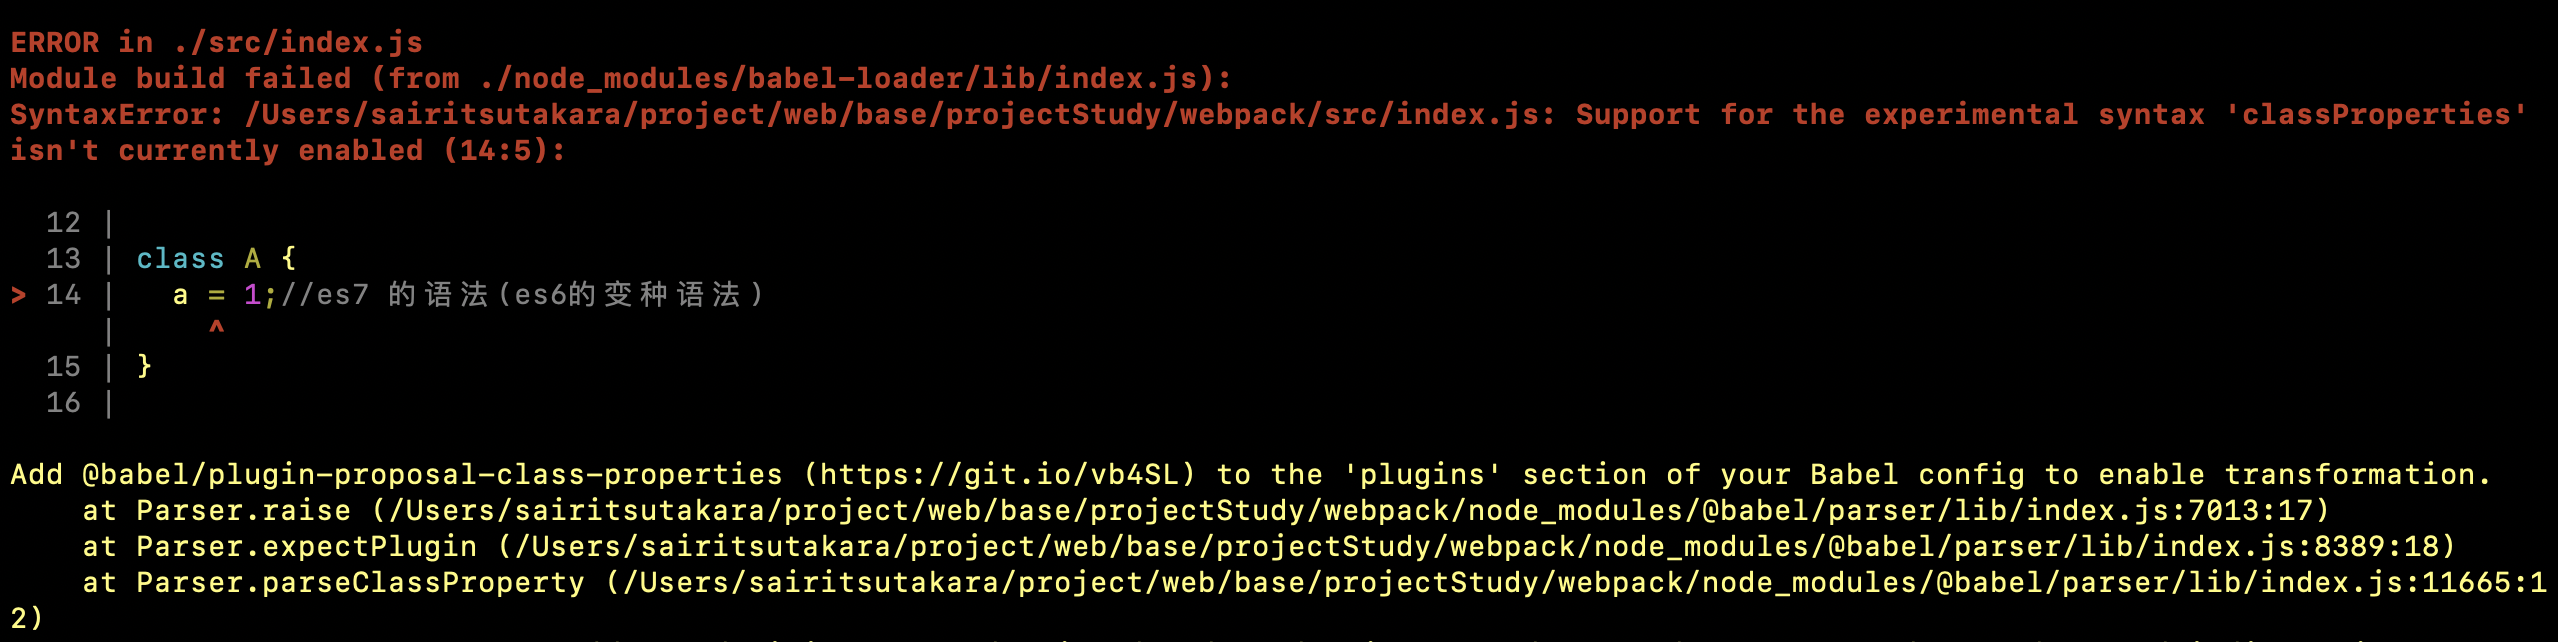
2.2.3 处理装饰器
当我们添加装饰器 会有如下提示

具体可以查看官网 https://babeljs.io/docs/en/babel-plugin-proposal-decorators
 {
        test: /\.js$/,
        use: [
          {
            loader: 'babel-loader',
            options: {//预设
              presets: ['@babel/preset-env'],
              plugins:[
                ["@babel/plugin-proposal-decorators", { "legacy": true }],
                ["@babel/plugin-proposal-class-properties", { "loose" : true }]
              ]
            }
          }
        ]
      },
index.js
@log
class A {
  a = 1;//es7 的语法(es6的变种语法)  // let a = new A() a.a = 1
}
function log(target) {
  console.log(target,'21');
}

2.2.4 处理es7语法
{
        test: /\.js$/,
        use: [
          {
            loader: 'babel-loader',
            options: {//预设
              presets: ['@babel/preset-env'],
              plugins:['@babel/plugin-proposal-class-properties']
            }
          }
        ]
      }
a.js
class B {

}

function* fnB() {
  yield 1;
}

console.log(fnB().next());

module.exports = 'a';
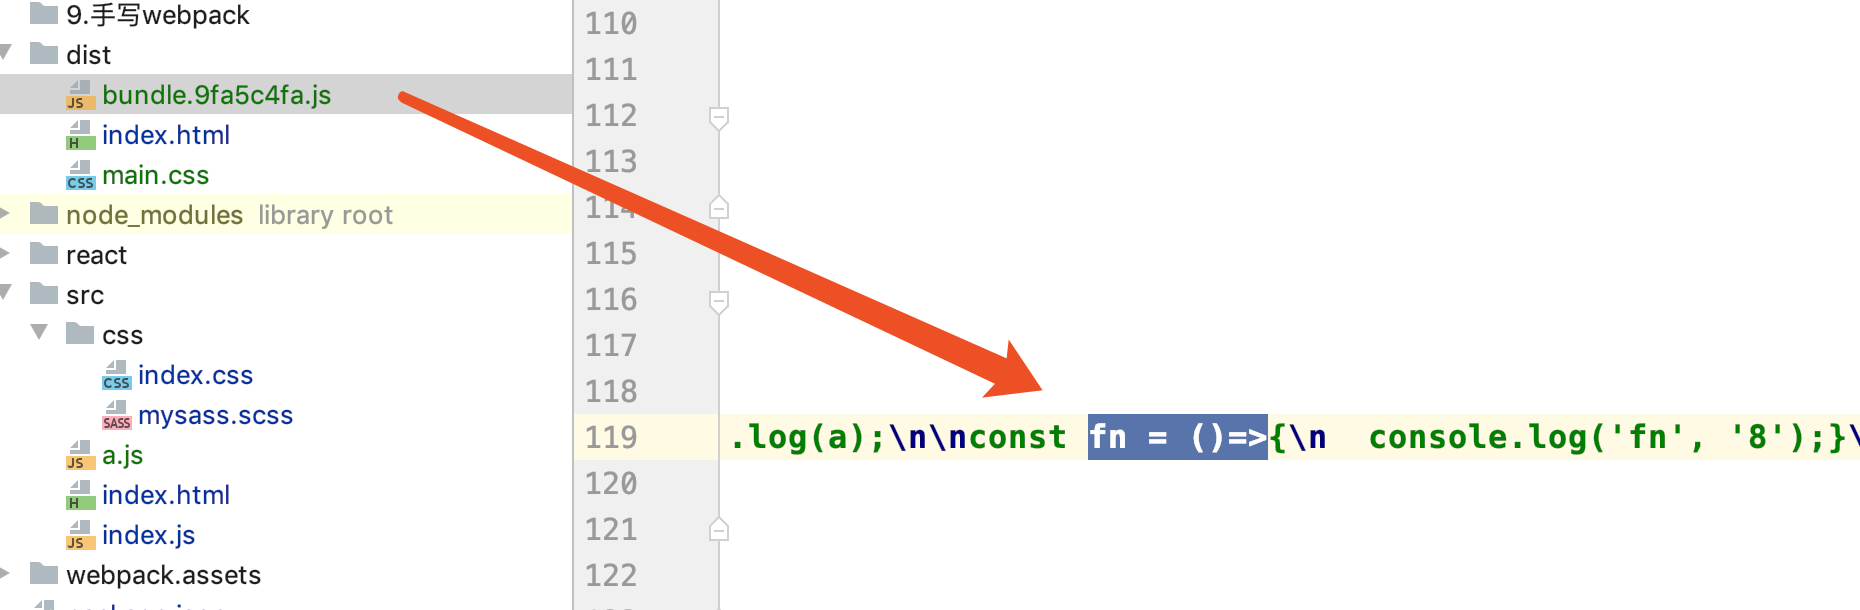
接下来打包发现 每个文件都会打包一个_classCallCheck
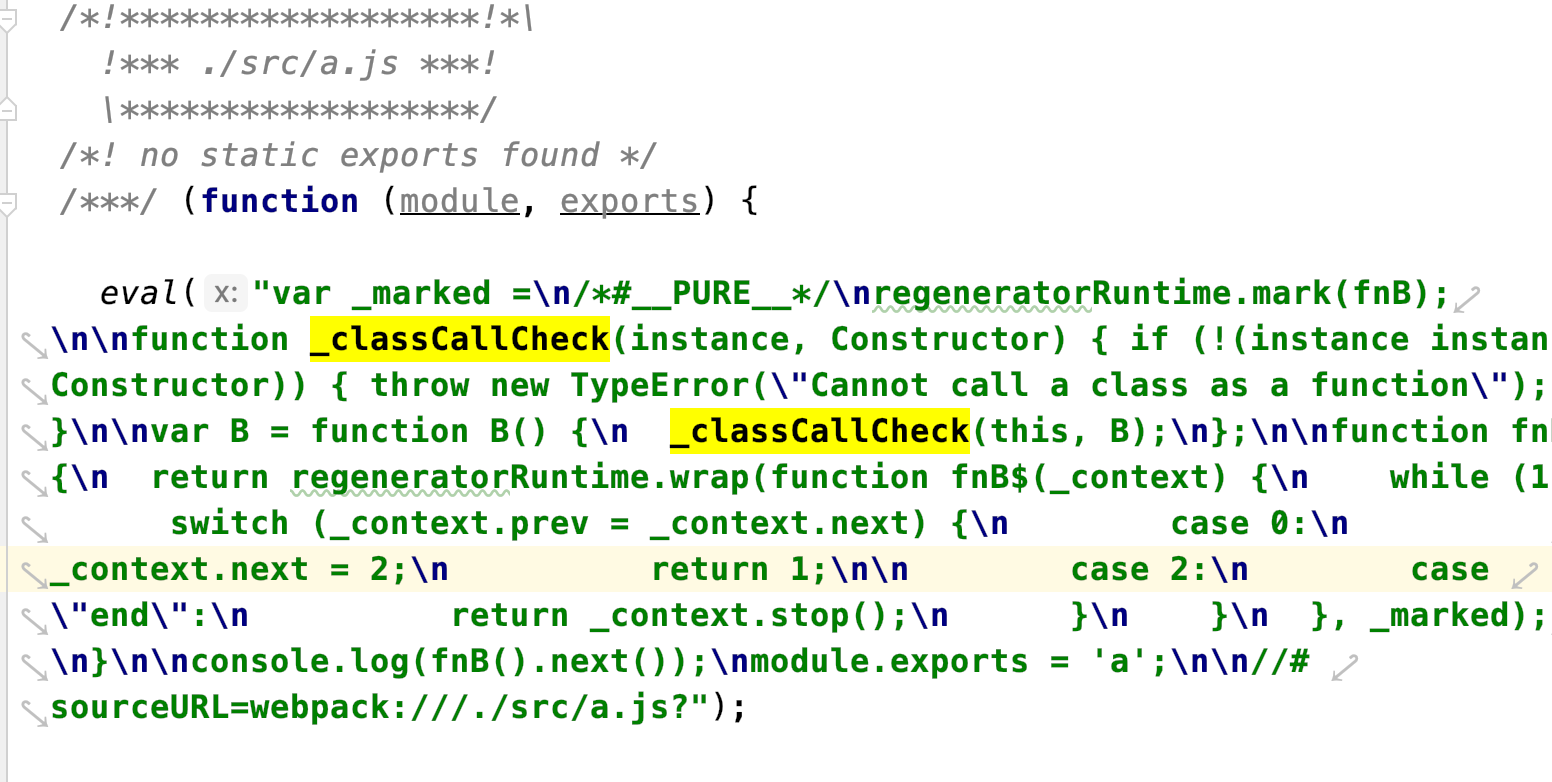
写了generator运行也会报错
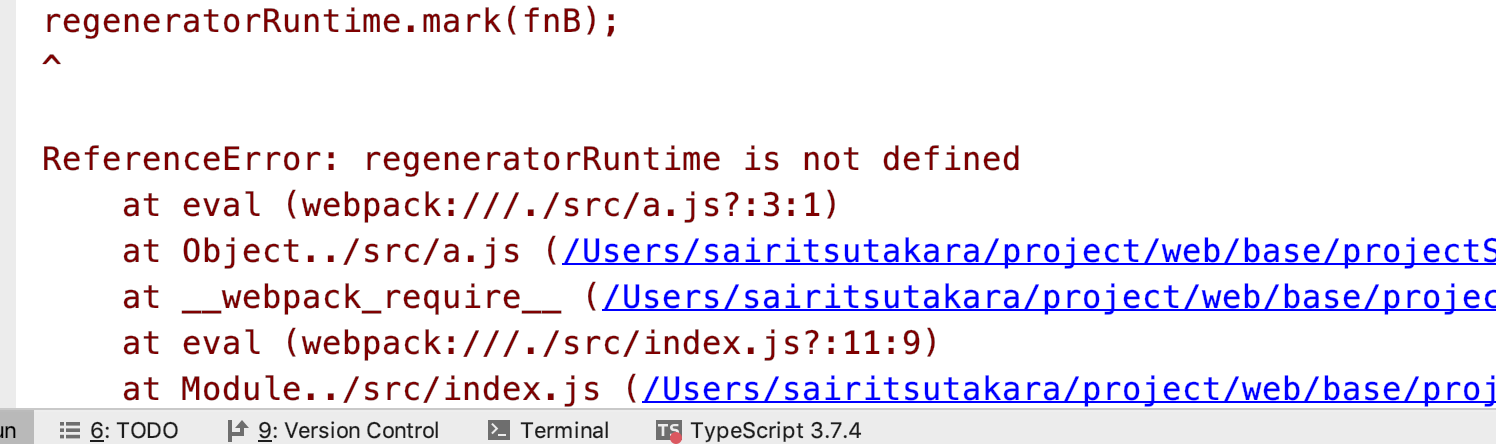
出现以上问题的原因是
-
在
webpack运行时不会自动检测哪些方法重用了- 一些
es6的高级语法 比如generator和promise不会转换成es5
- 一些
根据官方文档https://babeljs.io/docs/en/babel-plugin-transform-runtime#docsNav
需要下载两个包
yarn add @babel/plugin-transform-runtime @babel/runtime -D
执行npx webpack但是 报了一些警告

 {
        test: /\.js$/,
        use: [
          {
            loader: 'babel-loader',
            options: {//预设
              presets: ['@babel/preset-env'],
              plugins: [
                ["@babel/plugin-proposal-decorators", {"legacy": true}],
                ["@babel/plugin-proposal-class-properties", {"loose": true}],
                "@babel/plugin-transform-runtime"
              ]
            }
          }
        ],
        include: path.resolve(__dirname, 'src'),
        exclude: /node_modules/

      },
2.2.5 处理全局变量的问题
方法一 : 外置loader
require('expose-loader?$!jquery');
1
方法二 : 内置loader在每个模块都注入$
// rules:

{//内置loader
        test: require.resolve('jquery'),
        use: 'expose-loader?$'
      },

// plugins:

    //提供者
    new webpack.ProvidePlugin({
      "$": "jquery"
    })
优化:
如果在html引入cdn路径并且在页面也 import $ from jquery 这就坏了, 即使引入cdn也会打包
 //排除之外  加入 在cdn引入了这个包 就不会打包这个包
  externals: {
    'jquery': '$
  }
2.3 处理图片文件
2.3.1 处理js中的图片
index.js

import logo from './logo.png';
<img src=logo/>


webpack.config.js:
{
    test: /\.(png|jpg|gif)$/,
      use: [{
        loader: 'file-loader',
        options: {
        	esModule: false,
      },
    }
}
2.3.2 处理css中图片文件
因为css-loader中已经对图片做loader处理了 所以 只需要引入相应路径就行了
2.3.3 处理html中的图片
//1. 下载依赖
yarn add html-withimg-plugin -D

//2. 配置
{
    test:/\.html$/,
    use:['html-withimg-plugin']

}
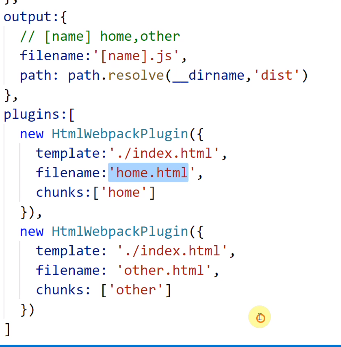
2.4 多入口多出口
2.5 webpack小插件
- clean-webpack-plugin
let {CleanWebpackPlugin} = require('clean-webpack-plugin');

//使用:
plugins:[
	new CleanWebpackPlugin()
]
- copy-webpack-plugin
const CopyPlugin = require('copy-webpack-plugin');

module.exports = {
  plugins: [
    new CopyPlugin([
      { from: 'source', to: 'dest' },
      { from: 'other', to: 'public' },
    ]),
  ],
};
2.6 resolve、分离
2.6.1 resolve
resolve:{
  modules:[path.resolve(__dirname,'node_modules')],//只从当前这个node_modules查找相应的包
  alise:{//别名
  "bootstrapcss":"bootstrap/dist/css/bootstrap.css"
	},
	extensions:['js','jsx','vue','json','css']
}
2.6.2 分离文件 dev、 prod、base
let {smart} = require('webpack-merge')
let base = require('./webpack.config.js')

module.exports = smart(base,{
  mode:'production'
})
2.7 分离打包文件
2.8 跨域
- 方式一:在devServer中配置
devServer: {
  port: 8080,
  host: '0.0.0.0',
  quiet: true,
  proxy: {
    // '/api': 'http://127.0.0.1:3000',
    '/api': {
      target: 'http://127.0.0.1:3000',
      pathRewrite:{
        '^/api': ''
      }
    },

  },
  before(app) {
    //app就是express对象
    app.get('/list', function (req, res) {
      res.send({code: 1, msg: 'hello'});
    });
  }
},
- 方式二 : 在服务端配置(node/express)
//1: npm i webpack-dev-middleware
let middleDevWebpack = require('webpack-dev-middleware')
let config = require('./webpack.config.js')

app.use(middleDevWebpack(config))
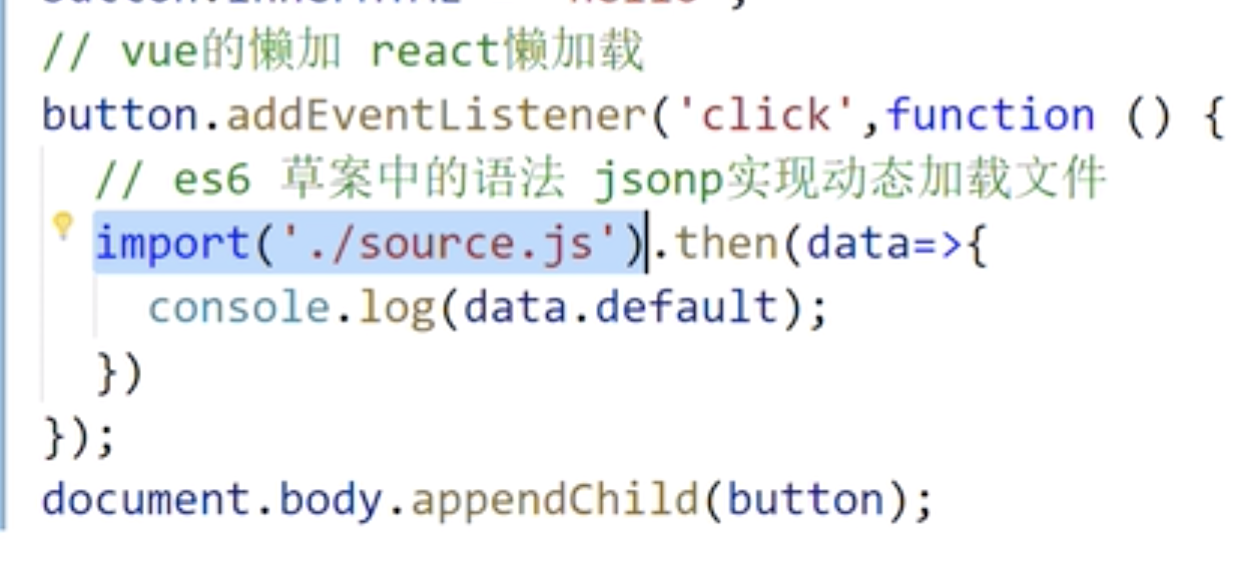
2.9 懒加载和热更新实时监听
-
热更新
devServer:{ hot:true, quite:true//安静启动 } -
实时监听
watch:true,
wathcOptions:{
  poll:1000,
    aggregateTimeout:500,
    ignore:/note_modules/
}
3. webpack优化
打包优化,可以从几个出发点点
-
打包体积
-
加载速度
-
打包速度
-
webpack自带优化
- tree-sharking : import 把没用的代码自动删除掉
- scope-hoisting : 作用域提升
-
优化网络解析时长和执行时长
- 添加DNS预解析
- 延时执行影响页面渲染的代码
-
优化webpack产出
- 优化代码重复打包
- 去掉不必要的import
- babel-preset-env 和 autoprefix 配置优化
- webpack runtime文件inline
- 去除不必要的async语句
- 优化第三方依赖
- lodash按需引入
-
webpack 知识点
- hash、contenthash、chunkhash的区别
- splitChunks详解
-
必杀技--动态链接库
-
多进程打包之HappyPack
-
提取公共代码
3.1 webpack自带优化
tree-sharkingscope-hoisting
3.2 多线程打包
需要用到happypack实现多线程打包
注意: 如果体积较小会使打包时间更长
第一步:下载
npm install happypack --save-dev
const HappyPack = require('happypack');

module.exports = {
    ...
}
第二步: 将常用的 loader 替换为 happypack/loader
const HappyPack = require('happypack');

module.exports = {
    ...
    module: {
        rules: [
            test: /\.js$/,
            // use: ['babel-loader?cacheDirectory'] 之前是使用这种方式直接使用 loader
            // 现在用下面的方式替换成 happypack/loader,并使用 id 指定创建的 HappyPack 插件
            use: ['happypack/loader?id=babel'],
            // 排除 node_modules 目录下的文件
            exclude: /node_modules/
        ]
    }
}
三、创建 HappyPack 插件
module.exports = {
    ...
    module: {
        rules: [
            test: /\.js$/,
            // use: ['babel-loader?cacheDirectory'] 之前是使用这种方式直接使用 loader
            // 现在用下面的方式替换成 happypack/loader,并使用 id 指定创建的 HappyPack 插件
            use: ['happypack/loader?id=babel'],
            // 排除 node_modules 目录下的文件
            exclude: /node_modules/
        ]
    },
    plugins: [
        ...,
        new HappyPack({
            /*
             * 必须配置
             */
            // id 标识符,要和 rules 中指定的 id 对应起来
            id: 'babel',
            // 需要使用的 loader,用法和 rules 中 Loader 配置一样
            // 可以直接是字符串,也可以是对象形式
            loaders: ['babel-loader?cacheDirectory']
        })
    ]
}
3.3 关于语言包的打包
有些包自带语言包,有时候不需要把所有的语言包跟着打包比如 moment,那么我们就需要把这个包特殊对待,
主要是通过webpack自导的IgnorePlugin
src下某.js
import moment from 'moment';
import 'moment/locale/zh-cn';

moment.locale('zh-cn');

let r = moment().endOf('day').fromNow();
console.log(r);
webpack.config.js
plugins: [
  ...
	new webpack.IgnorePlugin(/\.\/locale/,/moment/),
]
3.3 不打包某个文件
有些文件我们不希望打包,比如已经在cdn中引入了的文件,此时要用externals进行配置
modules:{
  noParse:/jquery/,
 	...
}

plugins: [
  ...
	new webpack.ProvidePlugin({
      '$': 'jquery'
  }),
]

//忽略打包的文件
externals:{
  'jquery': '$'
}
3.4 关于css前缀的处理
3.5 关于js新语法的处理
3.6 关于文件拆分的处理
3.7 关于别名和扩展名的处理
3.8 webpack必杀技 : 动态链接库
-
什么是动态链接库: 用dll链接的方式提取固定的js文件,并链接这个js文件
当我们引入一个js文件的时候,这个js文件比较大,那我们是否可以单独打包,发布到cdn上,直接引用
-
比如 当我们想要把react打包的时候,希望将react和reactdom放到一个js文件打包的时候 不打包这两个文件,而是直接引用js的cdn路径
新建一个webpack的js配置文件
webpack.react.js
var path = require('path');
let webpack = require("webpack");

module.exports = {
  mode: 'development',
  entry: {
    react: ['react', 'react-dom']
  },
  output:{
    filename: '_dll_[name].js',
    path: path.resolve(__dirname, 'dist'),
    library: '_dll_[name]',
    //  "var" | "assign" | "this" | "window" | "self" | "global" | "commonjs" | "commonjs2" | "commonjs-module" | "amd" | "amd-require" | "umd" | "umd2" | "jsonp" | "system"
    // libraryTarget: 'commonjs2'//默认 var
  },
  plugins: [
    new webpack.DllPlugin({
      name: '_dll_[name]',
      path: path.resolve(__dirname, 'dist', 'manifest.json')
    })

  ]
};
npx webpack --config webpack.react.js
此时就会生成一个manifest.json文件
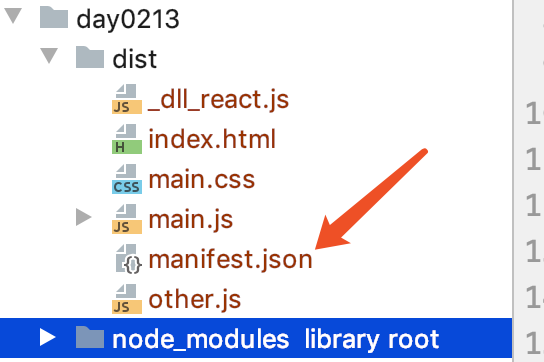
最后 在webpack.prod.config.js线上配置文件中引入插件
    new webpack.DllReferencePlugin({
      manifest: path.resolve(__dirname, 'dist', 'manifest.json')
    })
3.9 抽离公共代码块
optimization: {//webpack4.0之后出现的优化项
    minimizer: [new TerserPlugin({}), new OptimizeCssAssetsWebpackPlugin({})],//压缩css
    //缺陷 可以压缩css 但是 js压缩又出现了问题

    splitChunks:{//分割代码块
      cacheGroups:{//缓存组
        common:{//公共的逻辑
          chunks: 'initial',//从入口文件开始查找
          minSize: 0,//最小分包体积
          minChunks: 2,//
        },
        vendor:{
          priority: 1,
          test:/node_modules/,
          chunks: 'initial',
          minSize: 0,
          minChunks: 2
        }
      }
    }
  },
4. webpack打包原理
webpack 构建流程
Webpack 的运行流程是一个串行的过程,从启动到结束会依次执行以下流程 :
- 初始化参数:从配置文件和 Shell 语句中读取与合并参数,得出最终的参数。
- 开始编译:用上一步得到的参数初始化 Compiler 对象,加载所有配置的插件,执行对象的 run 方法开始执行编译。
- 确定入口:根据配置中的 entry 找出所有的入口文件。
- 编译模块:从入口文件出发,调用所有配置的 Loader 对模块进行翻译,再找出该模块依赖的模块,再递归本步骤直到所有入口依赖的文件都经过了本步骤的处理。
- 完成模块编译:在经过第 4 步使用 Loader 翻译完所有模块后,得到了每个模块被翻译后的最终内容以及它们之间的依赖关系。
- 输出资源:根据入口和模块之间的依赖关系,组装成一个个包含多个模块的 Chunk,再把每个 Chunk 转换成一个单独的文件加入到输出列表,这步是可以修改输出内容的最后机会。
- 输出完成:在确定好输出内容后,根据配置确定输出的路径和文件名,把文件内容写入到文件系统。
在以上过程中,Webpack 会在特定的时间点广播出特定的事件,插件在监听到感兴趣的事件后会执行特定的逻辑,并且插件可以调用 Webpack 提供的 API 改变 Webpack 的运行结果。
实践加深理解,撸一个简易 webpack
1. 定义 Compiler 类
class Compiler {
  constructor(options) {
    // webpack 配置
    const { entry, output } = options
    // 入口
    this.entry = entry
    // 出口
    this.output = output
    // 模块
    this.modules = []
  }
  // 构建启动
  run() {}
  // 重写 require函数,输出bundle
  generate() {}
}
2. 解析入口文件,获取 AST
我们这里使用@babel/parser,这是 babel7 的工具,来帮助我们分析内部的语法,包括 es6,返回一个 AST 抽象语法树。
// webpack.config.js

const path = require('path')
module.exports = {
  entry: './src/index.js',
  output: {
    path: path.resolve(__dirname, './dist'),
    filename: 'main.js'
  }
}
//

const fs = require('fs')
const parser = require('@babel/parser')
const options = require('./webpack.config')

const Parser = {
  getAst: path => {
    // 读取入口文件
    const content = fs.readFileSync(path, 'utf-8')
    // 将文件内容转为AST抽象语法树
    return parser.parse(content, {
      sourceType: 'module'
    })
  }
}

class Compiler {
  constructor(options) {
    // webpack 配置
    const { entry, output } = options
    // 入口
    this.entry = entry
    // 出口
    this.output = output
    // 模块
    this.modules = []
  }
  // 构建启动
  run() {
    const ast = Parser.getAst(this.entry)
  }
  // 重写 require函数,输出bundle
  generate() {}
}

new Compiler(options).run()
3. 找出所有依赖模块
Babel 提供了@babel/traverse(遍历)方法维护这 AST 树的整体状态,我们这里使用它来帮我们找出依赖模块。
const fs = require('fs')
const path = require('path')
const options = require('./webpack.config')
const parser = require('@babel/parser')
const traverse = require('@babel/traverse').default

const Parser = {
  getAst: path => {
    // 读取入口文件
    const content = fs.readFileSync(path, 'utf-8')
    // 将文件内容转为AST抽象语法树
    return parser.parse(content, {
      sourceType: 'module'
    })
  },
  getDependecies: (ast, filename) => {
    const dependecies = {}
    // 遍历所有的 import 模块,存入dependecies
    traverse(ast, {
      // 类型为 ImportDeclaration 的 AST 节点 (即为import 语句)
      ImportDeclaration({ node }) {
        const dirname = path.dirname(filename)
        // 保存依赖模块路径,之后生成依赖关系图需要用到
        const filepath = './' + path.join(dirname, node.source.value)
        dependecies[node.source.value] = filepath
      }
    })
    return dependecies
  }
}

class Compiler {
  constructor(options) {
    // webpack 配置
    const { entry, output } = options
    // 入口
    this.entry = entry
    // 出口
    this.output = output
    // 模块
    this.modules = []
  }
  // 构建启动
  run() {
    const { getAst, getDependecies } = Parser
    const ast = getAst(this.entry)
    const dependecies = getDependecies(ast, this.entry)
  }
  // 重写 require函数,输出bundle
  generate() {}
}

new Compiler(options).run()
4. AST 转换为 code
将 AST 语法树转换为浏览器可执行代码,我们这里使用@babel/core 和 @babel/preset-env。
const fs = require('fs')
const path = require('path')
const options = require('./webpack.config')
const parser = require('@babel/parser')
const traverse = require('@babel/traverse').default
const { transformFromAst } = require('@babel/core')

const Parser = {
  getAst: path => {
    // 读取入口文件
    const content = fs.readFileSync(path, 'utf-8')
    // 将文件内容转为AST抽象语法树
    return parser.parse(content, {
      sourceType: 'module'
    })
  },
  getDependecies: (ast, filename) => {
    const dependecies = {}
    // 遍历所有的 import 模块,存入dependecies
    traverse(ast, {
      // 类型为 ImportDeclaration 的 AST 节点 (即为import 语句)
      ImportDeclaration({ node }) {
        const dirname = path.dirname(filename)
        // 保存依赖模块路径,之后生成依赖关系图需要用到
        const filepath = './' + path.join(dirname, node.source.value)
        dependecies[node.source.value] = filepath
      }
    })
    return dependecies
  },
  getCode: ast => {
    // AST转换为code
    const { code } = transformFromAst(ast, null, {
      presets: ['@babel/preset-env']
    })
    return code
  }
}

class Compiler {
  constructor(options) {
    // webpack 配置
    const { entry, output } = options
    // 入口
    this.entry = entry
    // 出口
    this.output = output
    // 模块
    this.modules = []
  }
  // 构建启动
  run() {
    const { getAst, getDependecies, getCode } = Parser
    const ast = getAst(this.entry)
    const dependecies = getDependecies(ast, this.entry)
    const code = getCode(ast)
  }
  // 重写 require函数,输出bundle
  generate() {}
}

new Compiler(options).run()
5. 递归解析所有依赖项,生成依赖关系图
const fs = require('fs')
const path = require('path')
const options = require('./webpack.config')
const parser = require('@babel/parser')
const traverse = require('@babel/traverse').default
const { transformFromAst } = require('@babel/core')

const Parser = {
  getAst: path => {
    // 读取入口文件
    const content = fs.readFileSync(path, 'utf-8')
    // 将文件内容转为AST抽象语法树
    return parser.parse(content, {
      sourceType: 'module'
    })
  },
  getDependecies: (ast, filename) => {
    const dependecies = {}
    // 遍历所有的 import 模块,存入dependecies
    traverse(ast, {
      // 类型为 ImportDeclaration 的 AST 节点 (即为import 语句)
      ImportDeclaration({ node }) {
        const dirname = path.dirname(filename)
        // 保存依赖模块路径,之后生成依赖关系图需要用到
        const filepath = './' + path.join(dirname, node.source.value)
        dependecies[node.source.value] = filepath
      }
    })
    return dependecies
  },
  getCode: ast => {
    // AST转换为code
    const { code } = transformFromAst(ast, null, {
      presets: ['@babel/preset-env']
    })
    return code
  }
}

class Compiler {
  constructor(options) {
    // webpack 配置
    const { entry, output } = options
    // 入口
    this.entry = entry
    // 出口
    this.output = output
    // 模块
    this.modules = []
  }
  // 构建启动
  run() {
    // 解析入口文件
    const info = this.build(this.entry)
    this.modules.push(info)
    this.modules.forEach(({ dependecies }) => {
      // 判断有依赖对象,递归解析所有依赖项
      if (dependecies) {
        for (const dependency in dependecies) {
          this.modules.push(this.build(dependecies[dependency]))
        }
      }
    })
    // 生成依赖关系图
    const dependencyGraph = this.modules.reduce(
      (graph, item) => ({
        ...graph,
        // 使用文件路径作为每个模块的唯一标识符,保存对应模块的依赖对象和文件内容
        [item.filename]: {
          dependecies: item.dependecies,
          code: item.code
        }
      }),
      {}
    )
  }
  build(filename) {
    const { getAst, getDependecies, getCode } = Parser
    const ast = getAst(filename)
    const dependecies = getDependecies(ast, filename)
    const code = getCode(ast)
    return {
      // 文件路径,可以作为每个模块的唯一标识符
      filename,
      // 依赖对象,保存着依赖模块路径
      dependecies,
      // 文件内容
      code
    }
  }
  // 重写 require函数,输出bundle
  generate() {}
}

new Compiler(options).run()
6. 重写 require 函数,输出 bundle
const fs = require('fs')
const path = require('path')
const options = require('./webpack.config')
const parser = require('@babel/parser')
const traverse = require('@babel/traverse').default
const { transformFromAst } = require('@babel/core')

const Parser = {
  getAst: path => {
    // 读取入口文件
    const content = fs.readFileSync(path, 'utf-8')
    // 将文件内容转为AST抽象语法树
    return parser.parse(content, {
      sourceType: 'module'
    })
  },
  getDependecies: (ast, filename) => {
    const dependecies = {}
    // 遍历所有的 import 模块,存入dependecies
    traverse(ast, {
      // 类型为 ImportDeclaration 的 AST 节点 (即为import 语句)
      ImportDeclaration({ node }) {
        const dirname = path.dirname(filename)
        // 保存依赖模块路径,之后生成依赖关系图需要用到
        const filepath = './' + path.join(dirname, node.source.value)
        dependecies[node.source.value] = filepath
      }
    })
    return dependecies
  },
  getCode: ast => {
    // AST转换为code
    const { code } = transformFromAst(ast, null, {
      presets: ['@babel/preset-env']
    })
    return code
  }
}

class Compiler {
  constructor(options) {
    // webpack 配置
    const { entry, output } = options
    // 入口
    this.entry = entry
    // 出口
    this.output = output
    // 模块
    this.modules = []
  }
  // 构建启动
  run() {
    // 解析入口文件
    const info = this.build(this.entry)
    this.modules.push(info)
    this.modules.forEach(({ dependecies }) => {
      // 判断有依赖对象,递归解析所有依赖项
      if (dependecies) {
        for (const dependency in dependecies) {
          this.modules.push(this.build(dependecies[dependency]))
        }
      }
    })
    // 生成依赖关系图
    const dependencyGraph = this.modules.reduce(
      (graph, item) => ({
        ...graph,
        // 使用文件路径作为每个模块的唯一标识符,保存对应模块的依赖对象和文件内容
        [item.filename]: {
          dependecies: item.dependecies,
          code: item.code
        }
      }),
      {}
    )
    this.generate(dependencyGraph)
  }
  build(filename) {
    const { getAst, getDependecies, getCode } = Parser
    const ast = getAst(filename)
    const dependecies = getDependecies(ast, filename)
    const code = getCode(ast)
    return {
      // 文件路径,可以作为每个模块的唯一标识符
      filename,
      // 依赖对象,保存着依赖模块路径
      dependecies,
      // 文件内容
      code
    }
  }
  // 重写 require函数 (浏览器不能识别commonjs语法),输出bundle
  generate(code) {
    // 输出文件路径
    const filePath = path.join(this.output.path, this.output.filename)
    // 懵逼了吗? 没事,下一节我们捋一捋
    const bundle = `(function(graph){
      function require(module){
        function localRequire(relativePath){
          return require(graph[module].dependecies[relativePath])
        }
        var exports = {};
        (function(require,exports,code){
          eval(code)
        })(localRequire,exports,graph[module].code);
        return exports;
      }
      require('${this.entry}')
    })(${JSON.stringify(code)})`

    // 把文件内容写入到文件系统
    fs.writeFileSync(filePath, bundle, 'utf-8')
  }
}

new Compiler(options).run()
7. 看完这节,彻底搞懂 bundle 实现
我们通过下面的例子来进行讲解,先死亡凝视 30 秒
;(function(graph) {
  function require(moduleId) {
    function localRequire(relativePath) {
      return require(graph[moduleId].dependecies[relativePath])
    }
    var exports = {}
    ;(function(require, exports, code) {
      eval(code)
    })(localRequire, exports, graph[moduleId].code)
    return exports
  }
  require('./src/index.js')
})({
  './src/index.js': {
    dependecies: { './hello.js': './src/hello.js' },
    code: '"use strict";\n\nvar _hello = require("./hello.js");\n\ndocument.write((0, _hello.say)("webpack"));'
  },
  './src/hello.js': {
    dependecies: {},
    code:
      '"use strict";\n\nObject.defineProperty(exports, "__esModule", {\n  value: true\n});\nexports.say = say;\n\nfunction say(name) {\n  return "hello ".concat(name);\n}'
  }
})
step 1 : 从入口文件开始执行
// 定义一个立即执行函数,传入生成的依赖关系图
;(function(graph) {
  // 重写require函数
  function require(moduleId) {
    console.log(moduleId) // ./src/index.js
  }
  // 从入口文件开始执行
  require('./src/index.js')
})({
  './src/index.js': {
    dependecies: { './hello.js': './src/hello.js' },
    code: '"use strict";\n\nvar _hello = require("./hello.js");\n\ndocument.write((0, _hello.say)("webpack"));'
  },
  './src/hello.js': {
    dependecies: {},
    code:
      '"use strict";\n\nObject.defineProperty(exports, "__esModule", {\n  value: true\n});\nexports.say = say;\n\nfunction say(name) {\n  return "hello ".concat(name);\n}'
  }
})
step 2 : 使用 eval 执行代码
// 定义一个立即执行函数,传入生成的依赖关系图
;(function(graph) {
  // 重写require函数
  function require(moduleId) {
    ;(function(code) {
      console.log(code) // "use strict";\n\nvar _hello = require("./hello.js");\n\ndocument.write((0, _hello.say)("webpack"));
      eval(code) // Uncaught TypeError: Cannot read property 'code' of undefined
    })(graph[moduleId].code)
  }
  // 从入口文件开始执行
  require('./src/index.js')
})({
  './src/index.js': {
    dependecies: { './hello.js': './src/hello.js' },
    code: '"use strict";\n\nvar _hello = require("./hello.js");\n\ndocument.write((0, _hello.say)("webpack"));'
  },
  './src/hello.js': {
    dependecies: {},
    code:
      '"use strict";\n\nObject.defineProperty(exports, "__esModule", {\n  value: true\n});\nexports.say = say;\n\nfunction say(name) {\n  return "hello ".concat(name);\n}'
  }
})
可以看到,我们在执行"./src/index.js"文件代码的时候报错了,这是因为 index.js 里引用依赖 hello.js,而我们没有对依赖进行处理,接下来我们对依赖引用进行处理。
step 3 : 依赖对象寻址映射,获取 exports 对象
// 定义一个立即执行函数,传入生成的依赖关系图
;(function(graph) {
  // 重写require函数
  function require(moduleId) {
    // 找到对应moduleId的依赖对象,调用require函数,eval执行,拿到exports对象
    function localRequire(relativePath) {
      return require(graph[moduleId].dependecies[relativePath]) // {__esModule: true, say: ƒ say(name)}
    }
    // 定义exports对象
    var exports = {}
    ;(function(require, exports, code) {
      // commonjs语法使用module.exports暴露实现,我们传入的exports对象会捕获依赖对象(hello.js)暴露的实现(exports.say = say)并写入
      eval(code)
    })(localRequire, exports, graph[moduleId].code)
    // 暴露exports对象,即暴露依赖对象对应的实现
    return exports
  }
  // 从入口文件开始执行
  require('./src/index.js')
})({
  './src/index.js': {
    dependecies: { './hello.js': './src/hello.js' },
    code: '"use strict";\n\nvar _hello = require("./hello.js");\n\ndocument.write((0, _hello.say)("webpack"));'
  },
  './src/hello.js': {
    dependecies: {},
    code:
      '"use strict";\n\nObject.defineProperty(exports, "__esModule", {\n  value: true\n});\nexports.say = say;\n\nfunction say(name) {\n  return "hello ".concat(name);\n}'
  }
})
这下应该明白了吧 ~ 可以直接复制上面代码到控制台输出哦~
总结
Webpack 是一个庞大的 Node.js 应用,如果你阅读过它的源码,你会发现实现一个完整的 Webpack 需要编写非常多的代码。 但你无需了解所有的细节,只需了解其整体架构和部分细节即可。
对 Webpack 的使用者来说,它是一个简单强大的工具; 对 Webpack 的开发者来说,它是一个扩展性的高系统。
Webpack 之所以能成功,在于它把复杂的实现隐藏了起来,给用户暴露出的只是一个简单的工具,让用户能快速达成目的。 同时整体架构设计合理,扩展性高,开发扩展难度不高,通过社区补足了大量缺失的功能,让 Webpack 几乎能胜任任何场景。


 693
693


 被折叠的 条评论
为什么被折叠?
被折叠的 条评论
为什么被折叠?
 到【灌水乐园】发言


