


Spring Boot
Spring Boot用于简化Spring框架项目的创建和启动,简化项目配置,内置了Spring,SpringMVC,Tomcat,并提供对其他框架的扩展.
pom.xml中引入Spring Boot web启动器依赖
<parent>
    <artifactId>spring-boot-starter-parent</artifactId>
    <groupId>org.springframework.boot</groupId>
    <version>2.1.5.RELEASE</version>
 </parent>
 <dependencies>
   <dependency>
     <groupId>junit</groupId>
     <artifactId>junit</artifactId>
     <version>3.8.1</version>
     <scope>test</scope>
   </dependency>
<!--    spring boot web启动器-->
   <dependency>
     <groupId>org.springframework.boot</groupId>
     <artifactId>spring-boot-starter-web</artifactId>
   </dependency>
<!--    thymeleaf-->
   <dependency>
     <groupId>org.springframework.boot</groupId>
     <artifactId>spring-boot-starter-thymeleaf</artifactId>
     <version>2.1.5.RELEASE</version>
   </dependency>

   <!--载入mybatis-->
   <dependency>
     <groupId>org.mybatis.spring.boot</groupId>
     <artifactId>mybatis-spring-boot-starter</artifactId>
     <version>1.3.2</version>
   </dependency>
   <dependency>
     <groupId>mysql</groupId>
     <artifactId>mysql-connector-java</artifactId>
     <version>8.0.13</version>
   </dependency>
   <!--允许使用jsp-->
   <dependency>
     <groupId>org.apache.tomcat.embed</groupId>
     <artifactId>tomcat-embed-jasper</artifactId>
     <version>9.0.19</version>
     <scope>provided</scope>
   </dependency>
   <!-- jstl 依赖 -->
   <dependency>
     <groupId>javax.servlet</groupId>
     <artifactId>jstl</artifactId>
   </dependency>

 </dependencies>
Spring-boot-starter-web内置了Spring和Spring MVC,Tomcat等:
如果想用Netty可以用Spring-boot-starter-webflux.

Spring Boot的启动类
@SpringBootApplication
public class Run {
    public static void main(String[] args) {
        SpringApplication application = new SpringApplication(Run.class);
        application.run(args);
    }
}
或者:
@SpringBootApplication
public class Run {
    public static void main(String[] args) {
        SpringApplication.run(Run.class,args);
    }
}
直接在main方法中启动,而不需要配置Tomcat来启动
启动成功:

直接用localhost:8080访问
注意: @SpringBootApplication 默认扫描当前类的同包以及子包下的类。所以需要把service、dao等写在启动类包的同包或子包下面,而且启动类不能在默认包
整合mybatis
Spring Boot持久层提供了Spring-jdbc,mybatis,hibernate等的支持,此处使用mybatis.
pom.xml引入mybatis-spring-boot-starter依赖:
<!--载入mybatis-->
    <dependency>
      <groupId>org.mybatis.spring.boot</groupId>
      <artifactId>mybatis-spring-boot-starter</artifactId>
      <version>1.3.2</version>
    </dependency>

<!--mysql驱动-->
    <dependency>
      <groupId>mysql</groupId>
      <artifactId>mysql-connector-java</artifactId>
      <version>8.0.13</version>
    </dependency>
  </dependencies>
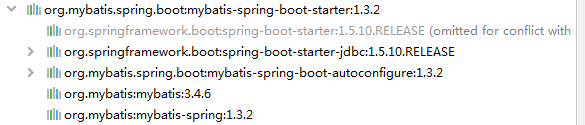
经过实测1.3.2兼容spring-boot-starter-web的2.1.5.RELEASE版本,其他有些版本不能兼容导致不能启动
mybatis-spring-boot-starter包含了mybatis:
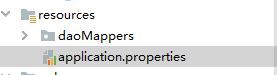
创建Spring Boot配置文件
Spring Boot的配置文件是固定的,为application.properties或application.yml
创建application.properties:
内容:
properties:
spring.datasource.driver-class-name=com.mysql.cj.jdbc.Driver
<!--GMT%2B8 根据url编码规范%2B在url中表示+,GMT+8为北京时间。mysql默认使用系统时区-->
spring.datasource.url=jdbc:mysql://localhost:3306/travel?serverTimezone=GMT%2B8&useSSL=false
spring.datasource.username=root
spring.datasource.password=188278
mybatis.type-aliases-package=com.test.domain
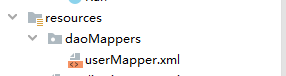
mybatis.mapperLocations=classpath:daoMappers/*.xml
yml:
yml要注意缩进和":"后要有空格
spring:
	datasource:
		driver-class-name: com.mysql.cj.jdbc.Driver
		#GMT%2B8  根据url编码规范%2B在url中表示+,GMT+8为北京时间。mysql默认使用系统时区
		url: jdbc:mysql://localhost:3306/travel?serverTimezone=GMT%2B8&useSSL=false
		username: root
		password: 1234

mybatis:
	type-aliases-package: com.test.domain
	mapperLocations: classpath:daoMappers/*.xml
mybatis.mapperLocations为mybatis映射文件位置
实体类
如果不想写get,set可以用lombok.

package com.test.domain;

import java.io.Serializable;

/**
 * 用户实体类
 */
public class User implements Serializable {
    private int uid;//用户id
    private String username;//用户名,账号
    private String password;//密码
    private String name;//真实姓名
    private String birthday;//出生日期
    private String sex;//男或女
    private String telephone;//手机号
    private String email;//邮箱
    private String status;//激活状态,Y代表激活,N代表未激活
    private String code;//激活码(要求唯一)

    /**
     * 无参构造方法
     */
    public User() {
    }

    /**
     * 有参构方法
     * @param uid
     * @param username
     * @param password
     * @param name
     * @param birthday
     * @param sex
     * @param telephone
     * @param email
     * @param status
     * @param code
     */
    public User(int uid, String username, String password, String name, String birthday, String sex, String telephone, String email, String status, String code) {
        this.uid = uid;
        this.username = username;
        this.password = password;
        this.name = name;
        this.birthday = birthday;
        this.sex = sex;
        this.telephone = telephone;
        this.email = email;
        this.status = status;
        this.code = code;
    }

    public int getUid() {
        return uid;
    }

    public void setUid(int uid) {
        this.uid = uid;
    }

    public String getUsername() {
        return username;
    }

    public void setUsername(String username) {
        this.username = username;
    }

    public String getPassword() {
        return password;
    }

    public void setPassword(String password) {
        this.password = password;
    }

    public String getName() {
        return name;
    }

    public void setName(String name) {
        this.name = name;
    }

    public String getBirthday() {
        return birthday;
    }

    public void setBirthday(String birthday) {
        this.birthday = birthday;
    }

    public String getSex() {
        return sex;
    }

    public void setSex(String sex) {
        this.sex = sex;
    }

    public String getTelephone() {
        return telephone;
    }

    public void setTelephone(String telephone) {
        this.telephone = telephone;
    }

    public String getEmail() {
        return email;
    }

    public void setEmail(String email) {
        this.email = email;
    }

    public String getStatus() {
        return status;
    }

    public void setStatus(String status) {
        this.status = status;
    }

    public String getCode() {
        return code;
    }

    public void setCode(String code) {
        this.code = code;
    }
}
使用lombok
pom.xml引入依赖:
    <!--lombok-->
    <dependency>
      <groupId>org.projectlombok</groupId>
      <artifactId>lombok</artifactId>
      <optional>true</optional>
      <version>1.16.18</version>
    </dependency>
@Data 自动生成所有属性的get,set方法
@AllArgsConstructor 自动生成所有参数的构造方法
@NoArgsConstructor 自动生成无参构造方法.
/**
 * 用户实体类
 */
@Data       //自动生成所有属性的get,set方法
@AllArgsConstructor
@NoArgsConstructor
public class User implements Serializable {
    private int uid;//用户id
    private String username;//用户名,账号
    private String password;//密码
    private String name;//真实姓名
    private String birthday;//出生日期
    private String sex;//男或女
    private String telephone;//手机号
    private String email;//邮箱
    private String status;//激活状态,Y代表激活,N代表未激活
    private String code;//激活码(要求唯一)
}
@Sl4j还可以打印日志.用log.info()方法.
如:
@RestController
@Slf4j
public class TestController {
    @Autowired
    private UserService userService;
    @RequestMapping("/test")
    public String test(){
        userService.checkPwd("aa","111111");
        log.info("****this is test");
        return "test";
    }
}
编写dao层类
@Mapper
public interface UserDao {
    public User findById(int id);
    @Select("select * from tab_user where name=#{name}")
    public List<User> findByName(String name);
}
创建映射文件:
编写映射文件:
<?xml version="1.0" encoding="UTF-8"?>
<!DOCTYPE mapper
        PUBLIC "-//mybatis.org//DTD Mapper 3.0//EN"
        "http://mybatis.org/dtd/mybatis-3-mapper.dtd">

<mapper namespace="com.test.dao.UserDao">
    <select id="findById" resultType="com.test.domain.User" parameterType="int">
        select * from tab_user where uid = #{id}
    </select>
</mapper>
业务层
@Service
public class UserService {
    @Autowired
    private UserDao userDao;
    public boolean checkPwd(String uname,String upwd){
        System.out.println(userDao.findById(1).getName());
        System.out.println(userDao.findByName("aa"));
        User user=userDao.findById(1);
        if (uname.equals(user.getName())&&upwd.equals(user.getPassword())){
            return true;
        } else {
            return false;
        }
    }
}
Thymeleaf
pom引入依赖:
    <dependency>
      <groupId>org.springframework.boot</groupId>
      <artifactId>spring-boot-starter-thymeleaf</artifactId>
    </dependency>
application.properties配置文件中配置thymaleaf配置:
spring.thymeleaf.cache = false
spring.thymeleaf.encoding = UTF-8
开发时关闭缓存
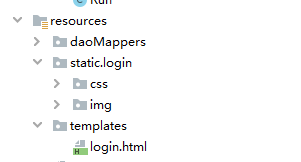
Thymeleaf默认静态文件位置是resources/static,默认模板文件位置是resources/templates,默认后缀是.html,也可以自己配置:
#spring.thymeleaf.mode = HTML5
spring.thymeleaf.prefix = classpath:/mytemplates/
spring.thymeleaf.suffix = .html
spring.thymeleaf.prefix = classpath:/mytemplates/指定了模板页面位置.
模板页面不能直接访问,需要通过控制类跳转。
页面引入thymeleaf:
<html xmlns:th="http://www.thymeleaf.org">
@{}链接表达式
<link th:href="@{login/css/signin.css}" rel="stylesheet">
将默认从resources/static/login/css/signin.css中寻找该文件.
<form class="form-signin" th:action="@{/Login}">
将请求Login
${…}获取变量
和EL表达式类似


至于h1里面的原有的值只是为了给前端开发时做展示用的.这样的话很好的做到了前后端分离。
*{…}选择变量表达式
th:text=“*{firstName}等价于th:text=”${session.user.firstName}
文本替换
th:text=“|Welcome to our application, ${user.name}!|“相当于th:text=”'Welcome to our application, ’ + ${user.name} + ‘!’”
但只能包含表达式变量,而不能有条件判断等
Each循环
<tr th:each="emp : ${empList}">
   <td th:text="${emp.id}">1</td>
   <td th:text="${emp.name}">海</td>
   <td th:text="${emp.age}">18</td>
</tr>
调用JavaScript函数拼接参数
th:οnclick=“‘delUser(’+${user.id}+‘);’”
条件判断
If,如果成立则显示,否则不显示标签.
th:if=“${hello==‘Hell’}”
?:,相当于if-else。
th:text=“${hello==‘Hello’?‘Hello’:‘Hi’}+‘!请登录’”
控制层
@Controller
public class UserController {
    // 向用户登录页面跳转
    @GetMapping("/userLogin")
    public String toLoginPage(Model model) {
        model.addAttribute("hello","Hello");
        return "login";
    }
	 @PostMapping("/Login")
   public String login(String name, String pwd,Model model) throws IOException {
        if(!userService.checkPwd(name,pwd)){
            model.addAttribute("error","t");
        }
        return "login";
    }
}
数据展示层
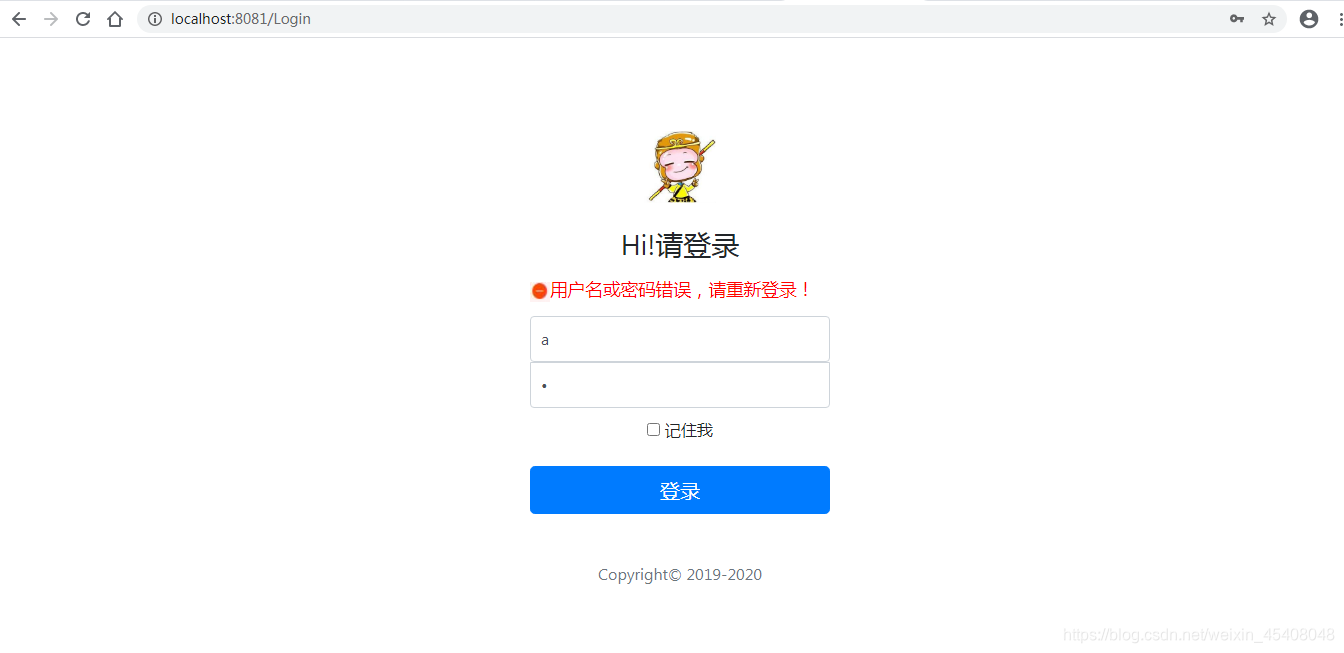
<!DOCTYPE html>
<html xmlns="http://www.w3.org/1999/xhtml" xmlns:th="http://www.thymeleaf.org">
<head>
    <meta http-equiv="Content-Type" content="text/html; charset=UTF-8">
    <title>用户登录界面</title>
    <link th:href="@{login/css/bootstrap.min.css}" rel="stylesheet">
    <link th:href="@{login/css/signin.css}" rel="stylesheet">
</head>
<body class="text-center">
<form class="form-signin" th:action="@{/Login}" th:method="post">
    <img class="mb-4" th:src="@{/login/img/login.jpg}" width="72px" height="72px">
    <h1 class="h3 mb-3 font-weight-normal" th:text="${hello=='Hello'?'Hello':'Hi'}+'!请登录'">请登录</h1>
    <!-- 用户登录错误信息提示框 -->
    <div th:if="${param.error}" style="color: red;height: 40px;text-align: left;font-size: 1.1em">
        <img th:src="@{/login/img/loginError.jpg}" width="20px">用户名或密码错误,请重新登录!
    </div>
    <input type="text" name="name" class="form-control" placeholder="用户名" required="" autofocus="">
    <input type="password" name="pwd" class="form-control" placeholder="密码" required="">
    <div class="checkbox mb-3">
        <label>
            <input type="checkbox" name="rememberme"> 记住我
        </label>
    </div>
    <button class="btn btn-lg btn-primary btn-block" type="submit">登录</button>
    <p class="mt-5 mb-3 text-muted">Copyright© 2019-2020</p>
</form>
</body>
</html>
SpringBoot Test
SpringBoot Test可以不用启动整个项目就进行功能测试.
pom.xml导入依赖:
	<dependency>
      <groupId>org.springframework.boot</groupId>
      <artifactId>spring-boot-starter-test</artifactId>
    </dependency>
不需要再导入Junit,其中已包含Junit依赖.
dao层:
@Mapper
public interface UserDao {
    public User findById(int id);
}
<mapper namespace="com.test.dao.UserDao">
    <select id="findById" resultType="com.test.domain.User" parameterType="int">
        select * from tab_user where uid = #{id}
    </select>
</mapper>
Service层:
@Service
public class UserServiceImpl implements UserService {
    @Autowired
    private UserDao userDao;

    public User getUserById(Integer id) {
        return userDao.findById(id);
    }

}
Controller层:
@Controller

public class UserController {
    @Autowired
    private UserService userService;

    @GetMapping("/getUserById")
    @ResponseBody
    public UserVo findUserById(Integer id){
        User user = userService.getUserById(id);
        UserVo userVo=new UserVo();
        BeanUtils.copyProperties(user,userVo);
        return userVo;
    }

}
项目入口:
@SpringBootApplication(scanBasePackages = "com.test.*")
@MapperScan("com.test.dao")
public class Run {
    public static void main(String[] args) {
        SpringApplication application = new SpringApplication(Run.class);
        application.run(args);
    }
}
创建测试类:
IDEA有专门文件夹可以存放测试文件代码.

控制层测试
@ExtendWith(SpringExtension.class)
@SpringBootTest(classes = Run.class,webEnvironment = SpringBootTest.WebEnvironment.RANDOM_PORT)
@AutoConfigureMockMvc
@Slf4j
public class UserTest {
    @LocalServerPort    //自动获取随机端口
    private int port;


    @Autowired
    private TestRestTemplate testRestTemplate;

    @Test
    public void getUserTest(){
        ResponseEntity<UserVo> responseEntity = testRestTemplate.getForEntity("http://localhost:"+port+"/getUserById?id=1", UserVo.class,"");
        UserVo userVo=responseEntity.getBody();
        log.info("得到用户名为:"+userVo.getName());
    }
}
webEnvironment 可选值
MOCK:此值为默认值,该类型提供一个mock环境,可以和@AutoConfigureMockMvc或@AutoConfigureWebTestClient搭配使用,开启Mock相关的功能。注意此时内嵌的服务(servlet容器)并没有真正启动,也不会监听web服务端口。
RANDOM_PORT:启动一个真实的web服务,监听一个随机端口。
DEFINED_PORT:启动一个真实的web服务,监听一个定义好的端口(从application.properties读取)。
NONE:启动一个非web的ApplicationContext,既不提供mock环境,也不提供真实的web服务。
classes 指定SpringBoot项目入口,webEnvironment 设置自动获取随机端口.
测试结果:

如果是Post方法的测试,则调用testRestTemplate.postForEntity()
service层测试
@Slf4j
@ExtendWith(SpringExtension.class)
/*service层测试不需开启web*/
@SpringBootTest(classes = Run.class,webEnvironment = SpringBootTest.WebEnvironment.NONE)

public class UserServiceTest {
    @Autowired
    private UserService userService;

    @Test
    public void userServiceTest(){
        User user = userService.getUserById(new Integer(1));
        log.info("用户名:"+user.getName());

    }
}
测试结果:

SpringBoot项目的部署
打包成jar包
Pom.xml中配置:
<packaging>jar</packaging>
还要指定main方法所在的类:
  <plugins>
    <plugin>
      <groupId>org.springframework.boot</groupId>
      <artifactId>spring-boot-maven-plugin</artifactId>
      <configuration>
        <mainClass>com.itheima.BlogSystemApplication</mainClass>
      </configuration>
    </plugin>
  </plugins>
</build>


 455
455


 被折叠的 条评论
为什么被折叠?
被折叠的 条评论
为什么被折叠?
 到【灌水乐园】发言


