


一、layer自定义皮肤
自定义透明度
body .layeriframe {
      background-color: rgba(255,255,255,0.8);
    }

layui.layer.open({
          type:2,
          skin: 'layeriframe',
	 	  ......//参数省略
          success: function (layero, index) {
            console.log(layero.children()[1].children[0].style)
            //layero.children()[1].children[0].setAttribute("backgroundColor","rgba(255,255,255,0.8)")
            layero.children()[1].children[0].setAttribute("allowTransparency",true)
            //layero.children()[1].children[0].style.backgroundColor = "rgba(255,255,255,0)"
          },
          end:function (){
          }
        });
二、给iframe标签加上allowTransparency属性
在回调函数里通过layero 给iframe标签加上allowTransparency=true
我的代码里面,iframe在layero.children()的下标1的位置,具体下标,可以打印layero.children()看一下
layui.layer.open({
          type:2,
	 	  ......//参数省略
          success: function (layero, index) {
            console.log(layero.children()[1].children[0].style)
            //layero.children()[1].children[0].setAttribute("backgroundColor","rgba(255,255,255,0.8)")
            layero.children()[1].children[0].setAttribute("allowTransparency",true)
            //layero.children()[1].children[0].style.backgroundColor = "rgba(255,255,255,0)"
          },
          end:function (){
          }
        });
也可以直接通过layero对页面文档直接一步到胃, 就不用再执行后续几步操作了
layero.children()[1].children[0].setAttribute("allowTransparency",true)
layero.children()[1].children[0].contentDocument.getElementsByTagName("html")[0].style.backgroundColor = "transparent"
layero.children()[1].children[0].contentDocument.getElementsByTagName("body")[0].style.backgroundColor = "transparent"
三、修改被装载页面的html
在被装载页面的html头文件位置修改background-color样式
原因: layuiadmin框架的admin.css文件里对html标签有全局配置,要覆盖修改
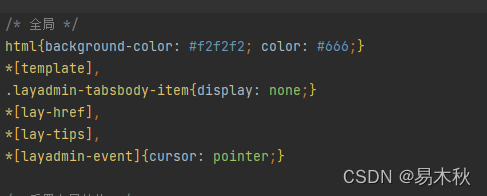
<!DOCTYPE html>
<html xmlns="http://www.w3.org/1999/html" style="background-color: transparent">
<head>
四、修改被装载页面的body样式
修改body的background-color样式为透明
</head>
<body style="background-color: transparent; ">
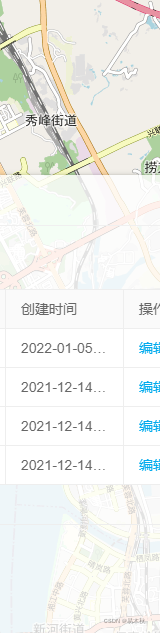
五、看效果


 1970
1970


 被折叠的 条评论
为什么被折叠?
被折叠的 条评论
为什么被折叠?
 到【灌水乐园】发言


