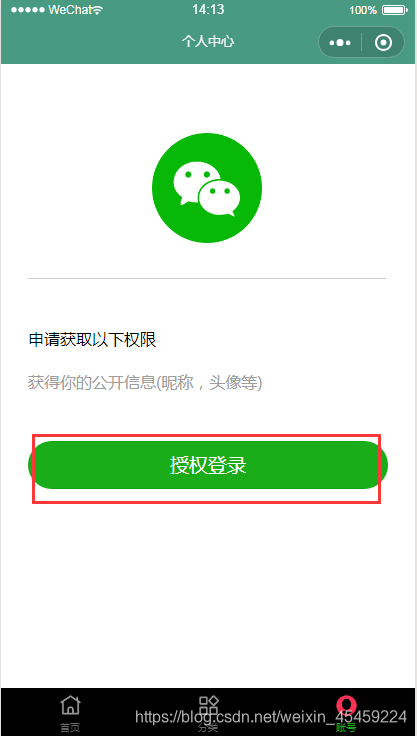
微信小程序 用户中心界面(二)

微信小程序 用户中心界面

效果图展示

  1. 用户未授权界面效果图:
    在这里插入图片描述
  2. 用户授权后界面展示图:
    在这里插入图片描述

.wxml 文件

<view wx:if="{{isHide}}">
  <view wx:if="{{canIUse}}">
    <view class='header'>
      <image src='/static/images/weixin_1.png'></image>
    </view>

    <view class='content'>
      <view>申请获取以下权限</view>
      <text>获得你的公开信息(昵称,头像等)</text>
    </view>

    <button class='bottom' type='primary' open-type="getUserInfo" lang="zh_CN" bindgetuserinfo="bindGetUserInfo">
      授权登录
    </button>
  </view>
  <view wx:else>请升级微信版本</view>
</view>

<view wx:else>
  <view class="userinfo">
      <image bindtap="bindViewTap" class="userinfo-avatar" src="{{userInfo.avatarUrl}}" background-size="cover"></image>
      <text class="userinfo-nickname">{{userInfo.nickName}}</text>
  </view>

  <view class="hr"></view>
  <view class='item'>
    <view class="title">手机绑定</view>
    <view class="detail2">
      <text>></text>
    </view>
  </view>
  <view class="line"></view>

  <view class='item'>
    <view class="title">写博客</view>
    <view class="detail2">
      <text>></text>
    </view>
  </view>
  <view class="hr"></view>
  <view class='item'>
    <view class="title">我的博客</view>
    <view class="detail2">
      <text> ></text>
    </view>
  </view>
  <view class="line"></view>
  <view class="item">
    <view class="title">我的收藏</view>
    <view class="detail2">
      <text> ></text>
    </view>
  </view>
  <view class="line"></view>
  <view class="item">
    <view class="title">意见反馈</view>
    <view class="detail2">
      <text> ></text>
    </view>
  </view>
  <view class="line"></view>
  <view class="item">
    <view class="title">设置</view>
    <view class="detail2">
      <text> ></text>
    </view>
  </view>
  <view class="hr"></view>
</view>

.wxss 文件

/* pages/mine/mine.wxss */
.userinfo {
  display: flex;
  flex-direction: column;
  align-items: center;
  background: #eb6161;
  width: 100%;
  height: 300rpx;
}

.userinfo-avatar {
  width: 128rpx;
  height: 128rpx;
  margin: 20rpx;
  border-radius: 50%;
}

.userinfo-nickname {
  color: black;
}

.header {
  margin: 90rpx 0 90rpx 50rpx;
  border-bottom: 1px solid #ccc;
  text-align: center;
  width: 650rpx;
  height: 300rpx;
  line-height: 450rpx;
}

.header image {
  width: 200rpx;
  height: 200rpx;
}

.content {
  margin-left: 50rpx;
  margin-bottom: 90rpx;
}

.content text {
  display: block;
  color: #9d9d9d;
  margin-top: 40rpx;
}

.bottom {
  border-radius: 80rpx;
  margin: 70rpx 50rpx;
  font-size: 35rpx;
}

/* 用户中心 */

.hr {
  width: 100%;
  height: 15px;
  background-color: #f4f5f6;
}
.item {
  display: flex;
  flex-direction: row;
}
.title {
  padding-top: 15px;
  padding-bottom: 15px;
  padding-left: 15px;
  font-size: 15px;
}

.detail2 {
  font-size: 15px;
  position: absolute;
  right: 10px;
  height: 50px;
  line-height: 50px;
  color: #888;
}

.line {
  border: 1px solid #ccc;
  opacity: 0.2;
}

.js 文件

// pages/mine/mine.js
const app = getApp()
Page({

  /**
   * 页面的初始数据
   */
  data: {
    userInfo: {},
    //判断小程序的API,回调,参数,组件等是否在当前版本可用。
    canIUse: wx.canIUse('button.open-type.getUserInfo'),
    isHide: false,
  },
  //事件处理函数
  bindViewTap: function() {
    wx.navigateTo({
      url: '../logs/logs'
    })
  },

  /**
   * 生命周期函数--监听页面加载
   */
  onLoad: function() {
    var that = this;
    // 查看是否授权
    wx.getSetting({
      success: function(res) {
        if (res.authSetting['scope.userInfo']) {
          wx.getUserInfo({
            success: function(res) {
              app.globalData.userInfo = res.userInfo
              that.setData({
                userInfo: res.userInfo,
              })
              // 用户已经授权过,不需要显示授权页面,所以不需要改变 isHide 的值
              // 根据自己的需求有其他操作再补充
              // 我这里实现的是在用户授权成功后,调用微信的 wx.login 接口,从而获取code
              wx.login({
                success: res => {
                  // 获取到用户的 code 之后:res.code
                  // console.log("用户的code:" + res.code);
                  // 可以传给后台,再经过解析获取用户的 openid
                  // 或者可以直接使用微信的提供的接口直接获取 openid ,方法如下:
                  // wx.request({
                  //     // 自行补上自己的 APPID 和 SECRET
                  //     url: 'https://api.weixin.qq.com/sns/jscode2session?appid=自己的APPID&secret=自己的SECRET&js_code=' + res.code + '&grant_type=authorization_code',
                  //     success: res => {
                  //         // 获取到用户的 openid
                  //         console.log("用户的openid:" + res.data.openid);
                  //     }
                  // });
                }
              });
            }
          });
        } else {
          // 用户没有授权
          // 改变 isHide 的值,显示授权页面
          that.setData({
            isHide: true
          });
        }
      }
    });
  },

  bindGetUserInfo: function(e) {
    if (e.detail.userInfo) {
      //用户按了允许授权按钮
      var that = this;
      // 获取到用户的信息了,打印到控制台上看下
      console.log("用户的信息如下:");
      console.log(e.detail.userInfo);
      //授权成功后,通过改变 isHide 的值,让实现页面显示出来,把授权页面隐藏起来
      that.setData({
        isHide: false,
        userInfo: e.detail.userInfo
      });
    } else {
      //用户按了拒绝按钮
      wx.showModal({
        title: '警告',
        content: '您点击了拒绝授权,将无法进入小程序,请授权之后再进入!!!',
        showCancel: false,
        confirmText: '返回授权',
        success: function(res) {
          // 用户没有授权成功,不需要改变 isHide 的值
          if (res.confirm) {
            console.log('用户点击了“返回授权”');
          }
        }
      });
    }
  },

  /**
   * 生命周期函数--监听页面初次渲染完成
   */
  onReady: function() {

  },

  /**
   * 生命周期函数--监听页面显示
   */
  onShow: function() {

  },

  /**
   * 生命周期函数--监听页面隐藏
   */
  onHide: function() {

  },

  /**
   * 生命周期函数--监听页面卸载
   */
  onUnload: function() {

  },

  /**
   * 页面相关事件处理函数--监听用户下拉动作
   */
  onPullDownRefresh: function() {

  },

  /**
   * 页面上拉触底事件的处理函数
   */
  onReachBottom: function() {

  },

  /**
   * 用户点击右上角分享
   */
  onShareAppMessage: function() {
  }
})
  • 15
    点赞
  • 113
    收藏
    觉得还不错? 一键收藏
  • 5
    评论
微信小程序用户登录界面代码可以通过使用信开发者工具进行编写和调试。下面是一个简单的微信小程序用户登录界面的代码示例: ```html <!-- login.wxml --> <view class="container"> <view class="title">用户登录</view> <view class="form"> <input class="input" placeholder="请输入用户名" bindinput="bindUsernameInput" /> <input class="input" type="password" placeholder="请输入密码" bindinput="bindPasswordInput" /> <button class="btn" bindtap="login">登录</button> </view> </view> ``` ```css /* login.wxss */ .container { display: flex; flex-direction: column; align-items: center; justify-content: center; height: 100vh; } .title { font-size: 24px; margin-bottom: 20px; } .form { display: flex; flex-direction: column; } .input { width: 200px; height: 30px; margin-bottom: 10px; } .btn { width: 100px; height: 30px; background-color: #007aff; color: #fff; } ``` ```javascript // login.js Page({ data: { username: '', password: '' }, bindUsernameInput(e) { this.setData({ username: e.detail.value }); }, bindPasswordInput(e) { this.setData({ password: e.detail.value }); }, login() { // 在这里编写登录逻辑,可以调用后端接口进行验证等操作 console.log('用户名:', this.data.username); console.log('密码:', this.data.password); } }); ``` 以上代码示例中,`login.wxml`文件定义了用户登录界面的布局,`login.wxss`文件定义了界面的样式,`login.js`文件定义了页面的逻辑。用户输入用户名和密码后,点击登录按钮会触发`login`方法,可以在该方法中编写登录逻辑,例如调用后端接口进行验证等操作。

“相关推荐”对你有帮助么?

  • 非常没帮助
  • 没帮助
  • 一般
  • 有帮助
  • 非常有帮助
提交
评论 5
添加红包

请填写红包祝福语或标题

红包个数最小为10个

红包金额最低5元

当前余额3.43前往充值 >
需支付:10.00
成就一亿技术人!
领取后你会自动成为博主和红包主的粉丝 规则
hope_wisdom
发出的红包
实付
使用余额支付
点击重新获取
扫码支付
钱包余额 0

抵扣说明:

1.余额是钱包充值的虚拟货币,按照1:1的比例进行支付金额的抵扣。
2.余额无法直接购买下载,可以购买VIP、付费专栏及课程。

余额充值