


当前版本:apache-cassandra-3.0.24,CentOS7,jdk1.8
1. 声明
当前内容主要为本人记录搭建apache cassandra集群,并测试向集群中添加keyspace
主要内容:
- 搭建集群环境
- 测试向集群环境中插入keyspace
准备环境
| ip | 开放端口 |
|---|---|
| 192.168.1.103 | 7000、7001、9042、9160 |
| 192.168.1.104 | 7000、7001、9042、9160 |
2. 开放端口
开放 7000、7001、9042、9160端口
firewall-cmd --zone=public --add-port=7000/tcp --permanent
firewall-cmd --zone=public --add-port=7001/tcp --permanent
firewall-cmd --zone=public --add-port=9042/tcp --permanent
firewall-cmd --zone=public --add-port=9160/tcp --permanent
systemctl restart firewalld.service
firewall-cmd --reload
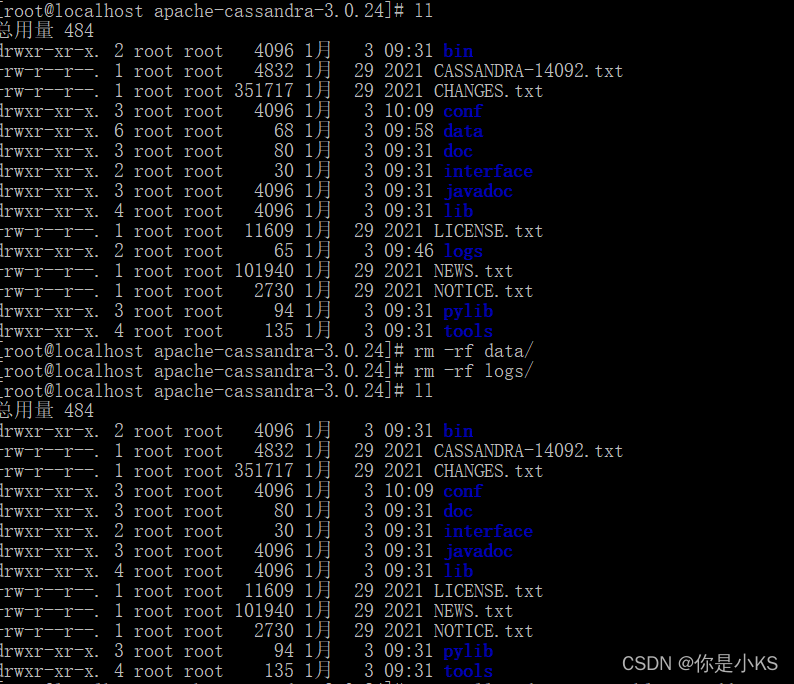
3. 清除之前的数据和日志
主要为清空之前的数据data文件夹和logs文件夹(cassandra中)
rm -rf data/
rm -rf logs/
4. 集群配置
修改192.168.1.103中的conf文件夹中cassandra.conf文件内容为
seed_provider:
    # Addresses of hosts that are deemed contact points.
    # Cassandra nodes use this list of hosts to find each other and learn
    # the topology of the ring.  You must change this if you are running
    # multiple nodes!
    - class_name: org.apache.cassandra.locator.SimpleSeedProvider
      parameters:
          # seeds is actually a comma-delimited list of addresses.
          # Ex: "<ip1>,<ip2>,<ip3>"
          - seeds: "192.168.1.104,192.168.1.103"
listen_address: 192.168.1.103
broadcast_address: 192.168.1.103
rpc_address: 192.168.1.103
修改192.168.1.104中的conf文件夹中cassandra.conf文件内容为
seed_provider:
    # Addresses of hosts that are deemed contact points.
    # Cassandra nodes use this list of hosts to find each other and learn
    # the topology of the ring.  You must change this if you are running
    # multiple nodes!
    - class_name: org.apache.cassandra.locator.SimpleSeedProvider
      parameters:
          # seeds is actually a comma-delimited list of addresses.
          # Ex: "<ip1>,<ip2>,<ip3>"
          - seeds: "192.168.1.104,192.168.1.103"
listen_address: 192.168.1.104
broadcast_address: 192.168.1.104
rpc_address: 192.168.1.104
主要为修改:
seeds为集群目标的各个节点的ip地址并使用分隔符分割listen_address、broadcast_address、rpc_address都是修改为本机地址
5. 启动集群中的各个节点
就像前面的正常启动即可:./bin/cassandra


出现Handshaking表示握手成功,即集群间的通信已经正常了
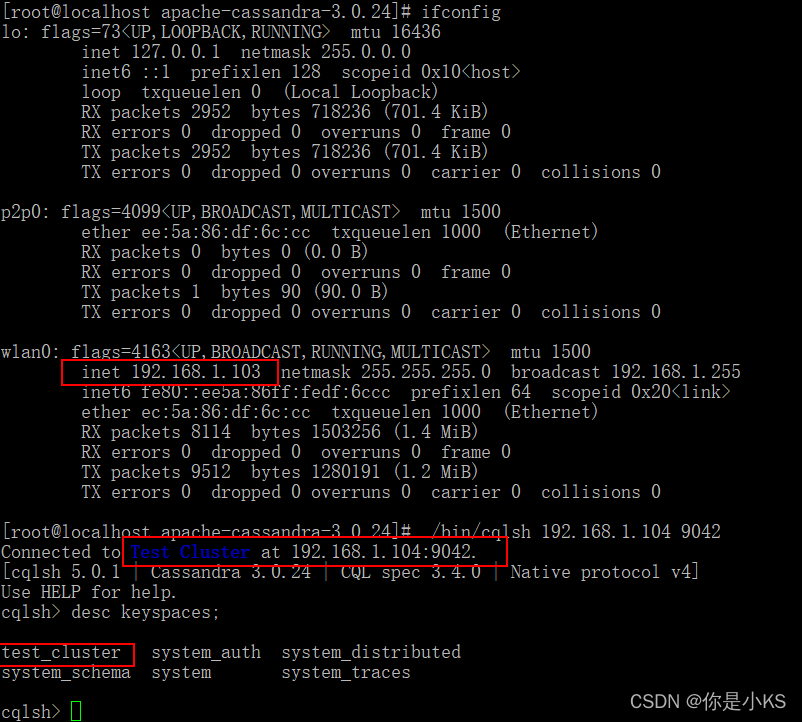
6. 查看集群状态
./nodetool status

表示集群间的状态为正常
7. 测试向集群中添加keyspace
主要参考使用java方式操作cassandra,所以这里就不贴出pom依赖了
public class OperationKeyspaceTest {
	private static final String DEFATUL_HOST = "192.168.1.103";
	private static final int DEFAULT_PORT = 9042;

	public static void main(String[] args) {
		// 查询当前cassandra的版本
		// 创建keyspace,如果该keyspace已经存在了那么就会报错Keyspace test already exists
		 createKeyspace("test_cluster");
		// 查看当前的keyspaces
		showKeyspaces();
		// 修改当前的keyspace
		//updateKeyspace("test");
		//showKeyspaces();
		// 删除keyspace
		//deleteKeyspace("test_cluster");
		//showKeyspaces();
	}

	// 修改当前的keyspace的副本数量为1
	private static void updateKeyspace(String keyspace) {
		execute((session) -> {
			session.execute("ALTER KEYSPACE "+keyspace+"  WITH replication = {'class': 'SimpleStrategy', 'replication_factor' : 1};");
		});
	}

	// 展示所有的keyspace
	private static void showKeyspaces() {
		execute((session) -> {
			Metadata metadata = session.getMetadata();
			Optional<String> clusterName = metadata.getClusterName();
			if (clusterName.isPresent()) {
				System.out.println("clusterName:" + clusterName.get());
			}
			Iterator<Entry<UUID, Node>> iterator = metadata.getNodes().entrySet().iterator();
			while (iterator.hasNext()) {
				Entry<UUID, Node> next = iterator.next();
				System.out.println("key=" + next.getKey() + ",value=" + next.getValue());
			}
			// 这里没有任何的keyspace
			Map<CqlIdentifier, KeyspaceMetadata> keyspaces = metadata.getKeyspaces();
			keyspaces.forEach((k, v) -> {
				System.out.println("key=" + k + ",value=" + v);
			});

		});
	}

	// 手动创建keyspace
	private static void createKeyspace(String keyspace) {
		execute((session) -> {
			session.execute("CREATE KEYSPACE "+keyspace+" WITH replication = {'class': 'SimpleStrategy', 'replication_factor' : 3} ");
		});
	}

	// 删除keyspace
	private static void deleteKeyspace(String keyspace) {
		execute((session) -> {
			session.execute("DROP KEYSPACE "+keyspace);
		});
	}

	private static CqlSession createCqlSession() {
		return CqlSession.builder()
				.addContactPoint(new InetSocketAddress("192.168.1.103", DEFAULT_PORT))
				.addContactPoint(new InetSocketAddress("192.168.1.104", DEFAULT_PORT))
				.build();
	}

	private static void execute(SessionHandler handler) {
		try (CqlSession session = createCqlSession()) {
			handler.handler(session);
		}
	}

	interface SessionHandler {
		void handler(CqlSession session);
	}
}
执行结果:

查看各个节点中的变化
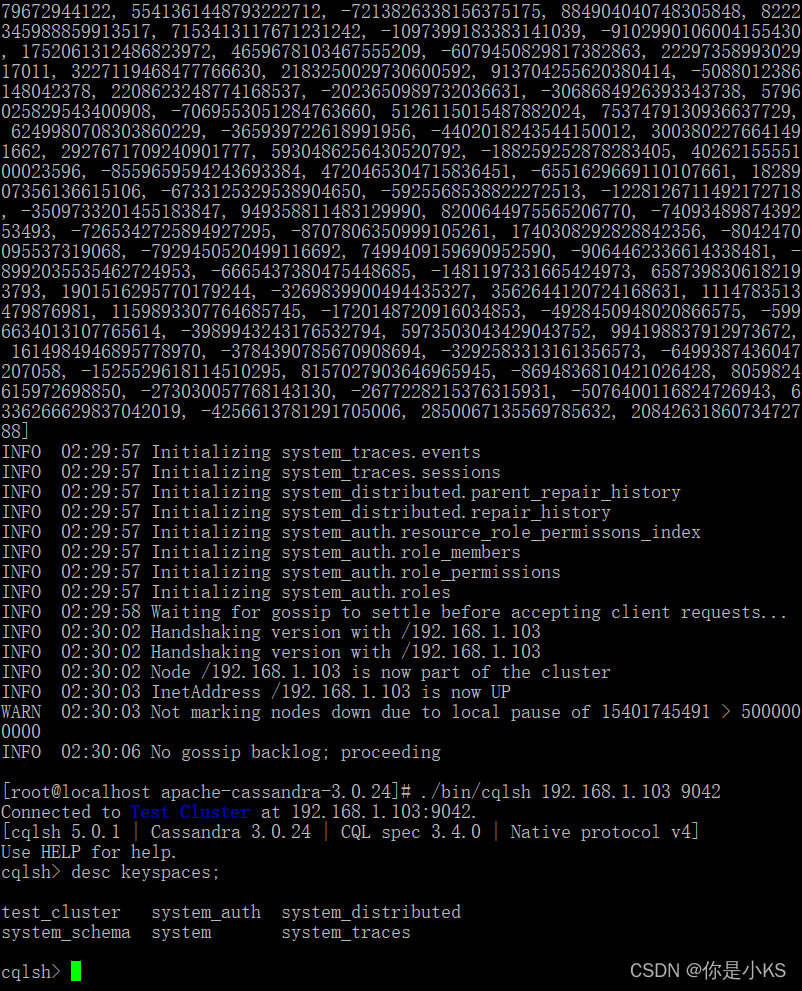
集群测试成功
8. 总结
1. cassandra的集群非常简单,但是一定要注意开放端口,否则每个节点的cassandra就是一个单独的节点,虽然测试添加还是可以执行但是会出现超时错误
2.集群中的使用java方式操作时,只要继续添加节点就可以了原来的代码可以保持不变


 913
913


 被折叠的 条评论
为什么被折叠?
被折叠的 条评论
为什么被折叠?
 到【灌水乐园】发言


