


项目的第三方样式库是vux,vux2必须配合vux-loader使用,webpack打包会做一些别的配置
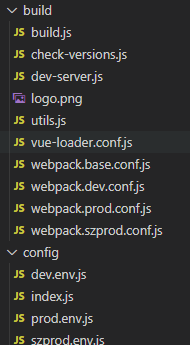
这是项目升级前的一些打包和环境配置目录,升级后目录结构没有改变。在这说明只是对我或你们的项目配置看看有哪些地方有差异
1.升级webpack以及插件
升级webpack到版本4的命令
npm install --save-dev webpack@4 我这里更新到了4.8.1
同时需要安装webpack-cli
npm install --save-dev webpack-cli 我这里更新到了2.1.3
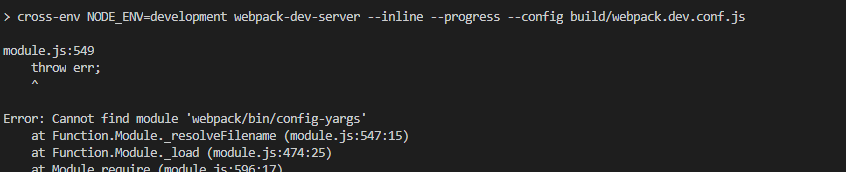
注意:这个报错是因为你使用了webpack4.20.0以上的版本,这个需要使用3.1.1版本的webpack-cli。这里我们指定webpack版本就好了npm install --save-dev webpack@4.8.1

1.1 调试本地开发环境
注意:这个报错是因为webpack-dev-serve 没有升级导致的
升级webpack-dev-serve的命令
npm install --save-dev webpack-dev-server@3 我这里更新到了3.1.14
注意:这个报错是因为部分依赖不支持webpack4不兼容
升级html-webpack-plugin 这里我升级到了4.5.2
npm install --save-dev html-webpack-plugin

注意:这个报错是因为webpack升级到版本4后,对应的vue-loader得升级到14版本及以上
升级vue-loader 我这里升级到了14.2.4
npm install --save-dev vue-loader

—————————————
注意:这个报错是因为less和less-loader的版本不兼容webpack4了 需要升级
升级vue-loader 我这里less升级到了3.13.1 less-loader升级到了4.1.0
npm install --save less less-loader 你也可以指定版本升级

再次运行npm run dev,发现已经可以成功运行了,让我们接下来开始解决不同环境打包的问题吧
1.2 调试项目打包的环境
尝试打包发布 看看会遇见什么问题
注意:webpack4已经升级不支持这种写法了,需要安装uglifyjs-webpack-plugin npm install --save-dev uglifyjs-webpack-plugin

这里我安装的版本是2.2.0
代码在这里
const UglifyJsPlugin = require('uglifyjs-webpack-plugin')
module.exports=merge(webpackBaseConfig,{
    plugins:[
        ......
        // 原来的配置注释掉就可以
        // new webpack.optimize.UglifyJsPlugin({
	    //   compress: {
	    //     warnings: false
	    //   },
	    //   sourceMap: config.build.productionSourceMap,
	    //   parallel: true
	    // }),
	    new UglifyJsPlugin({
	      cache: true,
	      parallel: true,
	      sourceMap: true
	    }),
    ]
});
再次运行,发现报错:

注意:webpack4已经升级不支持这种写法了,也就是说不在plugins里面进行操作。而是放在了optimization里面,写法不变下面贴代码
module.exports=merge(webpackBaseConfig,{
    plugins:[
        ......
        // 原来的配置注释掉就可以
        // new webpack.optimize.CommonsChunkPlugin({
	    //   name: 'vendor',
	    //   minChunks: function (module) {
	    //     // any required modules inside node_modules are extracted to vendor
	    //     return (
	    //       module.resource &&
	    //       /\.js$/.test(module.resource) &&
	    //       module.resource.indexOf(
	    //         path.join(__dirname, '../node_modules')
	    //       ) === 0
	    //     )
	    //   }
	    // }),
	    // new webpack.optimize.CommonsChunkPlugin({
	    //   name: 'manifest',
	    //   minChunks: Infinity
	    // }),
	    // new webpack.optimize.CommonsChunkPlugin({
	    //   name: 'app',
	    //   async: 'vendor-async',
	    //   children: true,
	    //   minChunks: 3
	    // }),
    ],
    optimization:{
        runtimeChunk: {
	      name: 'manifest'
	    },
	    splitChunks: {
	      chunks: 'async',
	      minSize: 30000,
	      minChunks: 1,
	      maxAsyncRequests: 30,
	      maxInitialRequests: 30,
	      cacheGroups: {
	        defaultVendors: {
	          test: /[\\/]node_modules[\\/]/,
	          chunks: 'initial',
	          priority: -10,
	          reuseExistingChunk: true,
	        },
	        default: {
	          minChunks: 2,
	          priority: -20,
	          reuseExistingChunk: true,
	        }
	      }
	    }
    }
});
再次运行,发现报错:

原因是:extract-text-webpack-plugin还不能支持webpack4.0.0以上的版本。
这个有两种解决办法,一个是npm install --save-dev extract-text-webpack-plugin@next 他会下载到+ extract-text-webpack-plugin@4.0.0-beta.0;另一个是使用另一种css提取工具mini-css-extract-plugin
更换css提取工具需要改变一下打包的配置,我们需要引入mini-css-extract-plugin插件,并添加到插件里:
npm install --save-dev mini-css-extract-plugin
const MiniCssExtractPlugin  = require('mini-css-extract-plugin')

module.exports=merge(webpackBaseConfig,{
    plugins:[
        ......
        // 原来的配置注释掉就可以
	    // new ExtractTextPlugin({
	    //   // contenthash 变化 chunkhash
	    //   filename: utils.assetsPath(`css/[name].[contenthash].css`),
	    //   // set the following option to `true` if you want to extract CSS from
	    //   // codesplit chunks into this main css file as well.
	    //   // This will result in *all* of your app's CSS being loaded upfront.
	    //   allChunks: false,
	    // }),
	    new MiniCssExtractPlugin({
	      filename: utils.assetsPath('css/[name].[contenthash].css'),//"[name].css"
	      chunkFilename: utils.assetsPath('css/[id].css'),//"[id].css"
	    }),
    ]
});
在同级的utils.js中 这里主要是需要添加mini-css-extract-plugin插件
// const ExtractTextPlugin = require("extract-text-webpack-plugin");
const MiniCssExtractPlugin = require('mini-css-extract-plugin')


	// Extract CSS when that option is specified
    // (which is the case during production build)
    if (options.extract) {
      // return ExtractTextPlugin.extract({
      //   use: loaders,
      //   fallback: 'vue-style-loader'
      // })
      return [MiniCssExtractPlugin.loader, ...loaders]
    } else {
      return ['vue-style-loader'].concat(loaders)
    }
再次运行 发现又有个异常
(node:24424) UnhandledPromiseRejectionWarning: Error: Cyclic dependency

(node:24424) UnhandledPromiseRejectionWarning: Unhandled promise rejection. This error originated either by throwing inside of an async function without a catch block, or by rejecting a promise which was not handled with .catch(). (rejection id: 2)
(node:24424) [DEP0018] DeprecationWarning: Unhandled promise rejections are deprecated. In the future, promise rejections that are not handled will terminate the Node.js process with a non-zero exit code.
这是由于CommonsChunkPlugin已经废弃,所以HtmlWebpackPlugin插件配置中的chunksSortMode也不再需要。。
new HtmlWebpackPlugin({
      filename: config.build.index,
      template: 'index.html',
      inject: true,
      minify: {
        removeComments: true,
        collapseWhitespace: true,
        removeAttributeQuotes: true
        // more options:
        // https://github.com/kangax/html-minifier#options-quick-reference
      },
      // necessary to consistently work with multiple chunks via CommonsChunkPlugin
 -    // chunksSortMode: 'dependency'
    }),
再次运行 发现可以打包成功了 但是有个没设置mode的警告

mode选项: 告知 webpack 使用相应模式的内置优化。可选 development 或 production。
你可以
module.exports = {
  mode: 'production'
};
或者从 CLI 参数中传递:
webpack --mode = production
再次运行发现已经可以打包成功了,比webpack3打包的时间也变少了。
在这次升级中,我总共升级或新增以下依赖:
"devDependencies": {
    //...
    "webpack": "^4.8.1",
    "webpack-cli": "^2.1.5",
    "webpack-dev-server": "^3.11.2",
    "vue-loader": "^14.2.4",
    "vue-style-loader": "^4.1.3",
    "html-webpack-plugin": "^4.5.2",
    "file-loader": "^2.0.0",
    "mini-css-extract-plugin": "^0.5.0",
    "less": "^3.13.1",
    "less-loader": "^4.1.0",
    "uglifyjs-webpack-plugin": "^2.2.0",
    "optimize-css-assets-webpack-plugin": "^3.2.1", // 压缩css
}
以上就是对webpack3升级到webpack4的总结。有什么问题可以随时私信我哦!!


 949
949


 被折叠的 条评论
为什么被折叠?
被折叠的 条评论
为什么被折叠?
 到【灌水乐园】发言


