一、IOC容器相关API
1.1 创建IOC容器
	方式一:
			Resource rs=(Resource) new ClassPathResource("org/jsoft/a_hello/applicationContext.xml");
			BeanFactory factory=new XmlBeanFactory(rs);

	方式二:
			加载一个配置文件:
				ApplicationContext ac=new ClassPathXmlApplicationContext("org/jsoft/a_hello/applicationContext.xml");

			加载多个配置文件:
				1. ApplicationContext ac=new ClassPathXmlApplicationContext(new String[] {
								"org/jsoft/g_transaction_detail/applicationContext.xml",
								"org/jsoft/g_transaction_detail/applicationContext2.xml"
						});

				2.ApplicationContext ac=new ClassPathXmlApplicationContext(
								"org/jsoft/g_transaction_detail/applicationContext.xml",
								"org/jsoft/g_transaction_detail/applicationContext2.xml"
						);
>>>>>> 利用ClassPathResource创建容器对象
@Test
public void testIOC() {
Resource rs=(Resource) new ClassPathResource("org/jsoft/a_hello/applicationContext.xml");
BeanFactory factory=new XmlBeanFactory(rs);
User u=(User) factory.getBean("user");
System.out.println(u.getAge());
}
>>>>>> 利用ClassPathXmlApplicationContext创建容器对象
@Test
public void testIOC2() {
ApplicationContext ac=new ClassPathXmlApplicationContext("org/jsoft/a_hello/applicationContext.xml");
User u=(User) ac.getBean("user");
System.out.println(u.getAge());
}
1.2 容器相关方法
public static void main(String[] args) {
ApplicationContext ac=new ClassPathXmlApplicationContext("org/jsoft/g_transaction_detail/applicationContext.xml");
DeptDao deptDao=(DeptDao) ac.getBean("deptDao");
DeptDao deptDao2 = ac.getBean("deptDao", DeptDao.class);
DeptDao deptDao3 = ac.getBean(DeptDao.class);
int num = ac.getBeanDefinitionCount();
String[] beanDefinitionNames = ac.getBeanDefinitionNames();
}
二、Bean对象创建的细节
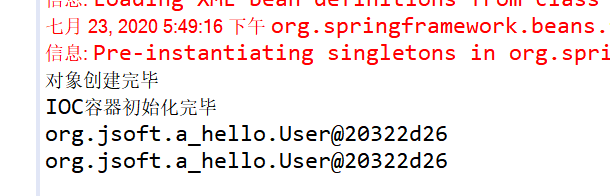
		1.Bean对象的创建默认为单例,IOC容器初始化时,自动创建。

		2.设置Bean对象创建的方式
		  scope="singleton" (默认值)
					设置Bean对象为单例
					单例对象默认为IOC容器初始化时自动加载。

		  scope="prototype"
					设置Bean对象为多例
					什么时候用到对象,什么时候创建


		3.设置单例对象的懒加载 (只对单例有效)
			lazy-init="default/false" (默认值)
					设置单例对象不开启懒加载模式。
					即单例对象在IOC容器初始化自动创建
			lazy-init="true" (只对单例有效)
					设置单例对象为懒加载。

		4.设置Bean对象创建后,初始化、销毁调用的方法
			init-method="init_user"
				   对应对象的init_user方法,在对象创建爱之后执行
	 		destroy-method="destroy_user"
				   在调用容器对象的destriy方法时候执行,(容器用实现类)
2.1 Bean对象的创建默认为单例,且在IOC容器初始化时自动创建
>>>>>> applicationContext.xml
<?xml version="1.0" encoding="UTF-8"?>
<beans xmlns="http://www.springframework.org/schema/beans"
     xmlns:xsi="http://www.w3.org/2001/XMLSchema-instance"
     xmlns:p="http://www.springframework.org/schema/p"
     xsi:schemaLocation="http://www.springframework.org/schema/beans
     http://www.springframework.org/schema/beans/spring-beans.xsd">


	<bean id="user"  class="org.jsoft.a_hello.User"  ></bean>


</beans>
>>>>>> User.java
public class User {

	private String name;
	private int age;

	public User() {
		super();
		System.out.println("对象创建完毕");
	}

	public String getName() {
		return name;
	}
	public void setName(String name) {
		this.name = name;
	}
	public int getAge() {
		return age;
	}
	public void setAge(int age) {
		this.age = age;
	}


}
>>>>>> App.java
public class App_bean {
@Test
public void testIOC() {
ApplicationContext ac=new ClassPathXmlApplicationContext("org/jsoft/a_hello/applicationContext.xml");
User u=(User) ac.getBean("user");
User u2=(User) ac.getBean("user");
System.out.println(u);
System.out.println(u2);
}
}
2.2 对象创建的方式(单例/多例)
	+++ 设置Bean对象为单例(默认值):
			<bean id="user"  class="org.jsoft.a_hello.User"  scope="singleton" ></bean>


	+++ 设置Bean对象为多例:
			<bean id="user"  class="org.jsoft.a_hello.User"  scope="prototype" ></bean>
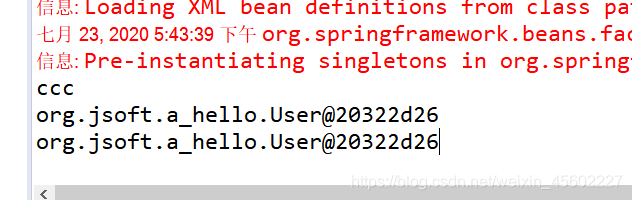
2.3.1 设置Bean对象为单例(Bean对象默认为单例)
>>>>>> applicationContext.xml
<?xml version="1.0" encoding="UTF-8"?>
<beans xmlns="http://www.springframework.org/schema/beans"
xmlns:xsi="http://www.w3.org/2001/XMLSchema-instance"
xmlns:p="http://www.springframework.org/schema/p"
xsi:schemaLocation="http://www.springframework.org/schema/beans
http://www.springframework.org/schema/beans/spring-beans.xsd">
<bean id="user" class="org.jsoft.a_hello.User" scope="singleton" ></bean>
<bean id="user2" class="org.jsoft.a_hello.User" scope="prototype" ></bean>
</beans>
>>>>>> App.java
public class App_bean {
@Test
public void testIOC() {
ApplicationContext ac=new ClassPathXmlApplicationContext("org/jsoft/a_hello/applicationContext.xml");
User u=(User) ac.getBean("user");
User u2=(User) ac.getBean("user");
System.out.println(u);
System.out.println(u2);
}
}
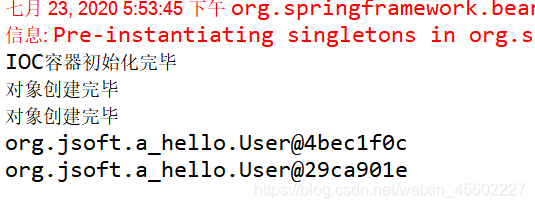
2.3.2 设置Bean对象为多例
<?xml version="1.0" encoding="UTF-8"?>
<beans xmlns="http://www.springframework.org/schema/beans"
     xmlns:xsi="http://www.w3.org/2001/XMLSchema-instance"
     xmlns:p="http://www.springframework.org/schema/p"
     xsi:schemaLocation="http://www.springframework.org/schema/beans
     http://www.springframework.org/schema/beans/spring-beans.xsd">


	<bean id="user"  class="org.jsoft.a_hello.User"  scope="prototype" ></bean>


</beans>
>>>>>> App.java
public class App_bean {
@Test
public void testIOC() {
ApplicationContext ac=new ClassPathXmlApplicationContext("org/jsoft/a_hello/applicationContext.xml");
User u=(User) ac.getBean("user");
User u2=(User) ac.getBean("user");
System.out.println(u);
System.out.println(u2);
}
}
2.3 对象创建的时间
	+++ 设置Bean对象为单例(默认值):
			<bean id="user"  class="org.jsoft.a_hello.User"  scope="singleton" ></bean>

		单例:IOC容器初始化时,对象就自动创建完毕。


	+++ 设置Bean对象为多例:
			<bean id="user"  class="org.jsoft.a_hello.User"  scope="prototype" ></bean>

		注意:在用到对象时,才创建对象。
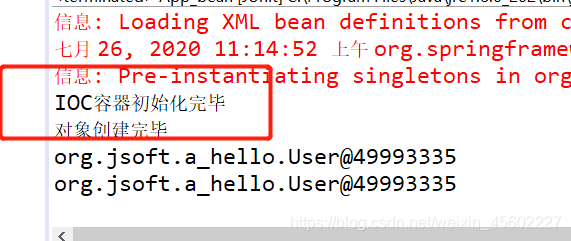
2.4 设置单例对象为懒加载
	bean对象默认为单例,且在IOC容器初始化时,自动创建。
	我们可以设置单例对象懒加载。

	lazy-init=default/false(默认值),不是懒加载
		<bean id="user"  class="org.jsoft.a_hello.User"  scope="singleton"  lazy-init="default" ></bean>

	lazy-init="true" ,懒加载
		<bean id="user"  class="org.jsoft.a_hello.User"  scope="singleton"  lazy-init="true" ></bean>
>>>>>> applicationContext.xml
<?xml version="1.0" encoding="UTF-8"?>
<beans xmlns="http://www.springframework.org/schema/beans"
     xmlns:xsi="http://www.w3.org/2001/XMLSchema-instance"
     xmlns:p="http://www.springframework.org/schema/p"
     xsi:schemaLocation="http://www.springframework.org/schema/beans
     http://www.springframework.org/schema/beans/spring-beans.xsd">


	<bean id="user"  class="org.jsoft.a_hello.User"  scope="singleton"  lazy-init="true" ></bean>


</beans>
>>>>>> User.java
public class User {

	private String name;
	private int age;

	public User() {
		super();
		System.out.println("对象创建完毕");
	}

	public String getName() {
		return name;
	}
	public void setName(String name) {
		this.name = name;
	}
	public int getAge() {
		return age;
	}
	public void setAge(int age) {
		this.age = age;
	}


}
>>>>>> App.java
public class App_bean {
@Test
public void testIOC() {
ApplicationContext ac=new ClassPathXmlApplicationContext("org/jsoft/a_hello/applicationContext.xml");
User u=(User) ac.getBean("user");
User u2=(User) ac.getBean("user");
System.out.println(u);
System.out.println(u2);
}
}
2.5 设置对象创建后,初始化/销毁调用的方法
		init-method="init_user"     对应对象的init_user方法,
		                            在对象创建爱之后执行

		destroy-method="xxx"  在调用容器对象的destriy方法时候执行,
		                      (只有容器用实现类,才能调用容器的销毁方法)
		<bean id="user"  class="org.jsoft.a_hello.User"  init-method="user_init"   destroy-method="user_destoty" ></bean>
>>>>>> applicationContext.xml
<?xml version="1.0" encoding="UTF-8"?>
<beans xmlns="http://www.springframework.org/schema/beans"
     xmlns:xsi="http://www.w3.org/2001/XMLSchema-instance"
     xmlns:p="http://www.springframework.org/schema/p"
     xsi:schemaLocation="http://www.springframework.org/schema/beans
     http://www.springframework.org/schema/beans/spring-beans.xsd">


	<bean id="user"  class="org.jsoft.a_hello.User"  init-method="user_init"   destroy-method="user_destoty" ></bean>


</beans>
>>>>>> User.java
public class User {
private String name;
private int age;
public User() {
super();
System.out.println("对象创建完毕");
}
public void user_init() {
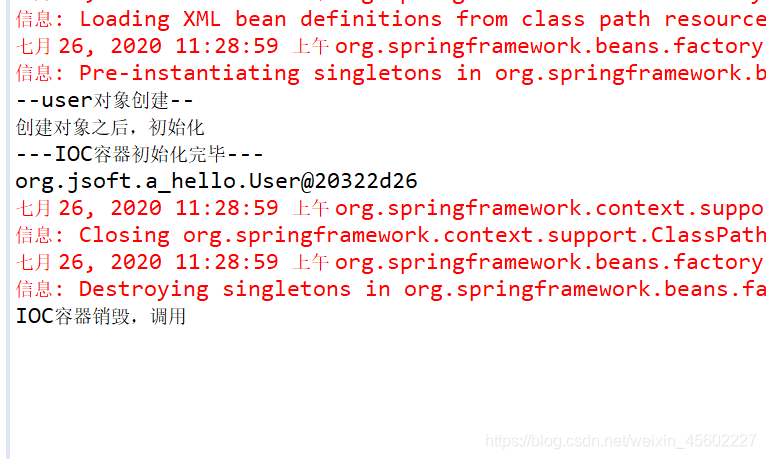
System.out.println("创建对象之后,初始化");
}
public void user_destoty(){
System.out.println("IOC容器销毁,调用");
}
public String getName() {
return name;
}
public void setName(String name) {
this.name = name;
}
public int getAge() {
return age;
}
public void setAge(int age) {
this.age = age;
}
}
>>>>>> App.java
public class App_bean {
@Test
public void testIOC() {
ClassPathXmlApplicationContext ac=new ClassPathXmlApplicationContext("org/jsoft/a_hello/applicationContext.xml");
System.out.println("---IOC容器初始化完毕---");
User u=(User) ac.getBean("user");
System.out.println(u);
ac.destroy();
}
}
三、总分配置文件配置
>>>>>> bean.xml
<?xml version="1.0" encoding="UTF-8"?>
<beans xmlns="http://www.springframework.org/schema/beans"
	xmlns:xsi="http://www.w3.org/2001/XMLSchema-instance"
	xmlns:p="http://www.springframework.org/schema/p"
	xmlns:context="http://www.springframework.org/schema/context"
	xmlns:aop="http://www.springframework.org/schema/aop"
	xmlns:tx="http://www.springframework.org/schema/tx"
	xmlns:dwr="http://directwebremoting.org/schema/spring-dwr/spring-dwr-2.4.xsd"
	xsi:schemaLocation="http://www.springframework.org/schema/beans
    	 http://www.springframework.org/schema/beans/spring-beans.xsd
     	 http://www.springframework.org/schema/context
         http://www.springframework.org/schema/context/spring-context.xsd
         http://www.springframework.org/schema/aop
         http://www.springframework.org/schema/aop/spring-aop.xsd
         http://www.springframework.org/schema/tx
     	 http://www.springframework.org/schema/tx/spring-tx.xsd">


    	<import resource="resource/bean-base.xml"/>
     	<import resource="resource/bean-dao.xml"/>
       	<import resource="resource/bean-service.xml"/>
       	<import resource="resource/bean-controller.xml"/>

</beans>
>>>>>> resource/bean-base.xml
<?xml version="1.0" encoding="UTF-8"?>
<beans xmlns="http://www.springframework.org/schema/beans"
xmlns:xsi="http://www.w3.org/2001/XMLSchema-instance"
xmlns:p="http://www.springframework.org/schema/p"
xmlns:context="http://www.springframework.org/schema/context"
xmlns:aop="http://www.springframework.org/schema/aop"
xmlns:tx="http://www.springframework.org/schema/tx"
xmlns:dwr="http://directwebremoting.org/schema/spring-dwr/spring-dwr-2.4.xsd"
xsi:schemaLocation="http://www.springframework.org/schema/beans
http://www.springframework.org/schema/beans/spring-beans.xsd
http://www.springframework.org/schema/context
http://www.springframework.org/schema/context/spring-context.xsd
http://www.springframework.org/schema/aop
http://www.springframework.org/schema/aop/spring-aop.xsd
http://www.springframework.org/schema/tx
http://www.springframework.org/schema/tx/spring-tx.xsd">
<bean id="dataSource" class="com.mchange.v2.c3p0.ComboPooledDataSource">
<property name="jdbcUrl" value="jdbc:mysql://localhost:3306/test"></property>
<property name="driverClass" value="com.mysql.jdbc.Driver"></property>
<property name="user" value="root"></property>
<property name="password" value="root"></property>
<property name="initialPoolSize" value="3"></property>
<property name="maxPoolSize" value="6"></property>
<property name="maxIdleTime" value="1000"></property>
</bean>
<bean id="sessionFactory" class="org.springframework.orm.hibernate3.LocalSessionFactoryBean">
<property name="dataSource" ref="dataSource"></property>
<property name="hibernateProperties">
<props>
<prop key="hibernate.dialect">org.hibernate.dialect.MySQLDialect</prop>
<prop key="hibernate.show_sql">true</prop>
<prop key="hibernate.hbm2ddl.auto">update</prop>
</props>
</property>
<property name="mappingDirectoryLocations">
<list>
<value>classpath:org/hlp/entity</value>
</list>
</property>
</bean>
<bean id="txManager" class="org.springframework.orm.hibernate3.HibernateTransactionManager">
<property name="sessionFactory" ref="sessionFactory"></property>
</bean>
<tx:advice id="txAdvice" transaction-manager="txManager">
<tx:attributes>
<tx:method name="get*" read-only="true"/>
<tx:method name="find*" read-only="true"/>
<tx:method name="*" read-only="false"/>
</tx:attributes>
</tx:advice>
<aop:config >
<aop:pointcut expression="execution(* org.hlp.dao.*.*(..))" id="pt"/>
<aop:advisor advice-ref="txAdvice" pointcut-ref="pt"/>
</aop:config>
<bean id="adminDao" class="org.hlp.dao.AdminDao">
<property name="sf" ref="sessionFactory"></property>
</bean>
</beans>
>>>>>> resource/bean-dao.xml
<?xml version="1.0" encoding="UTF-8"?>
<beans xmlns="http://www.springframework.org/schema/beans"
	xmlns:xsi="http://www.w3.org/2001/XMLSchema-instance"
	xmlns:p="http://www.springframework.org/schema/p"
	xmlns:context="http://www.springframework.org/schema/context"
	xmlns:aop="http://www.springframework.org/schema/aop"
	xmlns:tx="http://www.springframework.org/schema/tx"
	xmlns:dwr="http://directwebremoting.org/schema/spring-dwr/spring-dwr-2.4.xsd"
	xsi:schemaLocation="http://www.springframework.org/schema/beans
    	 http://www.springframework.org/schema/beans/spring-beans.xsd
     	 http://www.springframework.org/schema/context
         http://www.springframework.org/schema/context/spring-context.xsd
         http://www.springframework.org/schema/aop
         http://www.springframework.org/schema/aop/spring-aop.xsd
         http://www.springframework.org/schema/tx
     	 http://www.springframework.org/schema/tx/spring-tx.xsd">


	<bean id="adminDao" class="org.hlp.dao.AdminDao">
		<property name="sf" ref="sessionFactory"></property>
	</bean>

   	<bean id="deptDao" class="org.hlp.dao.DeptDao">
		<property name="sf" ref="sessionFactory"></property>
	</bean>

	<bean id="empDao" class="org.hlp.dao.EmpDao">
		<property name="sf" ref="sessionFactory"></property>
	</bean>

</beans>
>>>>>> resource/bean-service.xml
<?xml version="1.0" encoding="UTF-8"?>
<beans xmlns="http://www.springframework.org/schema/beans"
	xmlns:xsi="http://www.w3.org/2001/XMLSchema-instance"
	xmlns:p="http://www.springframework.org/schema/p"
	xmlns:context="http://www.springframework.org/schema/context"
	xmlns:aop="http://www.springframework.org/schema/aop"
	xmlns:tx="http://www.springframework.org/schema/tx"
	xmlns:dwr="http://directwebremoting.org/schema/spring-dwr/spring-dwr-2.4.xsd"
	xsi:schemaLocation="http://www.springframework.org/schema/beans
    	 http://www.springframework.org/schema/beans/spring-beans.xsd
     	 http://www.springframework.org/schema/context
         http://www.springframework.org/schema/context/spring-context.xsd
         http://www.springframework.org/schema/aop
         http://www.springframework.org/schema/aop/spring-aop.xsd
         http://www.springframework.org/schema/tx
     	 http://www.springframework.org/schema/tx/spring-tx.xsd">


	<bean id="adminService" class="org.hlp.service.impl.AdminService">
		<property name="adminDao" ref="adminDao"></property>
	</bean>

	<bean id="empService" class="org.hlp.service.impl.EmpService">
		<property name="empDao" ref="empDao"></property>
	</bean>

	<bean id="deptService" class="org.hlp.service.impl.DeptService">
		<property name="deptDao" ref="deptDao"></property>
	</bean>


</beans>


 623
623

 被折叠的 条评论
为什么被折叠?
被折叠的 条评论
为什么被折叠?
 到【灌水乐园】发言


