


yum -y install docker-ce-20.10.4-3.el7

systemctl start docke

docker ps -a

docker search elasticsearch

docker pull elasticsearch:7.6.1

docker images

docker run -d --name es2 -p 9200:9200 -p 9300:9300 -e "discovery.type=single-node" 41072cdeebc5
docker logs bae2d63e5f47部署Kibana
[root@node1 docker]#  mkdir -p /data/elk

[root@node1 docker]#  vim /data/elk/kibana.yml

[root@node1 ~]# more /data/elk/kibana.yml

#Default Kibana configuration for docker target

server.name: kibana

server.host: "0"

elasticsearch.hosts: [ "http://192.xx.xx.xx:9200" ]

xpack.monitoring.ui.container.elasticsearch.enabled: true
docker run -d --name=kibana --restart=always -p 5601:5601 -v /data/elk/kibana.yml:/usr/share/kibana/config/kibana.yml kibana:7.6.1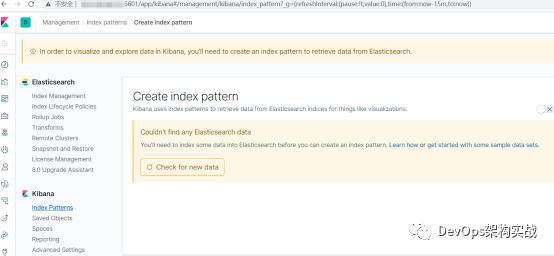
docker logs -f kibanaES集群监控Cerebro
[root@node1 ~]# unzip cerebro-0.8.3.zip
[root@node1 ~]# ln -s cerebro-0.8.3 cerebro

[root@node1 conf]# pwd

/root/cerebro/conf

[root@node1 conf]# ll

[root@node1 conf]# more application.conf

修改下面参数

hosts = [

  {

    host = "http://192.xx.xx.xx:9200"

    name = "en-es"

    headers-whitelist = [ "x-proxy-user", "x-proxy-roles", "X-Forwarded-For" ]

  }

  # Example of host with authentication
测试java环境

[root@node1 bin]# ll

total 20

-rwxr-xr-x 1 root root 9497 Apr  5  2019 cerebro

-rw-r--r-- 1 root root 4970 Apr  5  2019 cerebro.bat

[root@node1 bin]# ./cerebro -Dhttp.port=9000 -Dhttp.address=192.xx.xx.xx &>/dev/null &
访问cerebro
而且cerebro的使用特别简单,页面还很漂亮!

下载解压
https://github.com/lmenezes/cerebro/releases
wget https://github.com/lmenezes/cerebro/releases/download/v0.8.1/cerebro-0.8.1.tgz
tar xzf cerebro-0.8.1.tgz
启动
cerebro-0.8.1/bin/cerebro
[info] play.api.Play - Application started (Prod)
[info] p.c.s.AkkaHttpServer - Listening for HTTP on /0:0:0:0:0:0:0:0:9000
- 指定端口
bin/cerebro -Dhttp.port=8080
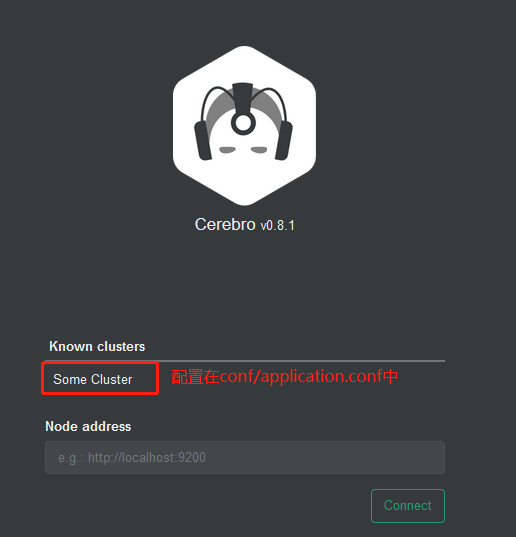
- 配置服务器
非必须:如果经常使用的话,可以先在conf/application.conf中配置好ElasticSearch服务器地址
hosts = [
  {
    host = "http://localhost:9200"
    name = "Some Cluster"
  },
  # Example of host with authentication
  #{
  #  host = "http://some-authenticated-host:9200"
  #  name = "Secured Cluster"
  #  auth = {
  #    username = "username"
  #    password = "secret-password"
  #  }
  #}
]
使用
- 浏览器打开连接http://192.168.58.101:9000
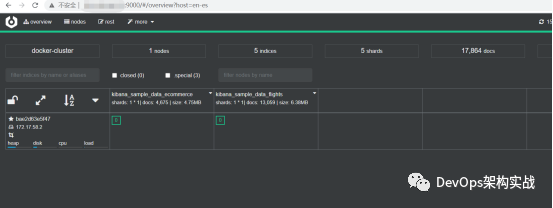
连接后可以显示集群信息:
-
概要信息
-
节点信息

-
Rest接口

-
其他功能


 1895
1895


 被折叠的 条评论
为什么被折叠?
被折叠的 条评论
为什么被折叠?
 到【灌水乐园】发言


