


 本文介绍了如何在uni-app中实现购物车功能,包括商品数量的加减、计算总金额和选中/未选中状态,以及删除商品的操作。通过自定义组件简化代码复用,并展示了相关效果。
uni-app实现购物车加减数量,计算金额数量,选中/未选中 删除商品
先看一下完整效果图 如下:
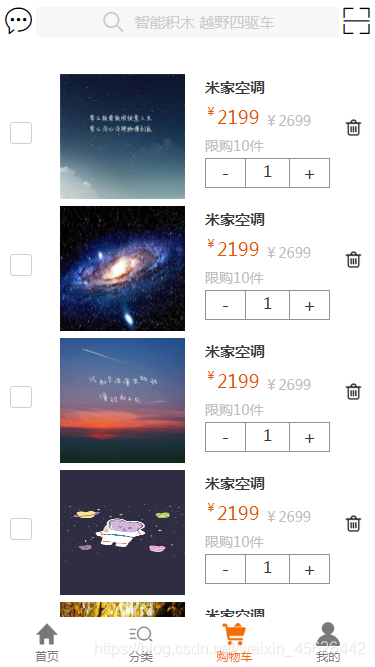
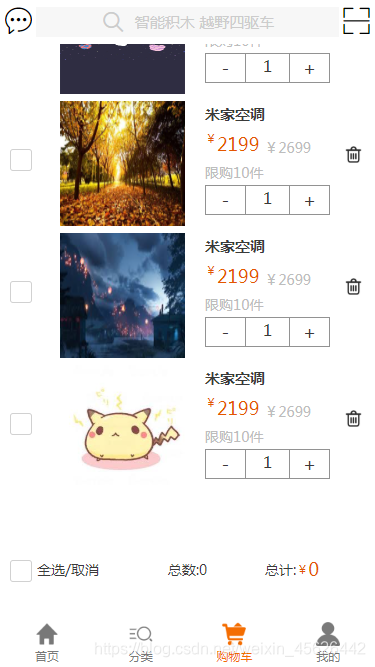
利用对数量的加减实现总数,总价

对商品的全选

组件内容:
<template>
	<view class="price display-flex align-end">
		<view class="current display-flex text-primary-color font-maxx" :class="isCurrentBold?'font-bold':''">
			<view class="text-primary-color font-mini">
				¥
			</view>
			{
   {
   currentPrice}}
		</view>
		<view class="original display-flex text-else-color" v-if="originalPrice">
			<view class="text-else-color">
				¥
			</view>
			{
   {
   originalPrice}}
		</view>
	</view>
</template>

<script>
	export default {

		// props:["currentPrice","originalPrice"],
		props:{

			currentPrice:String,
			originalPrice:String,
			isCurrentBold:{

				type:Boolean,
				default:false
			}
		},
		data() {

			return {


			};
		}
	}
</script>

<style>
.current{

	margin-right: 10upx;
}
</style>
这就是页面上价钱这一块
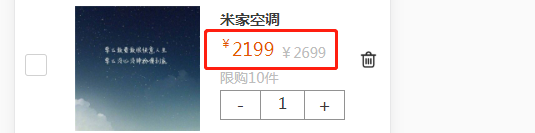
不使用组件的话,可以自己写,主要就是看着好看一点,别的页面要用到的话,直接引用就可以
```c
<template>
	<view class="index container">
		<!-- 商品内容 -->
		<!-- <detriment :detriment="detriment"></detriment> -->
		<view class="detriment display-flex justify-between flex-wrap width-100 flex-row">
			<view class="productItem display-flex  width-100" v-for="(item,index) in detriment"  >
				<!-- 单选 -->
				<checkbox-group class="check" @change="changeitem(item)">
					<checkbox value="item" :checked="item.flag"></checkbox>
				</checkbox-group>
				<!-- 左侧图片 -->
				<div class="left">
					<image :src="item.src"></image>
				</div>
				<!-- 右侧商品介绍 -->
				<div class="message display-flex flex-column justify-between">
					<!-- 商品名称 -->
					<view class="bigTitle font-bold font-max">
						{
   {
   item.bigTitle}}
					</view>
					<!-- 商品价格 -->
					<orginPrice :currentPrice="item.currentPrice" :originalPrice="item.originalPrice"></orginPrice>
					<!-- 限购10件 -->
					<view class="littleTitle font-middle text-else-color">
						{
   {
   item.littleTitle}}
					</view>
					<!-- 商品数量加减 -->
					<view class="shoppingNumber display-flex justify-between">
						<label class="minute" @click=
最低0.47元/天 解锁文章


 1万+
1万+

 被折叠的 条评论
为什么被折叠?
被折叠的 条评论
为什么被折叠?
 到【灌水乐园】发言


