


-
1.检查防火墙和selinux
| #查看防火墙状态,若防火墙为开启,则进行下一步关闭防火墙 systemctl status firewalld.service #关闭防火墙,并设置开机自关闭 systemctl stop firewalld.service systemctl disable firewalld.service #检查selinux,若selinux为开启,则进行下一步关闭selinux getenforce #关闭selinux sed -i "s/SELINUX=enforcing/SELINUX=disabled/g" /etc/selinux/config setenforce 0 cat /etc/selinux/config | grep SELINUX=disabled getenforce |
2.关闭IPv6
IPv6会对Xray服务有影响,所以需要关闭IPv6。
| #通过 /etc/sysctl.conf 文件对 /proc 进行永久修改。 #换句话说,就是用文本编辑器打开 /etc/sysctl.conf 然后添加以下内容: vi /etc/sysctl.conf #代码如下: #禁用整个系统所有接口的IPv6 net.ipv6.conf.all.disable_ipv6 = 1 #禁用某一个指定接口的IPv6(例如:eth0, lo) net.ipv6.conf.lo.disable_ipv6 = 1 net.ipv6.conf.eth0.disable_ipv6 = 1 #在 /etc/sysctl.conf 使这些更改生效,运行以下命令: sudo sysctl -p /etc/sysctl.conf |
3.修改limits.conf
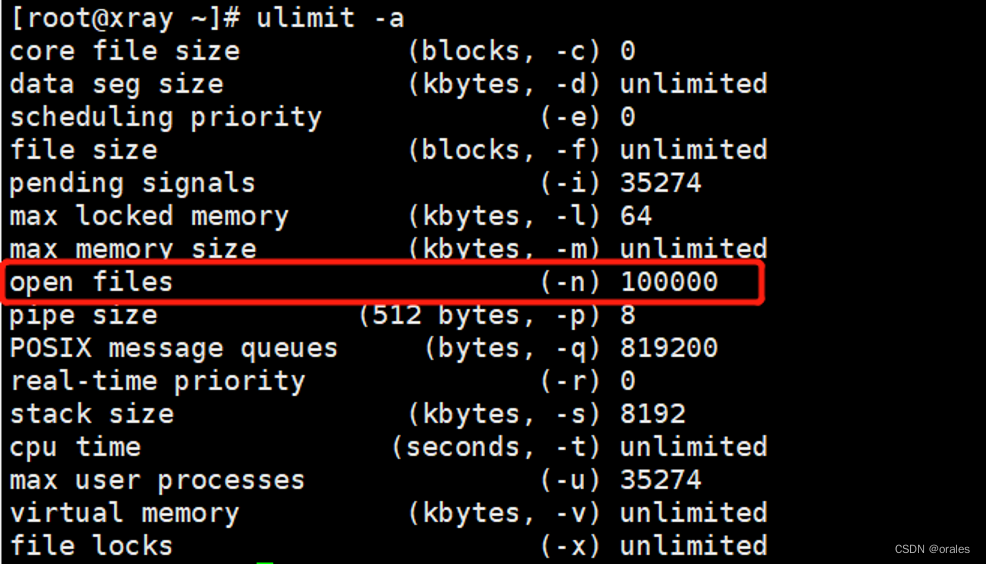
在深度递归扫描过程中,Xray 索引工件及其依赖项(元数据),Xray 需要同时管理许多打开的文件。Linux 系统上可以同时打开的默认最大文件数对于索引过程来说通常太低,因此可能导致性能瓶颈。为了获得最佳性能,我们建议按照以下步骤将可同时打开的文件数增加到 100,000(或系统可以处理的最大值)。
| #查看系统用户所有限制值 ulimit -a |
查看满足打开文件数最小值是否到100,000。
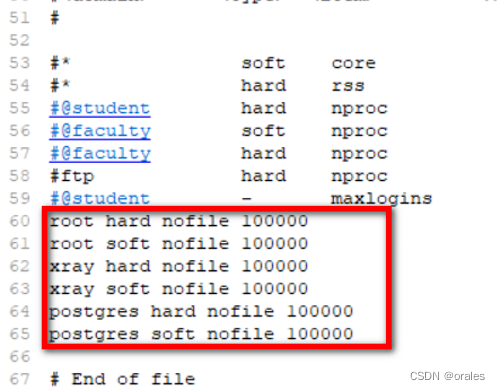
不满足则需要修改/etc/security/limits.conf 文件,记得修改后重启服务器
| vi /etc/security/limits.conf #在limit.conf添加以下内容: root hard nofile 100000 root soft nofile 100000 xray hard nofile 100000 xray soft nofile 100000 postgres hard nofile 100000 postgres soft nofile 100000 |
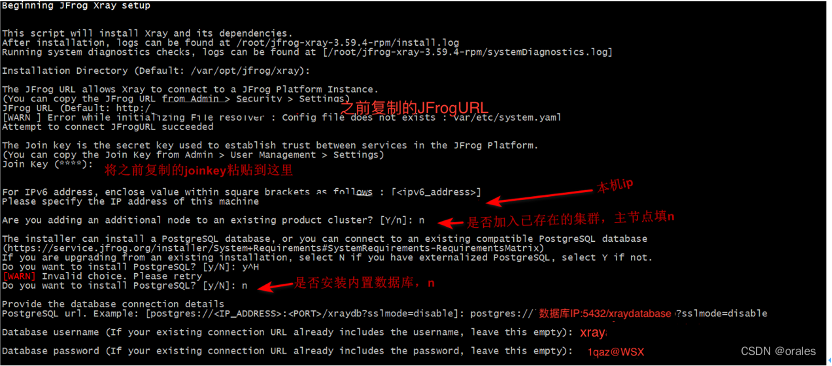
4.导出Joinkey和JFrog url
在安装xray之前,我们需要Artifactory的Join Key和JFrog URL,在后面的安装中我们需要输入。在security->settings->输入password->点击unlock
位置为Administration->User Management->settings->输入password->点击unlock
解锁后:需要保存下来join Key
JFrog Url,默认为Artifactory访问地址。例如http://192.168.5.103:8082
5.安装Xray
解压xray压缩包,进入解压目录,执行安装操作,安装后先不要启动
| #解压 tar -xvzf jfrog-xray-3.83.10-compose.tar.gz #进入解压目录 cd jfrog-xray-3.83.10-compose #执行安装命令 ./config.sh |
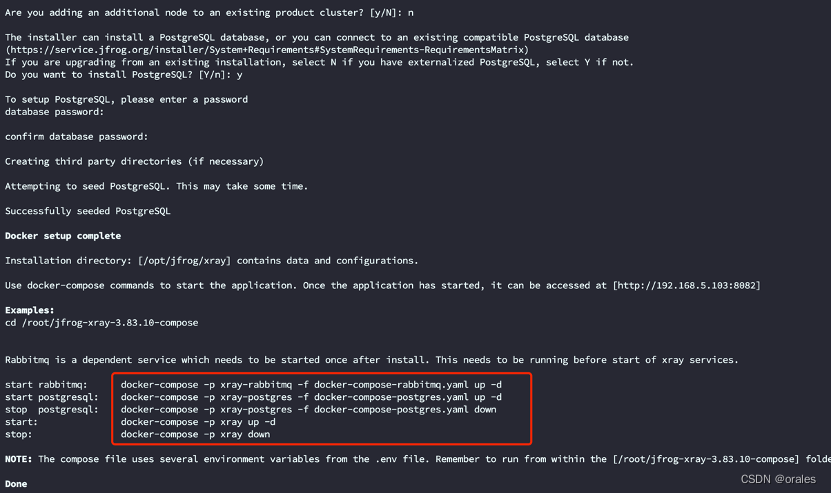
6.启动Xray及相关命令
| #上图命令从上往下依次启动容器,次序为rabbitmq、postgresql、xray。 #启动 docker-compose -p xray-rabbitmq -f docker-compose-rabbitmq.yaml up -d docker-compose -p xray-postgres -f docker-compose-postgres.yaml up -d docker-compose -p xray up -d #停止 docker-compose -p xray-postgres -f docker-compose-postgres.yaml down docker-compose -p xray down #查看日志 docker logs -f xray_server |
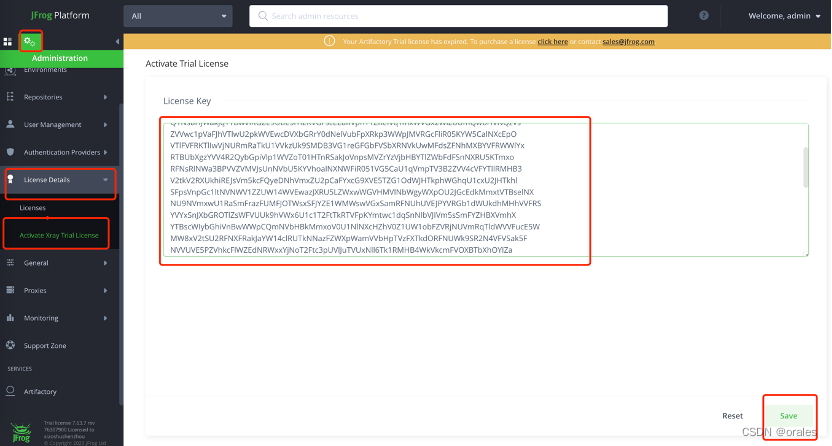
7.输入license
刷新Arifactory
到下图位置填入license

完成!


 1万+
1万+


 被折叠的 条评论
为什么被折叠?
被折叠的 条评论
为什么被折叠?
 到【灌水乐园】发言


