


AOP
AOP是Aspect Oriented Programming的缩写,即面向切面编程。通过预编译方式和运行期动态代理实现程序功能的统一维护的一种技术。
作用:AOP可以在不改变原有代码的情况下,去增加新的功能。
1.Spring实现AOP
(1)导入依赖包
<dependency>
            <groupId>org.aspectj</groupId>
            <artifactId>aspectjweaver</artifactId>
            <version>1.9.6</version>
</dependency>
(2)编写业务接口和实现类
接口
public interface UserService {
    public void add();

    public void delete();

    public void update();

    public void select();
}
实现类
public class UserServiceImpl implements UserService {

    public void add() {
        System.out.println("增加了一个用户");
    }

    public void delete() {
        System.out.println("删除了一个用户");
    }

    public void update() {
        System.out.println("修改了一个用户");
    }

    public void select() {
        System.out.println("查询了一个用户");
    }
}
(3)三种实现方式
1)Spring API实现
编写两个增强类
前置增强
public class Log implements MethodBeforeAdvice {
//method:要执行的目标对象方法
//args:参数
//target:目标对象
public void before(Method method, Object[] objects, Object target) throws Throwable {
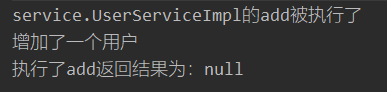
System.out.println(target.getClass().getName() + "的" + method.getName() + "被执行了");
}
}
后置增强
public class AfterLog implements AfterReturningAdvice {

    public void afterReturning(Object returnValue, Method method, Object[] args, Object target) throws Throwable {
        System.out.println("执行了" + method.getName() + "返回结果为:" + returnValue);
    }
}
去核心配置文件中注册bean,并实现aop切入
<?xml version="1.0" encoding="UTF-8"?>
<beans xmlns="http://www.springframework.org/schema/beans"
       xmlns:xsi="http://www.w3.org/2001/XMLSchema-instance"
       xmlns:aop="http://www.springframework.org/schema/aop"
       xsi:schemaLocation="http://www.springframework.org/schema/beans
       https://www.springframework.org/schema/beans/spring-beans.xsd
       http://www.springframework.org/schema/aop
       https://www.springframework.org/schema/aop/spring-aop.xsd">
    <!--注册bean-->
    <bean id="userService" class="service.UserServiceImpl"/>
    <bean id="log" class="log.Log"/>
    <bean id="after" class="log.AfterLog"/>

<!--方式一:使用原生Spring API接口-->
    <!--配置aop-->
    <aop:config>
        <!--expression:表达式,execution(要执行的位置!)-->
        <aop:pointcut id="pointcut" expression="execution(* service.UserServiceImpl.*(..))"/>

        <!--执行环绕增加!-->
        <aop:advisor advice-ref="log" pointcut-ref="pointcut"/>
        <aop:advisor advice-ref="after" pointcut-ref="pointcut"/>
    </aop:config>
</beans>
测试
public class MyTest {
    public static void main(String[] args) {
        ApplicationContext context = new ClassPathXmlApplicationContext("applicationContext.xml");

        UserService userService = (UserService) context.getBean("userService");

        userService.add();
    }
}
结果
2)自定义类实现
写切入类
public class DiyPointCut {
    public void before() {
        System.out.println("---方法执行前---");
    }


    public void after() {
        System.out.println("---方法执行后---");
    }

}
去核心配置文件中配置
<bean id="diy" class="diy.DiyPointCut"/>

    <aop:config>
        <aop:aspect ref="diy">
            <!--切入点-->
            <aop:pointcut id="point" expression="execution(* service.UserServiceImpl.*(..)))"/>
            <!--通知,即要实现的方法-->
            <aop:before method="before" pointcut-ref="point"/>
            <aop:after method="after" pointcut-ref="point"/>
        </aop:aspect>
    </aop:config>
测试结果

3)使用注解实现
首先编写注解实现的增强类
//使用注解方式实现aop
@Aspect
public class AnnotationPointCut {
    @Before("execution(* service.UserServiceImpl.*(..))")
    public void before() {
        System.out.println("---方法执行前---");
    }

    @After("execution(* service.UserServiceImpl.*(..))")
    public void after() {
        System.out.println("---方法执行后---");
    }
}
去核心配置文件中配置
<bean id="annotationPointCut" class="diy.AnnotationPointCut"/>
    <!--开启注解支持-->
    <aop:aspectj-autoproxy/>


 52万+
52万+


 被折叠的 条评论
为什么被折叠?
被折叠的 条评论
为什么被折叠?
 到【灌水乐园】发言


