


温馨提示:建议打开目录观看
Linus 发疯文学欣赏 👾
Git 是 Linux 之父 Linus Torvalds 于2005年开发的用于帮助管理 Linux 内核开发的开源版本控制软件。
美好的一天从阅读 Linus 的发疯文学开始。
(1) Linus 教你学习 Git

(2) Linus 评价 CVS (Concurrent Version System)

(3) 独一无二的 Linus

调侃结束,开始看代码
一、切换分支,make 和阅读 README
执行如下命令( checkout 后面那一串是第一次commit计算出来的哈希值),切换到最初版本的 git 分支。
$ git clone https://github.com/git/git.git
$ git log --reverse
$ git checkout e83c5163316f89bfbde7d9ab23ca2e25604af290
来自地狱的管理器,emmm,好中二啊救命:)

1.1 成功 make all
毕竟 Linus 老爷子开发的时候是2005年,一些库函数、编译器配置可能已经过时了。
(1)修改 Makefile 中的 LIBS 配置如下
LIBS = -lz -lcrypto
(2)安装函数库
sudo apt install zlib1g-dev
sudo apt install libssl-dev
(3)修改 cache.h 文件
将 61~63 行的变量声明加上 extern 关键字,不然 make 时会出现 “multiple definition” 错误。
extern const char *sha1_file_directory;
extern struct cache_entry **active_cache;
extern unsigned int active_nr, active_alloc;
最后在 Makefile 所在文件夹下执行 make all 即可,生成如下七个可执行文件:
- cat-file
- commit-tree
- init-db
- read-tree
- show-diff
- update-cache
- write-tree
1.2 README
Linus 可以说是在到处发癫,即使在 README 中也如此,他首先解释了一下为啥取名 Git 。
GIT - the stupid content tracker
“git” can mean anything, depending on your mood. ("git"叫啥取决于你的心情)
- random three-letter combination that is pronounceable, and not actually used by any common UNIX command. The fact that it is a mispronounciation of “get” may or may not be relevant.(未被 UNIX 系统使用的命令名,也可能是对 get 的错误发音,目前一切正常)
- stupid. contemptible and despicable. simple. Take your pick from the dictionary of slang.
- “global information tracker”: you’re in a good mood, and it actually works for you. Angels sing, and a light suddenly fills the room. (心情不错时它是好的信息追踪器,天使在唱歌,阳光撒遍房间)
- “goddamn idiotic truckload of sh*t”: when it breaks.(它没用时,白痴般的粪车)
二、按照执行顺序,解读7个可执行文件
2.1 init-db(相当于 git init)
$ ./init-db
defaulting to private storage area
defaulting 是执行 init-db 的输出语句,表示默认在当前目录下创建文件夹 " .dircache/objects/ " 。在 Linux 中以“.”开头的文件为隐藏文件。文件夹名的来源是在 cache.h 中定义的两个宏
/* cache.h */
#define DB_ENVIRONMENT "SHA1_FILE_DIRECTORY"
#define DEFAULT_DB_ENVIRONMENT ".dircache/objects"
对于第一个宏,Linus 的解释是,若希望多个分支共享一个数据库区域(DB area),即不同分支经 SHA1 计算后的哈希值保存在同一个目录中,可以配置这个宏。好处是节省了空间,坏处是让查找效率降低。默认做法还是在当前文件夹下新建 " .dircache/objects/ " 文件夹。
/* init-db.c */
// C语言中创建文件夹也是 mkdir,sha1_dir 就是 ".dircache/objects/",0700 是权限信息
// 创建成功返回 0,失败返回 -1
if (mkdir(sha1_dir, 0700) < 0) {
	if (errno != EEXIST) {
		perror(sha1_dir);
		exit(1);
	}
}
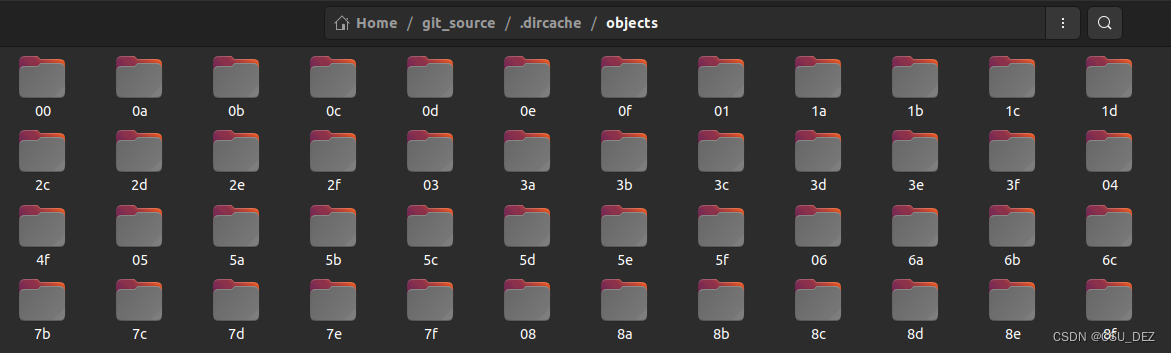
在 " .dircache/objects/ " 文件夹下还有从 00~ff 共256个文件夹,每个分支的哈希值计算完后取前两位,对应到指定的文件夹中。
/* init-db.c */
for (i = 0; i < 256; i++) {
	sprintf(path+len, "/%02x", i);	// x表示16进制,02表示结果为两位,不够的在前补0
	if (mkdir(path, 0700) < 0) { ... }
}
创建成功后的效果
🔎 插曲:cache.h 和 read-cache.c
源码中的所有的 C 文件都 #include "cache.h ",read-cache.c 则实现 cache.h 中声明的函数,初始化声明的变量,因此放在一起说。
Git 的底层安全机制是基于 SHA-1 (Secure Hash Algorithm 1),尽管谷歌在2017年的论文中提出了一种针对 SHA-1 的可操作的实现哈希碰撞的攻击方式(知乎网友估计攻击成本在 7~12 万美元每次)表明 SHA-1 的可靠性有所降低,但 Linus 说:
“我不信代码管理软件的天就要塌了。Git 要不要迁移到新的哈希算法呢?要。但 SHA-1 真如人们所说的要完蛋了吗?未必。”
对于主打安全的产品来说,尽快迁移到 SHA-2 可能才能获得市场的信赖。虽然目前攻击成本还很高,但也为 SHA-1 敲响了警钟。
关于 SHA-1 的背景知识,对于长度小于 264 的消息,SHA-1 会产生 160 位二进制数的消息摘要。但我们看到的 commit 签名没有160位啊,这是因为将其转为了 40 位十六进制数。SHA-1 是一种单向散列函数,用于加密且不可解密,不同的输入(消息)经过单向散列函数会得到固定长度的不同输出(散列值),且无法由散列值反算出消息。Google 对 SHA-1 的攻击方式就是构造不同输入却得到了相同的输出,即发生哈希碰撞。
(1)在 cache.h 中声明了二进制(SHA-1原始格式)和十六进制的相互转换函数
/* cache.h */
/* Return a statically allocated filename matching the sha1 signature */
extern char *sha1_file_name(unsigned char *sha1);
/* Convert to/from hex/sha1 representation */
extern int get_sha1_hex(char *hex, unsigned char *sha1);
extern char *sha1_to_hex(unsigned char *sha1); /* static buffer! */
sha1_file_name 是对 sha1 计算的哈希值进行处理,提取前两位找到 objects 下的对应文件夹。
sha1_to_hex 是将 160 位二进制数转为 40 位十六进制数,Linus 强调了这是静态 buffer,共分配了50个字节的空间,要注意⚠️。
get_sha1_hex 则是转换回 sha1 的 20 字节数组。
/* read-cache.c */
// 20个字节表示一个 SHA-1 摘要,转为 40 位十六进制数
char *sha1_to_hex(unsigned char *sha1) { // sha1 是 unsigned char[20]
	static char buffer[50];
	static const char hex[] = "0123456789abcdef";  // 16进制数按顺序对应
	char *buf = buffer;
	int i;
	for (i = 0; i < 20; i++) {
		// val是 8bit,但 4bit 表示一个十六进制数,因此拆分高低4位
		unsigned int val = *sha1++;
		*buf++ = hex[val >> 4];	 // 截取高4位
		*buf++ = hex[val & 0xf]; // 只保留低4位
	}
	return buffer;
}
(2)在 cache.h 中声明的使用 zlib 压缩和解压缩代码文件的函数
/* cache.h */
/* Write a memory buffer out to the sha file */
extern int *write_sha1_buffer(unsigned char *sha1, void *buf, unsigned int size);
/* Read and unpack a sha1 file into memory, write memory to a sha1 file */
extern void *read_sha1_file(unsigned char *sha1, char *type, unsigned long *size);
extern int write_sha1_file(char *buf, unsigned len);
Git 不是对代码原文件直接进行 SHA-1 计算,而是先通过 zlib 压缩后,对压缩文件进行 SHA-1。zlib 的使用参考官方文档。
write_sha1_buffer 是一个更常规的写文件操作,由 sha1 解析出要存放的文件位置,将 buf 写入文件,文件大小上限是 size。
write_sha1_file 函数的执行逻辑是 分配内存空间 -> 压缩文件 -> 做 SHA-1 -> 打开对应文件(objects下) -> 写文件。zlib 做压缩时的三个关键函数:deflateInit, deflate 和 deflateEnd。
read_sha1_file 则是做解压缩(inflate)。
/* read-cache.c */
int write_sha1_file(char *buf, unsigned len)
{
	int size;		  // 压缩文件大小上限,由 deflateBound() 指定
	char *compressed; // 压缩后的文件
	z_stream stream;  // zlib 使用的流式数据
	unsigned char sha1[20];
	SHA_CTX c;

    /* Set it up. 做清空内容、分配内存等初始化工作 */
    // ...
	deflateInit(&stream, Z_BEST_COMPRESSION); // Z_BEST_COMPRESSION = -1
	// ...

	/* Compress it. 使用 zlib 压缩 */
	stream.next_in = buf;
	stream.avail_in = len;
	stream.next_out = compressed;
	stream.avail_out = size;
	// do nothing. 等着压缩完成
	while(deflate(&stream, Z_FINISH) == Z_OK); // Z_FINISH 表示文件已读完;Z_OK 表示压缩成功
	deflateEnd(&stream);
	size = stream.total_out;

	/* SHA-1. 计算sha1 */
	// ...

	/* Write file. 找到对应文件夹,写文件 */
	if (write_sha1_buffer(sha1, compressed, size) < 0) return -1;
	printf("%s\n", sha1_to_hex(sha1)); // 打印 sha1 的十六进制形式
	return 0;
}
💡 Git 存储三类对象:blob 对象,tree 对象和 commit 对象,这些对象都是内容可寻址的(content-addressable)。
2.2 update-cache(相当于 git add)
首先看下效果,有个感性印象,再看代码。my_test_update.c 是用于测试的一个 C 文件,内容可以自由发挥。
$ ./update-cache my_test_update.c
变化1: 在 .dircache 目录下出现 index 文件。

变化2: 在 objects 文件夹下对应的 hash 值前两位命名的文件中加入本次提交。

前面说过,SHA-1 计算最后得到的是 40 位十六进制数,取其前 2 位用于匹配文件夹名,后 38 位作为文件名。
update-cache 可执行文件保存的是 blob (binary large objects)对象,Git 中的 blob 就是经 zlib 压缩后的文件内容。
📄 BLOB: A “blob” object is nothing but a binary blob of data, and doesn’t refer to anything else. … It is purely a blob of data (ie normally “file contents”). —— from README
2.3 write-tree(生成tree对象并写入objects)
根据 index 文件的内容生成一个 tree 对象并加入到 objects 文件夹中。tree 对象包含要提交的各个文件名及其对应的 sha1 值。
$ ./write-tree
2.6 cat-file(相当于 git show)
通过 sha1 值去 objetcs 文件夹下读取对应文件,解压缩后生成对应原文件内容。
2.7 show-diff(相当于 git diff)
$ ./show-diff


 1042
1042


 被折叠的 条评论
为什么被折叠?
被折叠的 条评论
为什么被折叠?
 到【灌水乐园】发言


