


Typora配置picgo-core自动上传图片,及自定义picgo-core上传组件
相关地址
- PicGo-Core:
https://github.com/PicGo/PicGo-Core - 插件开发文档:
https://picgo.github.io/PicGo-Core-Doc/
PicGo-Core
基本使用
# 安装
yarn global add picgo # 或者 npm install picgo -g

# 上传具体路径图片
picgo upload /xxx/xxx.jpg

# 上传剪贴板里的第一张图片(上传时会将格式转成png)
picgo upload
插件开发
- 使用模板
picgo init plugin <your-project-name>
- 进入编辑index.js
module.exports = (ctx) => {
  const register = () => {
    ctx.helper.uploader.register('upload_two', {
      async handle (ctx) {
        // console.log(ctx)
        try {
          const imgList = ctx.output
          for (const img of imgList) {
            if (img.fileName && img.buffer) {
              const base64Image = img.base64Image || Buffer.from(img.buffer)
              const options = {
                method: 'POST',
                url: '上传路径',
                formData: {
                  name: "file",
                  file: {
                    value: base64Image,
                    options: {
                        filename: img.fileName,
                        contentType: 'image/jpg'
                    }
                }
                }
              }

              let body = await ctx.Request.request(options)
              body = JSON.parse(body)
              if (body) {
                delete img.base64Image
                delete img.buffer
                img.imgUrl = body.url
              } else {
                throw new Error('Server error, please try again')
              }
            }
          }
          return ctx
        } catch (err) {
          ctx.emit("xxx", {
            title: '上传失败',
            body: '请检查你的配置以及网络',
            text: 'http://docs.imgur.com/api/errno/'
          })
          throw err
        }
      }
    })
  }
  const commands = (ctx) => [{
    label: '',
    key: '',
    name: '',
    async handle (ctx, guiApi) {}
  }]
  return {
    uploader: 'upload_two',
    commands,
    register
  }
}
- 加载插件
npm install ./picgo-plugin-<your-plugin-name>
- 编辑配置文件
配置文件
conf.json在用户目录下,.picgo文件夹下
{
  "picBed": {
    "current": "upload_two"
  },
  "picgoPlugins": {
    "picgo-plugin-upload_two": true
  }
}
效果
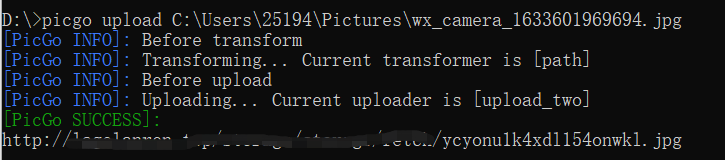
PicGo-Core插件开发不是必要的,它自带了类似6个类似七牛这样的图床,只需要配置文件里面指定图床就行
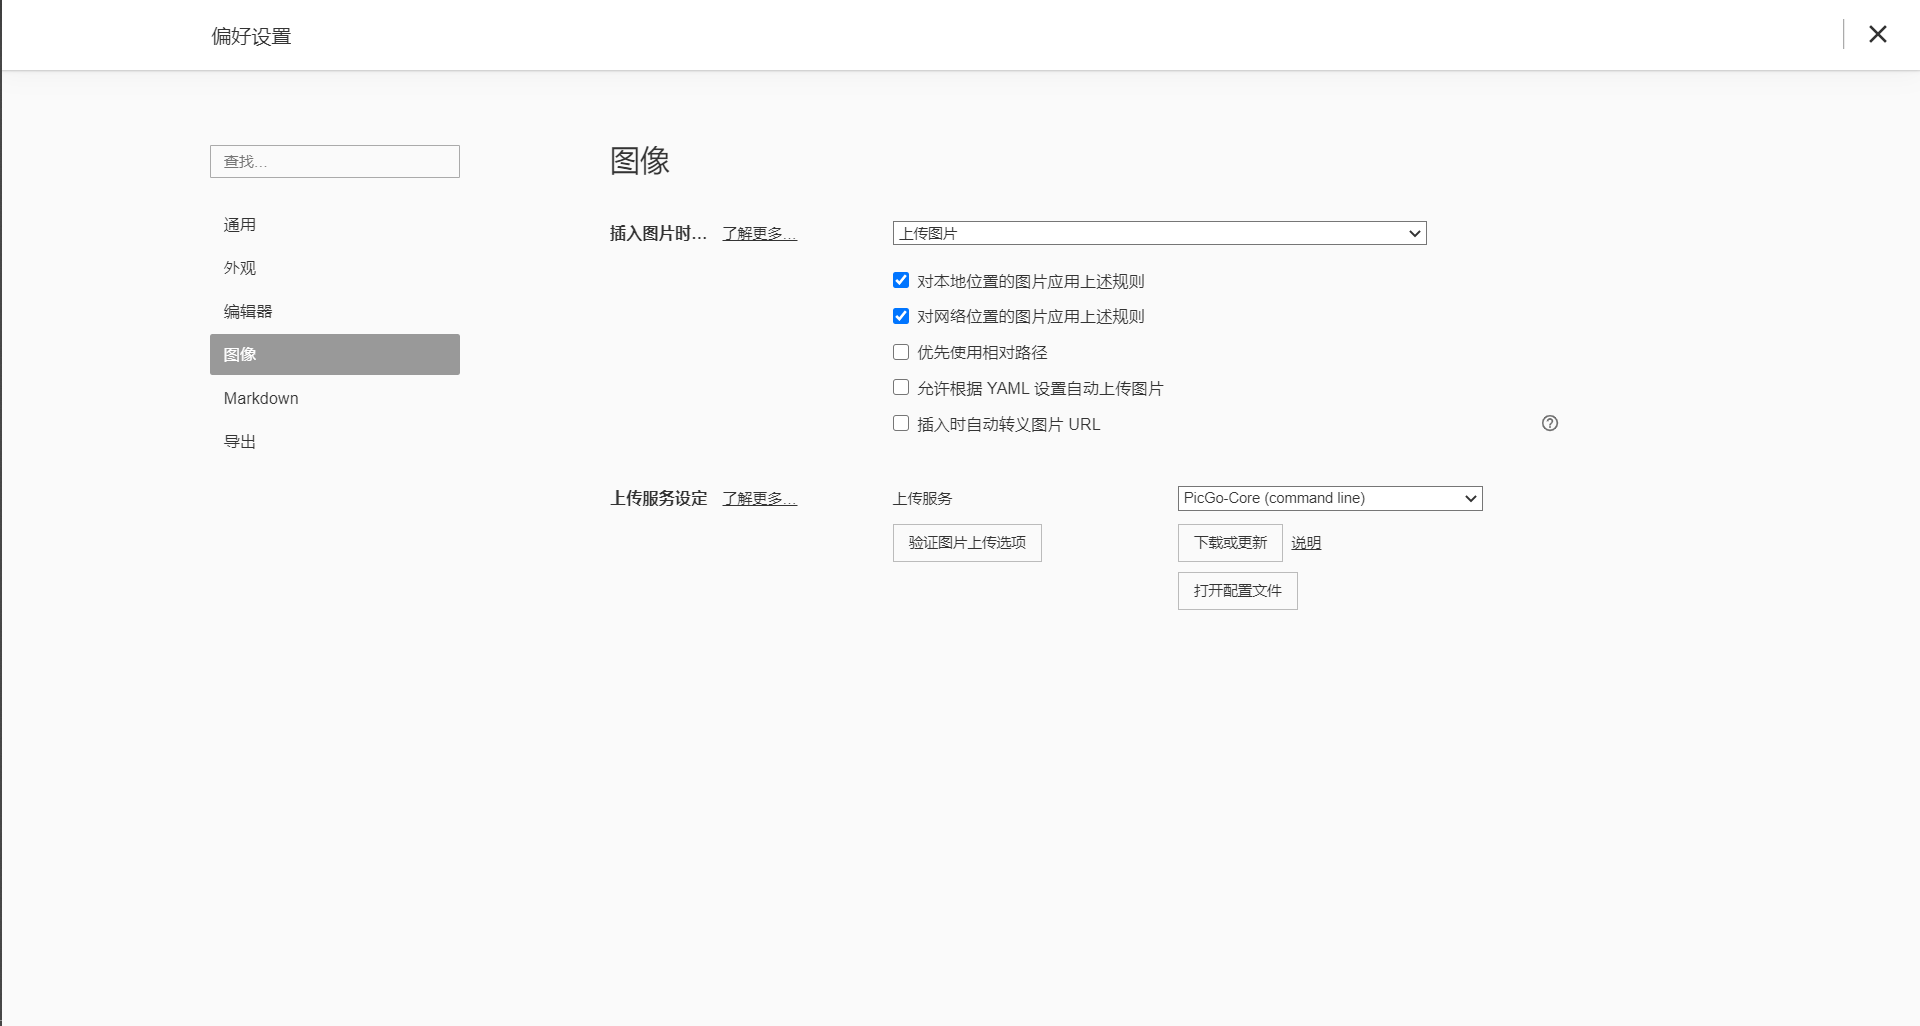
Typora中配置Picgo-Core
-
配置位置
文件>偏好设置>图像 -
设置如下


 被折叠的 条评论
为什么被折叠?
被折叠的 条评论
为什么被折叠?
 到【灌水乐园】发言


