


使用BP插件captcha-killer绕过验证码
前置条件
1、下载安装插件
burp2020前使用:https://github.com/c0ny1/captcha-killer/tree/0.1.2
burp2020后使用:https://github.com/Ta0ing/captcha-killer-java8
2、导入插件
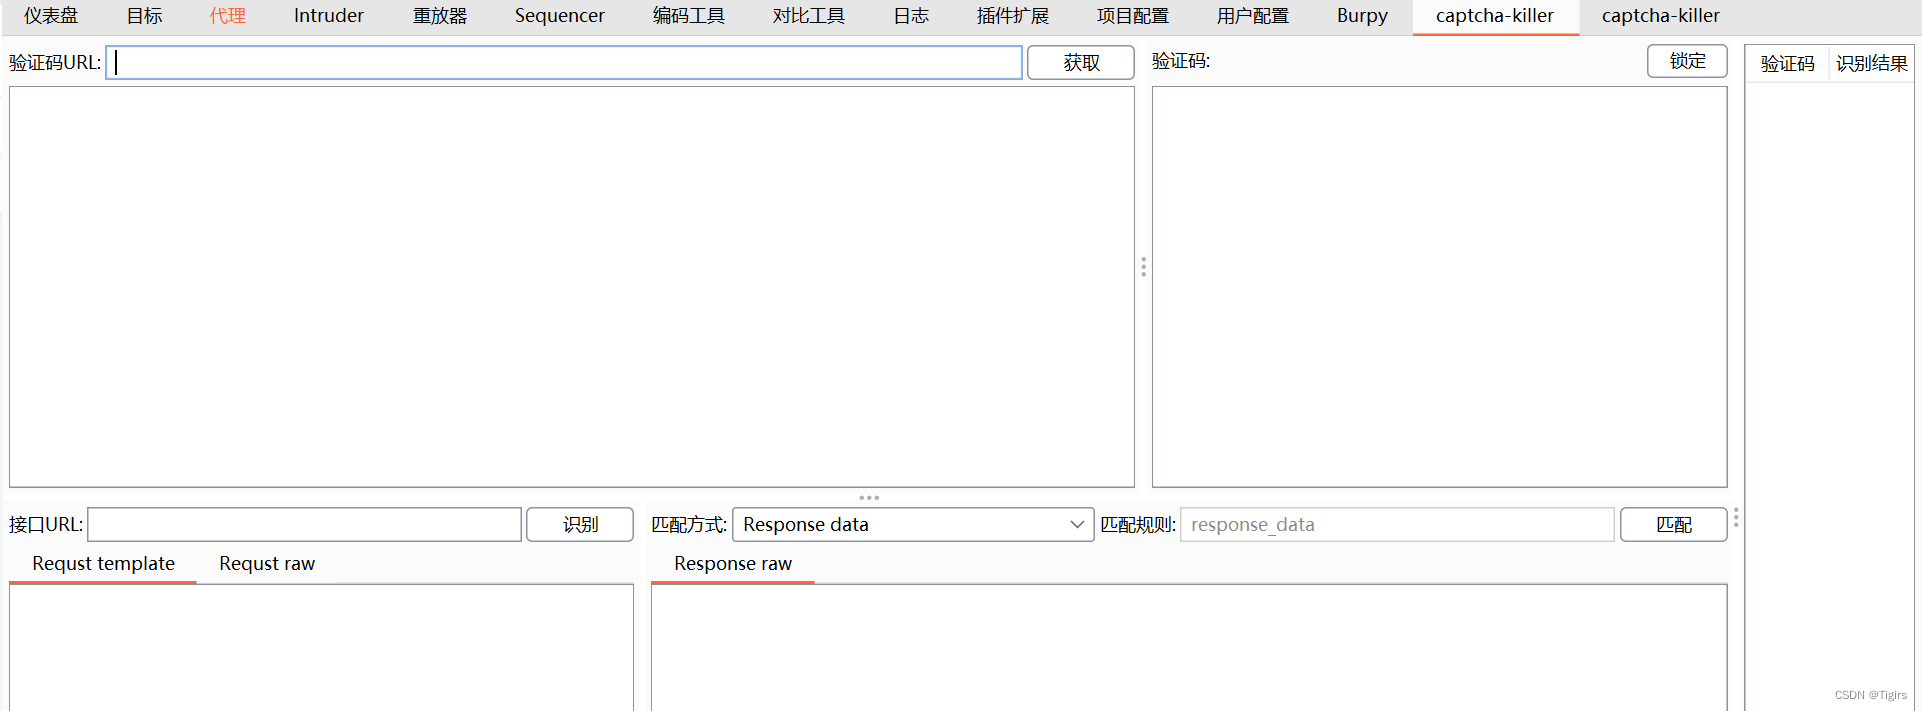
分为三个部分:上面为验证码的接口、下面为用来识别验证码的接口网站(百度、图鉴等可用来将图片识别为文字的网站)、右边为识别的结果。
利用过程
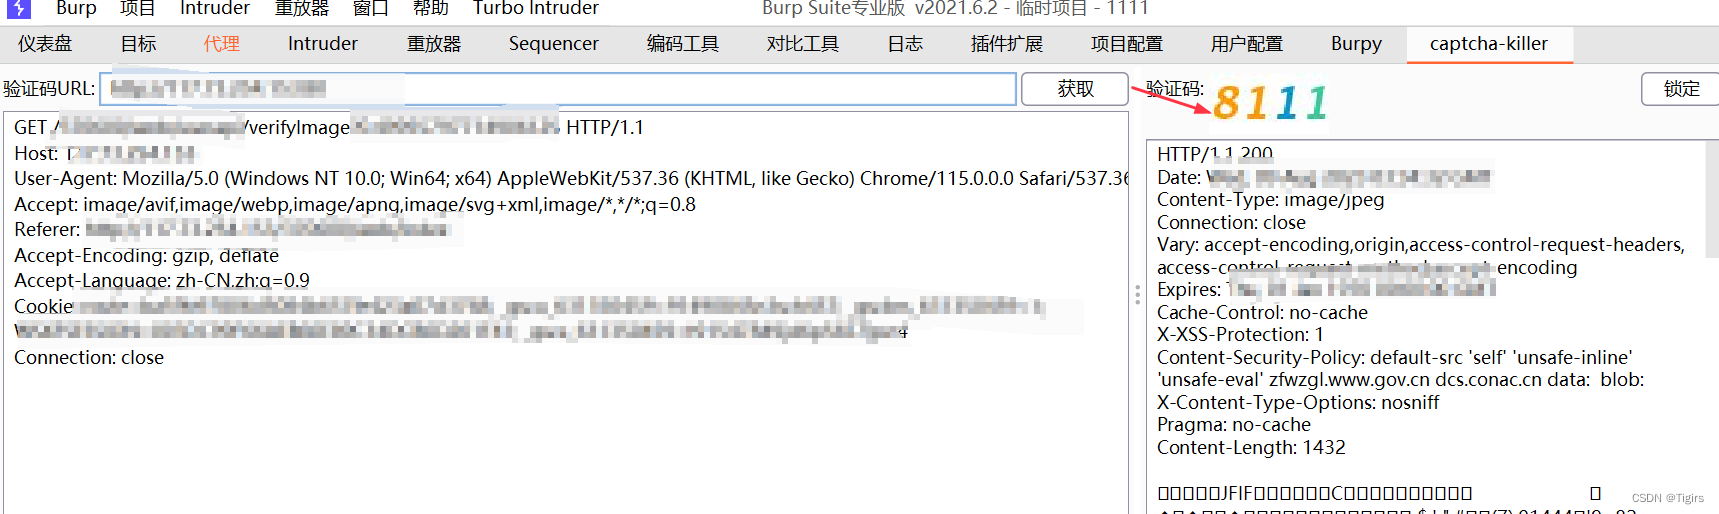
1、点击验证码刷新可抓取到验证码接口

抓到数据包,发送到插件:

点击获取我们就可以得到验证码:
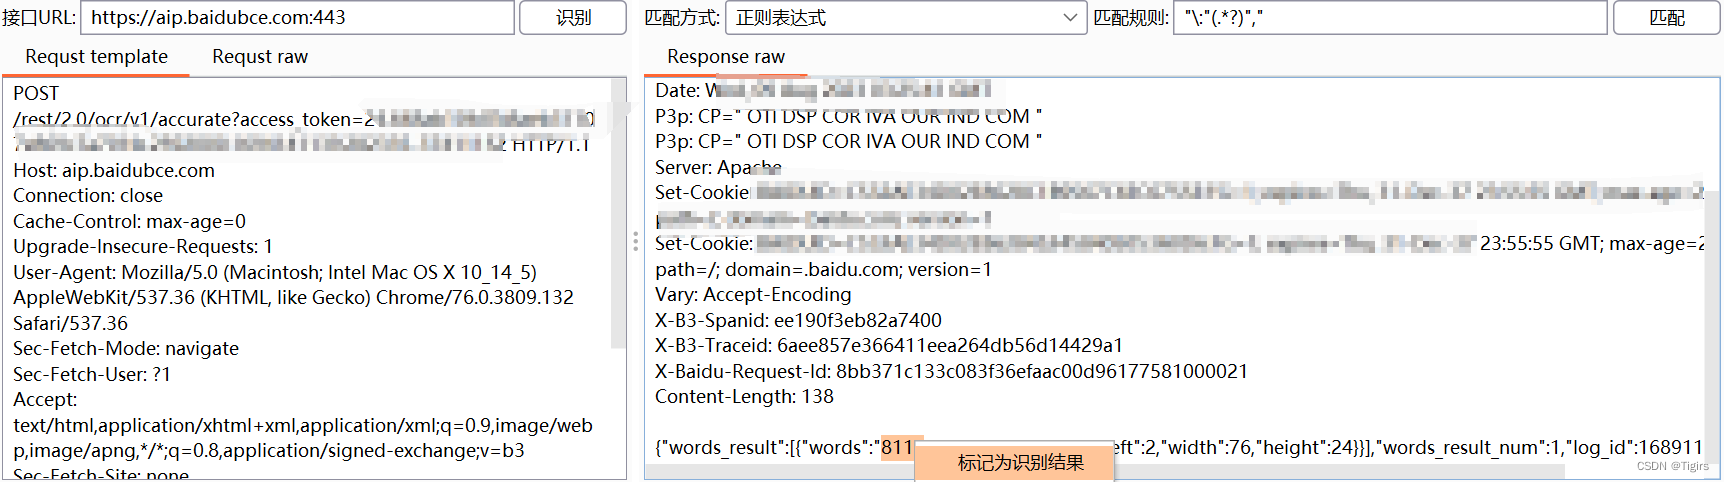
2、接入图片识别的接口,这里使用百度的接口

会得到一个数据包,这里需要我们注册申请得到一个access_token:
POST /rest/2.0/ocr/v1/accurate?access_token=[TOKEN] HTTP/1.1
Host: aip.baidubce.com
Connection: close
Cache-Control: max-age=0
Upgrade-Insecure-Requests: 1
User-Agent: Mozilla/5.0 (Macintosh; Intel Mac OS X 10_14_5) AppleWebKit/537.36 (KHTML, like Gecko) Chrome/76.0.3809.132 Safari/537.36
Sec-Fetch-Mode: navigate
Sec-Fetch-User: ?1
Accept: text/html,application/xhtml+xml,application/xml;q=0.9,image/webp,image/apng,*/*;q=0.8,application/signed-exchange;v=b3
Sec-Fetch-Site: none
Accept-Encoding: gzip, deflate
Accept-Language: zh-CN,zh;q=0.9
Content-Type: application/x-www-form-urlencoded
Content-Length: 55

image=<@URLENCODE><@BASE64><@IMG_RAW></@IMG_RAW></@BASE64></@URLENCODE>
注册账号:https://cloud.baidu.com/product/ocr_general
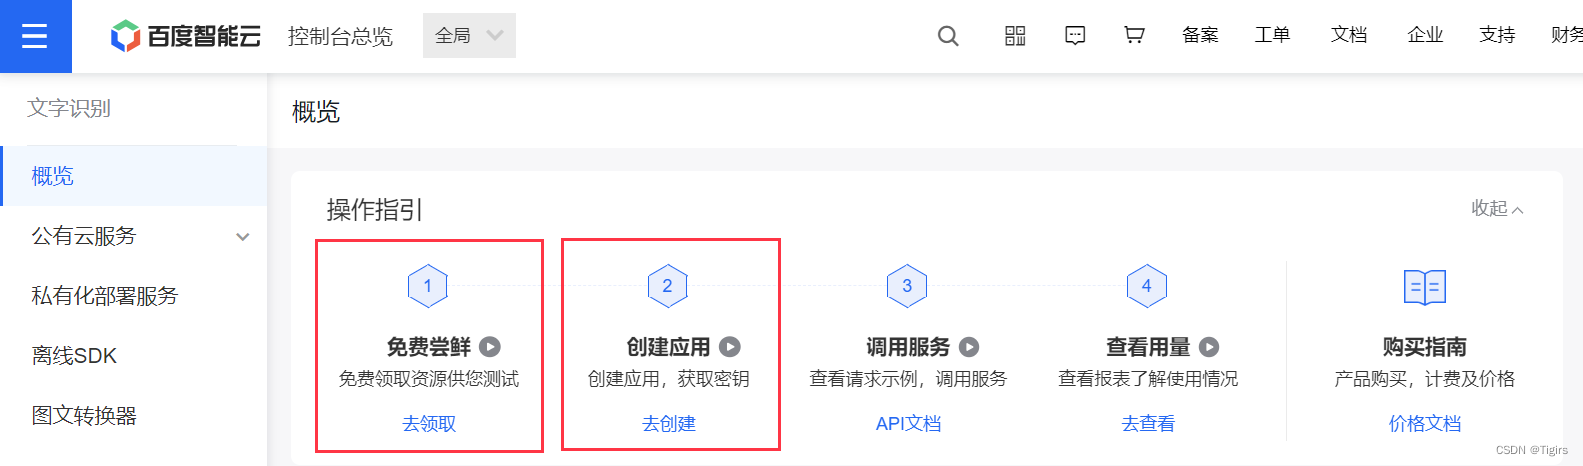
实名认证->免费领取资源->创建应用:
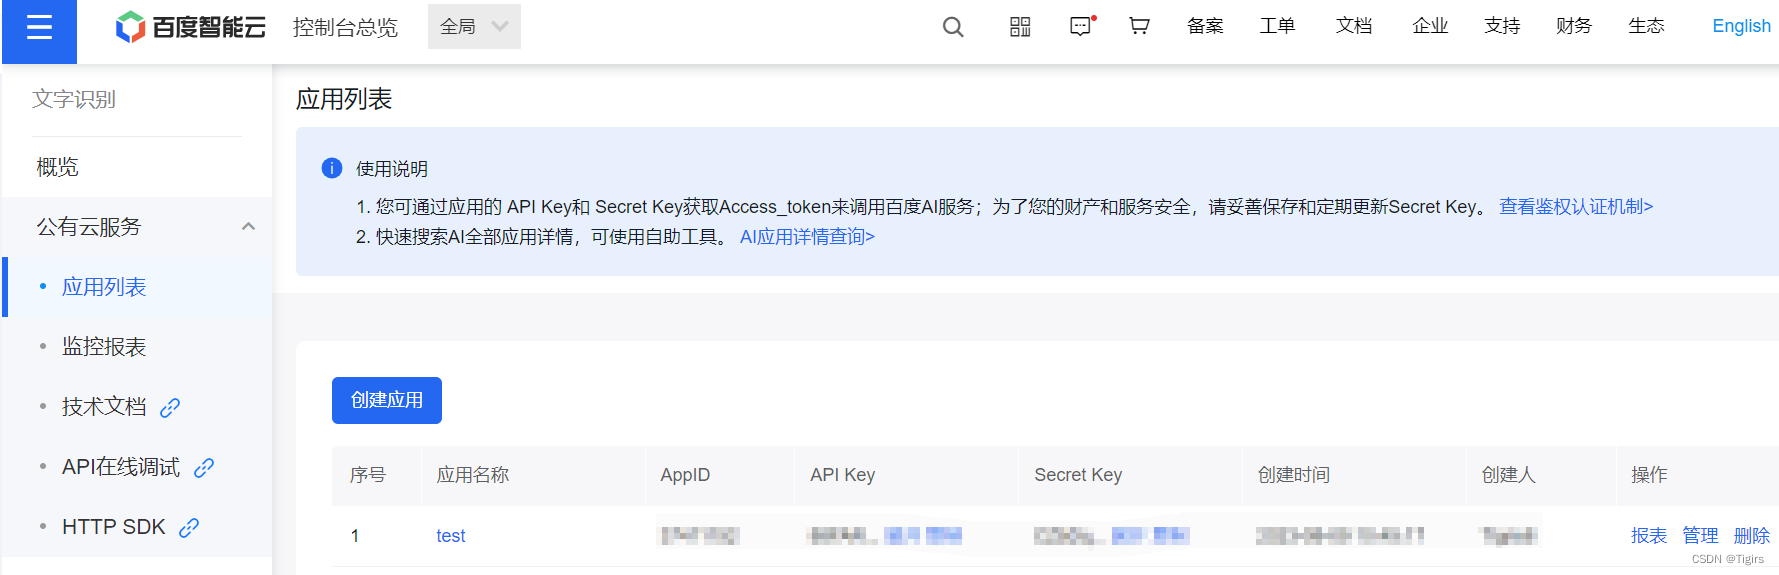
创建后得到一个应用(创建时候需勾选图片识别的相应功能,默认全部勾选就行):
3、获取access_token
这里用这个方法获取,较为简单:
https://aip.baidubce.com/oauth/2.0/token?grant_type=client_credentials&client_id=【你创建应用的API Key值】&client_secret=【你创建应用的Secret Key值】
得到access_token后复制到bp的插件里,点击识别,即可成功获取文本的验证码,右键标记为识别结果:
4、利用过程
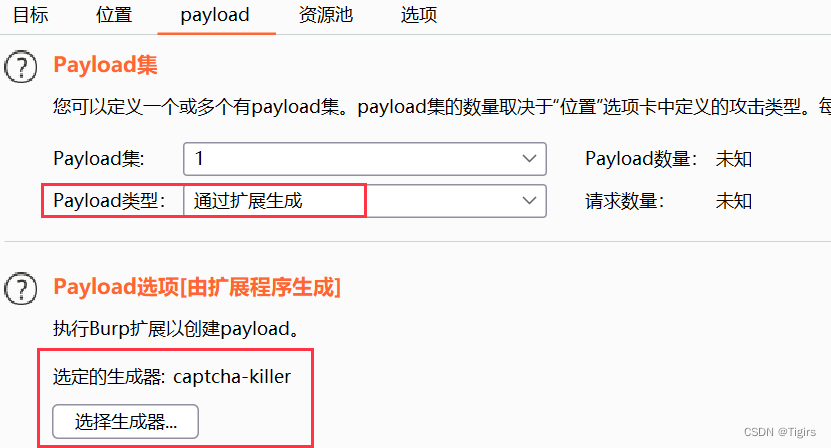
将需要的数据包发送至Intruder模块,添加验证码为变量,选择payload:
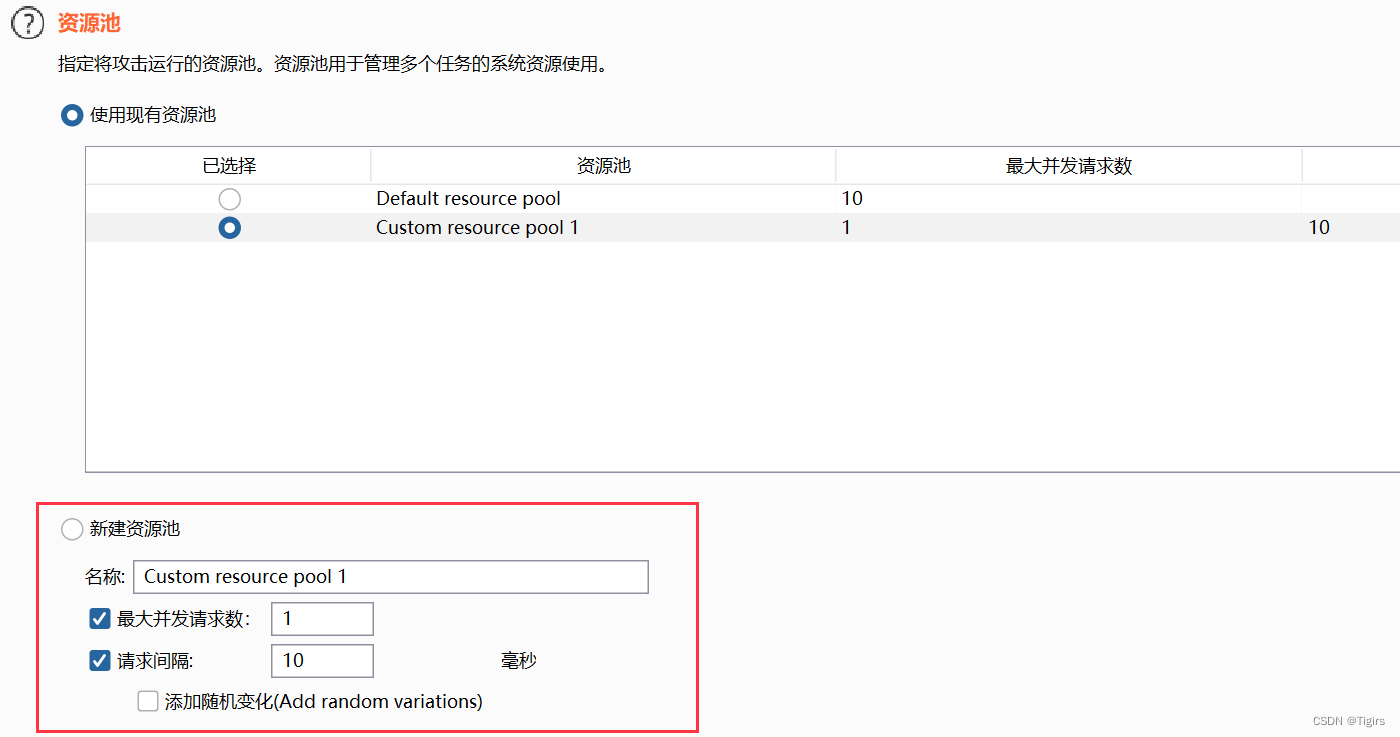
使用并发数为1的线程池,防止冲突:
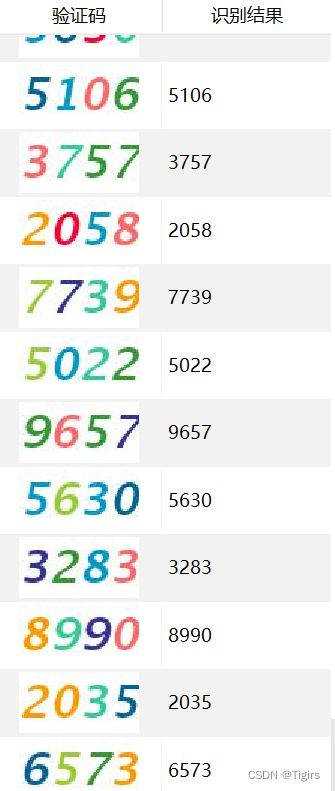
然后正常使用就行,可用于有验证码机制的账密bao破、短信hong zha等:


 1754
1754


 被折叠的 条评论
为什么被折叠?
被折叠的 条评论
为什么被折叠?
 到【灌水乐园】发言


