


Docker的资源控制管理
容器 = cgroup + namespace + rootfs + 容器引擎
- cgroup:资源控制
- namespace:访问隔离
- rootfs:文件系统隔离。镜像的本质就是一个 rootfs 文件
- 容器引擎:生命周期控制
文章目录
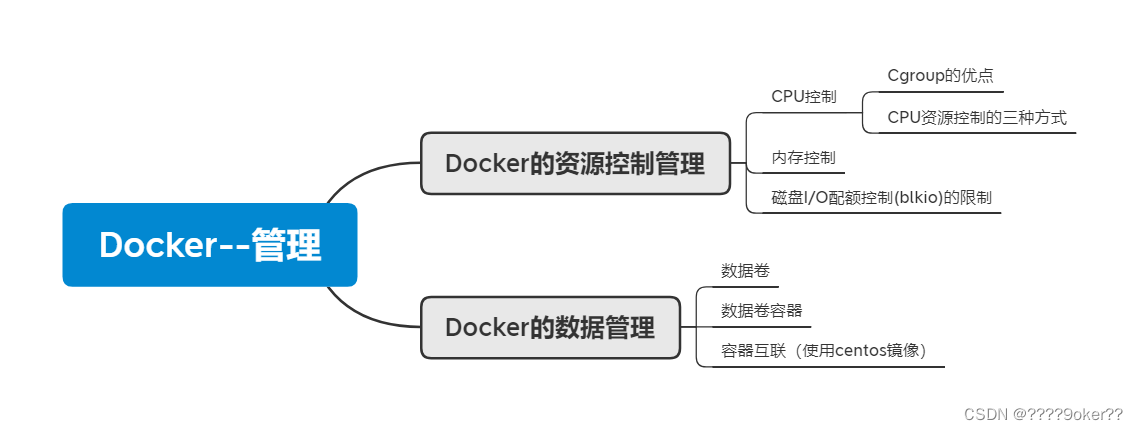
CPU控制
Cgroup 是 Control group 的简称,是 Linux 内核提供的一个特性,用于限制和隔离一组进程对系统资源的使用。对不同资源的具体管理是由各个子系统分工完成的。
Cgroup的优点
- 资源限制:可以对任务使用的资源总额进行限制
- 优先级分配:通过分配的 cpu 时间片数量以及磁盘 IO 带宽大小,实际上相当于控制了任务运行优先级
- 资源统计:可以统计系统的资源使用量,如 cpu 时长,内存用量等
- 任务控制:cgroup 可以对任务执行挂起、恢复等操作
CPU资源控制的三种方式
- 设置 CPU 使用率上限
[root@localhost ~]# docker ps -a							#查看容器状态
CONTAINER ID   IMAGE           COMMAND                  CREATED      STATUS                    PORTS                                               NAMES
228a9b43ff7b   centos:7        "/bin/bash"              3 days ago   Exited (0) 3 days ago                                                         test7
a09db8c18ca3   centos          "/bin/bash"              3 days ago   Exited (255) 3 days ago                                                       test6
2b3de9a8efe8   nginx           "/docker-entrypoint.…"   3 days ago   Exited (255) 3 days ago   80/tcp                                              test5
590162d14ba5   centos          "bash"                   3 days ago   Exited (255) 3 days ago                                                       test4
431ecd6d0eec   tomcat          "bash"                   3 days ago   Exited (255) 3 days ago                                                       test3
581f77fc4c7c   tomcat          "catalina.sh run"        3 days ago   Exited (255) 3 days ago   8080/tcp, 0.0.0.0:49110->80/tcp, :::49110->80/tcp   test2
95fffcb47dbb   tomcat          "catalina.sh run"        3 days ago   Exited (255) 3 days ago   0.0.0.0:49153->8080/tcp, :::49153->8080/tcp         test1
2d1f43c3d536   tomcat:latest   "/bin/bash"              3 days ago   Exited (137) 3 days ago                                                       reverent_banzai
[root@localhost ~]# docker start 228a9b43ff7b				#启动容器
228a9b43ff7b
[root@localhost ~]# docker ps -a							#容器已经启动
CONTAINER ID   IMAGE           COMMAND                  CREATED      STATUS                    PORTS                                               NAMES
228a9b43ff7b   centos:7        "/bin/bash"              3 days ago   Up 4 seconds                                                                  test7

#Linux 通过 CFS(Completely Fair Schedular,完全公平调度器)来调度各个进程对 CPU 的使用。CFS 默认的调度周期是100ms。我们可以设置每个容器进程的调度周期,以及在这个周期内各个容器最多能使用多少 CPU 时间。
#使用 --cpu-period 即可设置调度周期,使用 --cpu-quota 即可设置在每个周期内容器能使用的 CPU 时间。两者可以配合使用。
#cpu-period 和 cpu-quota 的单位为微秒。cpu-period 的最小值为 1000 微秒,最大值为 1 秒,默认值为 0.1 秒。
#cpu-quota 的值默认为 -1,表示不做控制。cpu-period 和 cpu-quota 参数一般联合使用。

[root@localhost ~]# cd /sys/fs/cgroup/cpu/docker/228a9b43ff7b70c022ae0ec4e3f10405e4da837e64059b5032e34cbac148fcef/	#进入
[root@localhost 228a9b43ff7b70c022ae0ec4e3f10405e4da837e64059b5032e34cbac148fcef]# ll
总用量 0
-rw-r--r--. 1 root root 0 6月  28 16:06 cgroup.clone_children
--w--w--w-. 1 root root 0 6月  28 16:06 cgroup.event_control
-rw-r--r--. 1 root root 0 6月  28 16:06 cgroup.procs
-r--r--r--. 1 root root 0 6月  28 16:06 cpuacct.stat
-rw-r--r--. 1 root root 0 6月  28 16:06 cpuacct.usage
-r--r--r--. 1 root root 0 6月  28 16:06 cpuacct.usage_percpu
-rw-r--r--. 1 root root 0 6月  28 16:06 cpu.cfs_period_us
-rw-r--r--. 1 root root 0 6月  28 16:06 cpu.cfs_quota_us
-rw-r--r--. 1 root root 0 6月  28 16:06 cpu.rt_period_us
-rw-r--r--. 1 root root 0 6月  28 16:06 cpu.rt_runtime_us
-rw-r--r--. 1 root root 0 6月  28 16:06 cpu.shares
-r--r--r--. 1 root root 0 6月  28 16:06 cpu.stat
-rw-r--r--. 1 root root 0 6月  28 16:06 notify_on_release
-rw-r--r--. 1 root root 0 6月  28 16:06 tasks
[root@localhost 228a9b43ff7b70c022ae0ec4e3f10405e4da837e64059b5032e34cbac148fcef]# cat cpu.cfs_quota_us
-1
[root@localhost 228a9b43ff7b70c022ae0ec4e3f10405e4da837e64059b5032e34cbac148fcef]# cat cpu.cfs_period_us
100000
[root@localhost 228a9b43ff7b70c022ae0ec4e3f10405e4da837e64059b5032e34cbac148fcef]# docker exec -it 228a9b43ff7b bash								   #登入容器
[root@228a9b43ff7b /]# vi test.sh					#编写死循环脚本
#!/bin/bash
i=0
while true
do
	let i++
done
[root@228a9b43ff7b /]# chmod +x test.sh 			#赋权
[root@228a9b43ff7b /]# sh test.sh 					#执行脚本

另一个终端测试查看
[root@localhost ~]# top								#查看cpu使用率接近100
top - 16:16:18 up 11 min,  4 users,  load average: 0.85, 0.35, 0.16
Tasks: 224 total,   2 running, 222 sleeping,   0 stopped,   0 zombie
%Cpu(s): 23.2 us,  1.7 sy,  0.0 ni, 75.0 id,  0.0 wa,  0.0 hi,  0.0 si,  0.0 st
KiB Mem :  3865308 total,   768180 free,  1018088 used,  2079040 buff/cache
KiB Swap:  8388604 total,  8388604 free,        0 used.  2500996 avail Mem

   PID USER      PR  NI    VIRT    RES    SHR S  %CPU %MEM     TIME+ COMMAND
  3224 root      20   0   11688   1124    940 R  99.7  0.0   1:53.30 sh

设置CPU使用频率上限
[root@localhost ~]# docker run -itd --name test8 --cpu-quota 50000 centos:7 /bin/bash	#建立新容器并设置上限
385687847ef4c3bd9252cb21dbb62e90942cfcb1505715d77f795730be07c3e4
[root@localhost ~]# cd /sys/fs/cgroup/cpu/docker/385687847ef4c3bd9252cb21dbb62e90942cfcb1505715d77f795730be07c3e4/
[root@localhost 385687847ef4c3bd9252cb21dbb62e90942cfcb1505715d77f795730be07c3e4]# ll
总用量 0
-rw-r--r--. 1 root root 0 6月  28 16:27 cgroup.clone_children
--w--w--w-. 1 root root 0 6月  28 16:27 cgroup.event_control
-rw-r--r--. 1 root root 0 6月  28 16:27 cgroup.procs
-r--r--r--. 1 root root 0 6月  28 16:27 cpuacct.stat
-rw-r--r--. 1 root root 0 6月  28 16:27 cpuacct.usage
-r--r--r--. 1 root root 0 6月  28 16:27 cpuacct.usage_percpu
-rw-r--r--. 1 root root 0 6月  28 16:27 cpu.cfs_period_us
-rw-r--r--. 1 root root 0 6月  28 16:27 cpu.cfs_quota_us
-rw-r--r--. 1 root root 0 6月  28 16:27 cpu.rt_period_us
-rw-r--r--. 1 root root 0 6月  28 16:27 cpu.rt_runtime_us
-rw-r--r--. 1 root root 0 6月  28 16:27 cpu.shares
-r--r--r--. 1 root root 0 6月  28 16:27 cpu.stat
-rw-r--r--. 1 root root 0 6月  28 16:27 notify_on_release
-rw-r--r--. 1 root root 0 6月  28 16:27 tasks
[root@localhost 385687847ef4c3bd9252cb21dbb62e90942cfcb1505715d77f795730be07c3e4]# cat cpu.cfs_quota_us
50000

[root@localhost 385687847ef4c3bd9252cb21dbb62e90942cfcb1505715d77f795730be07c3e4]# echo 40000 > cpu.cfs_quota_us		#直接更改文件内参数
[root@localhost 385687847ef4c3bd9252cb21dbb62e90942cfcb1505715d77f795730be07c3e4]# cat cpu.cfs_quota_us
40000

再次使用死循环脚本
开启新终端top查看cpu使用率即可
- 设置 CPU 资源占用比(设置多个容器时才生效)
[root@localhost ~]# docker run -itd --name test9 --cpu-shares 1024 centos:7		#创建新容器,设置容器的权重
6a8918784c41c49b5595ce881700e593ea9a1daeb0479e03bb4686eec021a7ed
[root@localhost ~]# docker run -itd --name test10 --cpu-shares 512 centos:7		#创建新容器,设置容器的权重
60e468a6970cd366563b3b9819d1a1040ded833a05630647f832aa0090b6ba91

终端1
[root@localhost ~]# docker exec -it 6a8918784c41 bash			#进入容器
[root@6a8918784c41 /]# yum install -y epel-release				#容器安装epel-release
[root@6a8918784c41 /]# yum install stress -y					#安装stress
[root@6a8918784c41 /]# stress -c 4								#产生四个进程,每个进程都反复不停的计算随机数的平方根
stress: info: [90] dispatching hogs: 4 cpu, 0 io, 0 vm, 0 hdd

终端2
[root@localhost ~]# docker exec -it 60e468a6970c bash
[root@60e468a6970c /]# yum install -y epel-release
[root@60e468a6970c /]# yum install stress -y
[root@60e468a6970c /]# stress -c 4
stress: info: [90] dispatching hogs: 4 cpu, 0 io, 0 vm, 0 hdd

终端3
[root@localhost ~]# docker stats								#验证查看CPU占比,发现是1:2的一个比例
CONTAINER ID   NAME      CPU %     MEM USAGE / LIMIT     MEM %     NET I/O          BLOCK I/O         PIDS
60e468a6970c   test10    132.19%   187.9MiB / 3.686GiB   4.98%     32.8MB / 286kB   0B / 49.9MB       7
6a8918784c41   test9     266.46%   201.5MiB / 3.686GiB   5.34%     32.8MB / 619kB   107MB / 50.7MB    7
- 设置容器绑定指定的 CPU
[root@localhost ~]# docker run -itd --name test11 --cpuset-cpus 0,3 centos:7 bash	#创建容器,并指定cpu号
5b0220b3bf7e497e00153ee63340f07c8e669e40201a642e7f0cb7054a72d36c

[root@localhost ~]# docker exec -it test11 bash										#登入容器
[root@5b0220b3bf7e /]# yum install -y epel-release和 && yum install -y stress		#安装epel-release和stress

[root@localhost ~]# top													#top过后,按下数字1,可现实所有cpu核数
top - 18:40:20 up 51 min,  2 users,  load average: 3.50, 1.39, 1.09
Tasks: 219 total,   5 running, 214 sleeping,   0 stopped,   0 zombie
%Cpu0  :100.0 us,  0.0 sy,  0.0 ni,  0.0 id,  0.0 wa,  0.0 hi,  0.0 si,  0.0 st
%Cpu1  :  0.0 us,  0.0 sy,  0.0 ni, 98.4 id,  0.0 wa,  0.0 hi,  1.6 si,  0.0 st
%Cpu2  :  0.0 us,  0.0 sy,  0.0 ni,100.0 id,  0.0 wa,  0.0 hi,  0.0 si,  0.0 st
%Cpu3  :100.0 us,  0.0 sy,  0.0 ni,  0.0 id,  0.0 wa,  0.0 hi,  0.0 si,  0.0 st
%Cpu4  :  0.0 us,  0.0 sy,  0.0 ni,100.0 id,  0.0 wa,  0.0 hi,  0.0 si,  0.0 st
%Cpu5  :  0.0 us,  0.0 sy,  0.0 ni,100.0 id,  0.0 wa,  0.0 hi,  0.0 si,  0.0 st
%Cpu6  :  0.0 us,  0.0 sy,  0.0 ni,100.0 id,  0.0 wa,  0.0 hi,  0.0 si,  0.0 st
%Cpu7  :  0.3 us,  0.3 sy,  0.0 ni, 99.3 id,  0.0 wa,  0.0 hi,  0.0 si,  0.0 st
KiB Mem :  3865308 total,  2266784 free,   621292 used,   977232 buff/cache
KiB Swap:  8388604 total,  8388604 free,        0 used.  2902020 avail Mem

   PID USER      PR  NI    VIRT    RES    SHR S  %CPU %MEM     TIME+ COMMAND
  3373 root      20   0    7312    100      0 R  50.2  0.0   1:02.41 stress
  3370 root      20   0    7312    100      0 R  49.8  0.0   1:02.42 stress
  3371 root      20   0    7312    100      0 R  49.8  0.0   1:02.40 stress
  3372 root      20   0    7312    100      0 R  49.8  0.0   1:02.40 stress
内存控制
-m可以设置分配的内存大小,-–memory-swap 可限制 swap 分区的内存大小,但必须与 -m 命令一起使用
正常情况下,–memory-swap 的值包含容器可用内存和可用 swap,所以 -m 300m --memory-swap=1g 的含义为:容器可以使用 300M 的物理内存,并且可以使用 700M(1G-300M)的 swap
-
如果 --memory-swap 设置为 0 或者不设置,则容器可以使用的 swap 大小为 -m 值的两倍
-
如果 --memory-swap 的值和 -m 相同,则容器不能使用swap
-
如果 --memory-swap 的值为 -1,它表示容器程序使用的内存受限,而可以使用的 swap 空间使用不受限制(宿主机有多少 swap 容器就可以使用多少)
#创建容器并赋予300M的内存和1G的swap交换空间

[root@localhost ~]# docker run -itd --name test12 -m 300m --memory-swap=1G centos:7 bash
146750630d1ed3da1bdbae1ebe62851b79eb47189cf63ebe74af4446aa25b962
[root@localhost ~]# docker ps -a
CONTAINER ID   IMAGE           COMMAND                  CREATED          STATUS                            PORTS                                               NAMES
146750630d1e   centos:7        "bash"                   22 seconds ago   Up 21 seconds                                                                         test12
磁盘I/O配额控制(blkio)的限制
–device-write-bps :限制某个设备上的写速度bps (数据量),单位可以是kb、mb (M)或者gb
#创建新容器,并设置写入速度为1MB
[root@localhost ~]# docker run -it --name test13 --device-write-bps /dev/sda:1mb centos:7 bash

#写入测试,看到结果为1MB
[root@ef9ce57cb67e /]# dd if=/dev/zero of=write_test bs=1M count=10 oflag=direct
10+0 records in
10+0 records out
10485760 bytes (10 MB) copied, 10.0051 s, 1.0 MB/s
–device - read-bps:限制某个设备上的读速度bps (数据量),单位可以是kb、mb (M)或者gb
#创建容器,并设置读速度为1MB
[root@localhost ~]# docker run -it --name test13 --device-write-bps /dev/sda:1mb centos:7 bash
--device-read-iops :限制读某个设备的iops (次数)
--device-write-iops :限制写入某个设备的iops (次数)
Docker的数据管理
管理Docker 容器中数据主要有两种方式:数据卷(Data Volumes)和数据卷容器( DataVolumes Containers)
数据卷
数据卷是一个供容器使用的特殊目录,位于容器中。可将宿主机的目录挂载到数据卷上,对数据卷的修改操作立刻可见,并且更新数据不会影响镜像,从而实现数据在宿主机与容器之间的迁移。数据卷的使用类似于Linux下对目录进行的mount操作。
主机
[root@localhost /]# yum install httpd				#安装httpd服务
[root@localhost /]# cd /var/www/html/
[root@localhost html]# ll							#查看目录
总用量 0

容器
[root@localhost ~]# docker run -it --name test14 -v /var/www/html:/test centos:7 bash	#创建容器,并把/var/www/html挂载到容器中的test

[root@20f3605c0949 /]# echo "this is test14 file" > /test/test.txt
[root@20f3605c0949 /]# ll test
total 4
-rw-r--r--. 1 root root 20 Jun 28 11:06 test.txt			#文件存在

主机
[root@localhost html]# cat /var/www/html/test.txt 			#验证,可以看到容器内创建的文件并写入的数据
this is test14 file
数据卷容器
如果需要在容器之间共享一些数据,最简单的方法就是使用数据卷容器。数据卷容器是一个普通的容器,专门提供数据卷给其他容器挂载使用。
终端1
[root@localhost ~]# docker run -it --name test15 -v /test1 -v /test2 centos:7 bash	#创建数据卷容器
[root@37e0085a4810 /]# echo "this is test15 file" > /test1/test.txt					#写入测试文件
[root@37e0085a4810 /]# echo "This Is Test15 File" > /test2/test.txt					#写入测试文件

终端2
[root@localhost html]# docker run -it --name test16 --volumes-from test15 centos:7 bash	#创建容器,并使用--volumes-from来挂载test15容器中的数据卷到新的容器

[root@1c44978f1267 /]# cat test1/test.txt 											#查看测试文件
this is test15 file
[root@1c44978f1267 /]# cat test2/test.txt 											#查看测试文件
This Is Test15 File
容器互联(使用centos镜像)
[root@localhost ~]# docker run -itd -P --name test17 centos:7 /bin/bash		#创建并运行源容器取名test17
6d85c4a75ff5107027063057404cd221ec2cf2d6e5426c2c64d3184f6fd569d3

#创建并运行接收容器取名test18,使用--link选项指定连接容器以实现容器互联
[root@localhost ~]# docker run -itd -P --name test18 --link test17:test17 centos:7 /bin/bash
cc0f0ce66cbded270647d6af3467e26c40921af770cb580fa4ef386087fadae1
[root@localhost ~]# docker ps -a
CONTAINER ID   IMAGE           COMMAND                  CREATED          STATUS                           PORTS                                               NAMES
cc0f0ce66cbd   centos:7        "/bin/bash"              5 seconds ago    Up 5 seconds                                                                         test18
6d85c4a75ff5   centos:7        "/bin/bash"              56 seconds ago   Up 56 seconds                                                                        test17

[root@localhost ~]# docker exec -it cc0f0ce66cbd bash			#进入test18容器
[root@cc0f0ce66cbd /]# ping test17								#ping 容器test17
PING test17 (172.17.0.3) 56(84) bytes of data.
64 bytes from test17 (172.17.0.3): icmp_seq=1 ttl=64 time=0.132 ms
64 bytes from test17 (172.17.0.3): icmp_seq=2 ttl=64 time=0.061 ms
64 bytes from test17 (172.17.0.3): icmp_seq=3 ttl=64 time=0.060 ms
64 bytes from test17 (172.17.0.3): icmp_seq=4 ttl=64 time=0.062 ms
64 bytes from test17 (172.17.0.3): icmp_seq=5 ttl=64 time=0.068 ms


 3292
3292


 被折叠的 条评论
为什么被折叠?
被折叠的 条评论
为什么被折叠?
 到【灌水乐园】发言


