


文章目录
单机编排之 Docker Compose
当在宿主机启动较多的容器时候,如果都是手动操作会觉得比较麻烦而且容器出错,这个时候推荐使用 docker 单机编排工具 docker compose,Docker Compose 是 docker 容器的一种编排服务,docker compose 是一个管理多个容器的工具,比如可以解决容器之间的依赖关系,就像启动一个 web 就必须得先把数据库服务先启动一样,docker compose 完全可以替代 docker run 启动容器。 #github 地址 https://github.com/docker/compose
基础环境准备
rm -rf /etc/yum.repos.d/*

wget -O /etc/yum.repos.d/CentOS-Base.repo http://mirrors.aliyun.com/repo/Centos-7.repo

wget -O /etc/yum.repos.d/epel.repo http://mirrors.aliyun.com/repo/epel-7.repo

wget -O /etc/yum.repos.d/docker-ce.repo https://mirrors.aliyun.com/docker-ce/linux/centos/docker-ce.repo

yum install docker-ce -y
安装
apt-get install docker-compose -y

docker-compose up -d

docker-compose start

验证版本:
docker-compose version

查看帮助:
docker-compose --help
从 docker compose 启动单个容器
目录可以在任意目录,推荐放在有意义的位置。
mkdir docker-compose
 cd docker-compose/
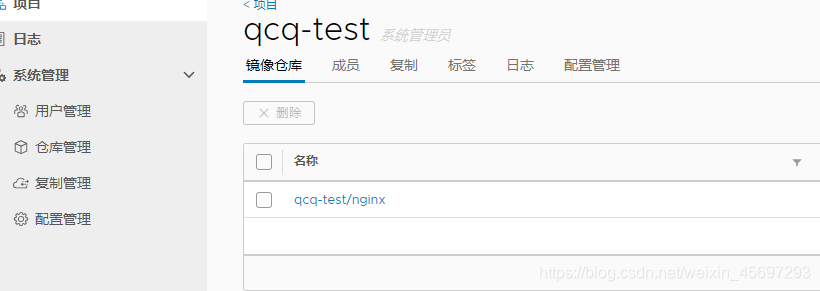
先给harbor服务器上传一个镜像

在node节点中
创建 yaml 格式配置文件
vim  /opt/qcq/docker-compose.yaml
web1:   					#服务名称
 image: 192.168.10.206/qcq_test/nginx:v1	   #镜像位置---在harbor中的
 container_name: web1  		#自定义容器名称
 expose:  					#暴露端口
 	- 80
	- 443
 ports:
 	- "80:80"
 	- "443:443"
启动容器:
必须要在 docker compose 文件所在的目录执行:
docker-compose up #前台启动


后台启动服务:-d
#容器的在启动的时候,会给容器自定义一个名称
docker-compose up -d
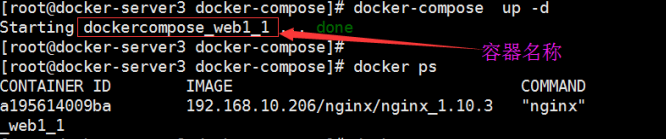

验证容器

查看容器进程:
从 docker compose 启动多个容器
编辑 docker-compose 文件:
[root@docker-server3 docker-compose]# cat docker-compose.yml

#用hapeoxy做高可用  注意haproxy配置文件,以及hosts文件
haproxy:
 image: 192.168.10.206/qcq/haproxy
 expose:
 - 80
 - 443
 container_name: nginx-web1
 ports:
 - "80:80"
 - "443:443"
 links:   #相当于高可用
 - web1   #注意是容器的名称
 - web2


web1:
 image: 192.168.10.206/nginx/nginx_1.10.3
 expose:
 - 80
 - 443
 container_name: nginx-web1
 ports:
 - "80:80"
 - "443:443"


web2: #每一个容器一个 ID
image: 192.168.10.206/nginx/nginx_1.10.3
 expose:
 - 80
 - 443
 container_name: nginx-web2
 ports:
 - "81:80"
 - "444:443"
 links:
  - tomcat-web1
  - tomcat-web2


tomcat-web1:
  container_name: tomcat-web1
  image: harbor.magedu.example.com/baseimages/centos-tomcat-web:app1
  #user: www
  #command: /apps/tomcat/bin/run_tomcat.sh

  #volunes把容器目录 映射到 本地
  #	- 本地:容器
#  volumes:
#    - /apps/tomcat/webapps/SalesManager:/apps/tomcat/webapps/SalesManager
  expose:
    - 8080
    - 8443
  ports:
    - "8801:8080"

tomcat-web2:
  container_name: tomcat-web2
  image: harbor.magedu.example.com/baseimages/centos-tomcat-web:app2
  expose:
    - 8080
    - 8443
  ports:
    - "8802:8080"
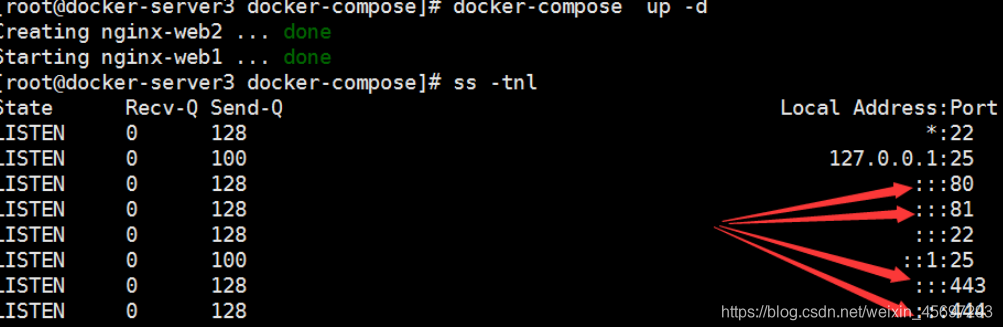
重新启动容器:
docker-compose stop
docker-compose up -d
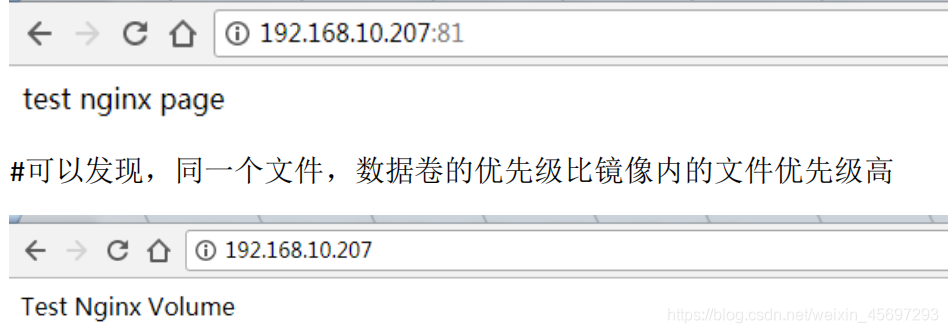
定义数据卷挂载
volumes
创建数据目录和文件:
mkdir -p /data/nginx
echo "Test Nginx Volume" > /data/nginx/index.html
编辑 compose 配置文件:
[root@docker-server3 docker-compose]# vim docker-compose.yml
web1:
image: 192.168.10.206/nginx/nginx_1.10.3
 expose:
 - 80
 - 443
 container_name: nginx-web1
 volumes:
 - /data/nginx:/usr/local/nginx/html
 ports:
 - "80:80"
 - "443:443"
web2:
 image: 192.168.10.206/nginx/nginx_1.10.3
 expose:
 - 80
 - 443
 container_name: nginx-web2
 ports:
 - "81:80"
- "444:443"
重新启动容器:
docker-compose stop
docker-compose up –d
其他常用命令
重启单个指定容器:
docker-compose restart web1

重启所有容器:
docker-compose restart
停止和启动单个容器:
docker-compose stop web1
docker-compose start web1
停止和启动所有容器:
docker-compose stop
docker-compose start
实现单机版的 HA+Nginx+Tomcat:
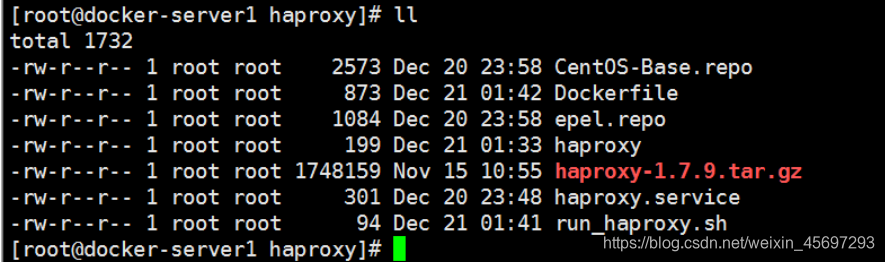
制作 Haproxy 镜像:
[root@docker-server1 haproxy]# pwd
/opt/dockerfile/web/haproxy
编辑 Dockerfile 文件:
[root@docker-server1 haproxy]# cat Dockerfile
#My Dockerfile
From docker.io/centos:7.2.1511
MAINTAINER qcq "qcq@300.cn"
#Yum Setting
ADD epel.repo /etc/yum.repos.d/epel.repo
ADD CentOS-Base.repo /etc/yum.repos.d/CentOS-Base.repo
RUN yum install gcc gcc-c++ pcre pcre-devel openssl openssl-devel -y
ADD haproxy-1.7.9.tar.gz /usr/local/src
RUN cd /usr/local/src/haproxy-1.7.9 && make TARGET=linux2628 USE_PCRE=1
USE_OPENSSL=1 USE_ZLIB=1 PREFIX=/usr/local/haproxy && make install
PREFIX=/usr/local/haproxy
RUN cp /usr/local/src/haproxy-1.7.9/haproxy-systemd-wrapper /usr/sbin/haproxy-
systemd-wrapper
RUN cp /usr/local/src/haproxy-1.7.9/haproxy /usr/sbin/haproxy
ADD haproxy.service /usr/lib/systemd/system/haproxy.service
ADD haproxy /etc/sysconfig/haproxy
ADD run_haproxy.sh /root/script/run_haproxy.sh
RUN chmod a+x /root/script/run_haproxy.sh
CMD ["/root/script/run_haproxy.sh"]
EXPOSE 80 9999
准备服务启动脚本:
[root@docker-server1 haproxy]# cat haproxy.service
[Unit]
Description=HAProxy Load Balancer
After=syslog.target network.target
[Service]
EnvironmentFile=/etc/sysconfig/haproxy
ExecStart=/usr/sbin/haproxy-systemd-wrapper -f /etc/haproxy/haproxy.cfg -p
/run/haproxy.pid $OPTIONS
ExecReload=/bin/kill -USR2 $MAINPID
[Install]
WantedBy=multi-user.target
前台启动脚本:
[root@docker-server1 haproxy]# cat run_haproxy.sh
#!/bin/bash
/usr/sbin/haproxy-systemd-wrapper -f /etc/haproxy/haproxy.cfg -p /run/haproxy.pid
haproxy 参数文件:
[root@docker-server1 haproxy]# cat haproxy
# Add extra options to the haproxy daemon here. This can be useful for
# specifying multiple configuration files with multiple -f options.
# See haproxy(1) for a complete list of options.
OPTIONS=""
准备压缩包及其他文件
执行构建镜像:
docker build -t  192.168.10.205/centos/centos_7.2.1511_haproxy_1.7.9
/opt/dockerfile/web/haproxy/
经镜像上传到 harbor 仓库
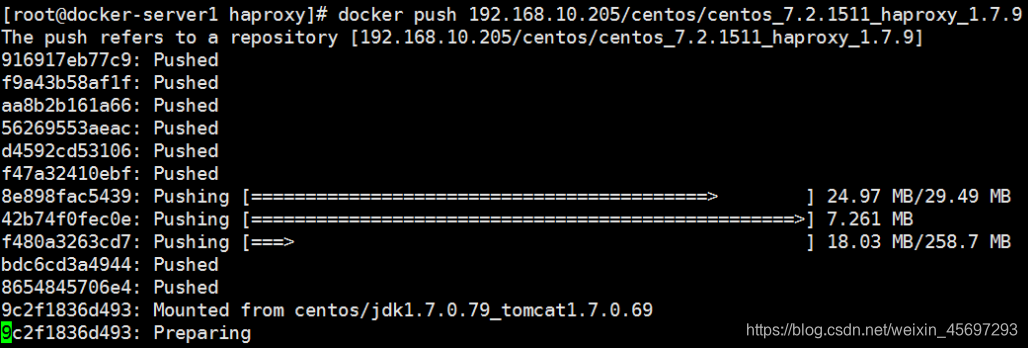
harbor 仓库验证

编辑 docker compose 文件及环境准备:
编辑 docker compose 文件:
[root@docker-server3 docker-compose]# pwd
/root/docker-compose
[root@docker-server3 docker-compose]# cat docker-compose.yml
nginx-web1:
 image: 192.168.10.205/nginx/nginx_1.10.3
 expose:
 - 80
 - 443
 container_name: nginx-web1
 volumes:
 - /data/nginx:/usr/local/nginx/html
 - /usr/local/nginx/conf/nginx.conf:/usr/local/nginx/conf/nginx.conf
 links:
 - tomcat-web1
 - tomcat-web2
nginx-web2:
 image: 192.168.10.205/nginx/nginx_1.10.3
 volumes:
 - /usr/local/nginx/conf/nginx.conf:/usr/local/nginx/conf/nginx.conf
 expose:
 - 80
 - 443
 container_name: nginx-web2
 links:
 - tomcat-web1
 - tomcat-web2

tomcat-web1:
 container_name: tomcat-web1
 image: 192.168.10.205/centos/jdk1.7.0.79_tomcat1.7.0.69
 user: www
 command: /apps/tomcat/bin/run_tomcat.sh

 volumes:
 - /apps/tomcat/webapps/SalesManager:/apps/tomcat/webapps/SalesManager
 expose:
 - 8080
 - 8443
 - tomcat-web2:
 container_name: tomcat-web2
 image: 192.168.10.205/centos/jdk1.7.0.79_tomcat1.7.0.69
 user: www
 command: /apps/tomcat/bin/run_tomcat.sh
 volumes:
 - /apps/tomcat/webapps/SalesManager:/apps/tomcat/webapps/SalesManager
 expose:
 - 8080
 - 8443
 -
haproxy:
 container_name: haproxy-web1
 image: 192.168.10.205/centos/centos_7.2.1511_haproxy_1.7.9
 command: /root/script/run_haproxy.sh
 volumes:
 - /etc/haproxy/haproxy.cfg:/etc/haproxy/haproxy.cfg
 ports:
 - "9999:9999"
 - "80:80"
 links:
 - nginx-web1
 - nginx-web2
准备 nginx 静态文件:
[root@docker-server3 docker-compose]# cat /data/nginx/index.html
Test Nginx Volume
准备 nginx 配置文件: #本地路径和 nginx 路径都是 /usr/local/nginx/conf/nginx.conf
[root@docker-server3 docker-compose]# grep -v "#" /usr/local/nginx/conf/nginx.conf
| grep -v "^$"
user nginx;
worker_processes auto;
daemon off;
events {
worker_connections 1024;
}
http {
include mime.types;
default_type application/octet-stream;
sendfile on;
keepalive_timeout 65;
upstream tomcat_webserver {
server tomcat-web1:8080;
server tomcat-web2:8080;
}
server {
listen 80;
server_name localhost;
location / {
root html;
index index.html index.htm;
}
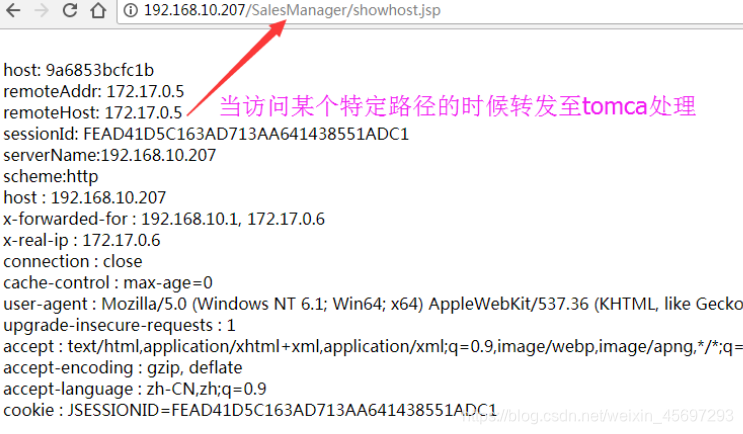
location /SalesManager {
proxy_pass http://tomcat_webserver;
proxy_set_header Host $host;
proxy_set_header X-Forwarded-For $proxy_add_x_forwarded_for;
proxy_set_header X-Real-IP $remote_addr;
}
error_page 500 502 503 504 /50x.html;
location = /50x.html {
root html;
}
} }
准备 tomcat 页面文件:
[root@docker-server3 docker-compose]# ll /apps/tomcat/webapps/SalesManager
total 8
-rw-r--r-- 1 www www 15 Dec 21 05:01 index.html
-rw-r--r-- 1 www www 696 Dec 21 05:01 showhost.jsp
[root@docker-server3 docker-compose]# cat
/apps/tomcat/webapps/SalesManager/showhost.jsp
<%@page import="java.util.Enumeration"%>
<br />
host:
<%try{out.println(""+java.net.InetAddress.getLocalHost().getHostName());}catch(Exc
eption e){}%>
<br />
remoteAddr: <%=request.getRemoteAddr()%>
<br />
remoteHost: <%=request.getRemoteHost()%>
<br />
sessionId: <%=request.getSession().getId()%>
<br />
serverName:<%=request.getServerName()%>
<br />
scheme:<%=request.getScheme()%>
<br />
<%request.getSession().setAttribute("t1","t2");%>
<%
 Enumeration en = request.getHeaderNames();
 while(en.hasMoreElements()){
 String hd = en.nextElement().toString();
 out.println(hd+" : "+request.getHeader(hd));
 out.println("<br />");
 }
%>
启动容器:
pwd
/root/docker-compose
docker-compose up –d
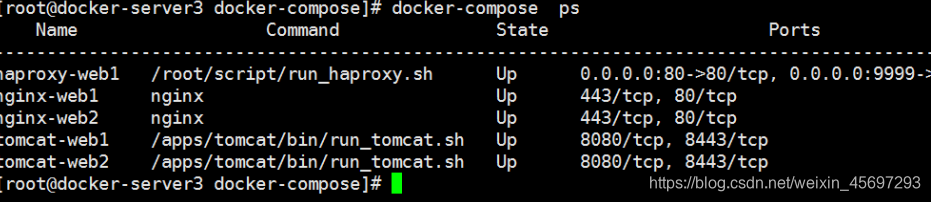
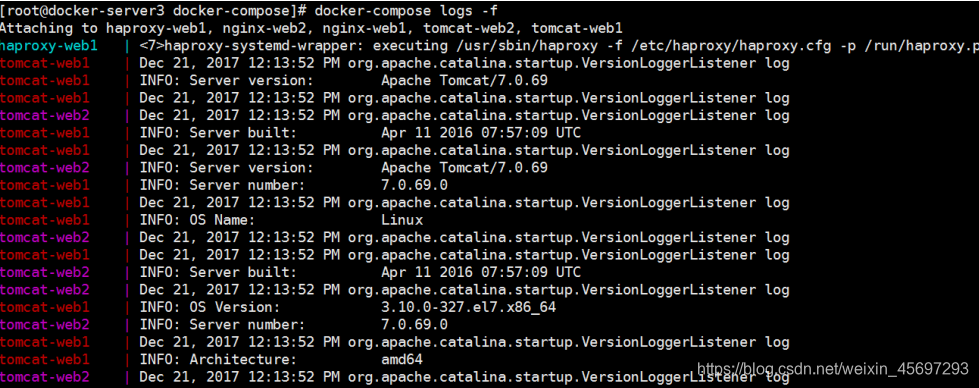
查看启动日志
docker-compose logs –f
访问 haroxy 管理界面:
192.168.10.207:9999/haproxy-status

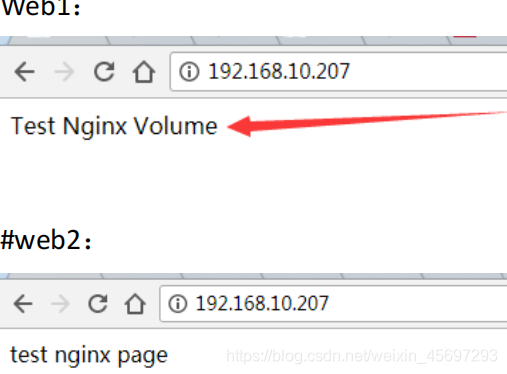
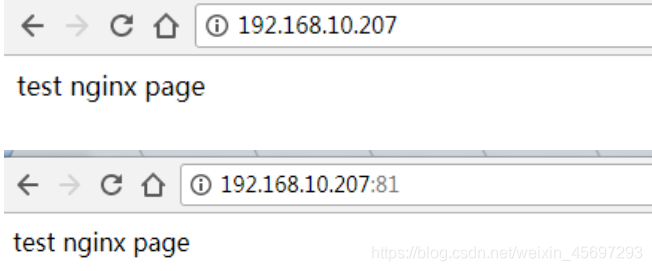
访问tomcat静态页面

访问tomcat动态页面


 5067
5067


 被折叠的 条评论
为什么被折叠?
被折叠的 条评论
为什么被折叠?
 到【灌水乐园】发言


