


本章节是为了帮助你起步一个完整的前后端分离项目。
前端技术栈: react、vite、mantine、tailwind CSS、zustand、rxjs、threejs
后端技术栈:nodemon、nodejs、vite
后端
项目结构
blog-backend/
│
├── server/
│   ├── index.js
│   └── routes/
│       └── posts.js
├── package.json
└── vite.config.js
1. 项目初始化
- 创建项目文件夹并初始化 Node.js 项目。
- 安装必要的依赖项。
2. 详细步骤
- 创建项目文件夹并初始化 Node.js 项目
mkdir blog-backend
cd blog-backend
npm init -y
- 安装必要的依赖项
安装 Express.js 作为我们的 web 框架,安装 Nodemon 作为开发依赖,用于监控文件变化并自动重启服务器。
npm install express
npm install --save-dev nodemon
- 创建 Express.js 服务器
在 server 文件夹中创建 index.js 入口文件。
// server/index.js
const express = require('express');
const path = require('path');
const postsRouter = require('./routes/posts');

const app = express();
const PORT = process.env.PORT || 3000;

// 中间件
app.use(express.json());
app.use(express.urlencoded({ extended: true }));

// 路由
app.use('/api/posts', postsRouter);

// 启动服务器
app.listen(PORT, () => {
  console.log(`Server is running on http://localhost:${PORT}`);
});
- 创建路由文件
在 server/routes 文件夹中创建 posts.js 路由文件。
// server/routes/posts.js
const express = require('express');
const router = express.Router();

// 模拟的博客帖子数据
let posts = [
  { id: 1, title: 'First Post', content: 'This is the first post.' },
  { id: 2, title: 'Second Post', content: 'This is the second post.' }
];

// 获取所有博客帖子
router.get('/', (req, res) => {
  res.json(posts);
});

// 获取单个博客帖子
router.get('/:id', (req, res) => {
  const post = posts.find(p => p.id === parseInt(req.params.id));
  if (post) {
    res.json(post);
  } else {
    res.status(404).json({ message: 'Post not found' });
  }
});

// 创建新的博客帖子
router.post('/', (req, res) => {
  const newPost = {
    id: posts.length + 1,
    title: req.body.title,
    content: req.body.content
  };
  posts.push(newPost);
  res.status(201).json(newPost);
});

// 更新博客帖子
router.put('/:id', (req, res) => {
  const post = posts.find(p => p.id === parseInt(req.params.id));
  if (post) {
    post.title = req.body.title || post.title;
    post.content = req.body.content || post.content;
    res.json(post);
  } else {
    res.status(404).json({ message: 'Post not found' });
  }
});

// 删除博客帖子
router.delete('/:id', (req, res) => {
  posts = posts.filter(p => p.id !== parseInt(req.params.id));
  res.status(204).end();
});

module.exports = router;
- 更新 package.json 脚本
在 package.json 中更新脚本,以便在开发过程中使用 Nodemon 监控文件变化。
{
  "name": "blog-backend",
  "version": "1.0.0",
  "description": "A blog backend using Node.js and Express.js",
  "main": "server/index.js",
  "scripts": {
    "start": "node server/index.js",
    "dev": "nodemon server/index.js"
  },
  "dependencies": {
    "express": "^4.17.1"
  },
  "devDependencies": {
    "nodemon": "^2.0.7"
  }
}
- 运行项目
运行以下命令启动开发服务器:
npm run dev
通过以上步骤,我们已经创建了一个基本的博客后端项目,使用 Node.js 和 Express.js 提供 API 接口。这个后端支持获取、创建、更新和删除博客帖子。你可以在前端使用任何框架或工具与这个 API 进行交互。
a. 为这些 API 添加单元测试来验证其功能。
b. 增加用户认证和授权,以保护博客帖子数据。
3.postman测试
3.1 获取所有博客帖子
方法: GET
URL: http://localhost:3000/api/posts
点击 “Send” 按钮,你应该会看到类似下面的响应:
[
  { "id": 1, "title": "First Post", "content": "This is the first post." },
  { "id": 2, "title": "Second Post", "content": "This is the second post." }
]
3.2. 获取单个博客帖子
方法: GET
URL: http://localhost:3000/api/posts/1
点击 “Send” 按钮,你应该会看到类似下面的响应:
{ "id": 1, "title": "First Post", "content": "This is the first post." }
3.3. 创建新的博客帖子
方法: POST
URL: http://localhost:3000/api/posts
Body: 选择 raw 和 JSON,然后输入以下内容:
{
  "title": "New Post",
  "content": "This is a new post."
}
点击 “Send” 按钮,你应该会看到类似下面的响应:
{
  "id": 3,
  "title": "New Post",
  "content": "This is a new post."
}
3.4. 更新博客帖子
方法: PUT
URL: http://localhost:3000/api/posts/1
Body: 选择 raw 和 JSON,然后输入以下内容:
{
  "title": "Updated First Post",
  "content": "This is the updated first post."
}
点击 “Send” 按钮,你应该会看到类似下面的响应:
{
  "id": 1,
  "title": "Updated First Post",
  "content": "This is the updated first post."
}
3.5. 删除博客帖子
方法: DELETE
URL: http://localhost:3000/api/posts/1
点击 “Send” 按钮,你应该会看到类似下面的响应:
{}
你已经使用 Postman 成功地测试了这个博客 API 的所有基本功能,包括获取所有帖子、获取单个帖子、创建新帖子、更新帖子和删除帖子。
a. 在 API 请求中添加身份验证以保护博客内容。
b. 为 API 添加更多的功能,例如评论功能或者用户管理功能
前端
1. 项目初始化
- 创建一个新的 Vite 项目并选择 React 作为框架。
- 安装必要的依赖项。
2. 详细步骤
- 创建项目文件夹并初始化 Vite 项目
首先,创建项目文件夹并初始化 Vite 项目:
mkdir blog-frontend
cd blog-frontend
npm init vite@latest
选择 react 作为模板:
# Project name: blog-frontend
# Select a framework: react
# Select a variant: react
然后安装项目依赖:
cd blog-frontend
npm install
- 安装必要的依赖项
安装 Mantine、Tailwind CSS、Zustand、RxJS 和 Three.js:
npm install @mantine/core @mantine/hooks @emotion/react @emotion/styled zustand rxjs three
npm install -D tailwindcss postcss autoprefixer
npx tailwindcss init -p
npm install react-router-dom
- 配置 Tailwind CSS
编辑 tailwind.config.js 文件以包含所有文件:
/** @type {import('tailwindcss').Config} */
export default {
  content: [
    "./index.html",
    "./src/**/*.{js,ts,jsx,tsx}",
  ],
  theme: {
    extend: {},
  },
  plugins: [],
}
在 src 文件夹中创建 index.css 文件,并添加 Tailwind 的基本样式:
/* src/index.css */
@tailwind base;
@tailwind components;
@tailwind utilities;
确保在 main.jsx 中导入 index.css 文件:
// src/main.jsx
import React from 'react';
import ReactDOM from 'react-dom';
import './index.css';
import App from './App';

ReactDOM.render(
  <React.StrictMode>
    <App />
  </React.StrictMode>,
  document.getElementById('root')
);
- 创建主要组件和结构
在 src 文件夹中创建以下文件和文件夹结构:
src/
├── components/
│   ├── Header.jsx
│   ├── PostList.jsx
│   └── Post.jsx
├── hooks/
│   └── usePosts.js
├── pages/
│   ├── Home.jsx
│   └── PostDetail.jsx
├── App.jsx
└── main.jsx
App.jsx:
import React from 'react';
import { BrowserRouter as Router, Route, Routes } from 'react-router-dom';
import { MantineProvider } from '@mantine/core';
import Home from './pages/Home';
import PostDetail from './pages/PostDetail';
import Header from './components/Header';

function App() {
  return (
    <MantineProvider withGlobalStyles withNormalizeCSS>
      <Router>
        <Header />
        <Routes>
          <Route path="/" element={<Home />} />
          <Route path="/post/:id" element={<PostDetail />} />
        </Routes>
      </Router>
    </MantineProvider>
  );
}

export default App;
Header.jsx:
import React from 'react';
import { Link } from 'react-router-dom';

function Header() {
  return (
    <header className="bg-blue-600 p-4 text-white">
      <nav className="container mx-auto">
        <Link to="/" className="text-lg font-bold">My Blog</Link>
      </nav>
    </header>
  );
}

export default Header;
Home.jsx:
import React from 'react';
import PostList from '../components/PostList';

function Home() {
  return (
    <div className="container mx-auto p-4">
      <h1 className="text-3xl font-bold mb-4">Blog Posts</h1>
      <PostList />
    </div>
  );
}

export default Home;
PostDetail.jsx:
import React from 'react';
import { useParams } from 'react-router-dom';

function PostDetail() {
  const { id } = useParams();
  // Fetch post detail using id
  return (
    <div className="container mx-auto p-4">
      <h1 className="text-3xl font-bold mb-4">Post Detail</h1>
      {/* Render post detail here */}
    </div>
  );
}

export default PostDetail;
PostList.jsx:
import React from 'react';
import { Link } from 'react-router-dom';
import usePosts from '../hooks/usePosts';

function PostList() {
  const posts = usePosts();
  return (
    <div>
      {posts.map(post => (
        <div key={post.id} className="mb-4 p-4 border rounded">
          <h2 className="text-2xl font-bold">
            <Link to={`/post/${post.id}`}>{post.title}</Link>
          </h2>
          <p>{post.content}</p>
        </div>
      ))}
    </div>
  );
}

export default PostList;
usePosts.js:
import { useEffect, useState } from 'react';

function usePosts() {
  const [posts, setPosts] = useState([]);

  useEffect(() => {
    fetch('/api/posts')
      .then(response => response.json())
      .then(data => setPosts(data));
  }, []);

  return posts;
}

export default usePosts;
- 配置 Vite 代理
在 vite.config.js 文件中配置代理,以将 API 请求转发到后端服务器:
import { defineConfig } from 'vite';
import react from '@vitejs/plugin-react';

export default defineConfig({
  plugins: [react()],
  server: {
    proxy: {
      '/api': 'http://localhost:3000'
    }
  }
});
- 运行前端项目
在项目根目录下运行以下命令启动开发服务器:
npm run dev
通过以上步骤,我们已经创建了一个使用 React、Vite、Mantine、Tailwind CSS、Zustand、RxJS 和 Three.js 的博客前端。这个前端项目通过 Vite 开发服务器代理 API 请求,并与之前创建的 Node.js 和 Express.js 后端进行交互。
a. 在前端添加更多组件,例如博客详情页和评论功能。
b. 使用 Three.js 创建炫酷的 3D 动画效果,并将其集成到博客前端中。
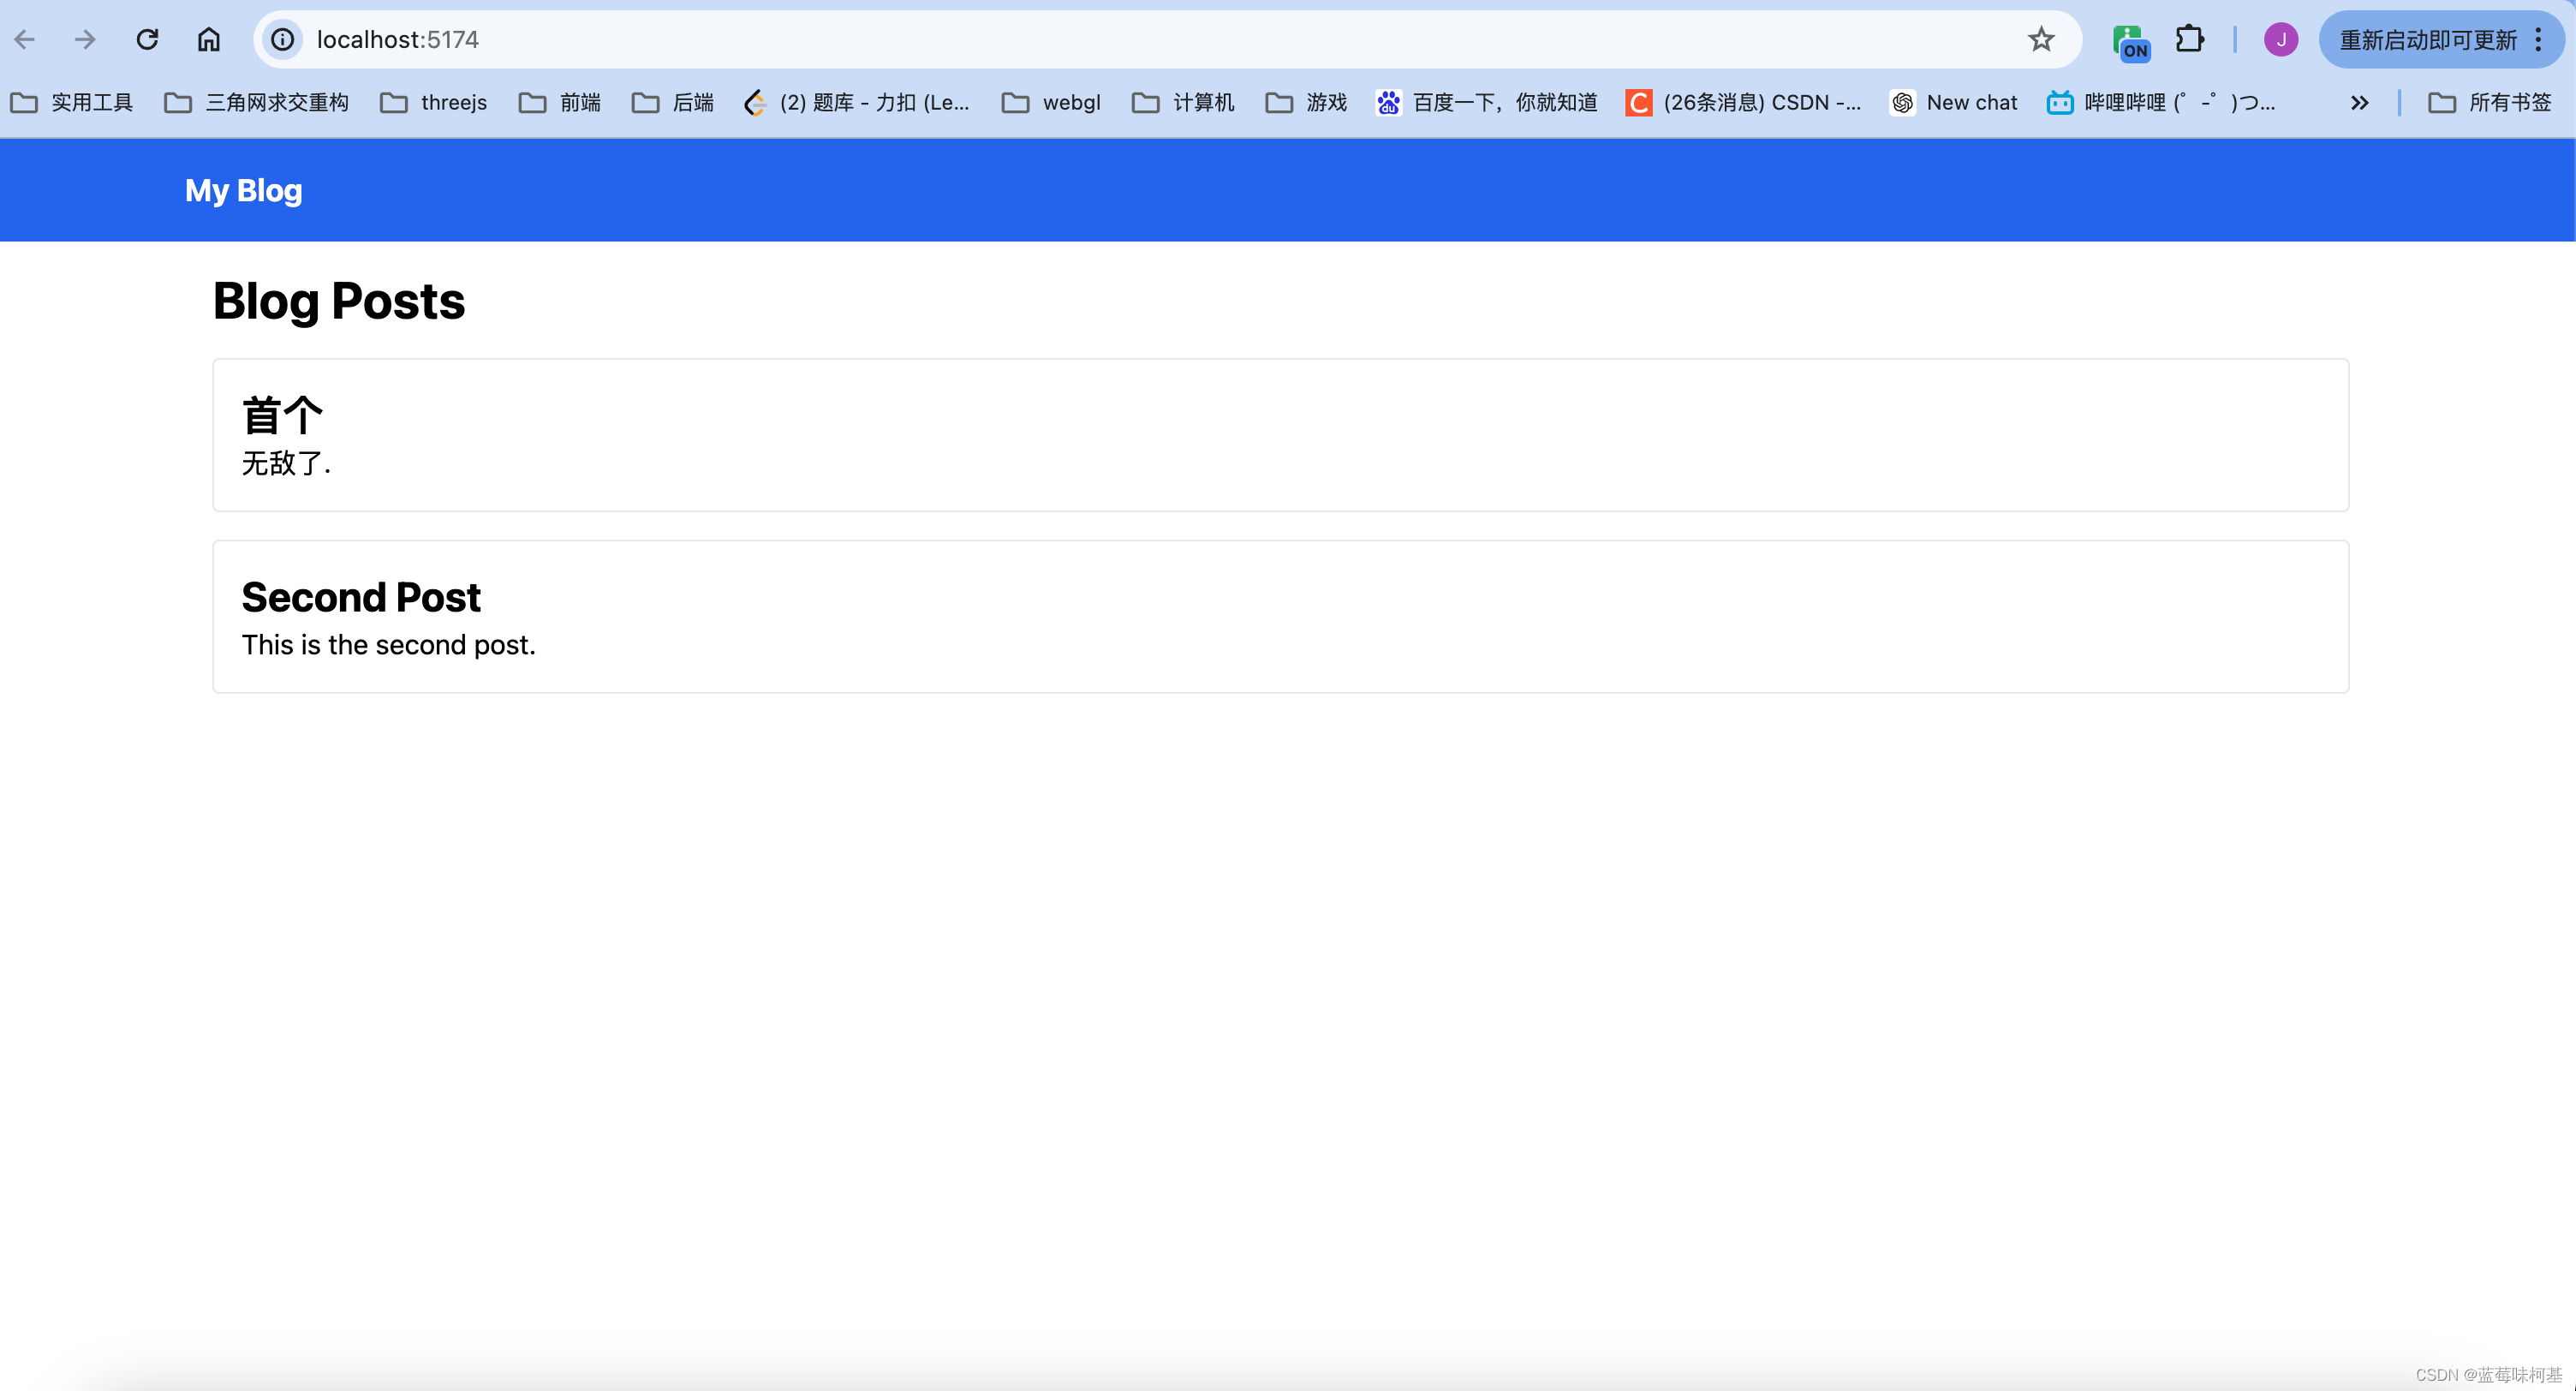
前后端都起起来,就可以在浏览器中访问前端页面了。
这一章主要是帮助小伙伴迅速起一个前后端分离的blog项目,后续可以自行diy。
后续我可能会继续更新自己的项目。


 484
484


 被折叠的 条评论
为什么被折叠?
被折叠的 条评论
为什么被折叠?
 到【灌水乐园】发言


