


前言
在上一章,我介绍了我现阶段对于U-net的理解,是粗浅也可能是不正确的理解。接下来我将介绍我使用U-net基于Camvid数据集的实战全过程和代码。

U-net网络代码(unet_model.py)
import torch
import torch.nn as nn
import torch.nn.functional as F


class DoubleConv(nn.Module):  #双层卷积模块
    def __init__(self,ch_in,ch_out):
        super(DoubleConv,self).__init__()
        self.double_conv= nn.Sequential(
            nn.Conv2d(ch_in,ch_out,kernel_size=3,padding=1),
            nn.BatchNorm2d(ch_out),
            nn.ReLU(inplace=True) , #inplace=True 表示原张量内存进行操作
            nn.Conv2d(ch_out,ch_out,kernel_size=3,padding=1),
            nn.BatchNorm2d(ch_out),
            nn.ReLU(inplace=True)
        )

    def forward(self,x):
        return self.double_conv(x)


class Down(nn.Module):  #双层卷积+最大值池化的下采样模块
    def __init__(self,ch_in,ch_out):
        super(Down,self).__init__()  #继承父类
        self.maxpool_conv =nn.Sequential(
            nn.MaxPool2d(kernel_size=2),
            DoubleConv(ch_in,ch_out)
        )
    def forward(self,x):
        return self.maxpool_conv(x)
"""
转置卷积:定义*表示卷积
  Y=C*X   :表示卷积核C卷积X得到 Y
  X=C'*Y  :C‘就是转置卷积核     就是用C’进行反向卷积操作,以实现图像分辨率的恢复
 """

class Up(nn.Module):  #转置卷积(逆卷积)上采样和双层卷积操作
    def __init__(self,ch_in,ch_out):
        super(Up,self).__init__()
        self.up = nn.ConvTranspose2d(ch_in,ch_in//2,kernel_size=2,stride=2)  #对x1进行运算通道数是x2的一半
        self.conv =DoubleConv(ch_in,ch_out)

    def forward(self,x1,x2):
        x1= self.up(x1)                                  #x1 [batch,ch,h,w]

        diffY=torch.tensor([x2.size()[2]-x1.size()[2]])  #计算x1与x2的高度h差
        diffX=torch.tensor(x2.size()[3]-x1.size()[3])    #计算x1与x2的宽度w差
        # x2 =x2[:,:,diffY//2:x1.size()[2]+diffY//2,diffX//2:x1.size()[3]+diffX//2] #裁剪x2操作
        x1 = F.pad(x1, [diffX // 2, diffX - diffX // 2,    #填充x1操作
                        diffY // 2, diffY - diffY // 2])


        x= torch.cat([x2,x1],dim=1)  #将两个图片在通道维度上进行拼接 拼接后通道数翻倍
        return  self.conv(x)                #最后进行双层卷积运算并返回


class OutConv(nn.Module):  #最后输出使用1*1的卷积核进行卷积
    def __init__(self, in_channels, out_channels):
        super(OutConv, self).__init__()
        self.conv = nn.Conv2d(in_channels, out_channels, kernel_size=1)

    def forward(self, x):
        return self.conv(x)


class UNet(nn.Module):
    def __init__(self,ch_in,n_classes):
        super(UNet,self).__init__()

        self.inc =DoubleConv(ch_in,64)
        self.down1= Down(64,128)
        self.down2= Down(128,256)
        self.down3= Down(256,512)
        self.down4= Down(512,1024)


        self.up1=Up(1024,512)
        self.up2=Up(512,256)
        self.up3=Up(256,128)
        self.up4=Up(128,64)

        self.outc =OutConv(64,n_classes)

    def forward(self,x):
        x1=self.inc(x)
        x2=self.down1(x1)
        x3=self.down2(x2)
        x4=self.down3(x3)
        x5=self.down4(x4)
        x =self.up1(x5,x4)
        x = self.up2(x,x3)
        x = self.up3(x,x2)
        x = self.up4(x, x1)
        x = self.outc(x)
        return  x


if __name__ == '__main__':
    temp = torch.randn([2,3,512,512])
    net=UNet(3,1)
    out= net(temp)
    print("out shape",out.shape)
Camvid数据集获取
Camvid数据集是剑桥大学的街景,有32种语义信息,用于语义分割用的数据集。数据集有367张训练集,101张验证集,233张测试集。可以从Kaggle网站上获取该数据集。这个是获取数据集的网址。
CamVid (Cambridge-Driving Labeled Video Database) | Kaggle
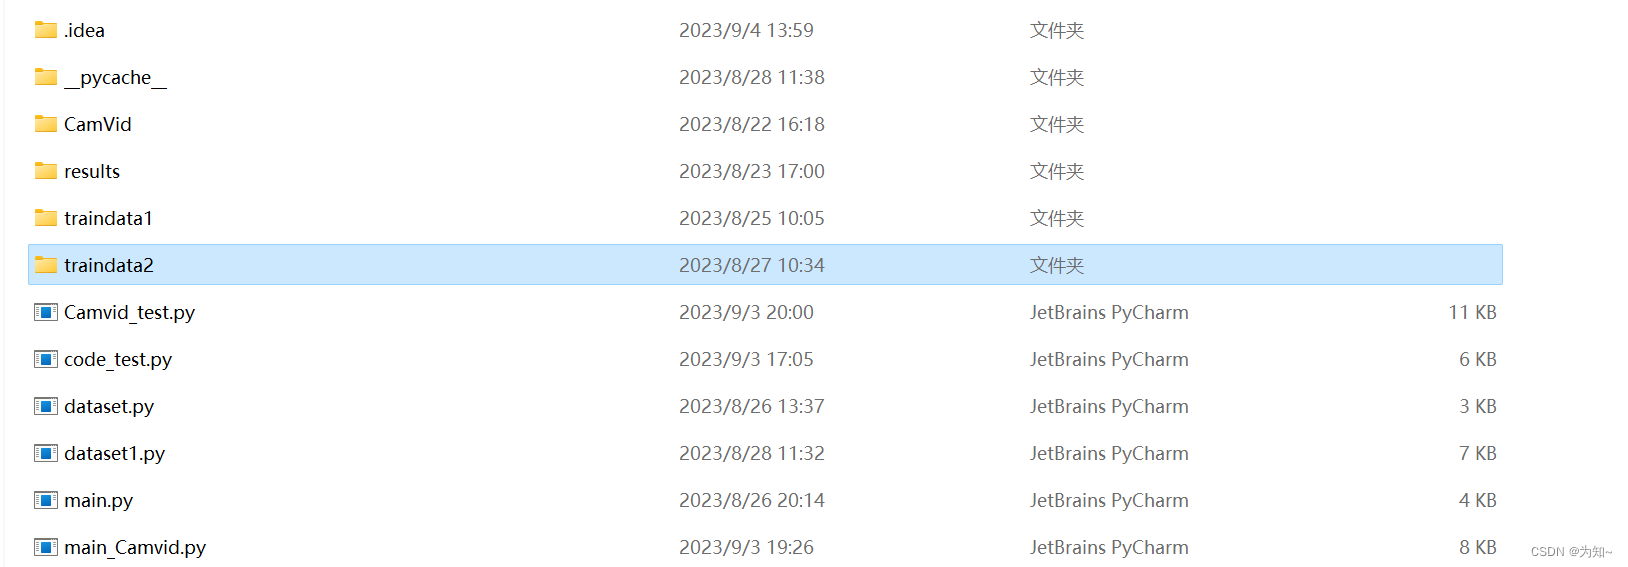
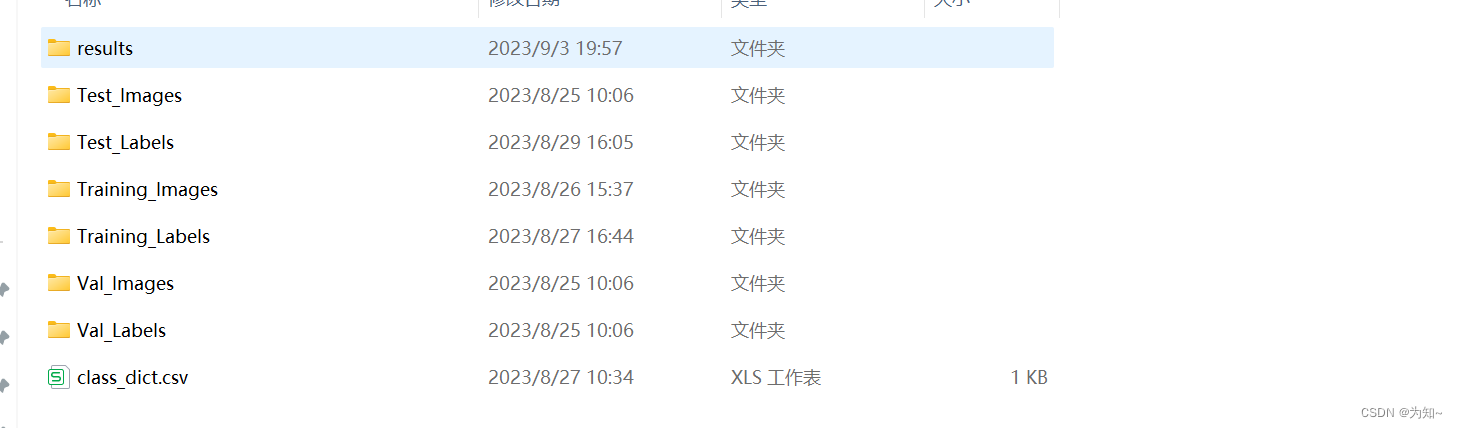
本工程中放在traindata2的文件夹下,并对一些文件进行重命名如下图所示。新建results文件夹用于放置生成的图片文件。
自定义数据集加载类(继承Dataset类)(dataset1.py)
数据集的加载类实现:图像大小的resize,
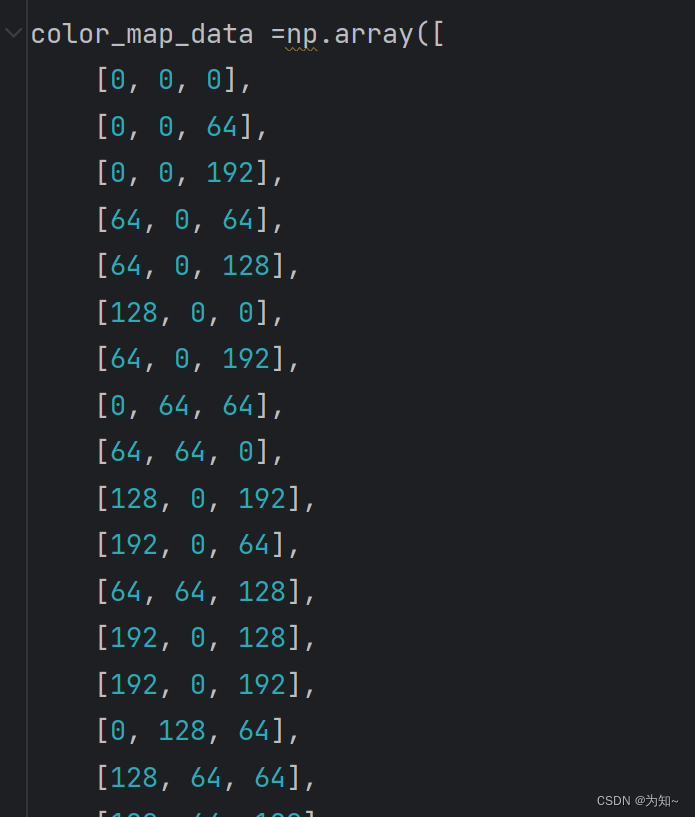
对于label,根据class_dict表格中的像素RGB取值对label的取值对label图片进行转换[512,512,3]转为[512,512],按如图所示RGB颜色顺序标记label像素点取值从0-31,和表格中顺序不同。
对于image将JPG的通道顺序进行转换,[h,w,ch]->[ch,h,w]。
废话不多说,直接上代码,
import torch
import cv2
import os
import glob
from torch.utils.data import Dataset
from torch.utils.data import DataLoader
import matplotlib.pyplot as plt
import random
import numpy as np

color_map_data =np.array([
    [0, 0, 0],
    [0, 0, 64],
    [0, 0, 192],
    [64, 0, 64],
    [64, 0, 128],
    [128, 0, 0],
    [64, 0, 192],
    [0, 64, 64],
    [64, 64, 0],
    [128, 0, 192],
    [192, 0, 64],
    [64, 64, 128],
    [192, 0, 128],
    [192, 0, 192],
    [0, 128, 64],
    [128, 64, 64],
    [128, 64, 128],
    [0, 128, 192],
    [64, 128, 64],
    [192, 64, 128],
    [128, 128, 0],
    [64, 128, 192],
    [128, 128, 64],
    [128, 128, 128],
    [64, 192, 0],
    [128, 128, 192],
    [192, 128, 64],
    [64, 192, 128],
    [192, 128, 128],
    [192, 128, 192],
    [192, 192, 0],
    [192, 192, 128]
])

class Val_Loader(Dataset):
    """
        以下的            是自定义数据集类的一个套路   这些称为定义数据集类所用到的特殊方法
        __init__
        __getitem__
        __len__
    """
    def __init__(self,data_path,num_classes):
        super(Val_Loader,self).__init__()   #继承父类
        self.data_path =data_path   # 定义属性(变量)
        self.imgs_path =glob.glob(os.path.join(data_path,'Val_Images/*.png'))
        self.labels_path = glob.glob(os.path.join(self.data_path, 'Val_Labels/*.png'))
        self.num_classes=num_classes
                                #glob.glob实现返回所有满足  data_path/Training_Images/*.jpg的路径列表
                                #注意imgs_path是路径的列表不是图片的列表
    def __getitem__(self, item):
        image_path= self.imgs_path[item]
        label_path=self.labels_path[item]
        #获取label的路径列表

        image=cv2.imread(image_path)
        label=cv2.imread(label_path)

        image =cv2.resize(image,dsize=(512,512),interpolation=cv2.INTER_NEAREST)#使用邻近插值的办法调整图片大小
        label =cv2.resize(label,dsize=(512,512),interpolation=cv2.INTER_NEAREST)#使用邻近插值的办法调整图片大小
        #注意cv2的函数这里,dsize是(w,h),有点区别,不过这里宽高一样就没有歧义
        image = cv2.cvtColor(image, cv2.COLOR_BGR2RGB) #将BGR格式转RGB格式
        label = cv2.cvtColor(label, cv2.COLOR_BGR2RGB)  # 将BGR格式转RGB格式

        # 根据color_map_data,RGB值,映射[512,512,3]=>[512,512]
        label_reg = np.zeros((512, 512), dtype=np.uint8)
        for index in range(color_map_data.shape[0]):   #遍历32种RGB颜色
            indice= np.where(np.all(label==color_map_data[index],axis=2))  #训练label与对应RGB颜色相同的索引
            label_reg[indice]=index    #对于与color_map_data[index]相同的索引位置像素值设置为index
        label=label_reg  #这样就得到一个[512,512]的标签, 标签的元素取值范围为0-31的整数,对应32种类别物体


        image =image.transpose(2,0,1)#因为对于JPG等图片转RGB图,[h,w,ch]通道维度是在最后,最要把通道维度提前才符合[ch,h,w]
        #对于灰度图 label [h,w] 需要将它转成[1,h,w]
        label = label.reshape(1,label.shape[0],label.shape[1])

        return  image,label

    def __len__(self):     #以便加载数据集时,dataloader获得数据集长度,来获知迭代次数
        return len(self.imgs_path)
class ISBI_Loader(Dataset):
    """
        以下的            是自定义数据集类的一个套路   这些称为定义数据集类所用到的特殊方法
        __init__
        __getitem__
        __len__
    """
    def __init__(self,data_path,num_classes):
        super(ISBI_Loader,self).__init__()   #继承父类
        self.data_path =data_path   # 定义属性(变量)
        self.imgs_path =glob.glob(os.path.join(data_path,'Training_Images/*.png'))
        self.labels_path = glob.glob(os.path.join(self.data_path, 'Training_Labels/*.png'))
        self.num_classes=num_classes
                                #glob.glob实现返回所有满足  data_path/Training_Images/*.jpg的路径列表
                                #注意imgs_path是路径的列表不是图片的列表
    def __getitem__(self, item):
        image_path= self.imgs_path[item]
        label_path=self.labels_path[item]
        #获取label的路径列表

        image=cv2.imread(image_path)
        label=cv2.imread(label_path)

        image =cv2.resize(image,dsize=(512,512),interpolation=cv2.INTER_NEAREST)#使用邻近插值的办法调整图片大小
        label =cv2.resize(label,dsize=(512,512),interpolation=cv2.INTER_NEAREST)#使用邻近插值的办法调整图片大小
        #注意cv2的函数这里,dsize是(w,h),有点区别,不过这里宽高一样就没有歧义
        image = cv2.cvtColor(image, cv2.COLOR_BGR2RGB) #将BGR格式转RGB格式
        label = cv2.cvtColor(label, cv2.COLOR_BGR2RGB)  # 将BGR格式转RGB格式
        label_reg = np.zeros((512, 512), dtype=np.uint8)

        for index in range(color_map_data.shape[0]):
            indice= np.where(np.all(label==color_map_data[index],axis=2))
            label_reg[indice]=index
        label=label_reg
        image =image.transpose(2,0,1)#因为对于JPG等图片转RGB图,[h,w,ch]通道维度是在最后,最要把通道维度提前才符合[ch,h,w]
        #对于灰度图 label [h,w] 需要将它转成[1,h,w]
        label = label.reshape(1,label.shape[0],label.shape[1])

        return  image,label

    def __len__(self):     #以便加载数据集时,dataloader获得数据集长度,来获知迭代次数
        return len(self.imgs_path)

batch_size=10
if __name__ == "__main__":    #测试

    num_classes=32
    isbi_dataset= ISBI_Loader("traindata2/",num_classes=num_classes)
    plt.show()
    train_loader = DataLoader(dataset=isbi_dataset,batch_size=batch_size,shuffle=False)
    x,label =iter(train_loader).__next__()
    #显示label
    label=label[0].view(512,512)  #取第一张图 [1,512,512]=>[512,512]
    print(label)

    flattened_array = label.flatten()

    # Get the unique pixel values
    unique_pixel_values = np.unique(flattened_array)
    print(unique_pixel_values)

    # Print the number of unique pixel value classes
    num_classes = len(unique_pixel_values)
    print(f"The tensor array has {num_classes} unique pixel value classes.")
    plt.figure()
    plt.imshow(label,cmap='gray',vmin=0,vmax=num_classes)  #0 1是像素值范围


    #显示image
    image_rgb=x.permute(0,2,3,1)  #将RGB通道置后
    plt.figure()
    plt.imshow(image_rgb[0])
    plt.axis('off')  # 不显示坐标轴
    plt.show()
训练主函数(main_Camvid.py)
训练损失采用交叉熵来训练,交叉熵是可以设置对于不同类别的权重,因为有的类别面积大,损失是按像素计算损失累计的,所以为提高MIOU,可以适当设置权重,但本文对于不同权重都设置为1。优化器这里选择adam优化器。
训练过程中总结,训练的过程往往需要根据当前损失设置合适的学习率,一个是提高训练速度,学习率设置太大会难以毕竟最优解,学习率设置太小也有可能在局部最优解波动导致无法逼近最优解需要根据经验取总结,在训练过程中手动或者编写自动调整学习率代码。本文中学习固定
import numpy as np
from collections import Counter
from unet_model import UNet
import  torch
from dataset1 import  ISBI_Loader,Val_Loader
from torch.utils.data import DataLoader
from torch import  nn,optim
import torch.nn.functional as F
from tqdm import tqdm
from torch.optim.lr_scheduler import StepLR
import matplotlib.pyplot as plt
data_path = "traindata2/" # todo 修改为你本地的数据集位置

batch_size=3
epochs=40
lr = 0.0002
num_classes=32

if torch.cuda.is_available():
    device = torch.device('cuda')
    print('cuda working')
else:
    device = torch.device('cpu')
    print('cpu working')

def CE_Loss(inputs, target, cls_weights, num_classes=21):
    n, c, h, w = inputs.size()
    #[b,32,h,w]->[b,h,w,32]  #.contiguous()保证张量所处内存的连续性,并且打平成[像素点数,32]的形式
    temp_inputs = inputs.transpose(1, 2).transpose(2, 3).contiguous().view(-1, c)
    #[b,1,32,32]->[b,32,32]->[b*32*32]
    temp_target = target.squeeze(dim=1).view(-1)
    CE_loss  = nn.CrossEntropyLoss(ignore_index=num_classes,weight=cls_weights)(temp_inputs, temp_target.to(dtype=torch.int64)).to(device)
    return CE_loss

if __name__ == "__main__":
    cls_weights = np.ones([num_classes], np.float32)  #设置对于不同分辨率的权重
    weights = torch.from_numpy(cls_weights).to(device)
    #加载Unet网络
    net= UNet(ch_in=3,n_classes=num_classes)
    #有需要可以加载预训练网络进行训练
    #net.load_state_dict(torch.load('unet32_3.pth', map_location=device))
    net.to(device=device)
    print("net model:",net)
    total_params = sum(p.numel() for p in net.parameters())
    print(f"总参数数量: {total_params}")

    #加载训练集
    isbi_dataset= ISBI_Loader(data_path,num_classes=num_classes)
    train_loader= DataLoader(isbi_dataset,batch_size=batch_size,shuffle=True)
    val_dataset = Val_Loader(data_path, num_classes=num_classes)
    val_loader  = DataLoader(val_dataset,batch_size=batch_size,shuffle=True)

    #定义优化算法 如有 SGD ADAM RMSprop adagrad等
    decay_step_size = 10  # 学习率衰减的步数
    decay_factor = 0.9  # 学习率衰减因子
    optimizer =optim.Adam(net.parameters(),lr=lr,weight_decay=1e-8)
    scheduler = StepLR(optimizer, step_size=decay_step_size, gamma=decay_factor)

    # 最佳损失开始时设置为正无穷
    best_loss =float('inf')
    per_epoch_num = len(isbi_dataset) / batch_size  #计算迭代次数,这里按照一个batch_size为迭代一次,所以要除batch_size
    # 创建空的损失列表
    val_losses = []
    train_losses=[]
    # 创建一个初始的空图表

    fig, ax = plt.subplots()


    with tqdm(total=epochs*per_epoch_num) as pbar:   #用于创建进度条,进度满数值为total,这里pbar是对进度条对象引用,
                                                   #后面通过pbar.update(1)更新进度条
        for epoch in range(epochs):
            #设置训练模式 养成好习惯
            net.train()
            ava_train_loss=0
            total_train_loss=0
            batch_num = 0
            for image,label in train_loader:
                image =image.to(device,dtype=torch.float32)  #pytorch框架的一些计算一般是float变量的运算
                label =label.to(device,dtype=torch.float32)  #这里有时候不是用float形变量会报错
                #将image放入网络
                pred= net(image)#[b,32,h,w]
                #计算loss
                loss=CE_Loss(pred,label,weights,num_classes)
                total_train_loss+=loss.detach().item()#计算累计损失
                batch_num+=1
                #更新网络参数
                optimizer.zero_grad()  #计算梯度信息前,记得清零梯度信息,不然梯度信息计算是累计的
                loss.backward()     #计算梯度信息
                optimizer.step()   #更新优化器
                pbar.update(1)     #更新进度条进度条数值+1

            ava_train_loss=total_train_loss/batch_num
            print("train_loss",ava_train_loss)
            train_losses.append(ava_train_loss)
            net.eval()
            ava_loss=0
            total_loss=0
            total_num = 0
            with torch.no_grad():
                for image,label in val_loader:
                    image = image.to(device, dtype=torch.float32)  # pytorch框架的一些计算一般是float变量的运算
                    label = label.to(device, dtype=torch.float32)  # 这里有时候不是用float形变量会报错
                    # 将image放入网络
                    pred = net(image)
                    loss = CE_Loss(pred, label, weights, num_classes)
                    total_loss+=loss
                    total_num+=1
                ava_loss=total_loss/total_num

                if(ava_loss<best_loss):
                    best_loss=ava_loss
                    torch.save(net.state_dict(), 'unet32.pth')
                # 添加损失到列表

                val_losses.append(ava_loss.cpu().item())   #因为绘图时转换losses为numpy数组,需要cpu上才能转换losses为numpy数组
                # 清除原图
                ax.clear()
                # 绘制损失曲线
                # 绘制第一个损失曲线(红色,带圆点)
                ax.plot(range(1, epoch + 2), val_losses, marker='o', linestyle='-', color='red', label='val_losses')

                # 绘制第二个损失曲线(蓝色,带正方形)
                ax.plot(range(1, epoch + 2), train_losses, marker='s', linestyle='--', color='blue', label='train_losses')
                # 添加标题
                ax.set_title(f'lr:{lr}')
                # 添加图例
                ax.legend()
                # 设置X轴和Y轴标签
                ax.set_xlabel('Epoch')
                ax.set_ylabel('Loss')
                # 保存图片
                plt.savefig('results/loss_plot.png')

                print("best val ava_loss:", best_loss.item())
                print("val ava_loss:", ava_loss.item())
测试集验证(camvid_test.py)
测试集验证这里涉及计算accuracy和miou。
import os
from utils_metrics import compute_mIoU
import numpy as np
import torch
from unet_model import  UNet
import cv2
from tqdm import tqdm

import numpy as np

from torchmetrics import Accuracy,Precision,Recall
from PIL import Image
from os.path import join


def calculate_iou_per_class(predictions, targets, num_classes):
    """
    Calculate IoU for each class and return a list of IoU values.

    Args:
        predictions (Tensor): Predicted label tensor.
        targets (Tensor): True label tensor.
        num_classes (int): Number of classes.

    Returns:
        class_ious (list): List of IoU values for each class.
    """
    class_ious = []
    for class_idx in range(num_classes):
        class_mask_pred = (predictions == class_idx)
        class_mask_target = (targets == class_idx)
        intersection = torch.logical_and(class_mask_pred, class_mask_target).sum()
        union = torch.logical_or(class_mask_pred, class_mask_target).sum()

        if union == 0:
            class_iou = 0.0
        else:
            class_iou = float(intersection) / float(union)

        class_ious.append(class_iou)

    return class_ious


def calculate_mean_iou(class_ious):
    """
    Calculate the mean IoU from a list of class IoU values.

    Args:
        class_ious (list): List of IoU values for each class.

    Returns:
        mean_iou (float): Mean IoU value.
    """
    my_array = np.array(class_ious)
    non_zero_elements = my_array[my_array != 0]
    mean_iou = np.mean(non_zero_elements) if len(non_zero_elements) > 0 else 0
    return mean_iou


if __name__ == "__main__":

    # 定义颜色映射数据
    color_map_data = np.array([
        [0, 0, 0],
        [0, 0, 64],
        [0, 0, 192],
        [64, 0, 64],
        [64, 0, 128],
        [128, 0, 0],
        [64, 0, 192],
        [0, 64, 64],
        [64, 64, 0],
        [128, 0, 192],
        [192, 0, 64],
        [64, 64, 128],
        [192, 0, 128],
        [192, 0, 192],
        [0, 128, 64],
        [128, 64, 64],
        [128, 64, 128],
        [0, 128, 192],
        [64, 128, 64],
        [192, 64, 128],
        [128, 128, 0],
        [64, 128, 192],
        [128, 128, 64],
        [128, 128, 128],
        [64, 192, 0],
        [128, 128, 192],
        [192, 128, 64],
        [64, 192, 128],
        [192, 128, 128],
        [192, 128, 192],
        [192, 192, 0],
        [192, 192, 128]
    ])

    color_tensor = torch.tensor(color_map_data, dtype=torch.uint8)


    test_dir = "traindata2/Test_Images"
    pred_dir = "traindata2/results"
    gt_dir = "traindata2/Test_Labels"

    num_classes = 32  # 定义分类的数量
    print("load model.")
    device = torch.device('cuda' if torch.cuda.is_available() else 'cpu')
    # 导入模型
    net= UNet(ch_in=3,n_classes=num_classes)
    net.to(device=device)
    # 加载模型参数,并且把模型加载到GPU
    net.load_state_dict(torch.load('unet32.pth', map_location=device))
    # 设置验证模式
    net.eval()
    img_names = os.listdir(test_dir)  # 获取文件目录下文件名称,返回一个文件名的列表
    image_ids = [image_name.split(".")[0] for image_name in img_names]  #遍历所有img_name的图片名字
                                      #以'.'作为分割,从一列分割成两列,并取第一列
    for image_id in tqdm(image_ids):  #遍历所有image_id,获取图片
        image_path = os.path.join(test_dir,image_id+".png")
        img= cv2.imread(image_path)
        if img is not None:  # 如果img不是不存在(存在)获取img的shape
            origin_shape = img.shape
        else:
            print(f"Failed to read image{image_path}")

        img = cv2.resize(img, dsize=(512, 512), interpolation=cv2.INTER_NEAREST)
        img = cv2.cvtColor(img, cv2.COLOR_BGR2RGB)  # BGR转RGB其实转不转这个其实都一样,主要为了有时候cv2显示要用RGB
        img = np.transpose(img, (2, 0, 1))  # 这里img还是numpy格式的 从[h,w,ch]=>[ch,h,w]
        img = img.reshape(1, 3, img.shape[1], img.shape[2])  # reshape 变成[batch,ch,h,w]
        img_tensor = torch.from_numpy(img).to(device=device, dtype=torch.float32)  # 转成tensor格式
        # 预测
        pred = net(img_tensor)
        pred_np = pred.detach().cpu().numpy()
        pred_np =np.transpose(pred_np,(0,2,3,1)) #[b,32,h,w]->[b,h,w,32]
        pred = np.argmax(pred_np,axis=3)#获取32个通道中数值最大的通道[b,h,w,32]->[b,h,w]
        pred = pred[0]   #[b=1,h,w]->[h,w]  这时候pred和标签lable格式是一样的[h,w]取值0-31
        # 将每个类别的通道映射为对应的颜色
        pred = color_tensor[pred].cpu().numpy()#根据索引值[h,w]->[h,w,3]
        #恢复原图大小
        pred = cv2.resize(pred,(origin_shape[1],origin_shape[0]),interpolation=cv2.INTER_NEAREST)
        pred = cv2.cvtColor(pred, cv2.COLOR_RGB2BGR)#RGB转BGR格式,不然图片颜色是R B是反的
        #将图片以png格式写到预测文件夹下
        cv2.imwrite(os.path.join(pred_dir,image_id+".png"),pred)


    #########################################################################
    #此时所有预测图已经写到results文件下,这时分别读取label和pred图计算accuracy和miou#
    #########################################################################
    gt_imgs = [join(gt_dir, x + "_L.png") for x in image_ids]  # 将路径与名字进行拼接得到路径列表
    pred_imgs = [join(pred_dir, x + ".png") for x in image_ids]
    total_accu = 0
    numc = 0
    total_miou=0
    accuracy = Accuracy(task='multiclass', num_classes=num_classes, average='micro')#初始化Accuracy类
    #采用改变分辨率计算和采用原图大小计算结果差不多,0.0001偏差,改变分辨率计算会快些。
    h=512
    w=512
    # h=origin_shape[0]     采用原图分辨率计算,需要将下面resize注释掉
    # w=origin_shape[1]
    for ind in range(len(gt_imgs)):
        pred = cv2.imread(pred_imgs[ind])
        label = cv2.imread(gt_imgs[ind])
        pred = cv2.cvtColor(pred, cv2.COLOR_BGR2RGB)  # 将BGR格式转RGB格式
        label = cv2.cvtColor(label, cv2.COLOR_BGR2RGB)  # 将BGR格式转RGB格式
        pred =cv2.resize(pred,dsize=(512,512),interpolation=cv2.INTER_NEAREST)#使用邻近插值的办法调整图片大小
        label =cv2.resize(label,dsize=(512,512),interpolation=cv2.INTER_NEAREST)#使用邻近插值的办法调整图片大小

        # 根据color_map_data,RGB值,映射[h,w,3]=>[h,w]
        pred_reg = np.zeros((h, w), dtype=np.uint8)
        for index in range(color_map_data.shape[0]):   #遍历32种RGB颜色
            indice= np.where(np.all(pred==color_map_data[index],axis=2))  #训练label与对应RGB颜色相同的索引
            pred_reg[indice]=index    #对于与color_map_data[index]相同的索引位置像素值设置为index
        pred=pred_reg  #这样就得到一个[h,w]的预测标签, 标签的元素取值范围为0-31的整数,对应32种类别物体

        label_reg = np.zeros((h, w), dtype=np.uint8)

        for index in range(color_map_data.shape[0]):   #遍历32种RGB颜色
            indice= np.where(np.all(label==color_map_data[index],axis=2))  #训练label与对应RGB颜色相同的索引
            label_reg[indice]=index    #对于与color_map_data[index]相同的索引位置像素值设置为index
        label=label_reg  #这样就得到一个[h,w]的标签, 标签的元素取值范围为0-31的整数,对应32种类别物体

        flattened_array = label.flatten()
        # Get the unique pixel values  获取label存在类别取值
        unique_pixel_values = np.unique(flattened_array)
        # print(unique_pixel_values)
        num = len(unique_pixel_values)
        # print(f"The tensor array has {num} unique pixel value classes.")
        #tensor->numpy
        label =torch.from_numpy(label)
        pred = torch.from_numpy(pred)
        class_ious = calculate_iou_per_class(pred, label, num_classes)#计算每一类的交并比 [32]的小的数组
                                                                #该类正确像素数量/该类正确像素数量+错误像素数量
        mean_iou = np.array(class_ious)[unique_pixel_values]    #由于有的类label是不存在IOU为0,这里只取存在类别的IOU
        mean_iou = np.mean(mean_iou)                #计算存在类别的平均IOU
        accu_reg = accuracy(pred, label)
        total_miou += mean_iou            #计算将所有图片MIOU累加,最后取平均
        total_accu += accu_reg            #计算将所有图片ACCURACY累加,最后取平均

    ava_accu = total_accu / (len(gt_imgs))
    ava_miou  = total_miou/(len(gt_imgs))
    print("ava_accu:", ava_accu)
    print("ava_miou:", ava_miou)
结果分析
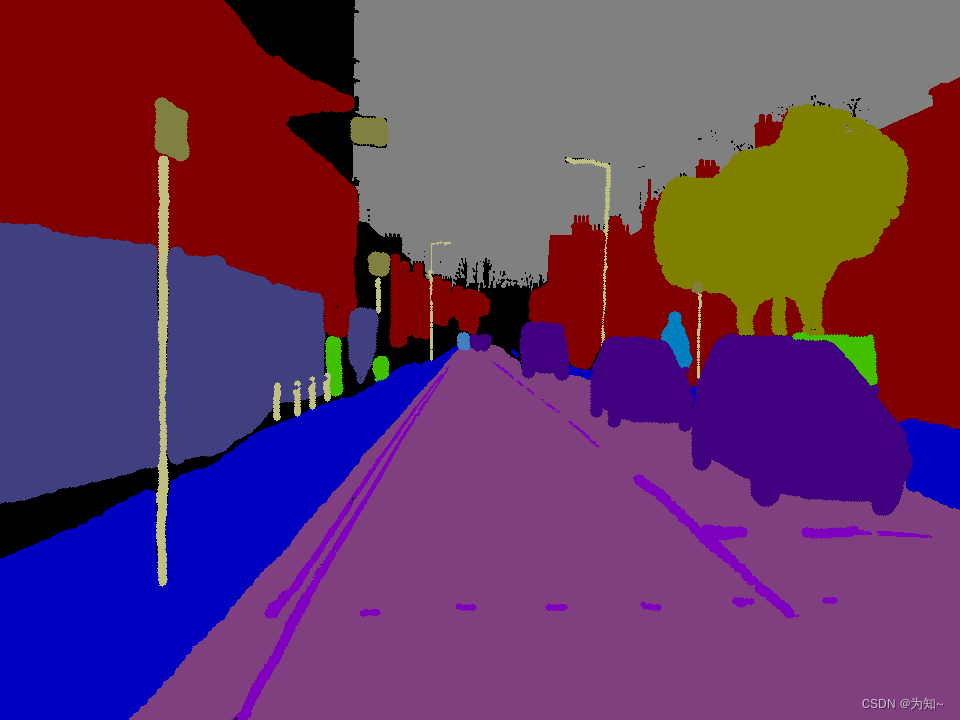
真实标签
 l
l
预测
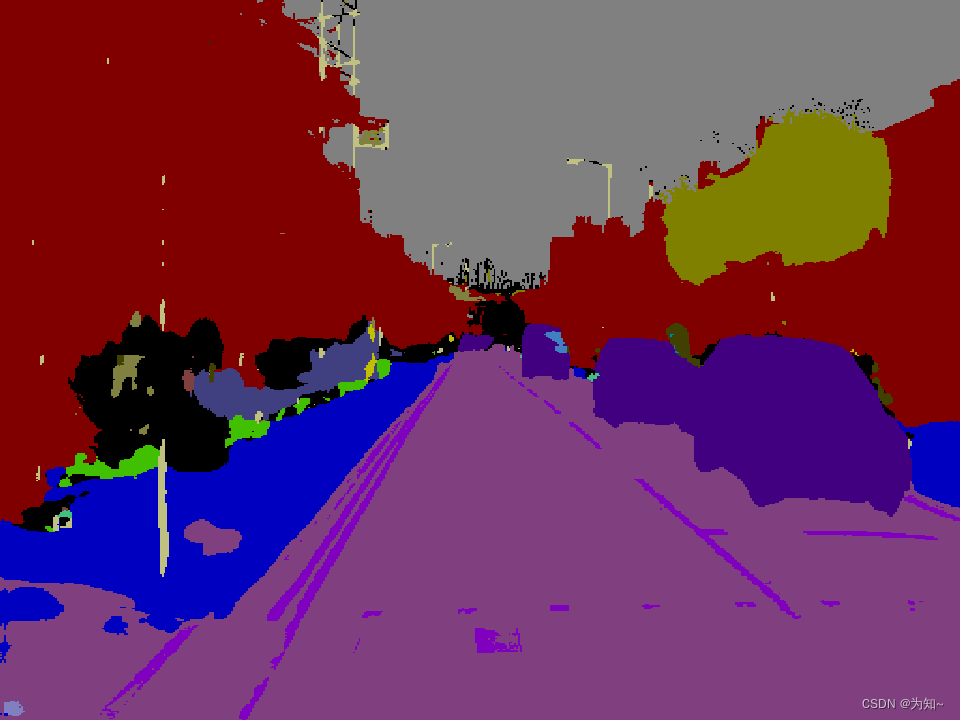
目前效果还是比较差的,不过还有进一步训练的空间。


 被折叠的 条评论
为什么被折叠?
被折叠的 条评论
为什么被折叠?
 到【灌水乐园】发言


