


 本文介绍了如何使用命令行和VisualStudio创建Avalonia应用程序,包括下载模板、新建项目并运行。在VisualStudio中安装Avalonia扩展,并展示了.axaml文件的结构,强调了MVVM模式和数据绑定的概念。此外,文章还概述了Avalonia的组件如控件、输入系统、布局和数据绑定机制。
1、使用Avalonia生成一个窗口
步骤1:下载Avalonia的模板
dotnet new install Avalonia.Templates步骤二:创建一个新的名为MyApp的应用程序
dotnet new avalonia.app -o MyApp步骤三:导航到MyApp并运行
cd MyApp
dotnet run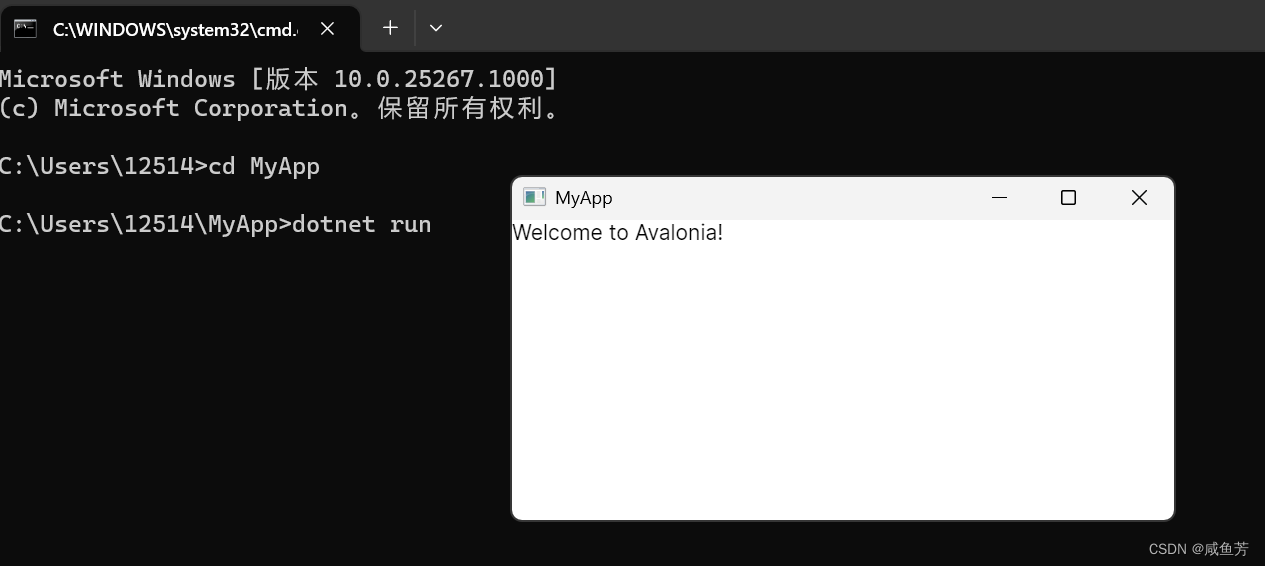
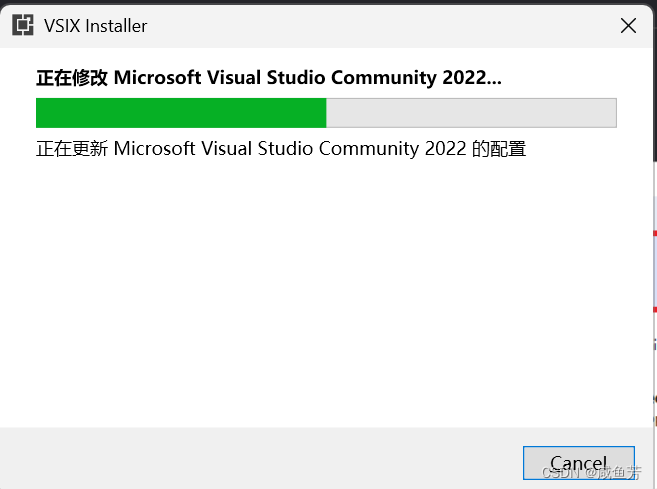
2、在Visual Studio中安装Avalonia的扩展
工具:Visual Studio2022
.net版本:.net7.0.201
步骤一:安装avalonia的扩展
点击vs2022中的扩展->搜索avalonia->下载->关闭Visual Studio会自动安装
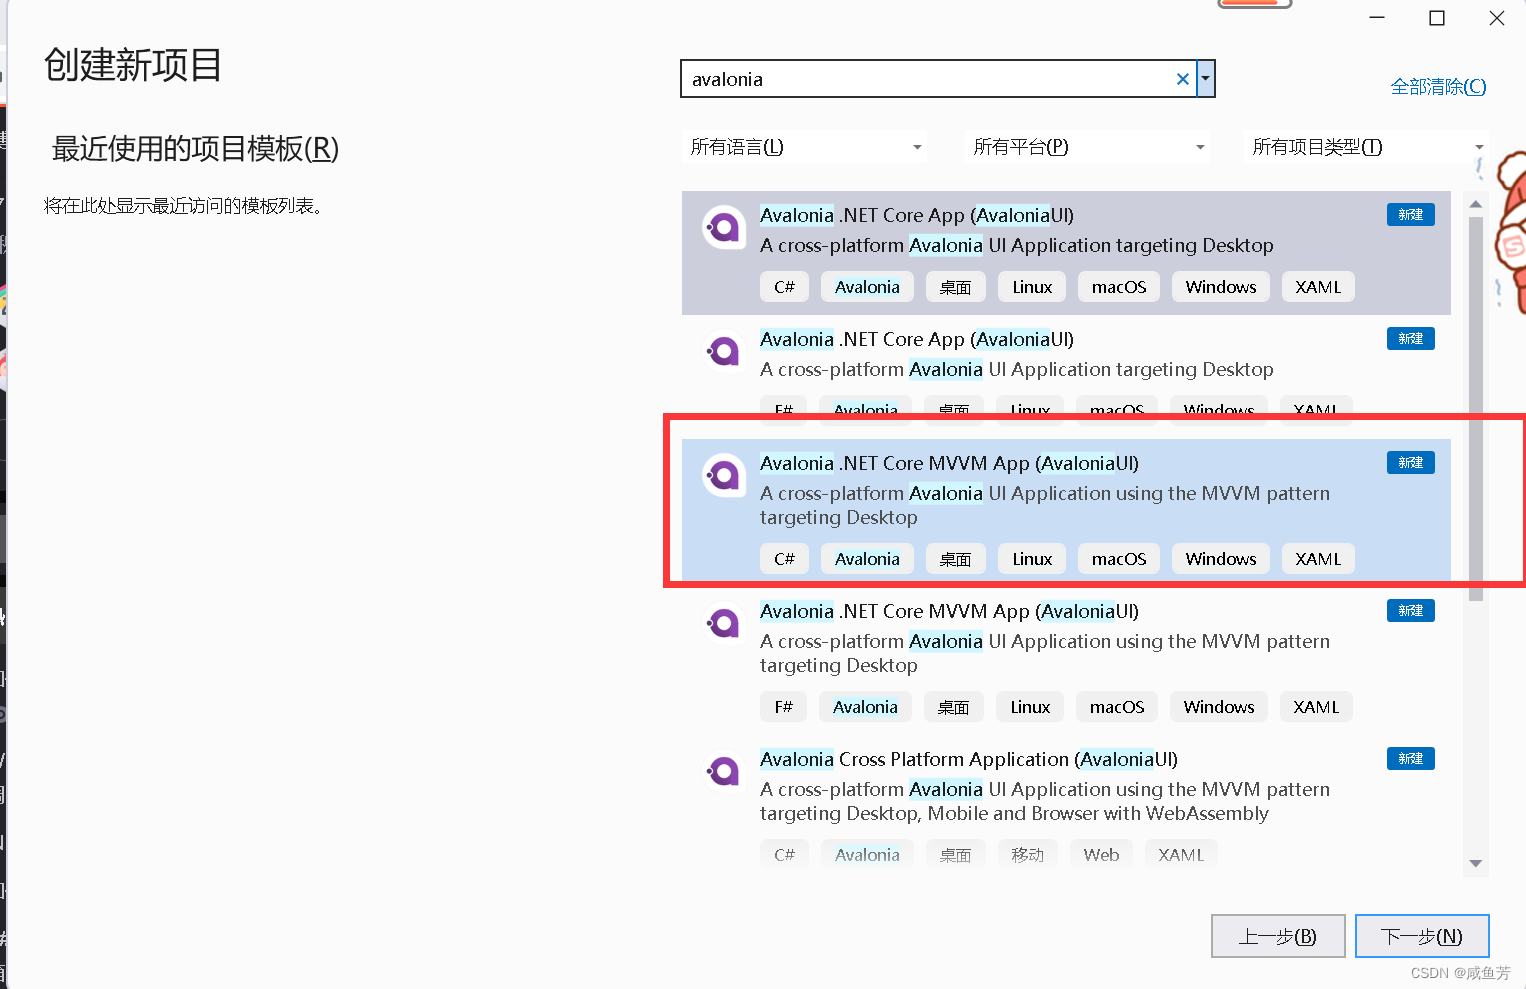
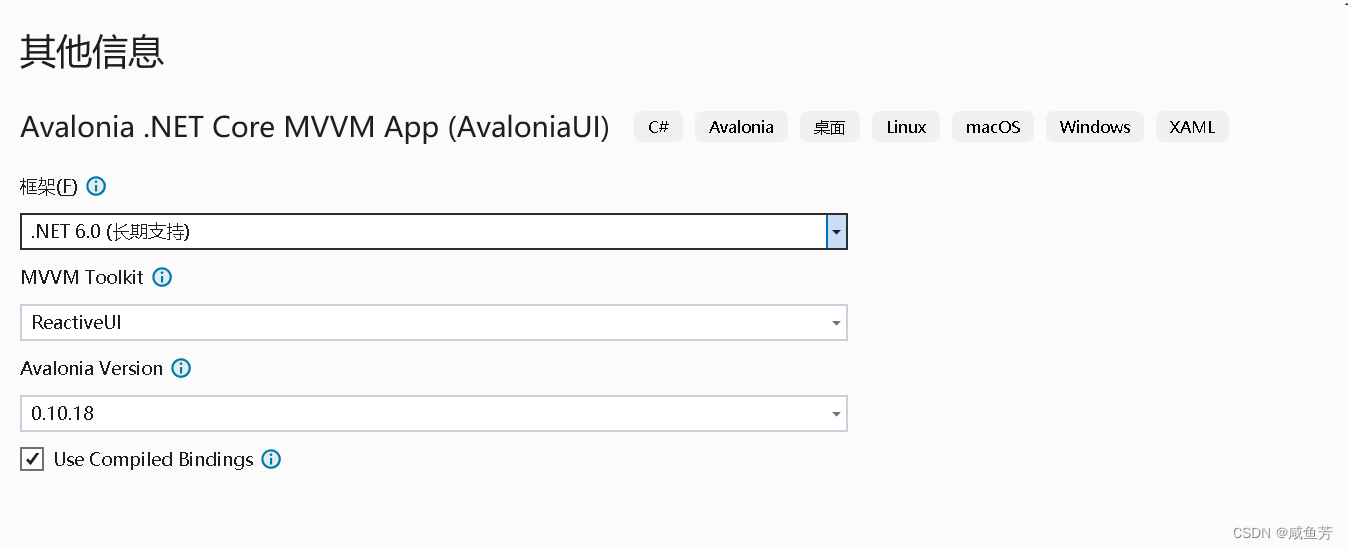
步骤二:新建一个项目
运行截图

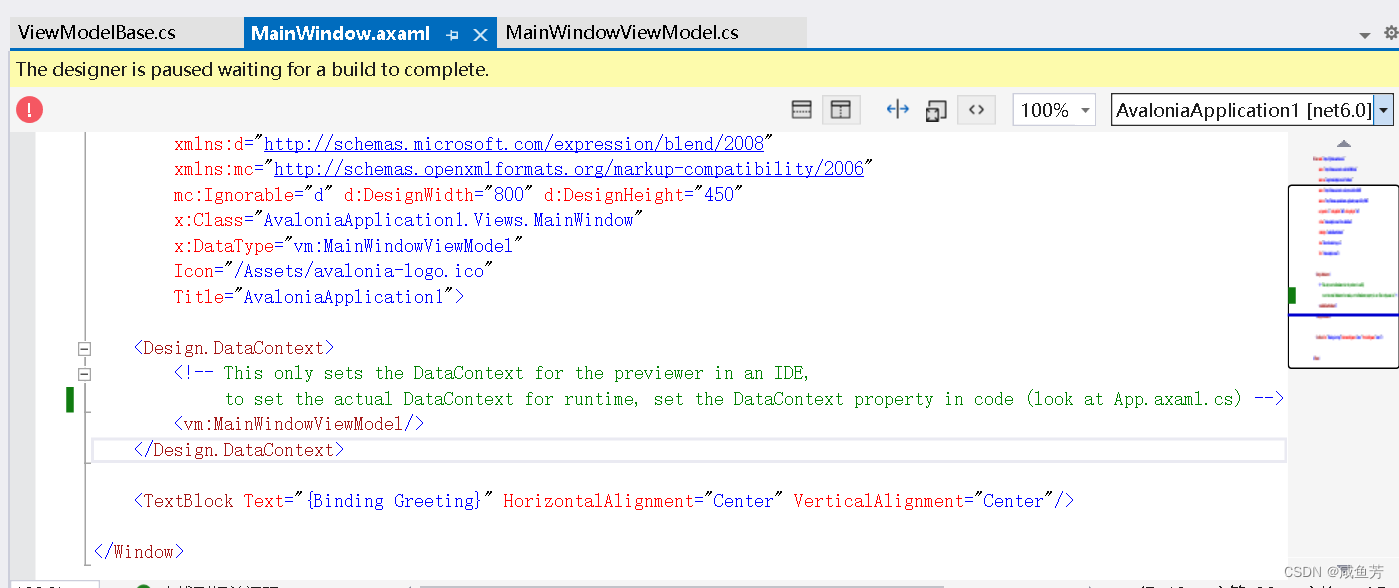
.axaml文件说明
- 要使用控件,必须引入命名空间:xmlns:d="http://schemas.microsoft.com/expression/blend/2008"
- 本案例采用mvvm模式,其中视图是围绕视图模型构建的,所以要在视图中引入视图模型:x:DataType="vm:MainWindowViewModel
- 其中.axaml控制外观、.cs控制行为
- 图标:Icon="/Assets/avalonia-logo.ico"
- 标题:Title="AvaloniaApplication1"
- 将TextBlock的Text属性绑定到MainWindowViewModel的Greeting方法上:<TextBlock Text="{Binding Greeting}" HorizontalAlignment="Center" VerticalAlignment="Center"/>
- 要设置实际的DataContext运行时,在代码中设置DataContext属性(查看App.axaml.cs)
3、Avalonia组成
(1)控制器
Buttons:
Button,RepeatButton
Data Display:
ItemsControl,ItemsRepeater,ListBox,TreeView
Input:
CheckBox,ComboBox,RadioButton,Slider,TextBox
Layout:
Border,Canvas,DockPanel,Expander,Grid,GridSplitter,Panel,Separator,ScrollBar,ScrollViewer,StackPanel,Viewbox,WrapPanel
Menus:
ContextMenu,Menu,NativeMenu
Navigation:
TabControl,TabStrip
User Information:
ProgressBar,TextBlock,ToolTip
(2)输入
Avalonia输入系统使用直接事件和路由事件来支持文本输入、焦点管理和鼠标定位。
(3)布局
Panel: Child controls are stacked on top of each other to fill the panel
DockPanel: Child controls are aligned to the edges of the panel
StackPanel: Child controls are stacked either vertically or horizontally
WrapPanel: Child controls are positioned in left-to-right order and wrapped to the next line when there are more controls on the current line than space allows
Grid: Child controls are positioned by rows and columns
Canvas: Child controls provide their own layout
(4)数据绑定
Multiple binding modes: one way, two way, one-time and one-way to source
Binding to a
DataContext
Binding to other controls
Binding to
Tasks and Observables
Binding converters and negating binding values
(5)Graphics图集
(6)Animation动画
PS:文档地址:Getting Started - Avalonia UI


 7634
7634

 被折叠的 条评论
为什么被折叠?
被折叠的 条评论
为什么被折叠?
 到【灌水乐园】发言


