


前言:ssm整合


一、整合mybatis
1、创建数据库
SET NAMES utf8mb4;
SET FOREIGN_KEY_CHECKS = 0;

-- ----------------------------
-- Table structure for books
-- ----------------------------
DROP TABLE IF EXISTS `books`;
CREATE TABLE `books`  (
  `bookID` int(11) NOT NULL AUTO_INCREMENT COMMENT '书id',
  `bookName` varchar(100) CHARACTER SET utf8 COLLATE utf8_general_ci NOT NULL COMMENT '书名',
  `bookCounts` int(11) NOT NULL COMMENT '数量',
  `detail` varchar(200) CHARACTER SET utf8 COLLATE utf8_general_ci NOT NULL COMMENT '描述',
  INDEX `bookID`(`bookID`) USING BTREE
) ENGINE = InnoDB AUTO_INCREMENT = 3 CHARACTER SET = utf8 COLLATE = utf8_general_ci ROW_FORMAT = Dynamic;

-- ----------------------------
-- Records of books
-- ----------------------------
INSERT INTO `books` VALUES (1, 'java入门', 10, '适合初学者');
INSERT INTO `books` VALUES (2, '初识多线程', 20, '多线程详解');

SET FOREIGN_KEY_CHECKS = 1;
2、导入依赖包
<dependencies>
   <dependency>
       <groupId>junit</groupId>
       <artifactId>junit</artifactId>
       <version>4.13.2</version>
   </dependency>
   <dependency>
       <groupId>com.mchange</groupId>
       <artifactId>c3p0</artifactId>
       <version>0.9.5.2</version>
   </dependency>
   <dependency>
       <groupId>mysql</groupId>
       <artifactId>mysql-connector-java</artifactId>
       <version>5.1.23</version>
   </dependency>
   <!--servlet jsp-->
   <dependency>
       <groupId>javax.servlet</groupId>
       <artifactId>javax.servlet-api</artifactId>
       <version>3.1.0</version>
   </dependency>
   <dependency>
       <groupId>javax.servlet.jsp</groupId>
       <artifactId>jsp-api</artifactId>
       <version>2.1</version>
   </dependency>
   <dependency>
       <groupId>javax.servlet.jsp.jstl</groupId>
       <artifactId>jstl-api</artifactId>
       <version>1.2</version>
   </dependency>
   <dependency>
       <groupId>taglibs</groupId>
       <artifactId>standard</artifactId>
       <version>1.1.2</version>
   </dependency>
   <!--下载-->
   <dependency>
       <groupId>commons-fileupload</groupId>
       <artifactId>commons-fileupload</artifactId>
       <version>1.3.3</version>
   </dependency>
   <!--mybatis-->
   <dependency>
       <groupId>org.mybatis</groupId>
       <artifactId>mybatis</artifactId>
       <version>3.5.6</version>
   </dependency>
   <dependency>
       <groupId>org.mybatis</groupId>
       <artifactId>mybatis-spring</artifactId>
       <version>2.0.5</version>
   </dependency>
   <!--spring-->
   <dependency>
       <groupId>org.springframework</groupId>
       <artifactId>spring-webmvc</artifactId>
       <version>5.2.0.RELEASE</version>
   </dependency>
   <dependency>
       <groupId>org.springframework</groupId>
       <artifactId>spring-jdbc</artifactId>
       <version>5.2.0.RELEASE</version>
   </dependency>
   <dependency>
       <groupId>org.aspectj</groupId>
       <artifactId>aspectjweaver</artifactId>
       <version>1.9.4</version>
   </dependency>
   <!--其他-->
   <dependency>
       <groupId>com.fasterxml.jackson.core</groupId>
       <artifactId>jackson-databind</artifactId>
       <version>2.11.4</version>
   </dependency>
   <dependency>
       <groupId>org.projectlombok</groupId>
       <artifactId>lombok</artifactId>
       <version>1.18.18</version>
   </dependency>
</dependencies>

<!--静态资源导出问题-->
<build>
   <resources>
       <resource>
           <directory>src/main/resources</directory>
           <includes>
               <include>**/*.xml</include>
               <include>**/*.properties</include>
           </includes>
           <filtering>true</filtering>
       </resource>

       <resource>
           <directory>src/main/java</directory>
           <includes>
               <include>**/*.xml</include>
               <include>**/*.properties</include>
           </includes>
           <filtering>true</filtering>
       </resource>
   </resources>
</build>
3、创建包结构

4、创建配置文件
db.properties
driver=com.mysql.jdbc.Driver
url=jdbc:mysql://localhost:3306/ssmbuild?useUnicode=true&characterEncoding=utf8&useSSL=false&useSSL=false&serverTimezone=UTC
username=root
password=123456
maybatis-config.xml
<?xml version="1.0" encoding="UTF-8" ?>
<!DOCTYPE configuration
        PUBLIC "-//mybatis.org//DTD Config 3.0//EN"
        "http://mybatis.org/dtd/mybatis-3-config.dtd">

<configuration>
    <typeAliases>
        <package name="com.ssmbuild.pojo"/>
    </typeAliases>

    <mappers>
        <package name="com.ssmbuild.dao"/>
    </mappers>
</configuration>
5、创建pojo类
@Data
@AllArgsConstructor
@NoArgsConstructor
public class Books {
    private int bookID;
    private String bookName;
    private int bookCounts;
    private String detail;
}
6、创建dao接口
@Repository
public interface BooksMapper {

    int addBooks(Books books);

    List<Books> findList();

    int update(Books books);

    int delete(int bookId);
}
7、创建映射文件
<?xml version="1.0" encoding="UTF-8" ?>
<!DOCTYPE mapper
        PUBLIC "-//mybatis.org//DTD Mapper 3.0//EN"
        "http://mybatis.org/dtd/mybatis-3-mapper.dtd">
<mapper namespace="com.ssmbuild.dao.BooksMapper">

    <insert id="addBooks" parameterType="books">
        insert into books (bookName,bookCounts,detail) values (#{bookName},#{bookCounts},#{detail})
    </insert>

    <select id="findList" resultType="books">
        select * from books
    </select>

    <update id="update" parameterType="books">
        update books set bookName = #{bookName},bookCounts=#{bookCounts},detail=#{detail}
        where bookId = #{bookId}
    </update>

    <delete id="delete" parameterType="int">
        delete from books where booksId = #{bookId}
    </delete>
</mapper>
8、创建service类
public interface BooksService {
    int addBooks(Books books);

    List<Books> findList();

    int update(Books books);

    int delete(int bookId);
}
9、创建sevice的实现类
@Service
public class BooksServiceImpl implements BooksService {

    private BooksMapper booksMapper;

    public void setBooksMapper(BooksMapper booksMapper) {
        this.booksMapper = booksMapper;
    }

    public int addBooks(Books books) {
        return booksMapper.addBooks(books);
    }

    public List<Books> findList() {
        return booksMapper.findList();
    }

    public int update(Books books) {
        return booksMapper.update(books);
    }

    public int delete(int bookId) {
        return booksMapper.delete(bookId);
    }
}
二、整合spring
1、创建dao层配置文件
<?xml version="1.0" encoding="UTF-8"?>
<beans xmlns="http://www.springframework.org/schema/beans"
xmlns:xsi="http://www.w3.org/2001/XMLSchema-instance"
xmlns:aop="http://www.springframework.org/schema/aop"
xmlns:context="http://www.springframework.org/schema/context"
xmlns:tx="http://www.springframework.org/schema/tx"
xsi:schemaLocation="http://www.springframework.org/schema/beans
http://www.springframework.org/schema/beans/spring-beans.xsd
http://www.springframework.org/schema/aop
http://www.springframework.org/schema/aop/spring-aop.xsd
http://www.springframework.org/schema/context
http://www.springframework.org/schema/context/spring-context.xsd
http://www.springframework.org/schema/tx
http://www.springframework.org/schema/tx/spring-tx.xsd">
<!--1、关联数据库配置文件-->
<context:property-placeholder location="classpath:db.properties"/>
<!--2、连接池
dpcp: 半自动化操作,不能自动连接
c3p0:自动化操作(自动化加载配置文件,并且可以自动设置到对象中)
druid:
hikari:
-->
<bean id="dataSource" class="com.mchange.v2.c3p0.ComboPooledDataSource">
<property name="driverClass" value="com.mysql.jdbc.Driver"/>
<property name="jdbcUrl"
value="jdbc:mysql://localhost:3306/ssmbuild?useUnicode=true&characterEncoding=utf8&useSSL=false&useSSL=false&serverTimezone=UTC"/>
<property name="user" value="root"/>
<property name="password" value="123456"/>
<property name="maxPoolSize" value="30"/> <!--最大连接数30-->
<property name="minPoolSize" value="10"/> <!--最小连接数10-->
</bean>
<!--3、sqlSessionFactory-->
<bean id="sqlSessionFactory" class="org.mybatis.spring.SqlSessionFactoryBean">
<property name="dataSource" ref="dataSource"/>
<!--绑定mybatis配置文件-->
<property name="configLocation" value="classpath:mybatis-config.xml"/>
</bean>
<!--4、配置dao接口扫描包,动态的实现了Dao接口可以注入到spring容器中-->
<bean class="org.mybatis.spring.mapper.MapperScannerConfigurer">
<!--注入sqlSessionFactory-->
<property name="sqlSessionFactoryBeanName" value="sqlSessionFactory"/>
<!--设置要扫描的包-->
<property name="basePackage" value="com.ssmbuild.dao"/>
</bean>
</beans>
2、创建service层配置文件
<?xml version="1.0" encoding="UTF-8"?>
<beans xmlns="http://www.springframework.org/schema/beans"
       xmlns:xsi="http://www.w3.org/2001/XMLSchema-instance"
       xmlns:aop="http://www.springframework.org/schema/aop"
       xmlns:context="http://www.springframework.org/schema/context"
       xmlns:tx="http://www.springframework.org/schema/tx"
       xsi:schemaLocation="http://www.springframework.org/schema/beans
        http://www.springframework.org/schema/beans/spring-beans.xsd
        http://www.springframework.org/schema/aop
        http://www.springframework.org/schema/aop/spring-aop.xsd
        http://www.springframework.org/schema/context
        http://www.springframework.org/schema/context/spring-context.xsd
        http://www.springframework.org/schema/tx
        http://www.springframework.org/schema/tx/spring-tx.xsd">

    <import resource="classpath:spring-dao.xml"/>
    <!--1、扫描service下的包-->
    <context:component-scan base-package="com.ssmbuild.service"/>
    <!--2、将所有的业务注入到spring中,可以通过配置或注解实现-->
    <bean id="booksMapperImpl" class="com.ssmbuild.service.impl.BooksServiceImpl">
        <property name="booksMapper" ref="booksMapper"/>
    </bean>

</beans>
3、创建applicationContext.xml文件并引入其他配置
<?xml version="1.0" encoding="UTF-8"?>
<beans xmlns="http://www.springframework.org/schema/beans"
       xmlns:xsi="http://www.w3.org/2001/XMLSchema-instance"
       xmlns:aop="http://www.springframework.org/schema/aop"
       xmlns:context="http://www.springframework.org/schema/context"
       xmlns:mvc="http://www.springframework.org/schema/mvc"
       xsi:schemaLocation="http://www.springframework.org/schema/beans
        http://www.springframework.org/schema/beans/spring-beans.xsd
        http://www.springframework.org/schema/aop
        http://www.springframework.org/schema/aop/spring-aop.xsd
        http://www.springframework.org/schema/context
        http://www.springframework.org/schema/context/spring-context.xsd
        http://www.springframework.org/schema/mvc
        http://www.springframework.org/schema/mvc/spring-mvc.xsd">

    <import resource="classpath:spring-dao.xml"/>
    <import resource="classpath:spring-service.xml"/>

</beans>
三、整合springMvc
1、添加项目web支持


2、配置web.xml文件
<?xml version="1.0" encoding="UTF-8"?>
<web-app xmlns="http://xmlns.jcp.org/xml/ns/javaee"
         xmlns:xsi="http://www.w3.org/2001/XMLSchema-instance"
         xsi:schemaLocation="http://xmlns.jcp.org/xml/ns/javaee http://xmlns.jcp.org/xml/ns/javaee/web-app_4_0.xsd"
         version="4.0">

    <!--配置前端控制器-->
    <servlet>
        <servlet-name>springmvc</servlet-name>
        <servlet-class>org.springframework.web.servlet.DispatcherServlet</servlet-class>
        <init-param>
            <param-name>contextConfigLocation</param-name>
            <param-value>classpath:applicationContext.xml</param-value>
        </init-param>
        <load-on-startup>1</load-on-startup>
    </servlet>
    <servlet-mapping>
        <servlet-name>springmvc</servlet-name>
        <url-pattern>/</url-pattern>
    </servlet-mapping>

    <!--配置编码过滤器-->
    <filter>
        <filter-name>encodingFilter</filter-name>
        <filter-class>org.springframework.web.filter.CharacterEncodingFilter</filter-class>
        <init-param>
            <param-name>encoding</param-name>
            <param-value>utf-8</param-value>
        </init-param>
    </filter>
    <filter-mapping>
        <filter-name>encodingFilter</filter-name>
        <url-pattern>/*</url-pattern>
    </filter-mapping>

    <!--配置session过期时间-->
    <session-config>
        <session-timeout>15</session-timeout>
    </session-config>
</web-app>
3、创建springmvc.xml配置文件
<?xml version="1.0" encoding="UTF-8"?>
<beans xmlns="http://www.springframework.org/schema/beans"
       xmlns:xsi="http://www.w3.org/2001/XMLSchema-instance"
       xmlns:aop="http://www.springframework.org/schema/aop"
       xmlns:context="http://www.springframework.org/schema/context"
       xmlns:mvc="http://www.springframework.org/schema/mvc"
       xsi:schemaLocation="http://www.springframework.org/schema/beans
        http://www.springframework.org/schema/beans/spring-beans.xsd
        http://www.springframework.org/schema/aop
        http://www.springframework.org/schema/aop/spring-aop.xsd
        http://www.springframework.org/schema/context
        http://www.springframework.org/schema/context/spring-context.xsd
        http://www.springframework.org/schema/mvc
        http://www.springframework.org/schema/mvc/spring-mvc.xsd">

    <!--1、注解驱动-->
    <mvc:annotation-driven/>
    <!--2、静态资源过滤-->
    <mvc:default-servlet-handler/>
    <!--3、扫描包-->
    <context:component-scan base-package="com.ssmbuild.controller"/>
    <!--4、视图解析器-->
    <bean class="org.springframework.web.servlet.view.InternalResourceViewResolver">
        <!--前缀-->
        <property name="prefix" value="/WEB-INF/jsp/"/>
        <!--后缀-->
        <property name="suffix" value=".jsp"/>
    </bean>

</beans>
4、在applicationContext.xml配置文件中引入springmvc配置
<?xml version="1.0" encoding="UTF-8"?>
<beans xmlns="http://www.springframework.org/schema/beans"
       xmlns:xsi="http://www.w3.org/2001/XMLSchema-instance"
       xmlns:aop="http://www.springframework.org/schema/aop"
       xmlns:context="http://www.springframework.org/schema/context"
       xmlns:mvc="http://www.springframework.org/schema/mvc"
       xsi:schemaLocation="http://www.springframework.org/schema/beans
        http://www.springframework.org/schema/beans/spring-beans.xsd
        http://www.springframework.org/schema/aop
        http://www.springframework.org/schema/aop/spring-aop.xsd
        http://www.springframework.org/schema/context
        http://www.springframework.org/schema/context/spring-context.xsd
        http://www.springframework.org/schema/mvc
        http://www.springframework.org/schema/mvc/spring-mvc.xsd">

    <import resource="classpath:spring-dao.xml"/>
    <import resource="classpath:spring-service.xml"/>
    <import resource="classpath:spring-mvc.xml"/>
</beans>
四、拦截器(完善)
1、创建类,并实现HandlerInterceptor接口
//自定义拦截器
public class MyInterceptor implements HandlerInterceptor {
    //return true 执行下一个拦截器,放行
    public boolean preHandle(HttpServletRequest request, HttpServletResponse response, Object handler) throws Exception {
        System.out.println("===========处理前==========");
        return true;
    }

    public void postHandle(HttpServletRequest request, HttpServletResponse response, Object handler, ModelAndView modelAndView) throws Exception {
        System.out.println("=========处理后============");
    }

    public void afterCompletion(HttpServletRequest request, HttpServletResponse response, Object handler, Exception ex) throws Exception {
        System.out.println("===========清理=========");
    }
}

//自定义登录拦截器
public class LoginInterceptor implements HandlerInterceptor {

    public boolean preHandle(HttpServletRequest request, HttpServletResponse response, Object handler) throws Exception {
        HttpSession session = request.getSession();
        //登录页面不用拦截
        if (request.getRequestURI().contains("login")){
            return true;
        }
        Object loginName = session.getAttribute("loginName");
        if (loginName != null){
            return true;
        }
        //如果未登录则跳转至登录页面
        request.getRequestDispatcher("login.jsp").forward(request,response);
        return false;
    }
}

2、在applicationConText.xml文件中配置
<?xml version="1.0" encoding="UTF-8"?>
<beans xmlns="http://www.springframework.org/schema/beans"
       xmlns:xsi="http://www.w3.org/2001/XMLSchema-instance"
       xmlns:aop="http://www.springframework.org/schema/aop"
       xmlns:context="http://www.springframework.org/schema/context"
       xmlns:mvc="http://www.springframework.org/schema/mvc"
       xsi:schemaLocation="http://www.springframework.org/schema/beans
        http://www.springframework.org/schema/beans/spring-beans.xsd
        http://www.springframework.org/schema/aop
        http://www.springframework.org/schema/aop/spring-aop.xsd
        http://www.springframework.org/schema/context
        http://www.springframework.org/schema/context/spring-context.xsd
        http://www.springframework.org/schema/mvc
        http://www.springframework.org/schema/mvc/spring-mvc.xsd">

    <import resource="classpath:spring-dao.xml"/>
    <import resource="classpath:spring-service.xml"/>
    <import resource="classpath:spring-mvc.xml"/>

    <!--拦截器配置-->
    <mvc:interceptors>
        <mvc:interceptor>
            <!--/** 表示包括这个下面的所有请求-->
            <mvc:mapping path="/**"/>
            <bean class="com.ssmbuild.config.MyInterceptor"/>
        </mvc:interceptor>
        <mvc:interceptor>
            <!--拦截admin下的所有请求-->
            <mvc:mapping path="/admin/**"/>
            <bean class="com.ssmbuild.config.LoginInterceptor"/>
        </mvc:interceptor>
    </mvc:interceptors>
</beans>
五、文件上传
1、导入依赖 commons-fileUpload
2、在applicationConText.xml文件中配置
<?xml version="1.0" encoding="UTF-8"?>
<beans xmlns="http://www.springframework.org/schema/beans"
       xmlns:xsi="http://www.w3.org/2001/XMLSchema-instance"
       xmlns:aop="http://www.springframework.org/schema/aop"
       xmlns:context="http://www.springframework.org/schema/context"
       xmlns:mvc="http://www.springframework.org/schema/mvc"
       xsi:schemaLocation="http://www.springframework.org/schema/beans
        http://www.springframework.org/schema/beans/spring-beans.xsd
        http://www.springframework.org/schema/aop
        http://www.springframework.org/schema/aop/spring-aop.xsd
        http://www.springframework.org/schema/context
        http://www.springframework.org/schema/context/spring-context.xsd
        http://www.springframework.org/schema/mvc
        http://www.springframework.org/schema/mvc/spring-mvc.xsd">

    <import resource="classpath:spring-dao.xml"/>
    <import resource="classpath:spring-service.xml"/>
    <import resource="classpath:spring-mvc.xml"/>

    <!--拦截器配置-->
    <mvc:interceptors>
        <mvc:interceptor>
            <!--/** 表示包括这个下面的所有请求-->
            <mvc:mapping path="/**"/>
            <bean class="com.ssmbuild.config.MyInterceptor"/>
        </mvc:interceptor>
        <mvc:interceptor>
            <!--拦截admin下的所有请求-->
            <mvc:mapping path="/admin/**"/>
            <bean class="com.ssmbuild.config.LoginInterceptor"/>
        </mvc:interceptor>
    </mvc:interceptors>

    <!--文件上传-->
    <!--ID必须为multipartResolver,否则就400问题-->
    <bean id="multipartResolver" class="org.springframework.web.multipart.commons.CommonsMultipartResolver">
        <!-- 请求的编码格式,必须和jSP的pageEncoding属性一致,以便正确读取表单的内容,默认为ISO-8859-1 -->
        <property name="defaultEncoding" value="utf-8"/>
        <!--设置文件上传的大小限制-->
        <property name="maxUploadSize" value="1048576"/>
        <property name="maxInMemorySize" value="40960"/>
    </bean>
</beans>
3、创建jsp上传页面
<%@ page contentType="text/html;charset=UTF-8" language="java" %>
<html>
  <head>
    <title>$Title$</title>
  </head>
  <body>
  <form action="${pageContext.request.contextPath}/upload" method="post" enctype="multipart/form-data">
    <input type="file" name="file">
    <input type="submit" value="upload">
  </form>
  </body>
</html>
4、创建java类
@Controller
public class FileUploadController {
    //采用流的方式上传文件
    @RequestMapping("/upload")
    @ResponseBody
    public String upload(@RequestParam("file") CommonsMultipartFile file, HttpServletRequest request) throws IOException {
        //获得文件名
        String filename = file.getOriginalFilename();
        if ("".equals(filename)){
            return "文件不存在";
        }
        //上传文件保存路径
        String path = request.getServletContext().getRealPath("/upload");
        File realPath = new File(path);
        if (!realPath.exists()){
            realPath.mkdir();
        }
        //文件上传
        InputStream inputStream = file.getInputStream();
        FileOutputStream outputStream = new FileOutputStream(new File(realPath, filename));
        int len = 0;
        byte[] bytes = new byte[1024];
        while ((len=inputStream.read(bytes))!=-1){
            outputStream.write(bytes,0,len);
            outputStream.flush();
        }
        //关闭流
        outputStream.close();
        inputStream.close();
        return "上传完毕";
    }

    //采用file.Transto上传文件
    @RequestMapping("/upload2")
    @ResponseBody
    public String upload2(@RequestParam("file") CommonsMultipartFile file,HttpServletRequest request) throws IOException {
        //上传文件保存路径
        String path = request.getServletContext().getRealPath("/upload");
        File realPath = new File(path);
        if (!realPath.exists()){
            realPath.mkdir();
        }
        //transferTo将文件写入磁盘,参数传入一个文件
        file.transferTo(new File(realPath+"/"+file.getOriginalFilename()));
        return "上传完毕";
    }
}
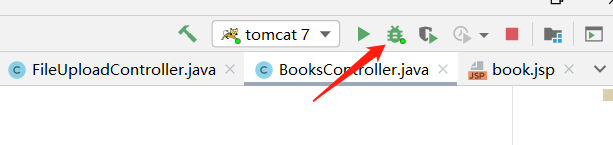
六、启动tomcat测试
1、配置tomcat


2、启动
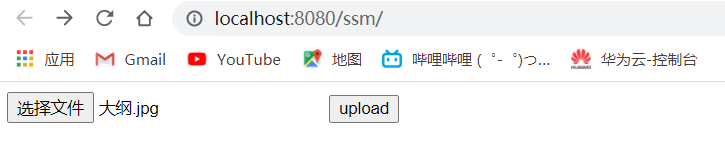
选择图片上传,完成测试即可!


 46万+
46万+


 被折叠的 条评论
为什么被折叠?
被折叠的 条评论
为什么被折叠?
 到【灌水乐园】发言


