


一、最简单的方法
强制分页
<div style="page-break-after: always;"></div>
二、复杂一点的方法:
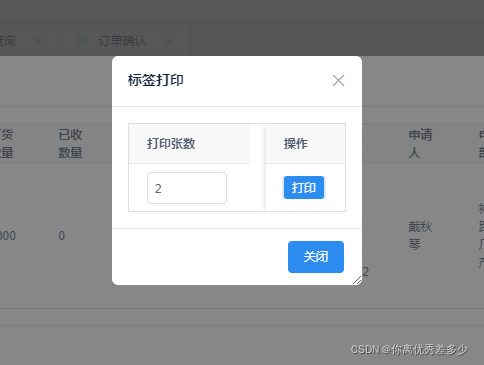
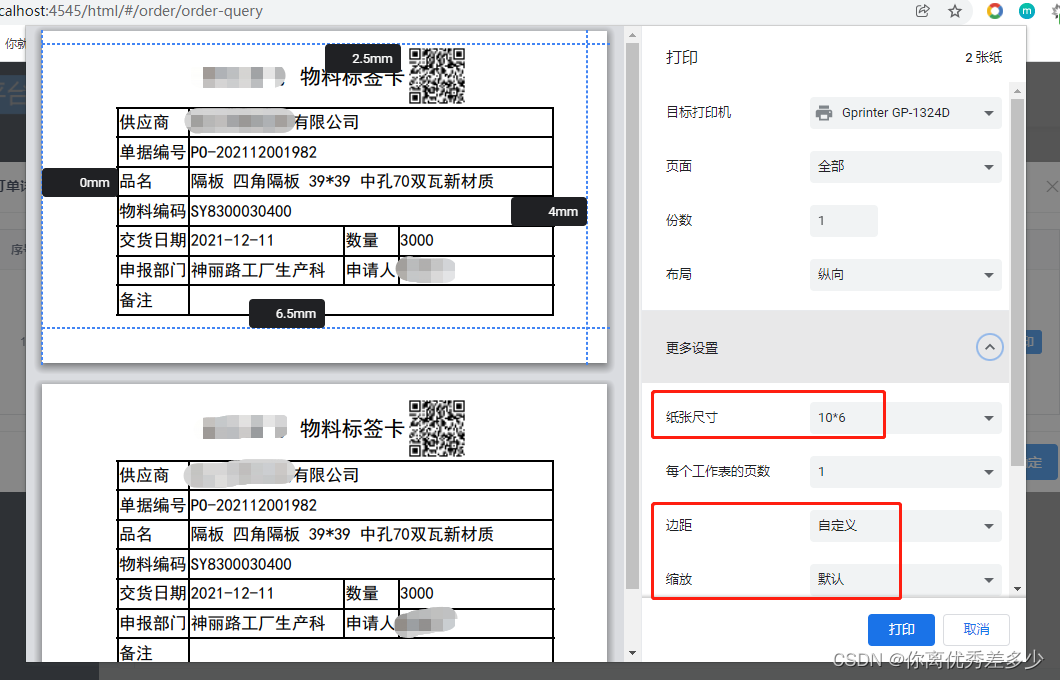
1.可填写打印张数,自动分页,在浏览打印中设置纸张大小、边距及缩放调整位置,使打印页面居中。
缺点:打印分页不稳定,没有自适应,需自己调整大小位置
如图所示
2.详细代码如下
<!-- 标签弹窗 -->
	<Modal width="250" :mask-closable="false" v-model="modalShow" title="标签打印">
      <Table stripe :columns="modal_title" :data="modal_data"></Table>
	  <div slot="footer"><Button type="primary" @click="close">关闭</Button></div>
    </Modal>
<!-- 标签打印 -->
	<Modal width="420" v-model="modalPrintShow" title="送货单">
		<div id="printContent" style="width:420px;">
			<div v-for="(item,i) in arrList">
				<div class="flex-c">
					<div style="font-size:15px;color: #000;font-family:'黑体';font-weight:500;"><span>浙江金华</span><span style="margin-left:10px;">物料标签卡</span></div>
					<vue-qr :text="`${modalNameList.materialNum}##${modalNameList.qty}##${modalNameList.suppCode}##${modalNameList.billNum}##${modalNameList.entryId}`" :size="45" :margin="5"></vue-qr>
				</div>
					<div style="margin:0px 0px 10px 0px;display:flex;justify-content:center;">
						<table border="1" class="printTable">
						<tr>
							<td>供应商</td>
							<td colspan="5">{{modalNameList.supp}}</td>
						</tr>
						<tr>
							<td>单据编号</td>
							<td colspan="5">{{modalNameList.billNum}}</td>
						</tr>
						<tr>
							<td>品名</td>
							<td colspan="5">{{modalNameList.materialName}}</td>
						</tr>
						<tr>
							<tr>
							<td>物料编码</td>
							<td colspan="5">{{modalNameList.materialNum}}</td>
						</tr>
							<td>交货日期</td>
							<td style="width:110px;" colspan="2">{{modalNameList.deliveryDate}}</td>
							<td>数量</td>
							<td style="width:110px;" colspan="2">{{modalNameList.qty}}</td>
						</tr>
						<tr>
							<td>申报部门</td>
							<td colspan="2">{{modalNameList.applyDeptName}}</td>
							<td>申请人</td>
							<td colspan="2">{{modalNameList.applyPersonName}}</td>
						</tr>
						<tr>
							<tr>
							<td>备注</td>
							<td colspan="5">{{modalNameList.remark}}</td>
						</tr>
						</table>
					</div>
				</div>
			</div>
			<div slot="footer"></div>
    </Modal>
<script>
import '@/assets/js/jquery-vendor'// 方法 2
import 'jQuery.print' // 方法 2
import printHtml from '@/components/print.js'//引入封装打印的文件★★★★★
import VueQr from 'vue-qr';//引入二维码
export default{
	components: {
		VueQr
	},
}
data(){
	return{
		arrList:[],
		modalNameList:{},
		modal_title:[{title: "打印张数",width: 120,
        render: (h, params) => {
          let arr1 = [
            h("InputNumber", {
              props: {
				'active-change':false,
                value: 1,
				min:1,
              },
              on: {
                input: (val) => {
                  this.modal_data[params.index].boxNumber = val;
				  params.row.boxNumber = val
                },
              },
            }),
          ];
          return h("div", arr1);
        },
      },
      {
          title: "操作",
          width: 80,
          fixed: "right",
          render: (h, params) => {
            let arr1 = [
              h(
                "Button",
                {
                  props: {
                    type: "primary",
                    size: "small",
                  },
                  on: {
                    click: () => {
						let d = params.row // 单行数据
						this.bqPrint(d)
					}
                  },
                },
                "打印"
              ),
            ];
            return h("div", arr1);
          },
        },
      ],
	}
}
methods(){
	//打印★★★★★
	bqPrint(d){
			this.arrList = []//分页的空数组,里面有几个对象就有几页
			this.modalNameList = d
			let num = d.boxNumber//num是填写的打印页数
			let obj = {num:num}
			for (let i = 0; i < num; i++) {
				this.arrList.push(obj)
			}
			// this.modalPrintShow = true
			this.$nextTick(() => {//this.$nextTick是强制刷新页面,防止打印的内容为空
				setTimeout(function () {//定时器延时是等待页面数据刷新完在打印
					let newstr = document.getElementById("printContent").innerHTML//newstr为打印的页面
					printHtml(newstr)//调用引入的文件方法printHtml
				},500)
			})
		},
}
</script>
3.printHtml 封装文件
export default function printHtml (html) {
  let style = getStyle()
  let container = getContainer(html)
  document.body.appendChild(style)
  document.body.appendChild(container)
  getLoadPromise(container).then(() => {
    window.print()
    document.body.removeChild(style)
    document.body.removeChild(container)
  })
}

// 设置打印样式
function getStyle () {
  let styleContent = `#print-container {
    display: none;
}
@media print {
    body > :not(.print-container) {
        display: none;
    }
    html,
    body {
      margin: 0 0.2cm;
      display: block !important;
      height:auto;
    }
    #print-container {
        display: block;
    }
    @page {
      margin: 0.25cm 0;
    }
}`
  let style = document.createElement('style')
  style.innerHTML = styleContent
  return style
}

// 清空打印内容
function cleanPrint () {
  let div = document.getElementById('print-container')
  if (div) {
    document.querySelector('body').removeChild(div)
  }
}

// 新建DOM,将需要打印的内容填充到DOM
function getContainer (html) {
  cleanPrint()
  let container = document.createElement('div')
  container.setAttribute('id', 'print-container')
  container.innerHTML = html
  return container
}

// 图片完全加载后再调用打印方法
function getLoadPromise (dom) {
  let imgs = dom.querySelectorAll('img')
  imgs = [].slice.call(imgs)

  if (imgs.length === 0) {
    return Promise.resolve()
  }

  let finishedCount = 0
  return new Promise(resolve => {
    function check () {
      finishedCount++
      if (finishedCount === imgs.length) {
        resolve()
      }
    }
    imgs.forEach(img => {
      img.addEventListener('load', check)
      img.addEventListener('error', check)
    })
  })
}


 966
966


 被折叠的 条评论
为什么被折叠?
被折叠的 条评论
为什么被折叠?
 到【灌水乐园】发言


