


文章目录
添加配置
配置pom.xml
在pom.xml中添加druid连接池、MyBatis框架、MySQL驱动的依赖:
    <!-- Druid -->
    <dependency>
      <groupId>com.alibaba</groupId>
      <artifactId>druid</artifactId>
      <version>1.1.21</version>
    </dependency>

    <!-- MyBatis -->
    <dependency>
      <groupId>org.mybatis.spring.boot</groupId>
      <artifactId>mybatis-spring-boot-starter</artifactId>
      <version>2.1.2</version>
    </dependency>

    <!-- MySQL Driver -->
    <dependency>
      <groupId>mysql</groupId>
      <artifactId>mysql-connector-java</artifactId>
      <scope>runtime</scope>
    </dependency>
解决生成后mapper.xml丢失问题
在xml的<build>标签中添加以下内容,否则生成后的文件mapper.xml会丢失:
    <resources>
      <resource>
        <directory>src/main/java</directory>
        <!-- 此配置不可缺,否则mybatis的Mapper.xml将会丢失 -->
        <includes>
          <include>**/*.xml</include>
        </includes>
      </resource>
      <!--指定资源的位置-->
      <resource>
        <directory>src/main/resources</directory>
      </resource>
    </resources>
配置application.properties
在application.properties中配置连接池和Mybatis主配置文件的位置:
spring.datasource.username=root
spring.datasource.password=123
spring.datasource.driver-class-name=com.mysql.cj.jdbc.Driver
spring.datasource.url=jdbc:mysql://localhost:3306/hello_mysql?useUnicode=true&characterEncoding=UTF-8&serverTimezone=UTC
spring.datasource.type=com.alibaba.druid.pool.DruidDataSource
spring.datasource.initialSize=10
spring.datasource.minIdle=10
spring.datasource.maxActive=50
spring.datasource.maxWait=60000
mybatis.config-location=classpath:mybatis-config.xml
这里的部分连接池配置不会生效,因为spring boot的默认配置中并没有这些配置项,为使其生效,我们需要创建一个新的类,这些我们之后再说。
配置mybatis-config.xml
MyBatis的配置规则还是不变,具体了解可以翻阅笔者以前的文章,值得一提的是,这里我们使用package来指定存放mapper的包,进行统一扫描:
<?xml version="1.0" encoding="UTF-8"?>
<!DOCTYPE configuration
PUBLIC "-//mybatis.org//DTD Config 3.0//EN"
"http://mybatis.org/dtd/mybatis-3-config.dtd">
<configuration>
<environments default="development">
<environment id="development">
<transactionManager type="JDBC"/>
<dataSource type="POOLED">
<property name="driver" value="com.mysql.cj.jdbc.Driver"/>
<property name="url"
value="jdbc:mysql://localhost:3306/hello_mysql?useUnicode=true&characterEncoding=UTF-8&serverTimezone=UTC"/>
<property name="username" value="root"/>
<property name="password" value="123"/>
</dataSource>
</environment>
</environments>
<mappers>
<package name="org.koorye.hellospringboot.mapper"/>
</mappers>
</configuration>
配置generatorConfig.xml
规则还是和以前完全相同,注意此处xml文件的命名必须如此且直接放在resource目录下,这是spring boot的默认配置(如果要修改文件名和位置请自行修改配置):
<?xml version="1.0" encoding="UTF-8"?>
<!DOCTYPE generatorConfiguration
PUBLIC "-//mybatis.org//DTD MyBatis Generator Configuration 1.0//EN"
"http://mybatis.org/dtd/mybatis-generator-config_1_0.dtd">
<generatorConfiguration>
<classPathEntry location="D:\software\system\mysql-8.0.19-winx64\lib\mysql-connector-java-8.0.19.jar"/>
<context id="MysqlGenerator" targetRuntime="MyBatis3">
<jdbcConnection driverClass="com.mysql.cj.jdbc.Driver"
connectionURL="jdbc:mysql://localhost:3306/hello_mysql?useUnicode=true&characterEncoding=UTF-8&serverTimezone=UTC"
userId="root"
password="123">
</jdbcConnection>
<javaModelGenerator targetPackage="org.koorye.hellospringboot.pojo" targetProject="src/main/java">
<property name="constructorBased" value="true"/>
<property name="enableSubPackages" value="false"/>
<property name="immutable" value="false"/>
<property name="trimStrings" value="true"/>
</javaModelGenerator>
<sqlMapGenerator targetPackage="org.koorye.hellospringboot.mapper" targetProject="src/main/java"/>
<javaClientGenerator type="XMLMAPPER" targetPackage="org.koorye.hellospringboot.mapper"
targetProject="src/main/java"/>
<table tableName="user"/>
</context>
</generatorConfiguration>
添加连接池配置类
我们之前说过,application.properties里的部分配置是不生效的,例如:
spring.datasource.initialSize=10
spring.datasource.minIdle=10
spring.datasource.maxActive=50
spring.datasource.maxWait=60000
要使其生效,我们需要实现一个配置类。
在config包内新建一个DruidConfig类,使用@ConfigurationProperties读取配置文件,prefix用于指定前缀,之后再用@Bean将其加入组件。
然后我们再配置Druid后台监听器,新建一个map用于存放用户名和密码,将其存入ServletRegistrationBean组件:
package org.koorye.hellospringboot.config;

import com.alibaba.druid.pool.DruidDataSource;
import com.alibaba.druid.support.http.StatViewServlet;
import org.springframework.boot.context.properties.ConfigurationProperties;
import org.springframework.boot.web.servlet.ServletRegistrationBean;
import org.springframework.context.annotation.Bean;
import org.springframework.context.annotation.Configuration;

import javax.sql.DataSource;
import java.util.HashMap;
import java.util.Map;

@Configuration
public class DruidConfig {
  @ConfigurationProperties(prefix = "spring.datasource")
  @Bean
  public DataSource druid() {
    return new DruidDataSource();
  }

  @Bean
  public ServletRegistrationBean statViewServlet() {
    ServletRegistrationBean bean = new ServletRegistrationBean(new StatViewServlet(), "/druid/*");
    Map<String, String> initParams = new HashMap<>();
    initParams.put("loginUsername", "admin");
    initParams.put("loginPassword", "admin");
    bean.setInitParameters(initParams);
    return bean;
  }
}
然后,我们就可以通过localhost:8080/druid/login.html访问后台啦:


MBG逆向工程生成代码
在右侧Maven的Plugins中找到mybatis-generator,双击运行mybatis-generator:generate:

解决逆向生成xxxKey和xxxwithBlobs的问题
网上的说法是如果你的数据表中有text类型的列就会生成这xxxKey和xxxwithBlobs,笔者的数据表中并没有text类型却还是生成了。
虽然不知道原因,不过我找到了解决方法。在generatorConfig.xml的<jdbcConnection>中加入一项property:
<jdbcConnection driverClass="com.mysql.cj.jdbc.Driver"
connectionURL="jdbc:mysql://localhost:3306/hello_mysql?useUnicode=true&characterEncoding=UTF-8&serverTimezone=UTC"
userId="root"
password="123">
<property name="nullCatalogMeansCurrent" value="true"/>
</jdbcConnection>
这样生成的代码就只有xxx和xxxExample啦:

使用MBG生成的代码访问数据库
笔者此处采取接口和mapper同包的结构,因此要分别配置接口和mapper的位置。
扫描mapper接口
在spring boot主程序上添加注解@MapperScan并指定mapper接口的位置:
package org.koorye.hellospringboot;

import org.mybatis.spring.annotation.MapperScan;
import org.springframework.boot.SpringApplication;
import org.springframework.boot.autoconfigure.SpringBootApplication;

@MapperScan("org.koorye.hellospringboot.mapper")
@SpringBootApplication
public class HelloSpringbootMybatisApplication {

  public static void main(String[] args) {
    SpringApplication.run(HelloSpringbootMybatisApplication.class, args);
  }

}
扫描mapper.xml
在application.properties中配置mapper.xml的位置
mybatis.mapperLocations=classpath*:xxx/xxx/xxx/mapper/*.xml
实现访问数据库的控制器
常规方法,通过流读取主配置文件,再通过SqlSessionFactory得到session和mapper,此处使用static来避免每次访问数据库都生成一次。之后依然是MBG的常规用法:
package org.koorye.hellospringboot.controller;

import com.alibaba.fastjson.JSON;
import org.apache.ibatis.io.Resources;
import org.apache.ibatis.session.SqlSession;
import org.apache.ibatis.session.SqlSessionFactory;
import org.apache.ibatis.session.SqlSessionFactoryBuilder;
import org.koorye.hellospringboot.mapper.UserMapper;
import org.koorye.hellospringboot.pojo.User;
import org.koorye.hellospringboot.pojo.UserExample;
import org.springframework.stereotype.Controller;
import org.springframework.web.bind.annotation.RequestMapping;
import org.springframework.web.bind.annotation.RequestParam;
import org.springframework.web.bind.annotation.ResponseBody;

import java.io.InputStream;
import java.util.List;
import java.util.Map;

@Controller
public class UserDataController {
  private static UserMapper mapper;
  private static SqlSession session;

  static {
    try {
      InputStream stream = Resources.getResourceAsStream("mybatis-config.xml");
      SqlSessionFactory factory = new SqlSessionFactoryBuilder().build(stream);
      session = factory.openSession();
      mapper = session.getMapper(UserMapper.class);
    } catch (Exception event) {
      event.printStackTrace();
    }
  }
  @RequestMapping("/user/list")
  public String view(Map<String, Object> map) {
    UserExample example = new UserExample();
    example.createCriteria().andIdIsNotNull();
    List<User> userList = mapper.selectByExample(example);
    map.put("userList", userList);
    return "list";
  }
}
自动装配mapper
上面的方法是按照MyBatis的方法手动读取配置文件获得mapper,不过spring boot可以直接通过@AutoWired得到mapper,然后就可以访问数据库啦:
package org.koorye.hellospringboot;

import org.junit.jupiter.api.Test;
import org.koorye.hellospringboot.mapper.UserMapper;
import org.koorye.hellospringboot.pojo.User;
import org.springframework.beans.factory.annotation.Autowired;
import org.springframework.boot.test.context.SpringBootTest;

@SpringBootTest
class ApplicationTests {

  @Autowired
  private UserMapper mapper;

  @Test
  void contextLoads() {
    User user = mapper.selectByPrimaryKey(1);
    System.out.println(user.getId() + user.getName());
  }

}
结果正常输出:

关于@Autowired报红
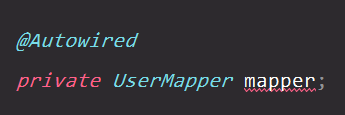
只需要在mapper的接口上添加@Repository注解,就不会报红啦: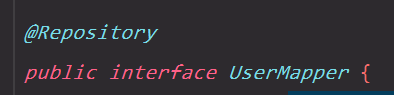


 884
884


 被折叠的 条评论
为什么被折叠?
被折叠的 条评论
为什么被折叠?
 到【灌水乐园】发言


