


1.1 LVS-NAT的配置及运用
1.1.1 基础环境准备
LVS调度器只作为WEB访问入口
Web访问出口由各个节点服务器分别承担
(1)集群拓朴

(2) 节点规划
| 主机名 | IP | 角色 | 备注 |
|---|---|---|---|
| DS | 192.168.79.157 VIP:192.168.79.200 | LVS负载调度器 | VIP为LVS的浮动IP |
| RS1 | 10.0.0.8 | 真实服务器1 | 提供WEB服务 |
| RS2 | 10.0.0.10 | 真实服务器2 | 提供WEB服务 |
| NFS-SER | 10.0.0.11 | 数据共享服务器 | 提供网页共享数据 |
此案例WEB服务器选用apache,数据共享服务器选用NFS。
(3)配置主机名
[root@localhost ~]# hostnamectl set-hostname DS
[root@localhost ~]# su -l
[root@localhost ~]# hostnamectl set-hostname RS1
[root@localhost ~]# su -l
[root@localhost ~]# hostnamectl set-hostname RS2
[root@localhost ~]# su -l
[root@localhost ~]# hostnamectl set-hostname NFS-SER
[root@localhost ~]# su -l
(4)处理防火墙
分别在四个节点上执行
systemctl stop firewalld
systemctl disable firewalld
sed -i 's/SELINUX=enforcing/SELINUX=disabled/g' /etc/selinux/config
setenforce 0
(5)同步时钟源
分别在四个节点上执行
yum -y install ntp ntpdate
ntpdate cn.pool.ntp.org
hwclock --systohc
(6) 在DR模式实例基础上调整网络
以VMware workstations虚拟机为例,模拟内外网络,以nat模式模拟外网,以仅主机模式模拟内网。
注意:
(1)在linux系统上,不同的网口在内核上是互通的,借此原理可模拟路由。
(2)在NAT模式上,我们要保证负载均衡器和后端节点的网络可正常通信,实现这一目的,可借助(1)的理论,在负载均衡器上添加一内网网卡,也可在负载均衡其上添加静态路由。此外需要在SR节点上将
网关指向负载均衡器的真实IP。
此处,采用在负载均衡器上添加网卡的方法来实现。
配置负载均衡器网络


注意:
ens32为NAT模式,ens34为仅主机模式。
配置rs以及nfs-ser节点网络
注意:rs1和rs2网卡只存在仅主机模式。
rs1:

rs2:

nfs-ser:
测试网络连通性
在负载均衡器上测试:
[root@ds ~]# ping 10.0.0.9
PING 10.0.0.9 (10.0.0.9) 56(84) bytes of data.
64 bytes from 10.0.0.9: icmp_seq=1 ttl=64 time=0.138 ms
64 bytes from 10.0.0.9: icmp_seq=2 ttl=64 time=0.267 ms
^C
--- 10.0.0.9 ping statistics ---
2 packets transmitted, 2 received, 0% packet loss, time 1000ms
rtt min/avg/max/mdev = 0.138/0.202/0.267/0.066 ms
[root@ds ~]# ping 10.0.0.10
PING 10.0.0.10 (10.0.0.10) 56(84) bytes of data.
64 bytes from 10.0.0.10: icmp_seq=1 ttl=64 time=0.226 ms
64 bytes from 10.0.0.10: icmp_seq=2 ttl=64 time=0.320 ms
^C
--- 10.0.0.10 ping statistics ---
2 packets transmitted, 2 received, 0% packet loss, time 1001ms
rtt min/avg/max/mdev = 0.226/0.273/0.320/0.047 ms
在rs上测试:


在nfs上测试网络
[root@nfs-ser ~]# ping 10.0.0.9
PING 10.0.0.9 (10.0.0.9) 56(84) bytes of data.
64 bytes from 10.0.0.9: icmp_seq=1 ttl=64 time=0.194 ms
64 bytes from 10.0.0.9: icmp_seq=2 ttl=64 time=0.287 ms
^C
--- 10.0.0.9 ping statistics ---
2 packets transmitted, 2 received, 0% packet loss, time 1000ms
rtt min/avg/max/mdev = 0.194/0.240/0.287/0.049 ms
[root@nfs-ser ~]# ping 10.0.0.10
PING 10.0.0.10 (10.0.0.10) 56(84) bytes of data.
64 bytes from 10.0.0.10: icmp_seq=1 ttl=64 time=0.255 ms
64 bytes from 10.0.0.10: icmp_seq=2 ttl=64 time=0.307 ms
^C
--- 10.0.0.10 ping statistics ---
2 packets transmitted, 2 received, 0% packet loss, time 1000ms
rtt min/avg/max/mdev = 0.255/0.281/0.307/0.026 ms
[root@nfs-ser ~]#
1.1.2 配置NFS数据共享服务器(略)
参考这里:添加链接描述
1.1.3配置WEB服务器(略)
参考这里:添加链接描述
1.1.4 配置LVS负载调度服务器
[root@ds ~]# ipvsadm -A -t 192.168.79.200:80  -s rr
[root@ds ~]# ipvsadm -a -t 192.168.79.200:80 -r 10.0.0.9:80  -m
[root@ds ~]# ipvsadm -a -t 192.168.79.200:80 -r 10.0.0.10:80  -m
[root@ds ~]# ipvsadm -ln
IP Virtual Server version 1.2.1 (size=4096)
Prot LocalAddress:Port Scheduler Flags
  -> RemoteAddress:Port           Forward Weight ActiveConn InActConn
TCP  192.168.79.200:80 rr
  -> 10.0.0.9:80                  Masq    1      0          0
  -> 10.0.0.10:80                 Masq    1      0          0
[root@ds ~]# ipvsadm --save
-A -t ds:http -s rr
-a -t ds:http -r 10.0.0.9:http -m -w 1
-a -t ds:http -r 10.0.0.10:http -m -w 1
开启路由转发
[root@ds ~]# echo 1 > /proc/sys/net/ipv4/ip_forward
永久配置
[root@ds ~]# cat /etc/sysctl.
sysctl.conf sysctl.d/
[root@ds ~]# cat /etc/sysctl.conf
# sysctl settings are defined through files in
# /usr/lib/sysctl.d/, /run/sysctl.d/, and /etc/sysctl.d/.
#
# Vendors settings live in /usr/lib/sysctl.d/.
# To override a whole file, create a new file with the same in
# /etc/sysctl.d/ and put new settings there. To override
# only specific settings, add a file with a lexically later
# name in /etc/sysctl.d/ and put new settings there.
#
# For more information, see sysctl.conf(5) and sysctl.d(5).
net.ipv4.ip_forward=1
net.ipv4.conf.default.send_redirects=0
net.ipv4.conf.all.send_redirects=0
net.ipv4.conf.eth0.send_redirects=0
立即生效
[root@ds ~]# sysctl -p
net.ipv4.ip_forward = 1
net.ipv4.conf.default.send_redirects = 0
net.ipv4.conf.all.send_redirects = 0
net.ipv4.conf.eth0.send_redirects = 0
1.1.5 重新配置nfs服务器
[root@net-ser ~]# cat /etc/exports
/data 10.0.0.0/24(rw,sync)

重启

[root@net-ser ~]# systemctl restart nfs
1.1.6 集群功能测试
测试使用VIP的IP地址。

在linux中端上测试:
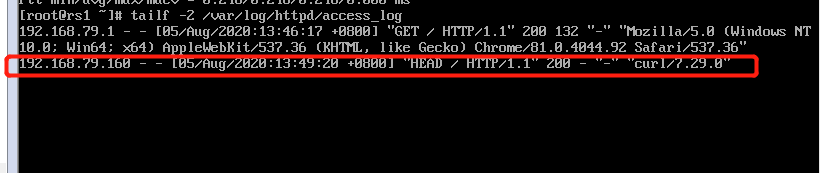
在rs上动态打印日志
在linux上访问服务两次

在ser01上:
在ser02上:
构建LVS集群注意事项
NAT模式下:
(1)路由转发:
在个该模式实现,LVS调度器必须能够提供数据转发功能,而CentOS7 系统默认的规则没有开启,需要手动
修改/etc/sysctl.conf文件开启该功能。
(2)该模式下,调度器除了担当调度的角色外,还要担当路由的角色,但CentOS7 下防火墙转发规则默认为
禁止转发,因此需要设置容许规则:[root@bogon ~]# firewall-cmd --set-default-
zone=trusted。
(3真实服务器网关必须指向调度服务器IP。
DR模式下:
   该模式下所有的真实服务器都配置了VIP地址,因此需要设置服务器不进行正对VIP地址的ARP广播,linux可
直接通过arp_ignore与arp_announce来实现。
arp_ignore用来定义网卡在相应外部ARP请求时的响应级别。
0:默认,任何网络的接口收到ARP请求后,如果本机的任意接口有该IP。则给予相应。
1:某个网络接口收到ARP请求后,判断请求的IP地址是否为本地接口,是则回应,否则不回应。LVS调度器会
将客户请求转发给真实服务器的eth0接口,而真实服务的VPI地址配置在本地的回环设备上。
arp_announce用来定义网卡广播ARP包时的级别
0:默认,任何网络接口收到ARP请求后,如果本机的任意接口有该IP,则相应
1:尽量避免相应MAC地址非本网络接口IP地址的ARP请求。
2:不相应MAC地址非本网络接口IP地址的ARP请求。


 412
412


 被折叠的 条评论
为什么被折叠?
被折叠的 条评论
为什么被折叠?
 到【灌水乐园】发言


