


从0开始搭建ssm框架。
首先创建一个maven工程。ssmdemo02,添加web的支持。
1. 创建数据库,创建数据库表。
CREATE DATABASE ssm;
USE ssm;

DROP TABLE IF EXISTS books

CREATE TABLE `books` (
`bookID` INT(10) NOT NULL AUTO_INCREMENT COMMENT '书id',
`bookName` VARCHAR(100) NOT NULL COMMENT '书名',
`bookCounts` INT(11) NOT NULL COMMENT '数量',
`detail` VARCHAR(200) NOT NULL COMMENT '描述',
KEY `bookID` (`bookID`)
) ENGINE=INNODB DEFAULT CHARSET=utf8

INSERT  INTO `books`(`bookID`,`bookName`,`bookCounts`,`detail`)VALUES
(1,'Java',1,'从入门到放弃'),
(2,'MySQL',10,'从删库到跑路'),
(3,'Linux',5,'从进门到进牢');
使用我们的IDEA工具连接数据库,需要注意的就是这个时区的问题。在MySQL8.0版本中要设置时区,一般有UTC(世界统一时间),CST(中国标准时间),Asia/Shanghai等。

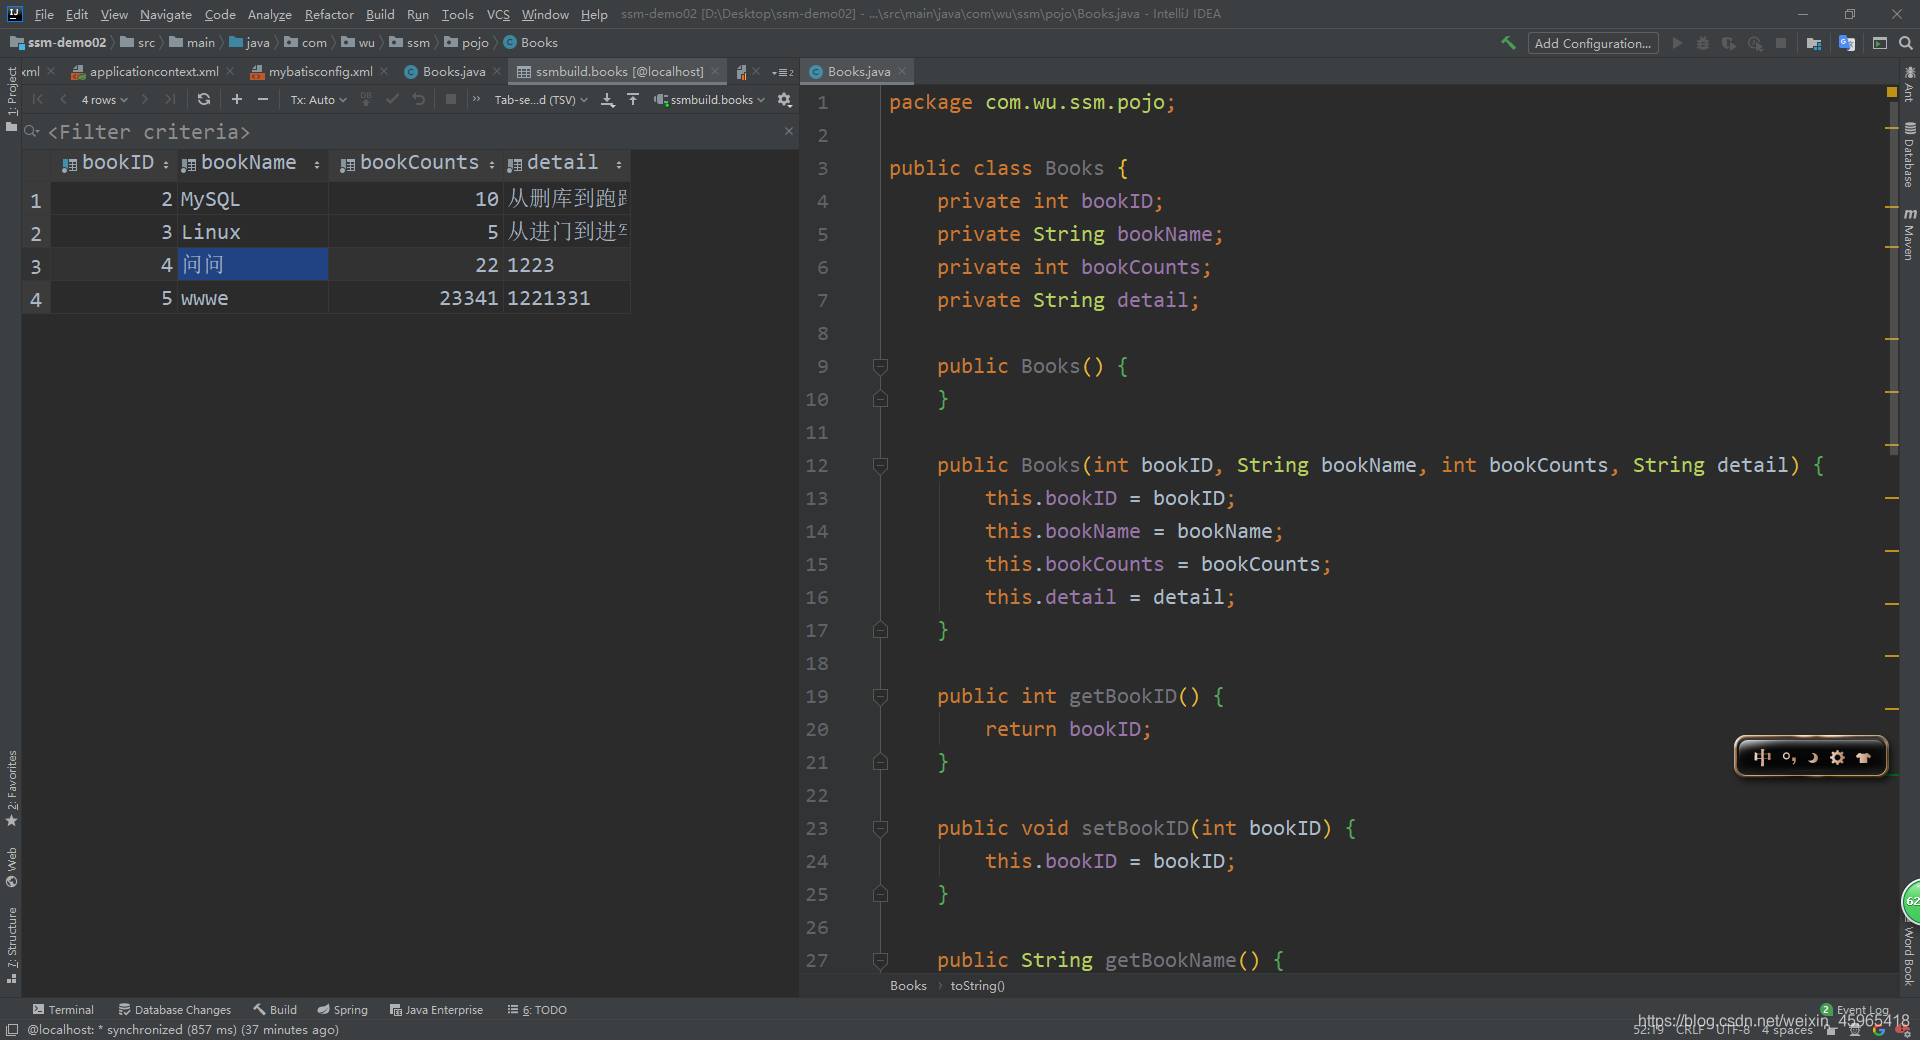
选择我们需要的数据库。测试连接是否完成。

打开我们的表。表结构如图。

2. 数据库的准备工作已经完成了。下面我们需要配置mybatis。
在我们的maven工程中导入pom依赖。
<dependencies>
   <!--Junit-->
   <dependency>
       <groupId>junit</groupId>
       <artifactId>junit</artifactId>
       <version>4.12</version>
   </dependency>
   <!--数据库驱动-->
   <dependency>
       <groupId>mysql</groupId>
       <artifactId>mysql-connector-java</artifactId>
       <version>5.1.47</version>
   </dependency>
   <!-- 数据库连接池 -->
   <dependency>
       <groupId>com.mchange</groupId>
       <artifactId>c3p0</artifactId>
       <version>0.9.5.2</version>
   </dependency>

   <!--Servlet - JSP -->
   <dependency>
       <groupId>javax.servlet</groupId>
       <artifactId>servlet-api</artifactId>
       <version>2.5</version>
   </dependency>
   <dependency>
       <groupId>javax.servlet.jsp</groupId>
       <artifactId>jsp-api</artifactId>
       <version>2.2</version>
   </dependency>
   <dependency>
       <groupId>javax.servlet</groupId>
       <artifactId>jstl</artifactId>
       <version>1.2</version>
   </dependency>

   <!--Mybatis-->
   <dependency>
       <groupId>org.mybatis</groupId>
       <artifactId>mybatis</artifactId>
       <version>3.5.2</version>
   </dependency>
   <dependency>
       <groupId>org.mybatis</groupId>
       <artifactId>mybatis-spring</artifactId>
       <version>2.0.2</version>
   </dependency>

   <!--Spring-->
   <dependency>
       <groupId>org.springframework</groupId>
       <artifactId>spring-webmvc</artifactId>
       <version>5.1.9.RELEASE</version>
   </dependency>
   <dependency>
       <groupId>org.springframework</groupId>
       <artifactId>spring-jdbc</artifactId>
       <version>5.1.9.RELEASE</version>
   </dependency>
</dependencies>
maven资源过滤
<build>
   <resources>
       <resource>
           <directory>src/main/java</directory>
           <includes>
               <include>**/*.properties</include>
               <include>**/*.xml</include>
           </includes>
           <filtering>false</filtering>
       </resource>
       <resource>
           <directory>src/main/resources</directory>
           <includes>
               <include>**/*.properties</include>
               <include>**/*.xml</include>
           </includes>
           <filtering>false</filtering>
       </resource>
   </resources>
</build>
建立项目的目录结构。datasource.properties文件中主要是一些数据库的配置。applicationcontext.xml文件和mybatis.xml文件分别是spring和mybatis的配置文件。


database.properties
jdbc.driver=com.mysql.jdbc.Driver
jdbc.url=jdbc:mysql://localhost:3306/ssmbuild?useSSL=true&useUnicode=true&characterEncoding=utf8
jdbc.username=root
jdbc.password=123456
根据我们的数据库来创建实体类
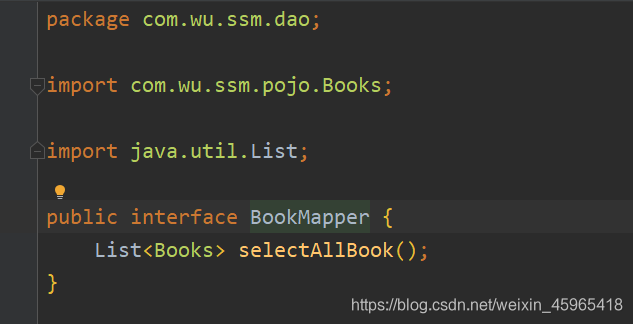
在dao层编写我们对数据库的业务操作。
bookMapper
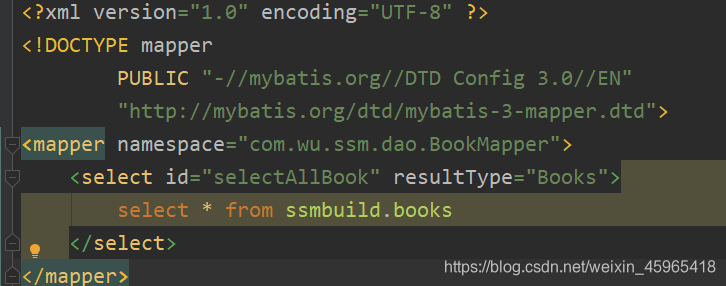
bookMapper.xml
service层(编写Service层代码时需要知道我们要借助dao层对数据库进行操作,因此需要引入mapper,然后要有set方法,方便在spring中进行注入)
BookService

BookService.impl

在mybatisconfig.xml文件里面配置别名以及注册mapper.
<?xml version="1.0" encoding="UTF-8" ?>
<!DOCTYPE configuration
        PUBLIC "-//mybatis.org//DTD Config 3.0//EN"
        "http://mybatis.org/dtd/mybatis-3-config.dtd">
<configuration>
    <!--设置别名-->
    <typeAliases>
        <package name="com.wu.ssm.pojo"/>
    </typeAliases>

    <!--注册mapper-->
    <mappers>
        <mapper class="com.wu.ssm.dao.BookMapper"/>
    </mappers>


</configuration>
现在我们的底层需求已经全部写完了。下面开始编写spring的代码。
在spring中我们主要的任务就是要把我们的类放在spring容器中。现在主要有以下任务需要做。
- spring需要整合mybatis。现在我们的mybatisconfig.xml的任务比较单一。只设置了别名和注册了mapper。整合mybatis的第一步就是需要引入我们的database.properties文件。注意要写classpath这个坑,不然会显示FileNotFound异常。
- 整合mybatis的下一步就是需要配置数据源。数据源的选择有很多种,我们选择c3p0,c3p0是全自动的数据源。引入相应的类,在属性中我们的值要写jstl表达式,从database.properties文件中拿到值。然后就是c3p0的一些自带的其他属性,比如最大连接池,最小连接池,在关闭的时候是否自动提交事务。
- 下一步需要配置sqlSessionFactory对象。主要的属性有datasource和configLocation。datasource就是我们上面配的数据源。configLocation就是我们编写的mybatisconfig.xml文件(要注意这里的classpath)。
- 整合mybatis的最后一步就是需要把我们Dao接口注入到spring容器里面。Dao接口没有set方法,也没有构造函数。我们可以实现接口,然后把它的实现类注入到spring的容器里面。也可以实现动态的注入。动态注入的代码如下。
<bean class="org.mybatis.spring.mapper.MapperScannerConfigurer">
        <property name="sqlSessionFactoryBeanName" value="sqlSessionFactory"/>
        <property name="basePackage" value="com.wu.ssm.dao"/>
    </bean>
spring整合mybatis的完整的配置文件如下。
<?xml version="1.0" encoding="UTF-8"?>
<beans xmlns="http://www.springframework.org/schema/beans"
       xmlns:xsi="http://www.w3.org/2001/XMLSchema-instance"
       xmlns:context="http://www.springframework.org/schema/context"
       xsi:schemaLocation="http://www.springframework.org/schema/beans http://www.springframework.org/schema/beans/spring-beans.xsd http://www.springframework.org/schema/context https://www.springframework.org/schema/context/spring-context.xsd">

    <!--关联数据库文件-->
    <context:property-placeholder location="classpath:database.properties"/>

    <!--数据库连接池-->
    <bean id="dataSource" class="com.mchange.v2.c3p0.ComboPooledDataSource">
        <property name="user" value="${jdbc.username}"/>
        <property name="password" value="${jdbc.password}"/>
        <property name="jdbcUrl" value="${jdbc.url}"/>
        <property name="driverClass" value="${jdbc.driver}"/>
        <!--c3p0连接池的私有属性-->
        <property name="maxPoolSize" value="30"/>
        <property name="minPoolSize" value="10"/>
        <property name="autoCommitOnClose" value="false"/>
        <property name="acquireRetryAttempts" value="2"/>
    </bean>

    <!--配置sqlSessionFactory对象-->
    <bean id="sqlSessionFactory" class="org.mybatis.spring.SqlSessionFactoryBean">
        <property name="dataSource" ref="dataSource"/>
        <!--配置mybatis全局配置文件-->
        <property name="configLocation" value="classpath:mybatisconfig.xml"/>
    </bean>

    <!--配置扫描dao包,动态实现Dao接口注入到spring容器中-->
    <bean class="org.mybatis.spring.mapper.MapperScannerConfigurer">
        <property name="sqlSessionFactoryBeanName" value="sqlSessionFactory"/>
        <property name="basePackage" value="com.wu.ssm.dao"/>
    </bean>
</beans>
spring整合dao层完毕之后我们就可以开始整合service层了,首先创建spring-service.xml文件。
spring-service.xml文件如下。需要注意的就是配置事务管理器。
<?xml version="1.0" encoding="UTF-8"?>
<beans xmlns="http://www.springframework.org/schema/beans"
       xmlns:xsi="http://www.w3.org/2001/XMLSchema-instance"
       xmlns:context="http://www.springframework.org/schema/context"
       xsi:schemaLocation="http://www.springframework.org/schema/beans http://www.springframework.org/schema/beans/spring-beans.xsd http://www.springframework.org/schema/context https://www.springframework.org/schema/context/spring-context.xsd">

    <context:component-scan base-package="com.wu.ssm.service"/>

    <!--BookService注入到IOC容器中-->
    <bean id="bookServiceImpl" class="com.wu.ssm.service.BookServiceImpl">
        <property name="bookMapper" ref="bookMapper"/>
    </bean>

    <!--配置事务管理器-->
    <bean id="transactionManager" class="org.springframework.jdbc.datasource.DataSourceTransactionManager">
        <!--注入数据库连接池-->
        <property name="dataSource" ref="dataSource"/>
    </bean>

</beans>
整合service层完毕。我们需要把spring-dao.xml文件和spring-service.xml文件导入到applicationcontext.xml文件中。我们把这么多配置分成这么多个的主要原因就是使得我们的配置文件清晰,一目了然,很干净很舒服,不容易出错。
在这里的时候我们可以自己写一个测试,看看我们的代码是否有错误。
在测试包下面写一个Test.测试没问题,可以开始下一步了。

web项目中,web.xml的配置
- 配置DispatcherServlet中我们要引入总的配置文件applicationcontext.xml,而不是引入spring-mvc.xml.
- 配置乱码过滤
- session的过期时间
<?xml version="1.0" encoding="UTF-8"?>
<web-app xmlns="http://xmlns.jcp.org/xml/ns/javaee"
         xmlns:xsi="http://www.w3.org/2001/XMLSchema-instance"
         xsi:schemaLocation="http://xmlns.jcp.org/xml/ns/javaee http://xmlns.jcp.org/xml/ns/javaee/web-app_4_0.xsd"
         version="4.0">
    <!--DispatcherServlet-->
    <servlet>
        <servlet-name>DispatcherServlet</servlet-name>
        <servlet-class>org.springframework.web.servlet.DispatcherServlet</servlet-class>
        <init-param>
            <param-name>contextConfigLocation</param-name>
            <param-value>classpath:applicationcontext.xml</param-value>
        </init-param>
        <load-on-startup>1</load-on-startup>
    </servlet>

    <servlet-mapping>
        <servlet-name>DispatcherServlet</servlet-name>
        <url-pattern>/</url-pattern>
    </servlet-mapping>

    <!--乱码过滤-->
    <filter>
        <filter-name>encodingFilter</filter-name>
        <filter-class>
            org.springframework.web.filter.CharacterEncodingFilter
        </filter-class>
        <init-param>
            <param-name>encoding</param-name>
            <param-value>utf-8</param-value>
        </init-param>
    </filter>
    <filter-mapping>
        <filter-name>encodingFilter</filter-name>
        <url-pattern>/*</url-pattern>
    </filter-mapping>

    <!--session过期时间-->
    <session-config>
        <session-timeout>14</session-timeout>
    </session-config>
</web-app>
配置spring-mvc文件,这里需要注意的坑就是在配置MVC注解驱动的时候容易把头文件自动导成cache。应该把cache全部改为mvc就行啦。把spring-mvc.xml文件写好之后需要导入总的配置文件applicationcontext.xml中。
<?xml version="1.0" encoding="UTF-8"?>
<beans xmlns="http://www.springframework.org/schema/beans"
       xmlns:xsi="http://www.w3.org/2001/XMLSchema-instance" xmlns:mvc="http://www.springframework.org/schema/mvc"
       xmlns:bean="http://www.springframework.org/schema/context"
       xsi:schemaLocation="http://www.springframework.org/schema/beans http://www.springframework.org/schema/beans/spring-beans.xsd
       http://www.springframework.org/schema/mvc http://www.springframework.org/schema/mvc/spring-mvc.xsd http://www.springframework.org/schema/context https://www.springframework.org/schema/context/spring-context.xsd">
    <!--配置springMVC-->
    <!--配置mvc的注解驱动-->
    <mvc:annotation-driven/>
    <!--静态资源默认servlet的配置-->
    <mvc:default-servlet-handler/>
    <!--扫描包-->
    <bean:component-scan base-package="com.wu.ssm.controller"/>
    <!--配置jsp,modelView模型视图解析器-->
    <bean class="org.springframework.web.servlet.view.InternalResourceViewResolver">
        <property name="prefix" value="/WEB-INF/jsp/"/>
        <property name="suffix" value=".jsp"/>
    </bean>
</beans>
applicationcontext.xml
<?xml version="1.0" encoding="UTF-8"?>
<beans xmlns="http://www.springframework.org/schema/beans"
       xmlns:xsi="http://www.w3.org/2001/XMLSchema-instance"
       xsi:schemaLocation="http://www.springframework.org/schema/beans http://www.springframework.org/schema/beans/spring-beans.xsd">
    <import resource="spring-dao.xml"/>
    <import resource="spring-service.xml"/>
    <import resource="spring-mvc.xml"/>
</beans>
现在我们就可以写controller层的代码了。
使用注解。
@Autowired自动装配
@Qualifier(“bookServiceImpl”) 这个注解主要是用作你在bean装配时名字有几个,用来确定其中一个,防止名称冲突。
@RequestMapping("/allbook") 这个注解是路径名。放在不同的位置有不同的效果。把这个注解放在类名上时,这个路径对所有点的方法都会适用,当把这个注解放在方法名上面时,只对当前方法有效。
class:BookController
package com.wu.ssm.controller;


import com.wu.ssm.pojo.Books;
import com.wu.ssm.service.BookService;
import org.springframework.beans.factory.annotation.Autowired;
import org.springframework.beans.factory.annotation.Qualifier;
import org.springframework.stereotype.Controller;
import org.springframework.ui.Model;
import org.springframework.web.bind.annotation.RequestMapping;

import java.util.List;

@Controller
@RequestMapping("/book")
public class BookController {
    //  在视图层我们需要调用service1层
    @Autowired
    @Qualifier("bookServiceImpl")
    private BookService bookService;

    @RequestMapping("/123")
    public String selectAllBook(Model model) {
        List<Books> list = bookService.selectAllBook();
        model.addAttribute("list", list);
        return "/allbook";
    }
}
在jsp文件下面编写allbook.jsp。
配置Tomcat服务器。注意的位置有2个位置。如图。

开启服务器,然后发现浏览器没有反应,跳转不到index.jsp页面。这里有一个问题就是我们的项目中没有包。打开项目结构,建立lib目录,把包导入即可。

下面是结果。


 883
883


 被折叠的 条评论
为什么被折叠?
被折叠的 条评论
为什么被折叠?
 到【灌水乐园】发言


