


首先 创建一个 Spring initiolar 项目
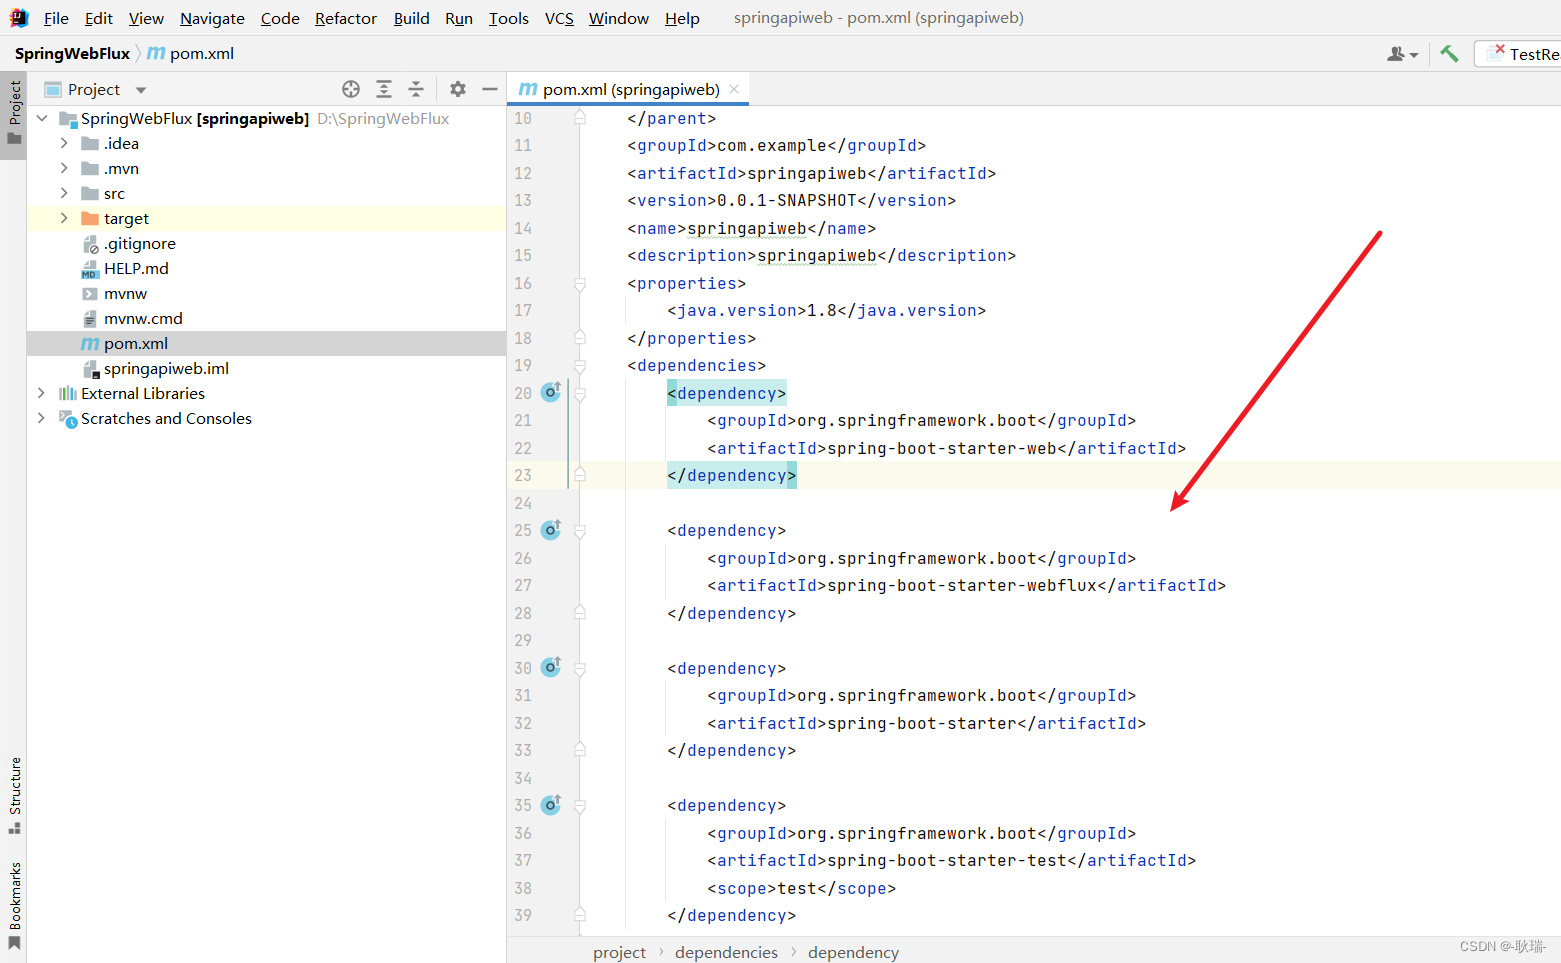
然后 找到项目配置文件 pom.xml
引入webflux 和 web
参考代码如下
<dependency>
	<groupId>org.springframework.boot</groupId>
	<artifactId>spring-boot-starter-web</artifactId>
</dependency>
<dependency>
	<groupId>org.springframework.boot</groupId>
	<artifactId>spring-boot-starter-webflux</artifactId>
</dependency>
然后在项目中打开如下图目录文件

就在这个文件中设置一个端口号 参考代码如下
server.port=8081
然后 打开项目如下图箭头所指的这个目录
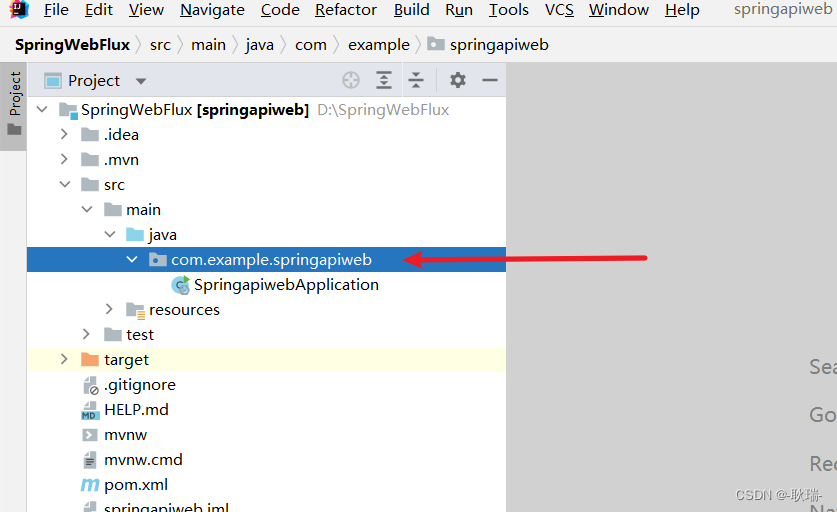
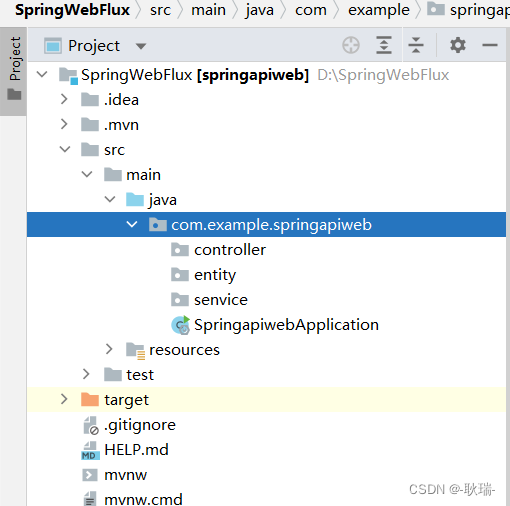
在项目创建我们项目所需要的结构包 entity,controller,senvice
然后 我们的项目就是这样的
在entity包下创建一个类 叫 User 参考代码如下
package com.example.springapiweb.entity;

public class User {
    private String name;
    private String gender;
    private Integer age;

    public User(String name,String gender,Integer age){
        this.name = name;
        this.gender = gender;
        this.age = age;
    }

    public void setName(String name){
        this.name = name;
    };

    public void setGender(String gender) {
        this.gender = gender;
    }

    public void setAge(Integer age) {
        this.age = age;
    }
    public String getName(){
        return this.name;
    };
    public String getGender() {
        return this.gender;
    }
    public Integer getAge() {
        return this.age;
    }
}
简单创建了一个实体类 创建了三个字段 name 用户名称 gender 性别 age 年龄 写了他们对应的get set 和 一个有参构造方法
然后呢 我们这个项目就不直接去操作数据库啦
我们在 senvice 包下创建一个接口 叫 UserService
参考代码如下
package com.example.springapiweb.senvice;

import com.example.springapiweb.entity.User;
import reactor.core.publisher.Flux;
import reactor.core.publisher.Mono;

public interface UserService {
    //根据id查询用户
    Mono<User> getUserById(int id);
    //查询所有用户
    Flux<User> getAllUser();
    //添加用户
    Mono<Void> saveUserInfo (Mono<User> user);
}
我们在接口中定义了几个比较简单的用户操作方法
然后在 senvice 下创建一个包 叫 impl 用于存放实现类 在下面创建一个类 叫 UserServiceImpl
参考代码如下
package com.example.springapiweb.senvice.impl;

import com.example.springapiweb.entity.User;
import com.example.springapiweb.senvice.UserService;
import org.springframework.stereotype.Repository;
import reactor.core.publisher.Flux;
import reactor.core.publisher.Mono;

import java.util.Map;
import java.util.HashMap;

@Repository
public class UserServiceImpl implements UserService {
    //创建map集合存储教据
    private final Map<Integer,User> users = new HashMap<>();

    //在构造方法中为map注入几条数据
    public UserServiceImpl(){
        this.users.put(1,new User("小猫猫","女",2));
        this.users.put(2,new User("小明","男",11));
        this.users.put(3,new User("服部半藏","男",32));
    }

    //根据id查询指定用户
    @Override
    public Mono<User> getUserById(int id) {
        return Mono.justOrEmpty(this. users. get (id));
    }

    //查询所有用户
    @Override
    public Flux<User> getAllUser() {
        return Flux.fromIterable(this.users.values());
    }

    //添加用户
    @Override
    public Mono<Void> saveUserInfo(Mono<User> userMono) {
        return userMono.doOnNext(person -> {
            //向map集合里面放值
            int id = users. size()+1;
            users.put(id,person);
        }).thenEmpty(Mono.empty());
    }
}
我们实现了UserService接口 因为我们这次并不打算操作数据库 所以 所有的操作都是通过Map集合实现的
要特别说明 我们添加后面特意加一个Mono.empty() 是结束流 不然他就成立一个无限的流了
而Mono只能返回 0-1个元素 而 Flux可以返回N个 所以 这里只有查询所有用户的方法用到了Flux
专业的人 做专业的事 这是一个很基础的术语
而 为了解决一开始 map没数据的问题 我们在构造方法中给他注入了几条数据
然后 通过 Repository 声明了当前的类在注解中
然后 在 controller 包下创建一个类 叫 UserController
参考代码如下
package com.example.springapiweb.controller;
import com.example.springapiweb.entity.User;
import com.example.springapiweb.senvice.UserService;
import org.springframework.beans.factory.annotation.Autowired;
import org.springframework.web.bind.annotation.*;
import reactor.core.publisher.Flux;
import reactor.core.publisher.Mono;

@RestController
public class UserController {
    //注入service
    @Autowired
    private UserService userService;

    //id查询
    @GetMapping("/user/{id}")
    public Mono<User> geetUserId(@PathVariable int id) {
        return userService. getUserById(id);
    };

    //查询所有
    @GetMapping("/user")
    public Flux<User> getUsers() {
        return userService.getAllUser();
    };

    @PostMapping("/saveuser")
    public Mono<Void> saveUser(@RequestBody User user) {
        Mono<User> userMono = Mono.just(user);
        return userService.saveUserInfo(userMono);
    };
}
这样 我们就简单做出了一个webflux的交互案例
讲解一下 PathVariable 通常是通过路径获取参数
RequestBody 则是要通过bodyi去取
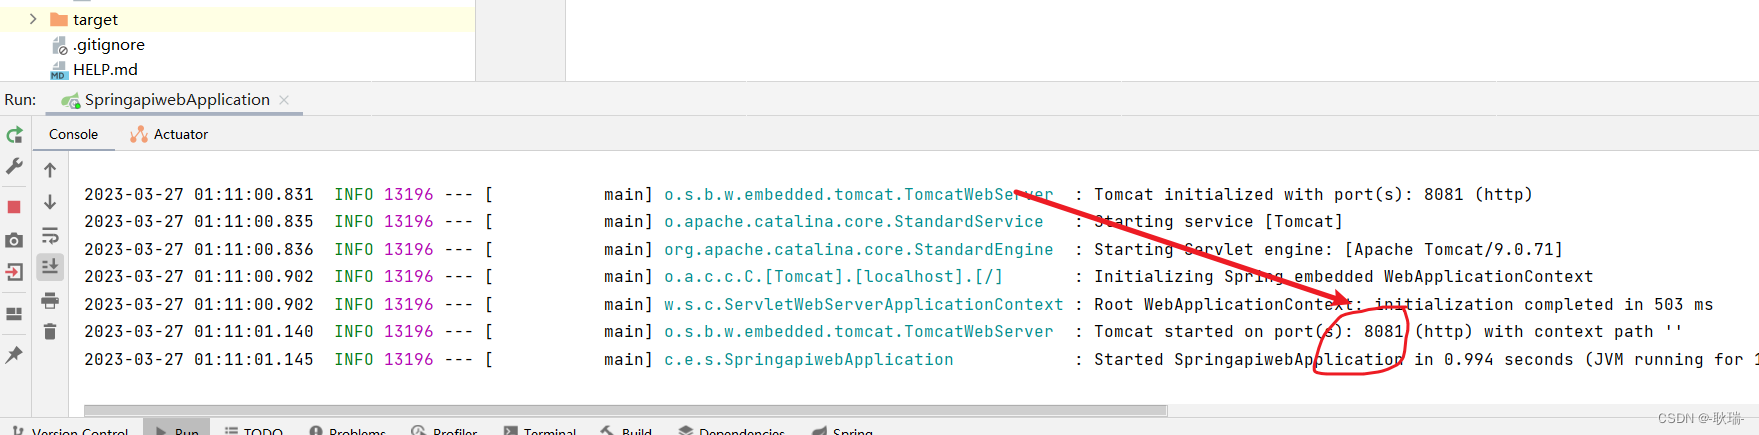
然后 我们如下图 找到他的启动类 进行一个启动
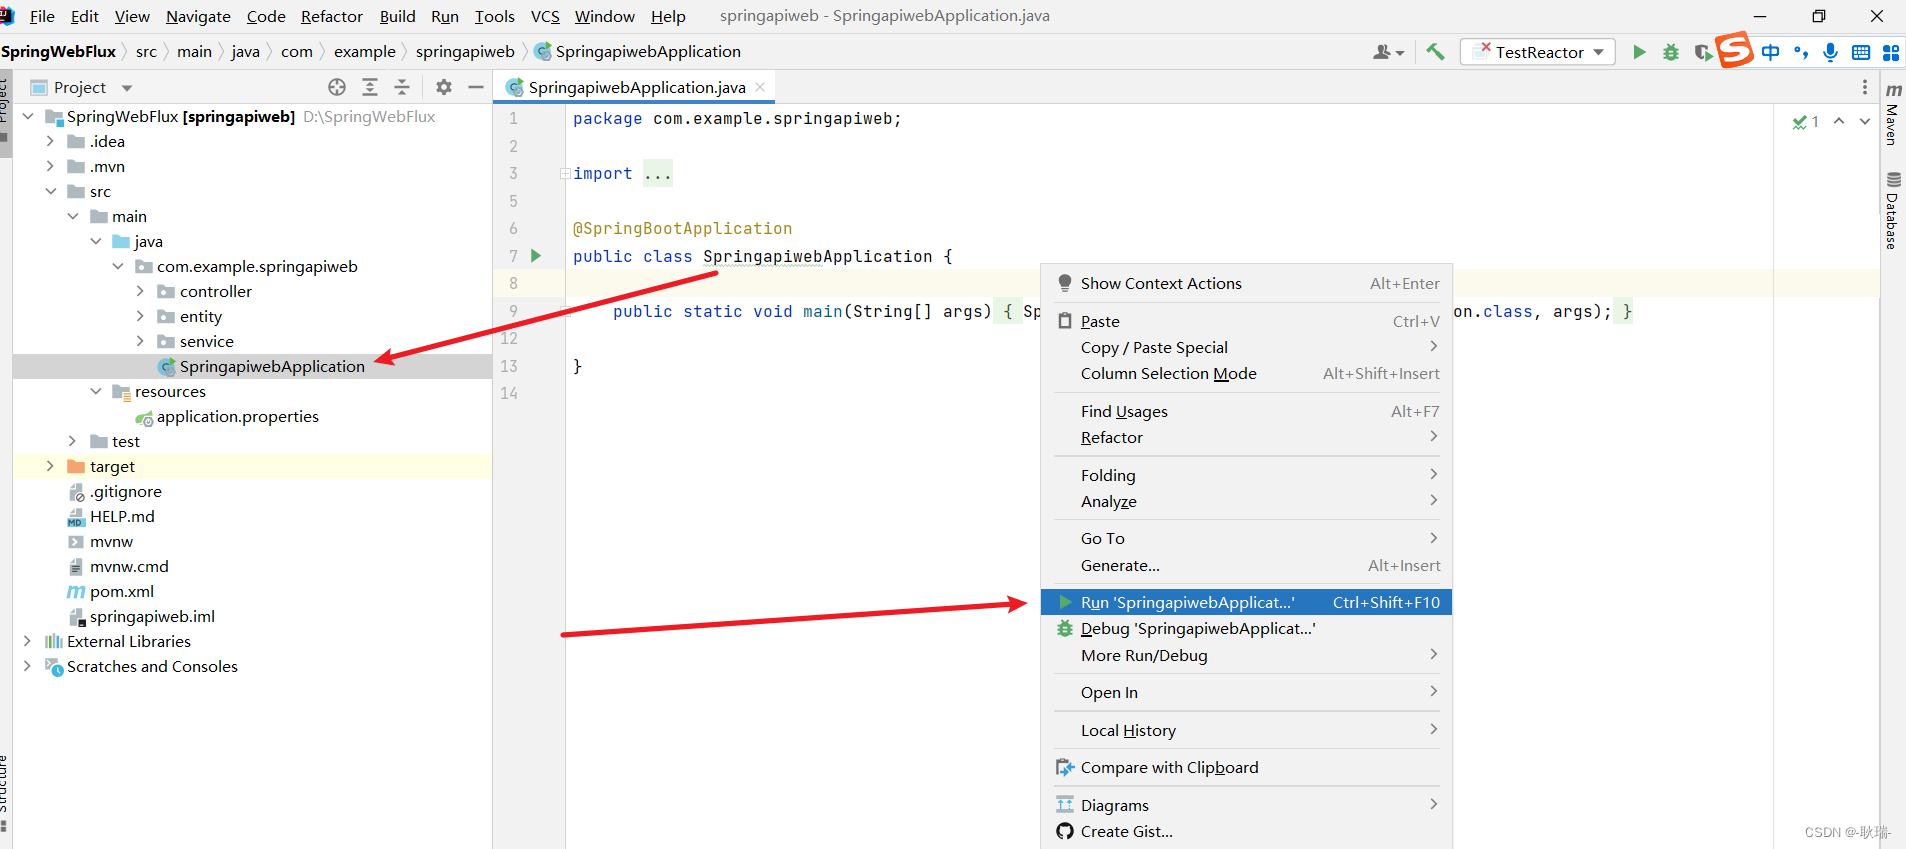
我们的项目就起来了
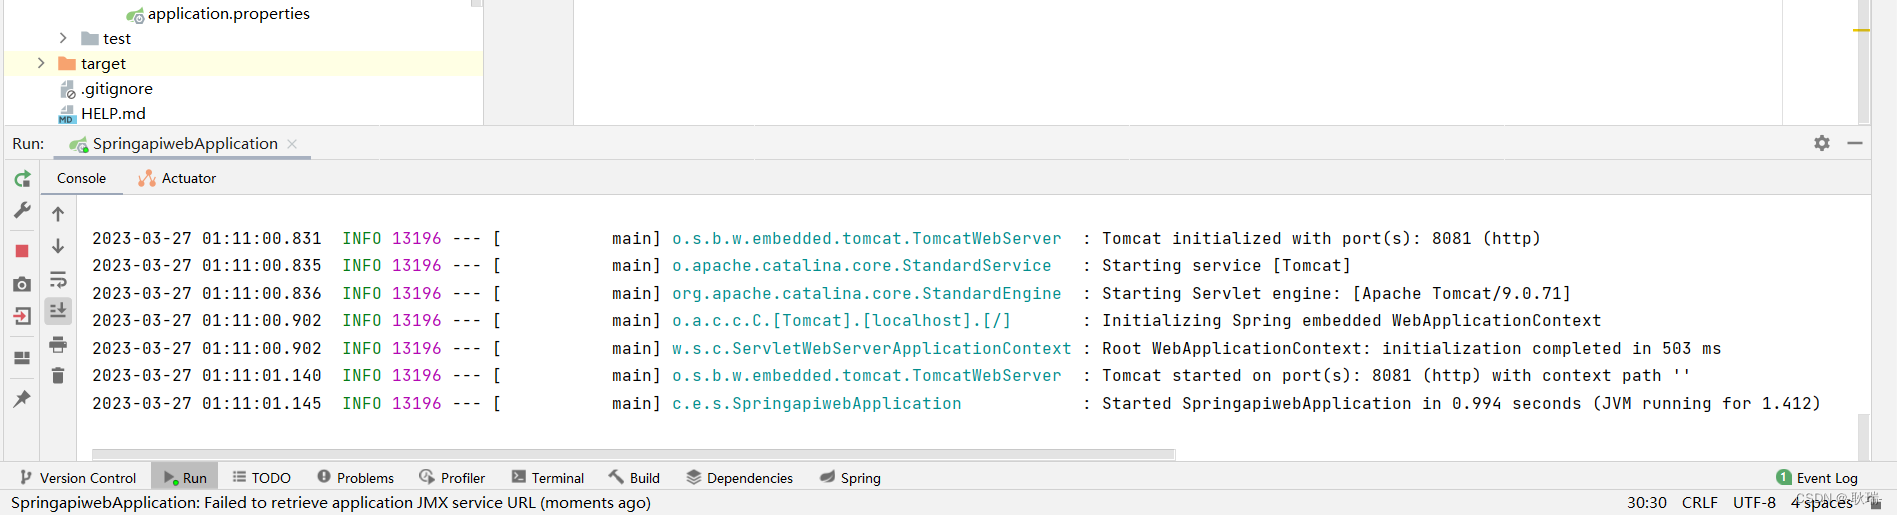
我们可以看到 目前这里的请求地址 是 本机的 8081
然后我们随便打开一个浏览器 访问 http://localhost:8081/user/1
运行结果如下
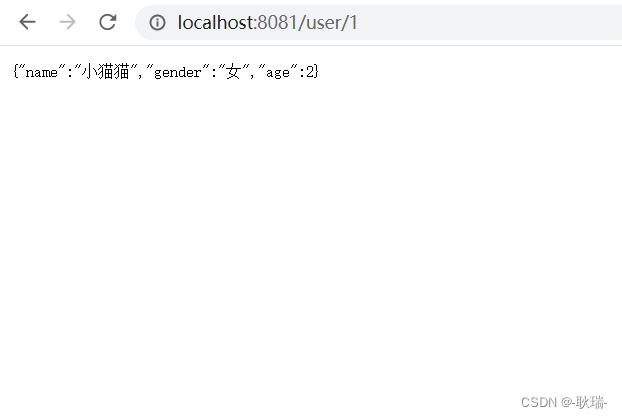
通过你电脑的IP+端口也可以访问 这里 因为没必要暴露 我就不演示IP的用法啦 很基础的东西了
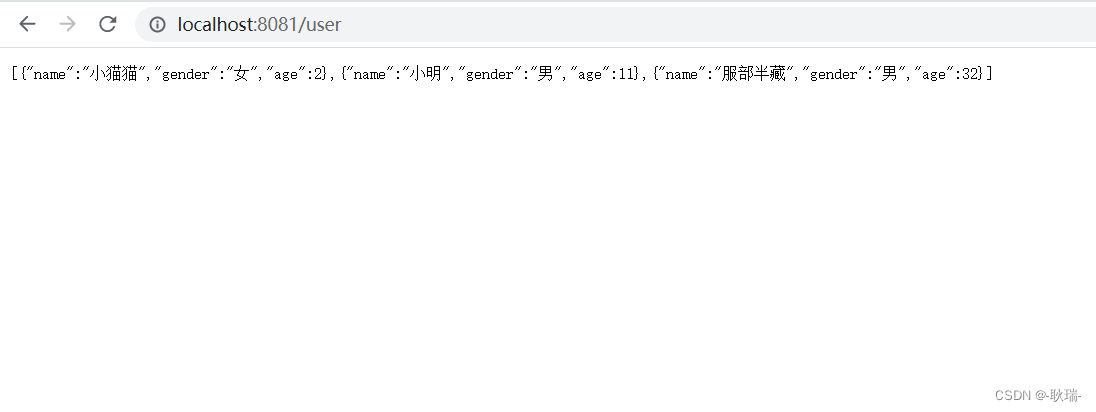
然后我们再通过浏览器直接访问 http://localhost:8081/user
运行结果如下


 1615
1615


 被折叠的 条评论
为什么被折叠?
被折叠的 条评论
为什么被折叠?
 到【灌水乐园】发言


