


 本文介绍了如何在SpringBoot项目中整合Ehcache和Redis缓存技术,包括引入依赖、配置文件设置、自定义缓存策略以及在启动类中启用缓存。通过实例展示了如何在接口中使用Cacheable并观察缓存效果。
之前的文章 spring boot整合 cache 以redis服务 处理数据缓存 便捷开发 带着大家通过spring boot整合了 cache 缓存
那么 我们就来说说 其他服务的缓存
而spring boot默认的缓存方案就是 cache 用simple模式
spring boot的强大在于它的整合能力 它将其他缓存技术整合 统一了接口
简单说 所有的接口都是一样的 代码不用动 换实现就好了
那么问题来了,都有哪些整合技术呢?
如下图
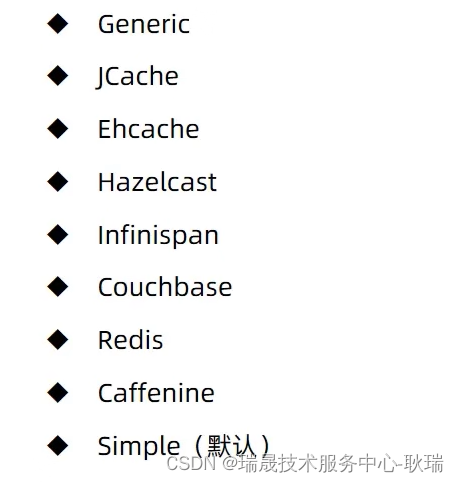
这是官方给出的解决方案
那么 我们这里 就在说一下
memcached
Redis
Simple
Ehcache
Redis之前说过了 Simple就是默认的
然后 本文 我们来说 Ehcache
然后 我们打开 java spring boot项目
pom.xml 导入坐标
<dependency>
	<groupId>net.sf.ehcache</groupId>
	<artifactId>ehcache</artifactId>
</dependency>
<dependency>
	<groupId>org.springframework.boot</groupId>
	<artifactId>spring-boot-starter-cache</artifactId>
</dependency>
然后 application.yml 加上如下代码
spring:
  cache:
    type: ehcache
这里 就是告诉它 我们 cache 要用 ehcache服务
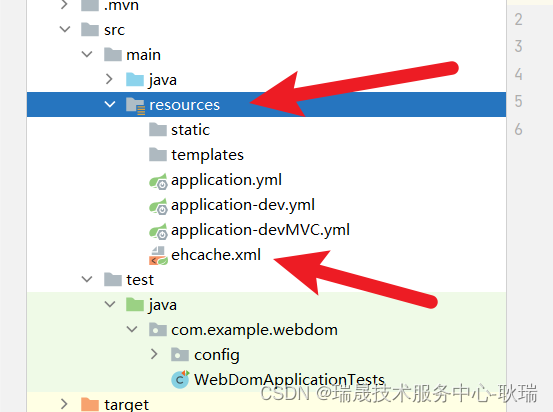
然后 找到如下图 目录 在下面创建一个 ehcache.xml
参考代码如下
<ehcache xmlns:xsi="http://www.w3.org/2001/XMLSchema-instance"
         xsi:noNamespaceSchemaLocation="http://www.ehcache.org/ehcache.xsd"
         updateCheck="false">

    <defaultCache
            eternal="false"
            timeToIdleSeconds="120"
            timeToLiveSeconds="120"
            maxEntriesLocalHeap="10000"
            maxEntriesLocalDisk="10000000"
            diskExpiryThreadIntervalSeconds="120"
            memoryStoreEvictionPolicy="LRU">

        <persistence strategy="localTempSwap"/>

    </defaultCache>

    <!-- 添加其他自定义缓存配置 -->

</ehcache>
地址这里 会出现报红的情况 这个是idea的问题 和我们没关系 不用管

然后 来说说它的配置
eternal: 缓存条目是否永久有效,这里设置为 false 表示不永久有效。
timeToIdleSeconds: 缓存条目在空闲多少秒后过期。
timeToLiveSeconds: 缓存条目在存活多少秒后过期。
maxEntriesLocalHeap: 缓存在堆内存中的最大条目数。
maxEntriesLocalDisk: 缓存在磁盘中的最大条目数。
diskExpiryThreadIntervalSeconds: 磁盘过期线程的运行间隔,用于清理过期的磁盘缓存条目。
memoryStoreEvictionPolicy: 内存存储驱逐策略,这里设置为 LRU (Least Recently Used,最近最少使用)。
后面是元素时间和策略 如果你想具体了解 可以自己去搜索
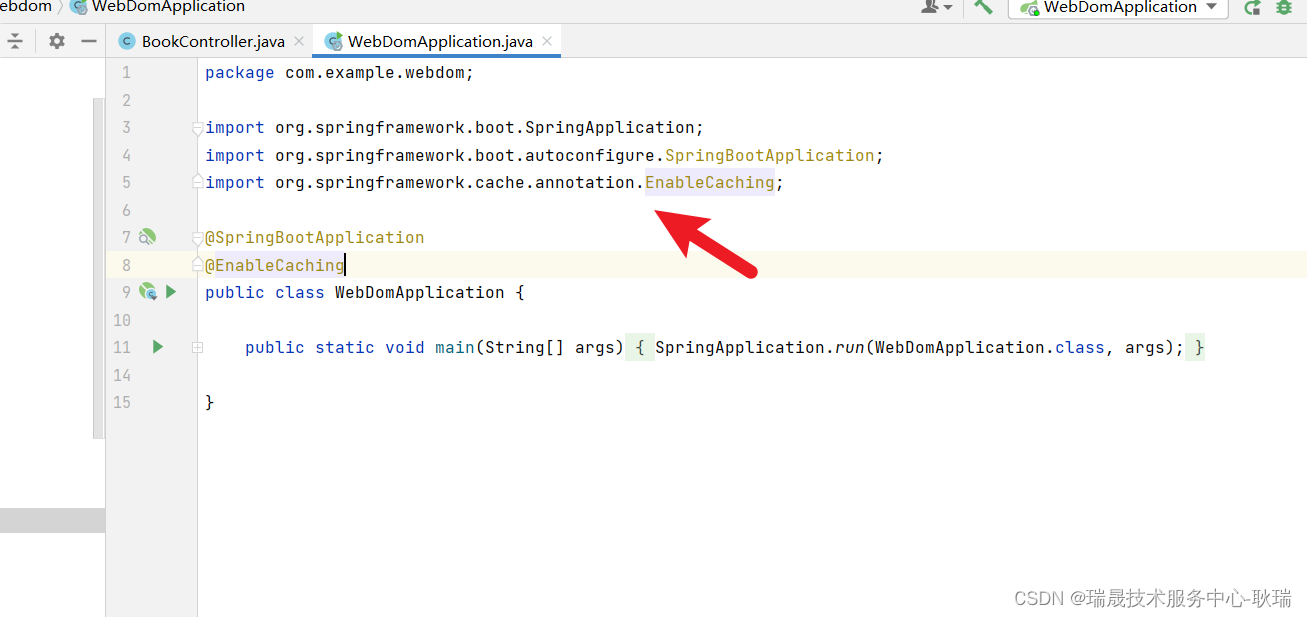
老规矩 启动类 加上 EnableCaching 启动cache
这里 我们属性类 就不需要 implements Serializable了

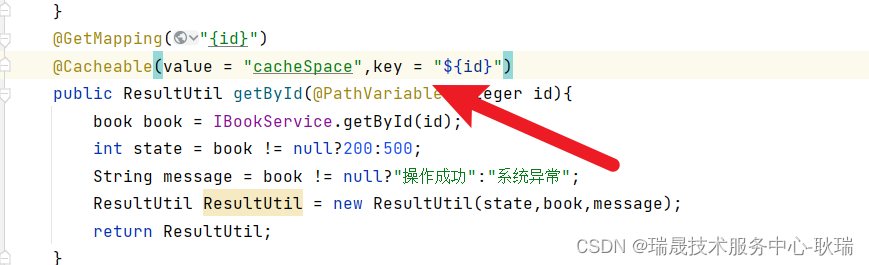
然后 我们接口方法还是这样写
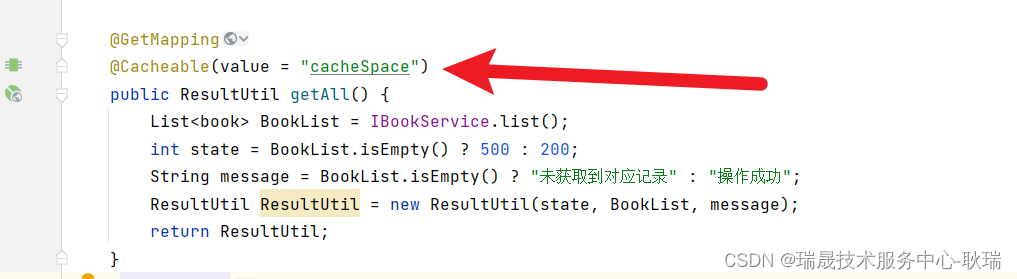
我们声明Cacheable 缓存空间叫 cacheSpace
还是那句话 如果根据id查 可以把id作为key进行存储
但如果这个时候 你直接启动项目 然后调用接口会报错的
因为 现在还没有 cacheSpace 这个缓存
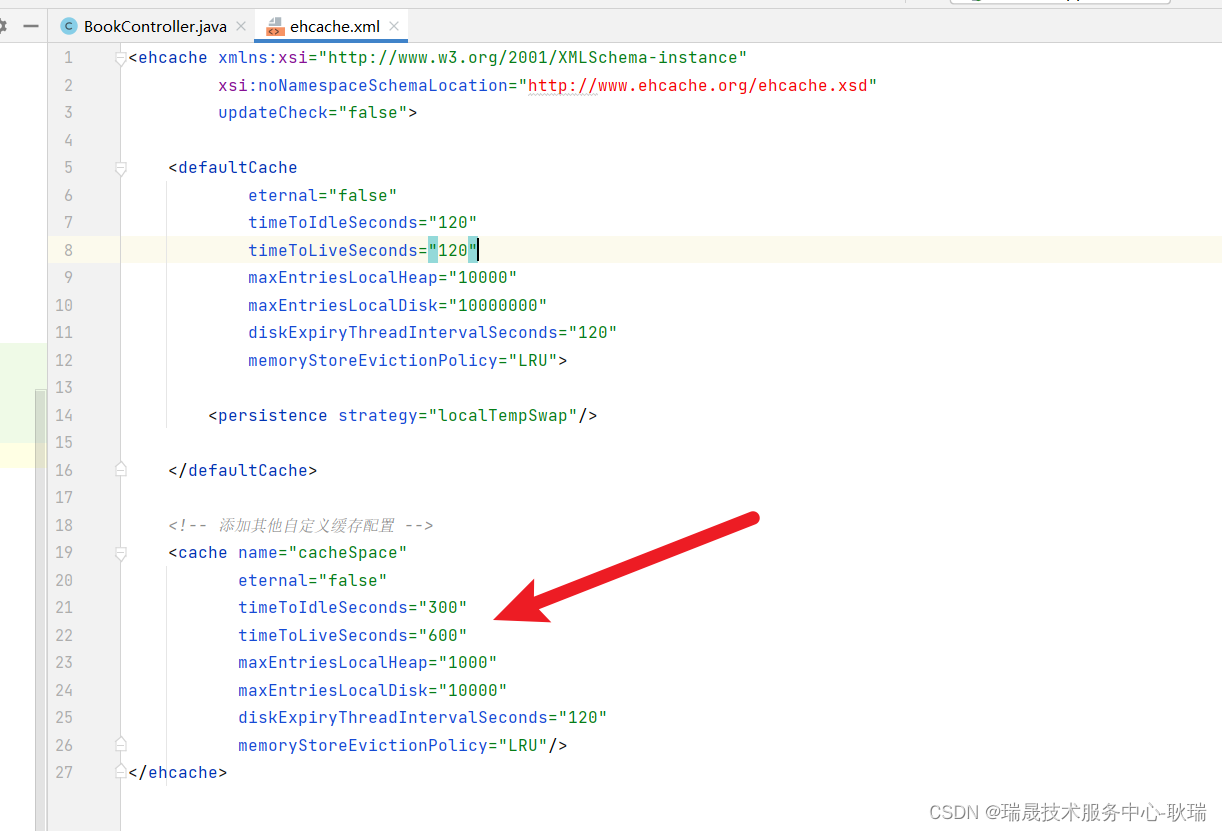
ehcache.xml加入代码
<!-- 添加其他自定义缓存配置 -->
<cache name="cacheSpace"
   eternal="false"
   timeToIdleSeconds="300"
   timeToLiveSeconds="600"
   maxEntriesLocalHeap="1000"
   maxEntriesLocalDisk="10000"
   diskExpiryThreadIntervalSeconds="120"
   memoryStoreEvictionPolicy="LRU"/>
我们加一个叫 cacheSpace 的缓存
重新启动项目
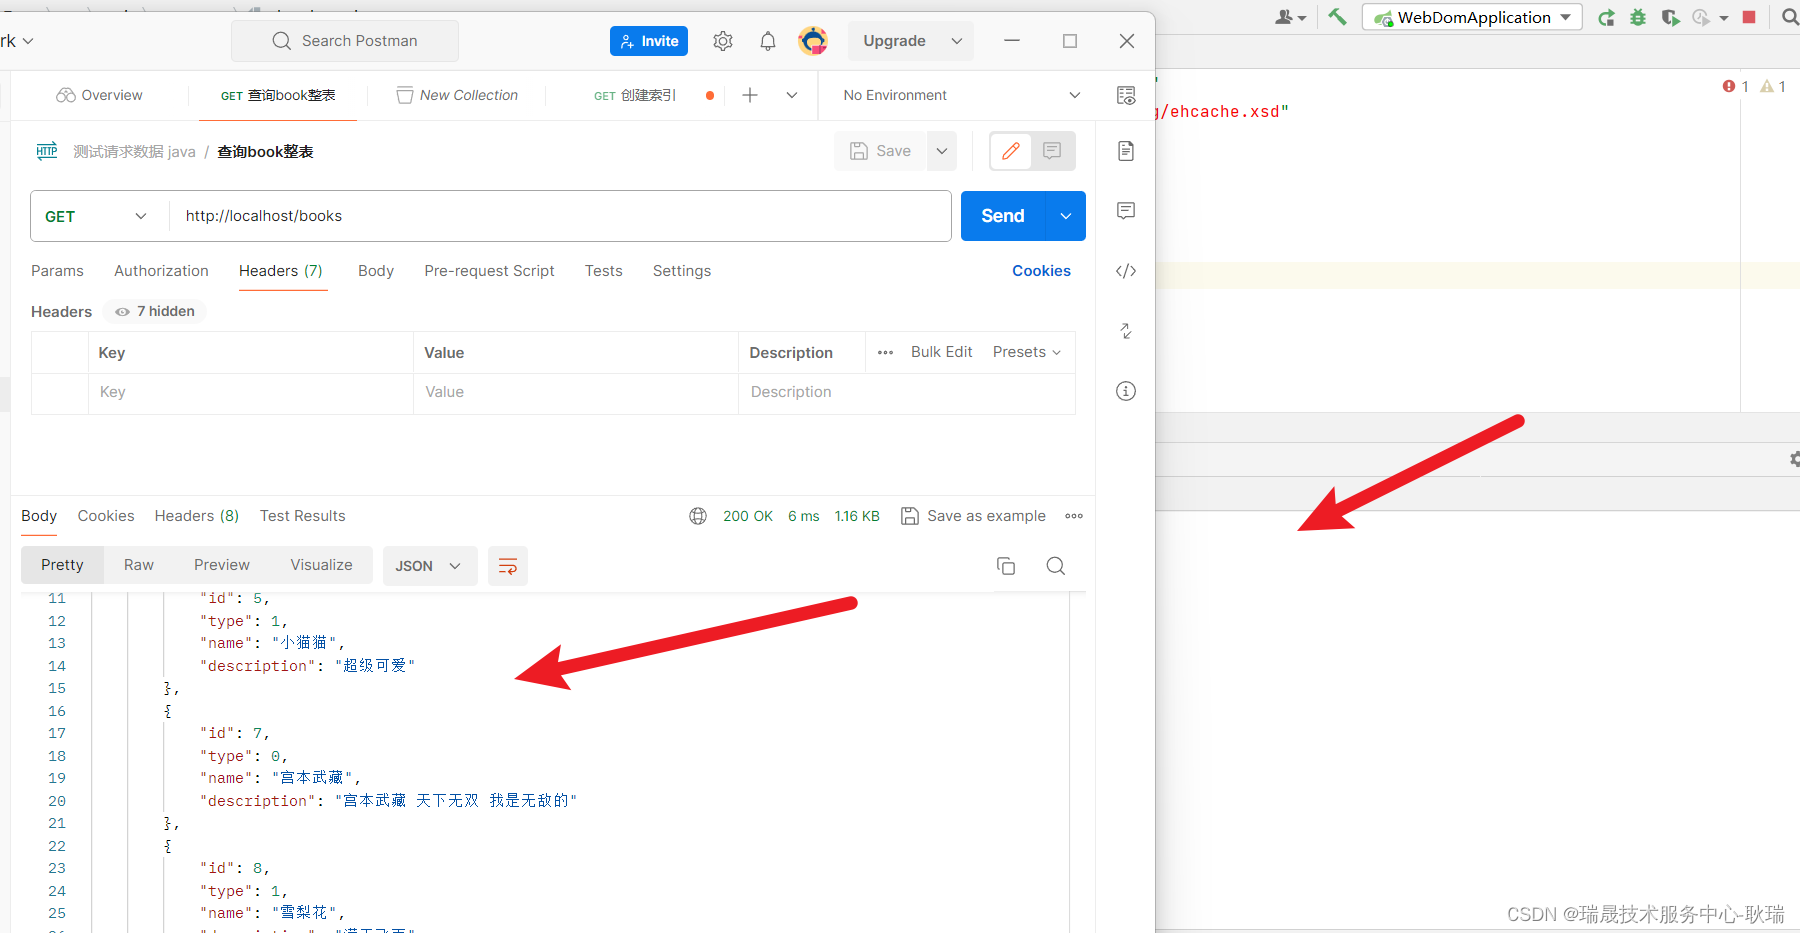
然后 我们调用接口
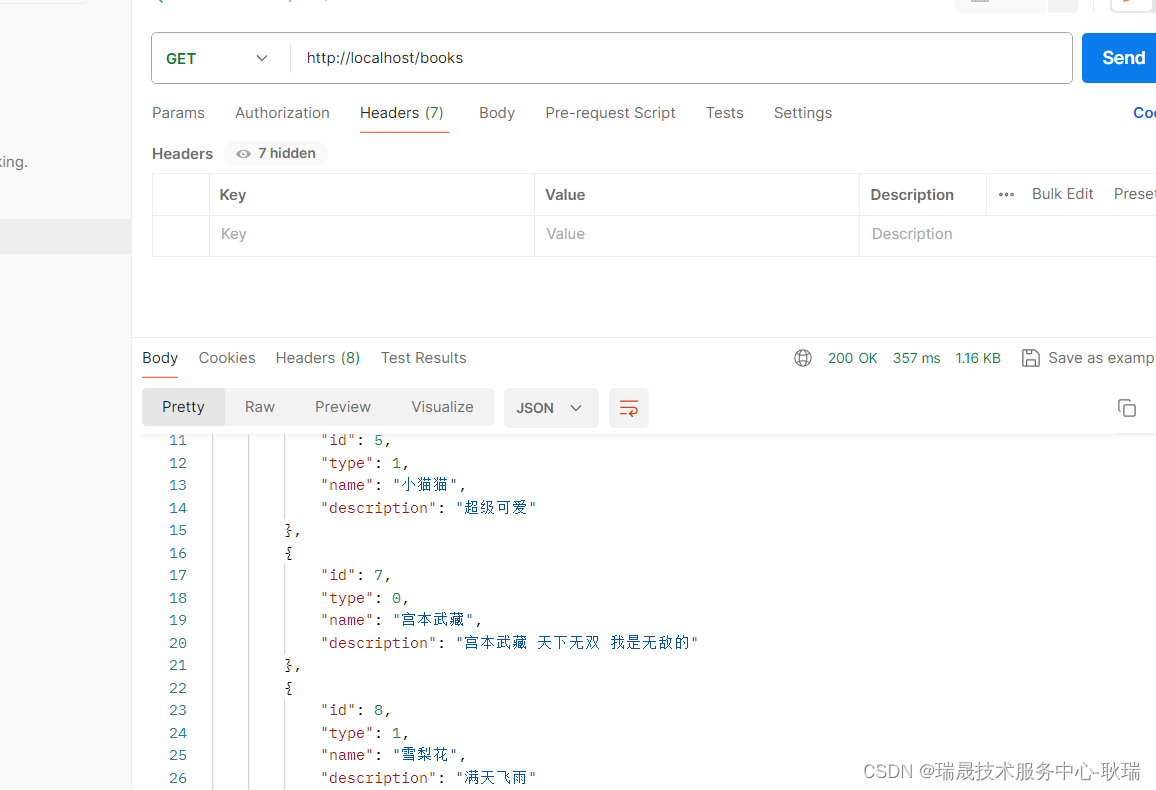
正常返回 看项目控制台 明显是有执行sql的
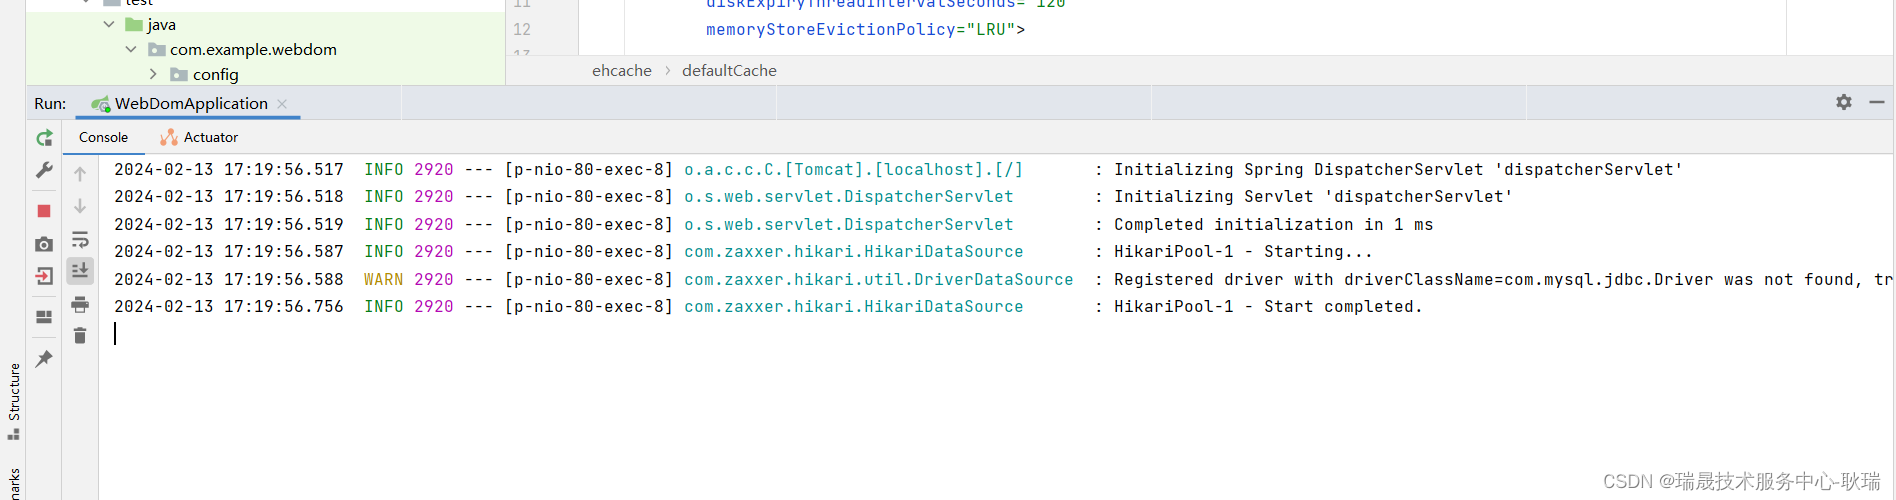
然后 我们清空控制台内容 然后重新调接口
很明显 我们的缓存已经形成了


 3147
3147


 被折叠的 条评论
为什么被折叠?
被折叠的 条评论
为什么被折叠?
 到【灌水乐园】发言


