


文章目录
Spring Security是什么
Spring Security是一个基于Spring的认证授权框架,它主要提供了认证、授权和常见网络攻击防护功能,从而保证了系统的安全性
Spring Security简单使用
- 初始化一个Spring Boot项目
我这里使用的Spring Boot版本是2.7.5

- 引入maven依赖
 <dependency>
       <groupId>org.springframework.boot</groupId>
         <artifactId>spring-boot-starter-web</artifactId>
     </dependency>
     <!--   spring security 启动依赖     -->
     <dependency>
         <groupId>org.springframework.boot</groupId>
         <artifactId>spring-boot-starter-security</artifactId>
     </dependency>
     <!--    thymeleaf模板引擎   -->
     <dependency>
         <groupId>org.springframework.boot</groupId>
         <artifactId>spring-boot-starter-thymeleaf</artifactId>
     </dependency>
- 在resources目录下创建templates目录
本次教程所有的html页面都放在该目录下

- 编写首页index.html
<html xmlns:th="https://www.thymeleaf.org">
<head>
    <title>Hello Security!</title>
</head>
<body>
<h1>Hello Security</h1>
<a th:href="@{/logout}">退出登录</a>
</body>
</html>
- 启动项目
可以看到控制台输出了用户的密码,其默认用户名是user

- 登录系统
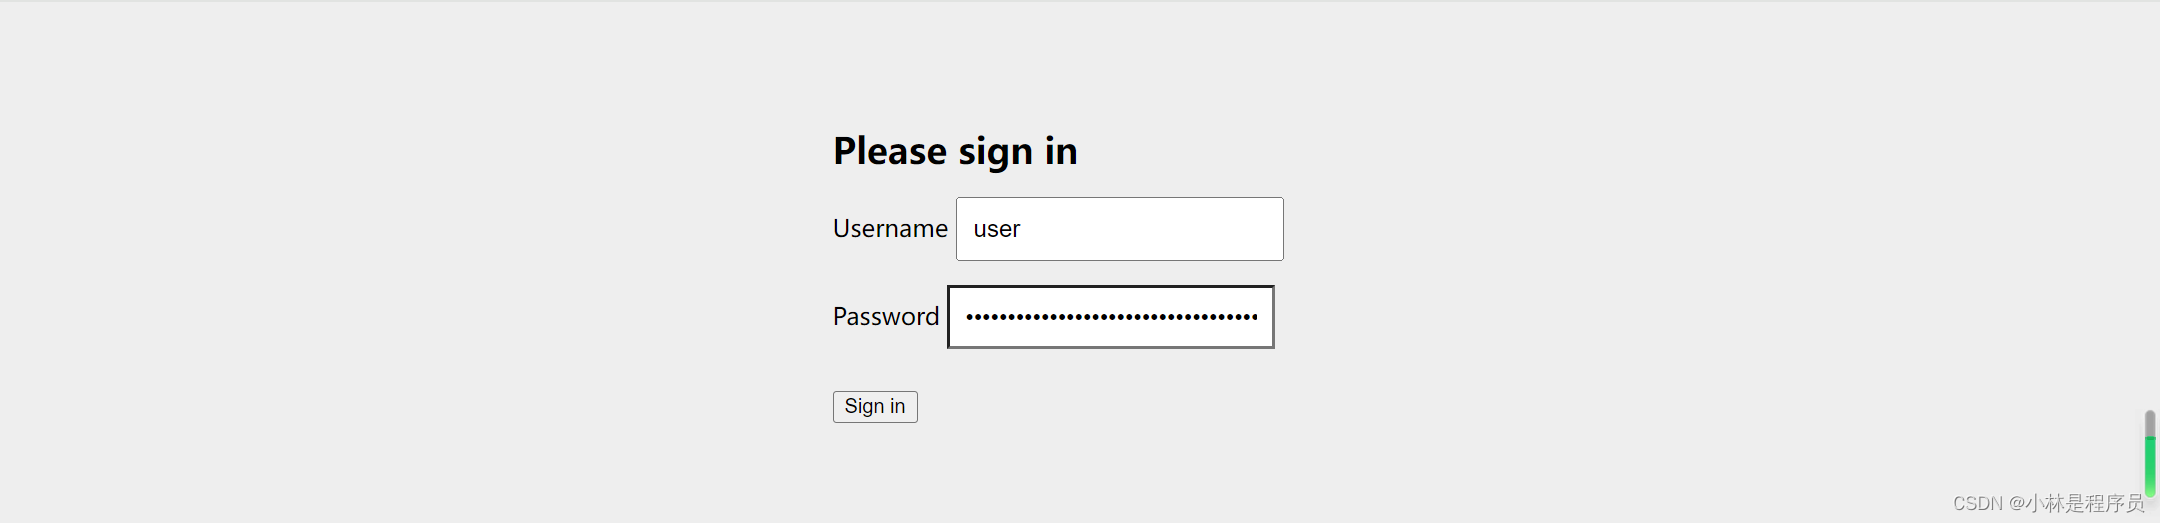

Spring Security为系统提供了默认的登录页、用户信息、登录成功跳转逻辑、登录失败跳转逻辑、注销成功跳转逻辑、未登录校验、权限校验等特性,接下来我们通过配置和编写代码覆盖Spring Security的默认特性
自定义Spring Security
自定义登录页
- 编写登录接口
@Controller
@RequestMapping("/auth")
public class LoginController {

    /**
     * 跳转到登录页
     *
     * @return
     */
    @GetMapping("/login")
    public String toLogin() {
        return "login";
    }
}
- 编写登录页login.html
<!DOCTYPE html>
<html xmlns="http://www.w3.org/1999/xhtml" xmlns:th="https://www.thymeleaf.org">
<head>
    <title>Please Log In</title>
</head>
<body>
<h1>Please Log In</h1>
<div th:if="${param.error}">
    Invalid username and password.</div>
<div th:if="${param.logout}">
    You have been logged out.</div>
<form th:action="@{/auth/login}" method="post">
    <div>
        <input type="text" name="user" placeholder="Username"/>
    </div>
    <div>
        <input type="password" name="pwd" placeholder="Password"/>
    </div>
    <input type="submit" value="Log in" />
</form>
</body>
</html>
- 配置Security过滤器链
@EnableWebSecurity  // 开启Security功能
public class WebSecurityConfig {
    @Bean
    public SecurityFilterChain filterChain(HttpSecurity http) throws Exception {
        http
                .authorizeRequests(authorize -> authorize
                        .antMatchers("/auth/login**").permitAll()  // 配置指定请求允许匿名访问
                        .anyRequest().authenticated()  // 配置所有请求需要认证才能访问
                )
                .formLogin(form ->
                        form.loginPage("/auth/login") // 自定义登录页
                                .permitAll()  // 允许任何人访问登录页
                                .usernameParameter("user")  // 自定义用户参数名
                                .passwordParameter("pwd")  // 自定义密码参数名
                )
                .csrf().disable() // 取消 csrf 防护,这样注销可以使用get请求,而无需post请求
        ;
        return http.build();
    }
}
- 重启项目测试

自定义用户数据源
- 创建数据库
我创建的数据库名是spring-security
- 创建用户表
CREATE TABLE `system_user` (
           `id` int(11) NOT NULL AUTO_INCREMENT COMMENT '主键',
           `username` varchar(100) NOT NULL COMMENT '用户名',
           `pwd` varchar(100) DEFAULT NULL COMMENT '密码',
           `gender` varchar(100) NOT NULL COMMENT '性别',
           PRIMARY KEY (`id`)
) ENGINE=InnoDB AUTO_INCREMENT=3 DEFAULT CHARSET=utf8mb4;
- 添加用户数据(密码是明文123456加密得到的)
INSERT INTO `spring-security`.`system_user`
(id, username, pwd, gender)
VALUES(1, 'xiaolin', '$2a$10$CxlGXE45Q1dqmStmycKrOO/cvlOf3Ywt7jZ42N9Q3LET6GSOW25OK', '男');
INSERT INTO `spring-security`.`system_user`
(id, username, pwd, gender)
VALUES(2, 'xiaolan', '$2a$10$CxlGXE45Q1dqmStmycKrOO/cvlOf3Ywt7jZ42N9Q3LET6GSOW25OK', '女');
- 添加maven依赖
  <dependency>
      <groupId>mysql</groupId>
      <artifactId>mysql-connector-java</artifactId>
    </dependency>
    <dependency>
      <groupId>com.baomidou</groupId>
      <artifactId>mybatis-plus-boot-starter</artifactId>
      <version>3.5.2</version>
    </dependency>
    <dependency>
      <groupId>org.projectlombok</groupId>
      <artifactId>lombok</artifactId>
    </dependency>
- 配置连接信息
spring:
  datasource:
    driver-class-name: com.mysql.cj.jdbc.Driver
    url: jdbc:mysql://localhost:3306/spring-security?useUnicode=true&characterEncoding=utf8&serverTimezone=UTC&useSSL=false
    username: root
    password: root
mybatis-plus:
  configuration:
    log-impl: org.apache.ibatis.logging.stdout.StdOutImpl  # mybatis-plus Sql日志打印
  mapper-locations: /mapper/**/*.xml # mapper的xml存放路径
-
启动类开启Mapper扫描

-
创建实体类
@Data
@NoArgsConstructor
@AllArgsConstructor
public class SystemUser {
    private Integer id;
    private String username;
    private String pwd;
    private String gender;
}
- 创建Mapper
public interface SystemUserMapper extends BaseMapper<SystemUser> {
}
- 在WebSecurityConfig配置类配置密码编码器
密码编码器帮助我们对密码进行加密存储
   @Bean
    public BCryptPasswordEncoder passwordEncoder() {
        return new BCryptPasswordEncoder();
    }
	// 密码编码器使用示例
   public static void main(String[] args) {
        // BCryptPasswordEncoder 对密码进行加密
        BCryptPasswordEncoder passwordEncoder = new BCryptPasswordEncoder();
        String password = passwordEncoder.encode("123456");
        System.out.println(password);
    }
- 自定义UserDetails
UserDetails是Spring用于存放用户信息、权限信息的类,如果我们需要额外扩展一些属性,就需要自定义UserDetails
public class CustomUserDetails extends SystemUser implements UserDetails {
	// 添加用户的一个默认角色,可以自定义角色名,不过角色前缀固定为ROLE_
    private List<GrantedAuthority> authorities = Collections.singletonList(new SimpleGrantedAuthority("ROLE_common"));

    public CustomUserDetails(SystemUser systemUser) {
        super(systemUser.getId(), systemUser.getUsername(), systemUser.getPwd(), systemUser.getGender());
    }

    @Override
    public Collection<? extends GrantedAuthority> getAuthorities() {
        return authorities;
    }

    @Override
    public String getPassword() {
        return super.getPwd();
    }

    @Override
    public boolean isAccountNonExpired() {
        return true;
    }

    @Override
    public boolean isAccountNonLocked() {
        return true;
    }

    @Override
    public boolean isCredentialsNonExpired() {
        return true;
    }

    @Override
    public boolean isEnabled() {
        return true;
    }
}
- 自定义用户认证服务
@Service
public class MyUserDetailsService implements UserDetailsService {
    @Autowired
    private SystemUserMapper systemUserMapper;

    /**
     * 验证用户信息
     *
     * @param username
     * @return
     * @throws UsernameNotFoundException
     */
    @Override
    public UserDetails loadUserByUsername(String username) throws UsernameNotFoundException {
        SystemUser systemUser = systemUserMapper.selectOne(new LambdaUpdateWrapper<SystemUser>()
                .eq(SystemUser::getUsername, username));
        if (systemUser == null) {
            throw new UsernameNotFoundException(username);
        } else {
            return new CustomUserDetails(systemUser);
        }
    }
}
- 重启项目进行登录

自定义登录成功跳转逻辑
- 在WebSecurityConfig配置类配置登录成功请求URL
...前面代码省略...
.usernameParameter("user")  // 自定义用户参数名
.passwordParameter("pwd")  // 自定义密码参数名
.defaultSuccessUrl("/auth/index", true)  // 自定义登录成功跳转url
...后面代码省略...
- 在LoginController添加跳转首页接口
    /**
     * 登录成功跳转到首页
     *
     * @return
     */
    @GetMapping("/index")
    public String toIndex() {
        return "index";
    }
自定义登录失败处理逻辑
自定义登录失败跳转逻辑
- 在WebSecurityConfig配置类配置登录失败请求URL
...前面代码省略...
.defaultSuccessUrl("/auth/index", true)  // 自定义登录成功跳转url
.failureUrl("/auth/login?login_error")  // 自定义登录失败跳转url
...后面代码省略...
- 在login.html页面自定义登录失败提示信息
...前面html省略...
<div th:if="${param.error}">
    Invalid username and password.</div>
<div th:if="${param.login_error}">
    自定义:无效的用户名和密码.</div>
<div th:if="${param.logout}">
    You have been logged out.</div>
...后面html省略...
自定义登录失败处理器
- 自定义认证失败处理器
public class CustomAuthenticationFailureHandler implements AuthenticationFailureHandler {
    // 重定向策略
    private final RedirectStrategy redirectStrategy = new DefaultRedirectStrategy();

    @Override
    public void onAuthenticationFailure(HttpServletRequest request, HttpServletResponse response, AuthenticationException exception) throws IOException, ServletException {
        // 重定向到登录页
        this.redirectStrategy.sendRedirect(request, response, "/auth/login?custom_login_error");
    }
}
- 在WebSecurityConfig配置类配置自定义认证失败处理器
...前面代码省略...
.failureUrl("/auth/login?login_error")  // 自定义登录失败跳转url
.failureHandler(new CustomAuthenticationFailureHandler())  // 自定义登录失败处理器
...后面代码省略...
- 在login.html页面自定义登录失败提示信息
...前面html省略...
<div th:if="${param.login_error}">
    自定义:无效的用户名和密码.</div>
<div th:if="${param.custom_login_error}">
    自定义处理器:无效的用户名和密码.</div>
<div th:if="${param.logout}">
    You have been logged out.</div>
...后面html省略...
以上两种方式都可以实现登录失败的跳转逻辑处理,使用其中一种即可
自定义注销成功跳转逻辑
- 在WebSecurityConfig配置类配置注销成功跳转URL
...前面代码省略...
.formLogin(form ->
    form.loginPage("/auth/login") // 自定义登录页
                .permitAll()  // 允许任何人访问登录页
                .usernameParameter("user")  // 自定义用户参数名
                .passwordParameter("pwd")  // 自定义密码参数名
                .defaultSuccessUrl("/auth/index", true)  // 自定义登录成功跳转url
                .failureUrl("/auth/login?login_error")  // 自定义登录失败跳转url
                .failureHandler(new CustomAuthenticationFailureHandler())  // 自定义登录失败处理器
)
.logout(logout ->
        logout.logoutSuccessUrl("/auth/login?login_logout") // 自定义注销成功跳转url
)
...后面代码省略...
- 在login.html页面自定义注销成功提示信息
...前面html省略...
<div th:if="${param.logout}">
    You have been logged out.</div>
<div th:if="${param.login_logout}">
    自定义:注销成功.</div>
...后面html省略...
自定义未登录跳转逻辑
- 自定义未登录处理器
public class CustomAuthenticationEntryPoint implements AuthenticationEntryPoint {
    private final RedirectStrategy redirectStrategy = new DefaultRedirectStrategy();
    @Override
    public void commence(HttpServletRequest request, HttpServletResponse response, AuthenticationException authException) throws IOException, ServletException {
        // 重定向到登录页
        this.redirectStrategy.sendRedirect(request, response, "/auth/login?login_not_alive");
    }
}
- 在WebSecurityConfig配置类配置自定义未登录处理器
...前面代码省略...
.logout(logout ->
        logout.logoutSuccessUrl("/auth/login?login_logout") // 自定义注销成功跳转url
)
.exceptionHandling(handler -> handler
        .authenticationEntryPoint(new CustomAuthenticationEntryPoint())  // 自定义用户未登录处理器
)
...后面代码省略...
- 在login.html页面自定义未登录提示信息
...前面html省略...
<div th:if="${param.login_logout}">
    自定义:注销成功.</div>
<div th:if="${param.login_not_alive}">
    自定义:用户已失效.</div>
...后面html省略...
自定义无访问权限跳转逻辑
-
WebSecurityConfig配置类开启安全校验注解

-
编写用户信息和用户列表接口
public interface SystemUserService {
    SystemUser getUser(String username);

    List<SystemUser> getUsers();

}
@Service
public class SystemUserServiceImpl implements SystemUserService {
    @Autowired
    private SystemUserMapper systemUserMapper;

    @Override
    public SystemUser getUser(String username) {
        return systemUserMapper.selectOne(new LambdaQueryWrapper<SystemUser>()
                .eq(SystemUser::getUsername, username));
    }

    @Override
    public List<SystemUser> getUsers() {
        return systemUserMapper.selectList(null);
    }
}
@Controller
@RequestMapping("/user")
public class SystemUserController {

    @Autowired
    private SystemUserService systemUserService;

    /**
     * 获取用户信息
     *
     * @param model
     * @return
     */
    @PreAuthorize("hasAnyRole('admin','common')")
    @GetMapping("/getUserInfo")
    public String getUserInfo(Model model) {
        Authentication authentication = SecurityContextHolder.getContext().getAuthentication();
        String username = authentication.getName();
        SystemUser user = systemUserService.getUser(username);
        model.addAttribute("user", user);
        return "user";
    }

    @PreAuthorize("hasRole('admin')")
    @GetMapping("/getUserList")
    public String getUserList(Model model) {
        List<SystemUser> users = systemUserService.getUsers();
        model.addAttribute("users", users);
        return "userList";
    }

}
- 编写用户信息页user.html
<html xmlns:th="https://www.thymeleaf.org">
<head>
    <title>个人主页</title>
</head>
<body>
<p>用户信息</p>
<div th:text="${user.username}"></div>
</body>
</html>
- 编写用户列表页userList.html
<html xmlns:th="https://www.thymeleaf.org">
<head>
    <title>用户列表</title>
</head>
<body>
<p>用户列表</p>
<div th:each="user:${users}" th:text="${user.username}"></div>
</body>
</html>
- 编写无权限403页面
<html xmlns:th="https://www.thymeleaf.org">
<head>
    <title>用户无权限!</title>
</head>
<body>
<h1>用户无权限</h1>
<div>
    用户无访问权限
</div>
</body>
</html>
- 首页index.html添加接口访问链接
...前面html省略...
<h1>Hello Security</h1>
<div>
    <a th:href="@{/user/getUserInfo}">个人主页</a>
    <br/>
    <a th:href="@{/user/getUserList}">用户列表</a>
</div>
<a th:href="@{/logout}">退出登录</a>
...前面html省略...
- LoginController定义无权限跳转接口
    /**
     * 用户无权限页面
     *
     * @return
     */
    @GetMapping("/accessError")
    public String toAccessError() {
        return "403";
    }
- 编写无权限处理器
public class CustomAccessDeniedHandler implements AccessDeniedHandler {
    private final RedirectStrategy redirectStrategy = new DefaultRedirectStrategy();

    @Override
    public void handle(HttpServletRequest request, HttpServletResponse response, AccessDeniedException accessDeniedException) throws IOException, ServletException {
        // 重定向到403页面
        this.redirectStrategy.sendRedirect(request, response, "/auth/accessError");
    }
}
- WebSecurityConfig配置类配置无权限处理器
...前面代码省略...
.authenticationEntryPoint(new CustomAuthenticationEntryPoint())  // 自定义用户未登录处理器
.accessDeniedHandler(new CustomAccessDeniedHandler())  // 自定义用户无权限处理器
...后面代码省略...
- 启动项目访问测试
访问首页,点击用户列表,跳转到403页面


html页面控制隐藏无权限接口
- 引入maven依赖
   <!--   thymeleaf对spring security的集成     -->
    <dependency>
      <groupId>org.thymeleaf.extras</groupId>
      <artifactId>thymeleaf-extras-springsecurity5</artifactId>
    </dependency>
- 首页index.html添加安全校验属性
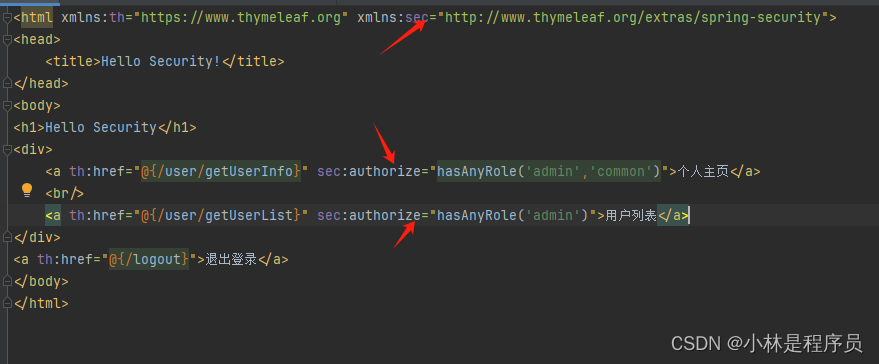
- 再次重启访问首页时,则用户列表标签不会显示

以上就是Spring Security的入门教程,本次教程的完整代码已上传至码云,欢迎大家测试
git clone https://gitee.com/xiaolin-v-java/spring-security-demo.git


 1168
1168


 被折叠的 条评论
为什么被折叠?
被折叠的 条评论
为什么被折叠?
 到【灌水乐园】发言


