


 本文详细描述了如何在ESP32-S3开发板上部署yolox_nano模型进行目标检测的过程,包括环境配置、TVM包安装、模型预处理和量化,以及针对内存溢出问题的解决方案,如将模型权重移到Flash并使用PSRAM存储输出。
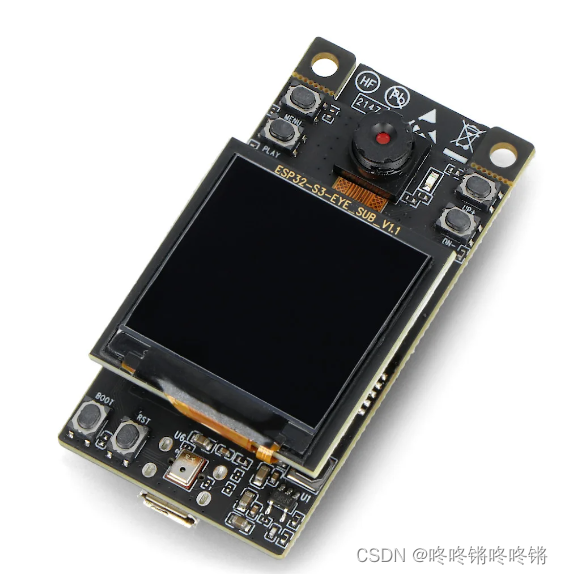
手上的是ESP32-S3-WROOM-1 N8R8芯片,整个链路跑通了,但是识别速度太慢了,20秒一张图,所以暂时还没打算进一步优化程序。
一、生成模型部署项目
官方指导文件:使用TVM自动生成模型部署项目
先下载onnx模型:yolox_nano.onnx,将下载好的yolox_nano.onnx放置在esp-dl/tutorial/evm_example路径下。
01 环境
- ESP-IDF 5.0
- 虚拟机Ubuntu 20.04
- python环境

02 配置TVM包
按官方文档下载完包后,设置环境变量PYTHONPATH
sudo vim ~/.bashrc
# 在文件的最后添加以下行,其中path-to-esp-dl更换为你的文件路径
export PYTHONPATH='$PYTHONPATH:/path-to-esp-dl/tools/tvm/python'
03 模型量化
3.1预处理
~/esp-dl $ cd tutorial/tvm_example
~/esp-dl/tutorial/tvm_example $ python -m onnxruntime.quantization.preprocess --input yolox_nano.onnx --output yolox_nano_opt.onnx
3.2 量化
- 生成校准数据
import numpy as np
import cv2
import os

# 图片路径
path = 'esp-dl/img/calib'

# 读取图片并将它们保存为numpy数组
images = []
for filename in os.listdir(path):
    img = cv2.imread(os.path.join(path, filename))
    img_resized = cv2.resize(img, (416, 416))
    img_array = np.transpose(img_resized, (2, 0, 1))
    img_array = img_array / 255.0
    if img_array is not None:
        images.append(img_array)
        print(filename)

# 将numpy数组保存为npy文件
np.save('esp-dl/tutorial/tvm_example/calib_416x416.npy', images)
- 生成模型输入
import numpy as np
import cv2
import os

path = 'esp-dl/img/input.jpg'

img = cv2.imread(path)
img_resized = cv2.resize(img, (416, 416))
img_array = np.transpose(img_resized, (2, 0, 1))
img_array = img_array / 255.0
images = [img_array]

np.save('esp-dl/tutorial/tvm_example/input_416x416.npy', images)
- 生成量化后的模型
~/esp-dl/tutorial/tvm_example $ python ../../tools/tvm/esp_quantize_onnx.py --input_model yolox_nano_opt.onnx --output_model yolox_nano_quant.onnx --calibrate_dataset calib_416x416.npy
Collecting tensor data and making histogram ...
Finding optimal threshold for each tensor using entropy algorithm ...
Number of tensors : 365
Number of histogram bins : 128 (The number may increase depends on the data it collects)
Number of quantized bins : 128
WARNING:root:Please use QuantFormat.QDQ for activation type QInt8 and weight type QInt8. Or it will lead to bad performance on x64.
04 生成项目
~/esp-dl/tutorial/tvm_example $ python ../../tools/tvm/export_onnx_model.py --model_path yolox_nano_quant.onnx --img_path input_416x416.npy --target_chip esp32s3 --out_path "." --template_path "../../tools/tvm/template_project_for_model/"
Model Information:
------------------
Input Name: images
Input Shape: (1, 3, 416, 416)
Input DType: float
Output Name: output
Output Shape: (1, 3549, 85)
Output DType: float
[17:21:47] /home/gansichen/Workspace/projects/local/framework/tvm/src/relay/transforms/convert_layout.cc:99: Warning: Desired layout(s) not specified for op: nn.max_pool2d
[17:21:47] /home/gansichen/Workspace/projects/local/framework/tvm/src/relay/transforms/convert_layout.cc:99: Warning: Desired layout(s) not specified for op: nn.max_pool2d
[17:21:47] /home/gansichen/Workspace/projects/local/framework/tvm/src/relay/transforms/convert_layout.cc:99: Warning: Desired layout(s) not specified for op: nn.max_pool2d
[17:21:47] /home/gansichen/Workspace/projects/local/framework/tvm/src/relay/transforms/convert_layout.cc:99: Warning: Desired layout(s) not specified for op: image.resize2d
[17:21:47] /home/gansichen/Workspace/projects/local/framework/tvm/src/relay/transforms/convert_layout.cc:99: Warning: Desired layout(s) not specified for op: image.resize2d
esp_dl_library_path: /home/zymidea/Desktop/esp32-cam/esp-dl
generated project in: ./new_project
二、烧录程序
烧录用的windows系统,将虚拟机中生成的new_project文件夹复制到PC端,打开ESP-IDF CMD
cd new_preject
idf.py set-target esp32s3
idf.py flash monitor
这是按照官方的教程进行烧录,但是模型太大会出现内存溢出esp32-template-project.elf section '.dram0.bss' will not fit in region 'dram0_0_seg' region 'dram0_0_seg' overflowed by 2141320 bytes。
~/new_project $ idf.py size-components
...
Total sizes:
Used static IRAM:   61042 bytes ( 301198 remain, 16.9% used)
	.text size:   60015 bytes
	.vectors size:    1027 bytes
Used stat D/IRAM: 2442376 bytes (-2096520 remain, 706.2% used) Overflow detected!
	.data size:   11088 bytes
	.bss  size: 2431288 bytes
Used Flash size : 3729295 bytes
	.text     :  473467 bytes
	.rodata   : 3255572 bytes
Total image size: 3801425 bytes (.bin may be padded larger)

找到new_project/build/project_description.json中libtvm_model.a静态文件的源代码。

官方指导片外RAM
需要调整的是将模型的权重文件保存到flash并将模型的输出存放在PSRAM,操作如下
// 打开/new_project/components/tvm_model/model/codegen/host/src/default_lib0.c

// 代码最前面
// 增加一个头文件
#include "E:/Espressif/frameworks/esp-idf-v5.0.4/components/esp_common/include/esp_attr.h"

// static struct global_const_workspace 将static改为const
const struct global_const_workspace

// 代码最后面
// __attribute__((section(".bss.noinit.tvm"), aligned(16))) 将这句话注释掉
static EXT_RAM_BSS_ATTR uint8_t global_workspace[2422784]; // 增加宏EXT_RAM_BSS_ATTR
// 打开/new_project/main/output_data.h
const static _SECTION_ATTR_IMPL(".ext_ram.bss", __COUNTER__) __attribute__((aligned(16))) float output_data[42588] // 指定该数组存放到外部RAM的.ext_ram.bss段
~/new_project $ idf.py menuconfig


修改完毕S键保存,Esc键退出。
修改/new_project/partitions.csv分区表中的factory的大小,原本的3000多K存储模型权重不够,将其增大点,三个区的Offset都清空,生成过程它会自动匹配。

所有的修改完毕后再重新再看一下各个RAM的使用情况
~/new_project $ idf.py size-components
...
Used static IRAM:   61042 bytes ( 301198 remain, 16.9% used)
	.text size:   60015 bytes
	.vectors size:    1027 bytes
Used stat D/IRAM:   19592 bytes ( 326264 remain, 5.7% used)
	.data size:   11088 bytes
	.bss  size:    8504 bytes
Used Flash size : 3729203 bytes
	.text     :  473455 bytes
	.rodata   : 3255492 bytes
Total image size: 3801333 bytes (.bin may be padded larger)
...

最后重新烧录就能运行成功了。
~/new_project $ idf.py flash monitor

二、更新
看我最新的文章:esp32-s3训练自己的数据进行目标检测、图像分类,效果还行。


 558
558

 被折叠的 条评论
为什么被折叠?
被折叠的 条评论
为什么被折叠?
 到【灌水乐园】发言


