


SpringCloud学习笔记
- 前言
- 1.集群和分布式的概念
- 2.微服务的优点
- 3.微服务的不足
- 4.为什么选择springcloud
- 5.SpringCloud的组成
- 6.服务治理
- 7.SpringCloud Eureka
- 8.Eureka Client代码实现
- 9.RestTemplate的使用
- 10 服务消费者 consumer
- 12.服务网关
- Ribbon实现负载均衡
- Feign
- 什么是Feign
- Ribbon和Feign的区别:
- Feign的优点
- 创建一个moudle和pom.xml
- 创建application.yml
- 创建启动类
- 创建声明式接口
- 创建Handler
- 启动Feign,进入http://localhost:8050/feign/index
- 服务熔断,application.yml里面添加熔断机制
- 创建FeignProviderClient接口的实现类FeignError,定义容错处理逻辑,通过@Component注解将FeignError实例注入IoC中。
- 在FeignProviderClient接口的定义处通过‘@FeignClient’的fallback属性设置映射
- 暂停服务提供者,重新启动Feign的启动类,再进入路径看,发现不跑provider而是跑FeignError。
- Hystrix容错机制
- SpringCloud 配置中心
- 服务跟踪
- 总结
前言
今天开始跟着楠哥(ps:学习框架强烈推荐b站的楠哥,讲的真的不错)学习springcloud。springcloud是现在找工作必备的技能之一。
1.集群和分布式的概念
在学习springcloud前,我们需要先理解我们常说的集群和分布式的概念。
集群:一台服务器无法负荷高并发的数据访问量,那么就设置十台服务器一起分担压力,十台不行就一百台(物理层面)
分布式:将一个复杂的问题拆分成若干个简单的小问题,将一个大型的项目架构拆分成若干个微服务来协同完成。(软件设计层面)。将一个庞大的工作拆分成若干个小步骤,分别由不同的人完成这些小步骤,最终将舍友的结果进行整合,实现大的需求。
2.微服务的优点
1.各个服务的开发、测试、部署都相互独立,比如用户服务可以拆分成一个单独的服务,而他的开发不依赖于其他服务,如果用户量很大,我们可以很容易对其进行负载
2.当一个新需求出现时,特别是在一个庞大的项目系统中,你得去考虑各方面的问题,兼容性,影响度等等,而使用微服务则可以直接跳过这些环节。
3.使用微服务将项目进行拆分之后,各项微服务消除了诸多限制,只需要保证对外提供的接口正常即可,至于使用什么语言,什么框架都通通不关心。
3.微服务的不足
1.微服务是基于拆分的,由谁来拆,怎么拆,都是问题。
2.当服务调用方法需要使用某服务的接口时,首先找到该服务的提供方,通常在一个公司里,这种场景是跨部门的,沟通成本可想而知。同时,如果服务的提供方需要对某个接口进行修改,也得和各个服务调用方进行沟通。
3.由于各个服务相互独立,它们的数据也是独立的,这就带来了一个问题,当调用多个服务接口来进行操作时,如何保证各个服务的一致性,这既是问题,也是难点。
4.为什么选择springcloud
springcloud完全基于springboot,服务调用方式REST API,整合了各种成熟的产品和架构,同时基于SpringBoot也使得整体的开发、配置、部署都非常方便。
5.SpringCloud的组成
服务治理:Eureka
服务通信:Ribbon
服务通信:Feign
服务网管:Zuul
服务跟踪:Zipkin
服务监控:Actuator
服务配置:Config
服务容错:Hystrix
6.服务治理
服务治理的核心三部分:服务提供者,服务消费者,注册中心。
服务注册:在分布式系统架构中,每个微服务在启动时,将自己的信息存储在注册中心。
服务发现:服务消费者从注册中心获取服务提供者的网络信息,通过该信息来调用服务。
SpringCloud的服务治理使用Eureka来实现的,Eureka是Netflix开源的基于 REST的服务治理解决方案,SpringCloud集成了Eureka,提供服务注册和服务发现的功能,可以和基于SpringBoot搭建的微服务应用轻松的完成整合,开箱即用。SpringCloud Eureka。
7.SpringCloud Eureka
Eureka Server:注册中心
Eureka Client:所有要进行注册的微服务通过Eureka Client连接到Eureka Server,完成注册。
创建父工程
    <parent>
        <groupId>org.springframework.boot</groupId>
        <artifactId>spring-boot-starter-parent</artifactId>
        <version>2.0.7.RELEASE</version>
    </parent>

    <dependencies>
        <dependency>
            <groupId>org.springframework.boot</groupId>
            <artifactId>spring-boot-starter-web</artifactId>
        </dependency>
    </dependencies>

    <dependencyManagement>
        <dependencies>
            <dependency>
                <groupId>org.springframework.cloud</groupId>
                <artifactId>spring-cloud-dependencies</artifactId>
                <version>Finchley.SR2</version>
                <type>pom</type>
                <scope>system</scope>
            </dependency>
        </dependencies>
    </dependencyManagement>
在父工程下创建一个Moudle,pom.xml
    <dependencies>
        <dependency>
            <groupId>org.springframework.cloud</groupId>
            <artifactId>spring-cloud-starter-netflix-eureka-server</artifactId>
            <version>2.0.2.RELEASE</version>
            <exclusions>
                <exclusion>
                    <groupId>javax.servlet</groupId>
                    <artifactId>servlet-api</artifactId>
                </exclusion>
            </exclusions>
        </dependency>
    </dependencies>
创建配置文件application.yml,添加Eureka Server相关配置。
server:
  port: 8761
eureka:
  client:
    register-with-eureka: false
    fetch-registry: false
    service-url:
      defaultZone: http://localhost:8761/eureka/
属性说明:
server.port:当前Eureka Server服务端口。
eureka.client.register-with-eurek:是否将当前的Eureka Server服务作为客户端进行注册。
eureeka.client.fetch-registry:是否获取其他Eureka Server服务的数据。
eureeka.client.service-url.defaultZone:注册中心的访问地址。
创建启动类:
@SpringBootApplication
@EnableEurekaServer
public class EurekaServerApplication {
    public static void main(String[] args) {
        SpringApplication.run(EurekaServerApplication.class,args);
    }
}
注解说明:
@SpringBootApplication:声明该类是SpringBoot服务的入口。
@EnableEurekaServer:声明该类是一个Eureka Server微服务,提供服务注册和服务发现功能,即注册中心
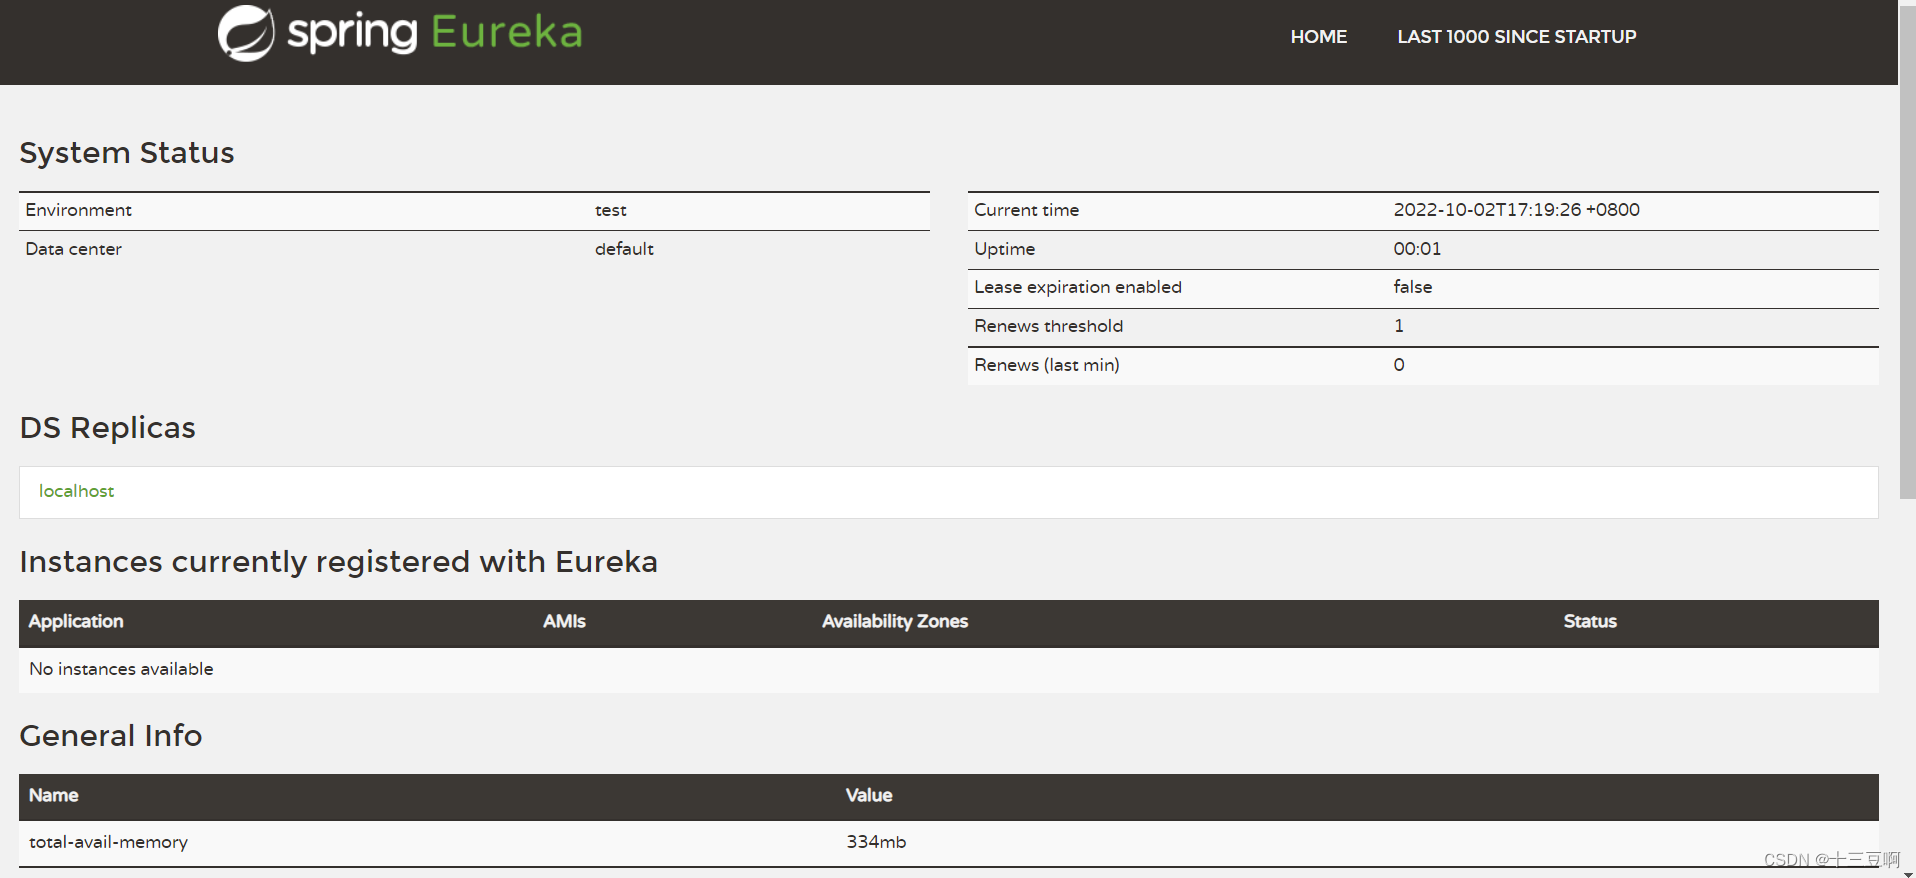
运行项目,运行成功后进入:http://localhost:8761/
成功截图:
8.Eureka Client代码实现
8.1 创建一个module
    <dependencies>
        <dependency>
            <groupId>org.springframework.cloud</groupId>
            <artifactId>spring-cloud-starter-netflix-eureka-client</artifactId>
            <version>2.0.2.RELEASE</version>
        </dependency>
    </dependencies>
8.2 创建配置文件application.yml,添加Eureka Client相关配置
server:
  port: 8010
spring:
  application:
    name: provider
eureka:
  client:
    service-url:
      defauletZone: http://localhost:8761/eureka/
  instance:
    prefer-ip-address: true
属性:
spring.application.name:当前服务注册在Eureka Server 上的名字。
eureka.client.service-url.defauletZone:当前注册中心的访问地址。
eureka.instance.prefer-ip-address:是否将当前服务的ip注册到Eureka Server
创建启动类:
@SpringBootApplication
@EnableEurekaServer
public class EurekaServerApplication {
    public static void main(String[] args) {
        SpringApplication.run(EurekaServerApplication.class,args);
    }
}
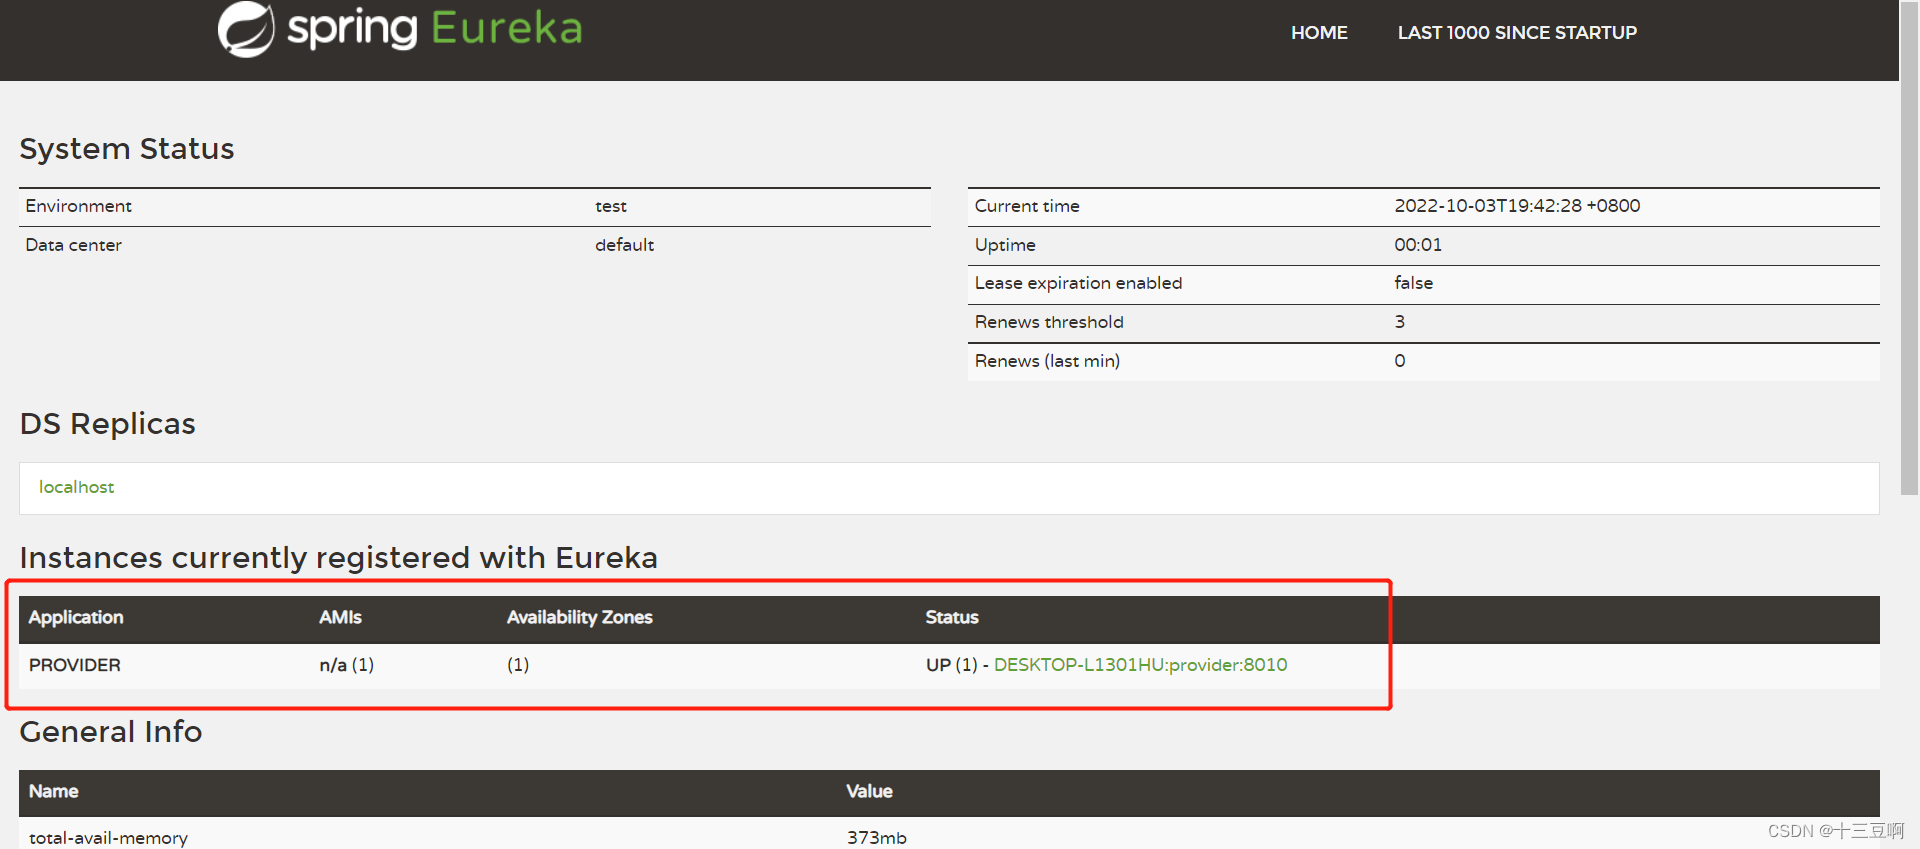
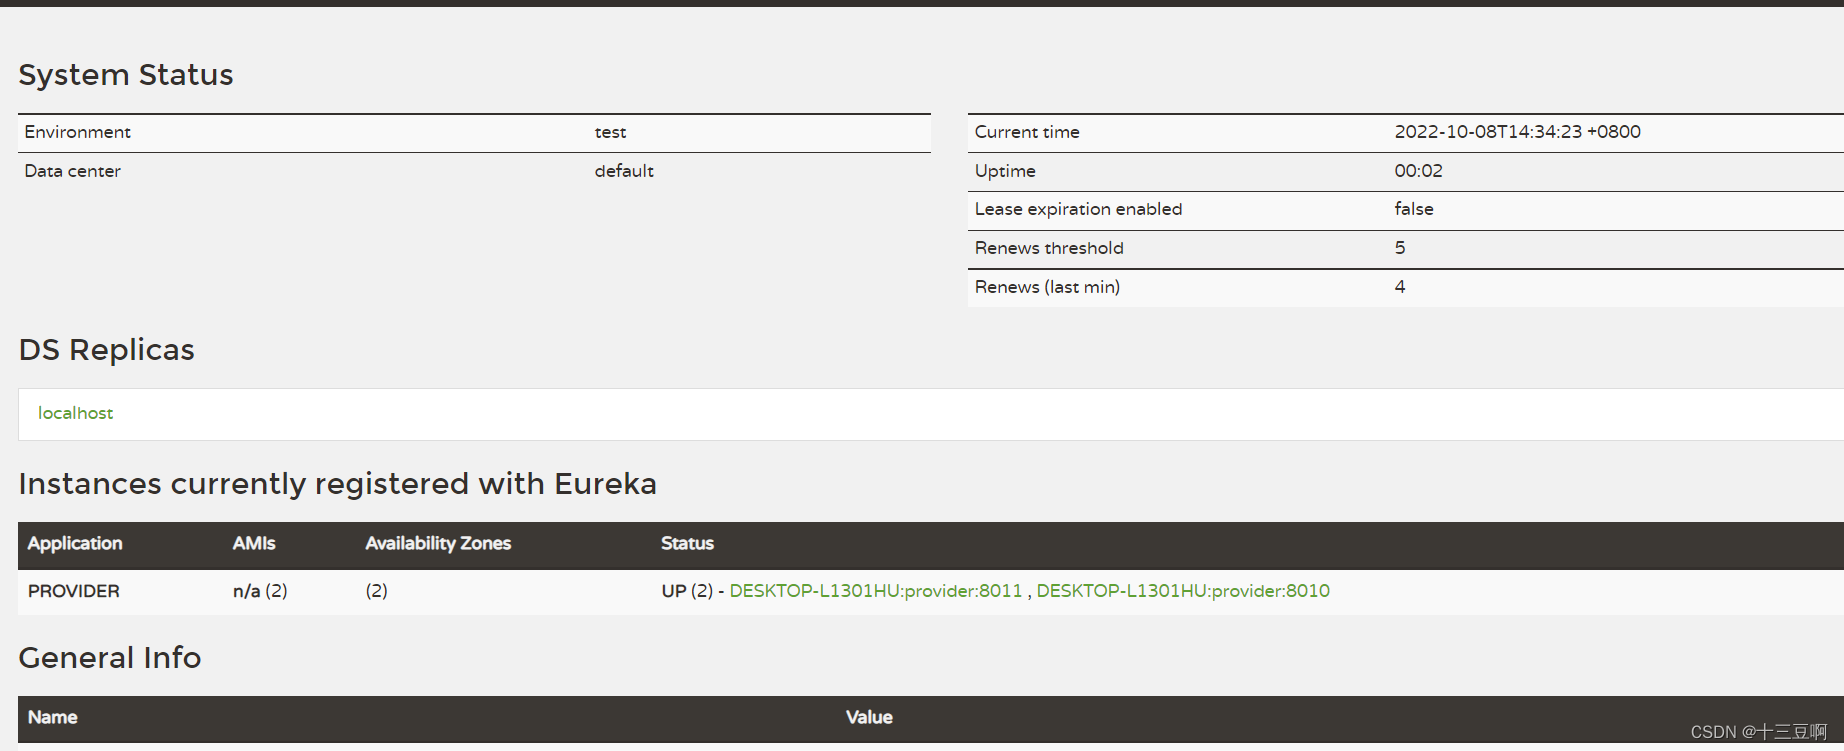
启动Eureka server和client,查看是否将服务提供者注册到注册中心
成功截图:
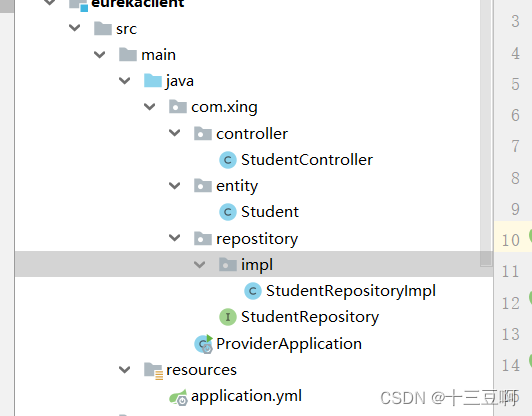
8.3 例子
架构:
在父工程的pom文件加上lombok的依赖
        <dependency>
            <groupId>org.projectlombok</groupId>
            <artifactId>lombok</artifactId>
            <version>1.18.6</version>
            <scope>provided</scope>
        </dependency>
    </dependencies>
Student:
@Data
@AllArgsConstructor
@NoArgsConstructor
public class Student {
    private long id;
    private String name;
    private int age;
}
StudentRepository:
public interface StudentRepository {
    public Collection<Student> findAll();
    public Student findById(long id);
    public void saveOrUpdate(Student student);
    public void deleteById(long id);
}
StudentRepository:
@Repository
public class StudentRepositoryImpl implements StudentRepository {
    private static Map<Long,Student> studentMap;

    static {
        studentMap = new HashMap<>();
        studentMap.put(1L, new Student(1L,"十三豆",22));
        studentMap.put(2L, new Student(2L,"十三豆啊",23));
        studentMap.put(3L, new Student(3L,"十三豆啊啊",24));
    }

    @Override
    public Collection<Student> findAll() {
        return studentMap.values();
    }

    @Override
    public Student findById(long id) {
        return studentMap.get(id);
    }

    @Override
    public void saveOrUpdate(Student student) {
        studentMap.put(student.getId(),student);
    }

    @Override
    public void deleteById(long id) {
        studentMap.remove(id);
    }
}
StudentController
@RestController
@RequestMapping("/student")
public class StudentController {
@Autowired
private StudentRepository studentRepository;
@GetMapping("/findAll")
public Collection<Student> findAll(){
return studentRepository.findAll();
}
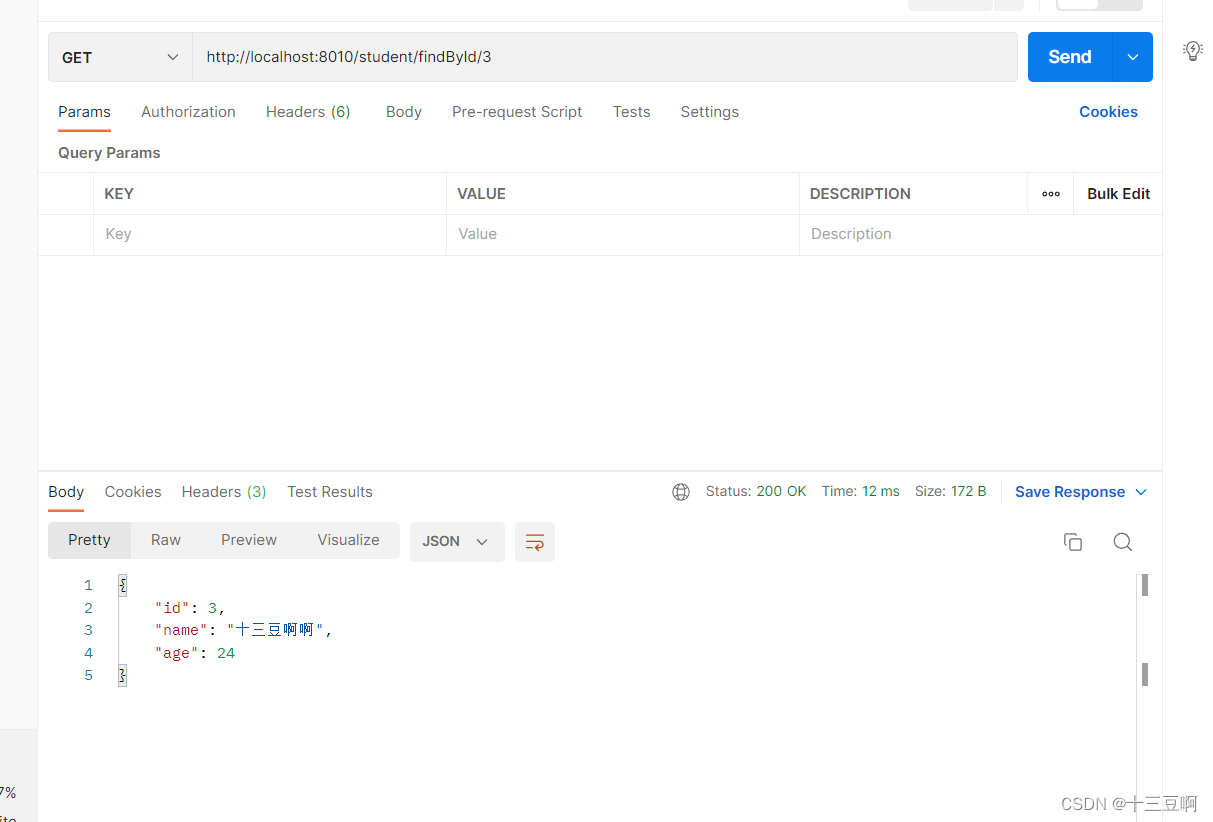
@GetMapping("/findById/{id}")
public Student findById(@PathVariable("id") long id){
return studentRepository.findById(id);
}
@PostMapping("/save")
public void save(@RequestBody Student student){
studentRepository.saveOrUpdate(student);
}
@PutMapping("/update")
public void update(@RequestBody Student student){
studentRepository.saveOrUpdate(student);
}
@DeleteMapping("deleteById/{id}")
public void deleteById(@PathVariable("id") long id){
studentRepository.deleteById(id);
}
}
重新启动服务器,并PostMan测试相关接口
测试成功
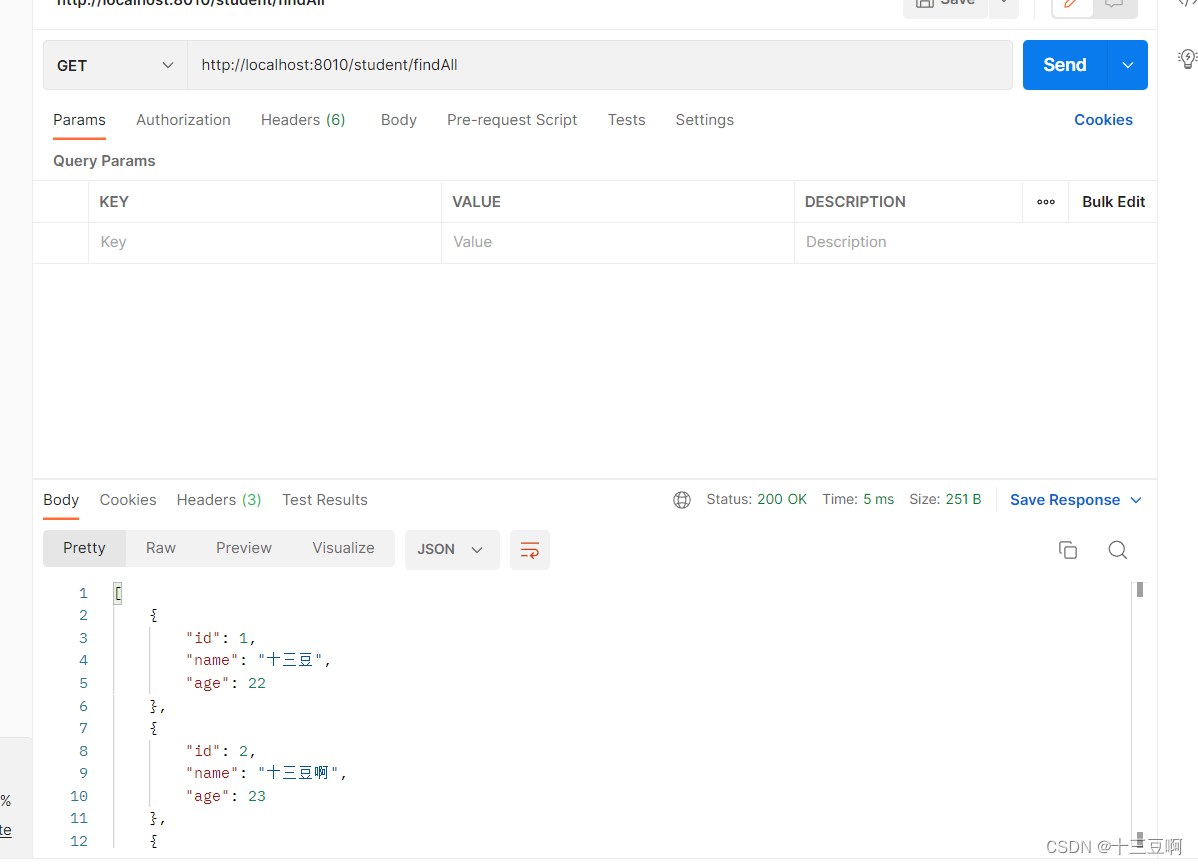
剩下的大家可以自己测试一下
9.RestTemplate的使用
什么是RestTemplate?
RestTemplate是Spring框架提供的基于Rest的服务组件,底层是对HTTP请求以及响应进行了封装,提供了很多个访问Rest服务的方法,可以简化代码开发。
如何使用RestTemplate:
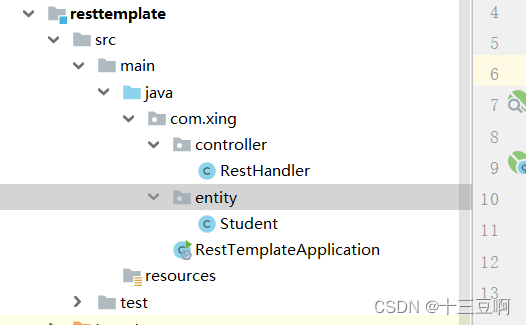
1.创建一个Maven工程,pom.xml
2.创建实体类,可以直接复制上面的student
3. Controller代码:(用RestTemplate来调用服务提供者的相关接口)
@RestController
@RequestMapping("/rest")
public class RestHandler {
@Autowired
private RestTemplate restTemplate;
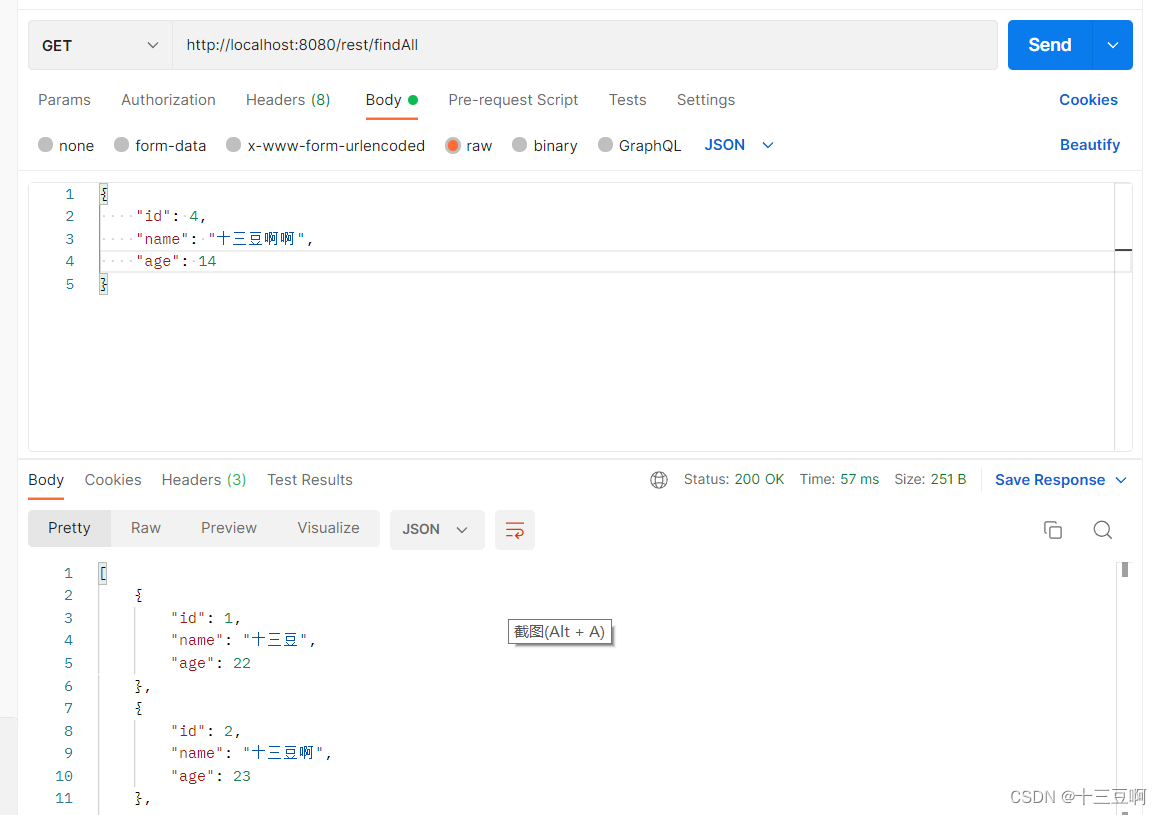
@GetMapping("/findAll")
public Collection<Student> findAll(){
return restTemplate.getForEntity("http://localhost:8010/student/findAll",Collection.class).getBody();
}
@GetMapping("/findById2")
public Collection<Student> findAll2(){
return restTemplate.getForObject("http://localhost:8010/student/findAll",Collection.class);
}
@GetMapping("/findById/{id}")
public Student findById(@PathVariable("id") long id){
return restTemplate.getForEntity("http://localhost:8010/student/findById/{id}",Student.class,id).getBody();
}
@GetMapping("findById2/{id}")
public Student findById2(@PathVariable("id") long id){
return restTemplate.getForObject("http://localhost:8010/student/findById/{id}",Student.class,id);
}
@PostMapping("save")
public void save(@RequestBody Student student){
restTemplate.postForObject("http://localhost:8010/student/save",student,null);
}
@PostMapping("save2")
public void save2(@RequestBody Student student){
restTemplate.postForEntity("http://localhost:8010/student/save",student,null);
}
@PutMapping("/update")
public void update(@RequestBody Student student){
restTemplate.put("http://localhost:8010/student/update",student);
}
@DeleteMapping("/deleteById/{id}")
public void deleteById(@PathVariable("id") long id){
restTemplate.delete("http://localhost:8010/student/deleteById/{id}",id);
}
}
4.启动类文件:(需要通过@Bean来把RestTemplate的实例注入)
@SpringBootApplication
public class RestTemplateApplication {
    public static void main(String[] args) {
        SpringApplication.run(RestTemplateApplication.class,args);
    }

    @Bean
    public RestTemplate restTemplate(){
        return new RestTemplate();
    }
}
10 服务消费者 consumer
创建maven工程,pom.xml
    <dependencies>
        <dependency>
            <groupId>org.springframework.cloud</groupId>
            <artifactId>spring-cloud-starter-netflix-eureka-client</artifactId>
            <version>2.0.2.RELEASE</version>
        </dependency>
    </dependencies>
创建配置文件application.yml
server:
  port: 8020
spring:
  application:
    name: comsumer
eureka:
  client:
    service-url:
      defaultZone: http://localhost:8761/eureka/
  instance:
    prefer-ip-address: true
创建启动类
@SpringBootApplication
public class ComsumerApplication {
    public static void main(String[] args) {
        SpringApplication.run(ComsumerApplication.class,args);
    }

    @Bean
    public RestTemplate restTemplate(){
        return  new RestTemplate();
    };


}
Handler
@RestController
@RequestMapping("/comsumer")
public class ComsumerHandler {

    @Autowired
    private RestTemplate restTemplate;

    @GetMapping("/findAll")
    public Collection<Student> findAll(){
        return restTemplate.getForEntity("http://localhost:8010/student/findAll",Collection.class).getBody();
    }

    @GetMapping("/findById2")
    public Collection<Student> findAll2(){
        return restTemplate.getForObject("http://localhost:8010/student/findAll",Collection.class);
    }

    @GetMapping("/findById/{id}")
    public Student findById(@PathVariable("id") long id){
        return restTemplate.getForEntity("http://localhost:8010/student/findById/{id}",Student.class,id).getBody();
    }

    @GetMapping("findById2/{id}")
    public Student findById2(@PathVariable("id") long id){
        return restTemplate.getForObject("http://localhost:8010/student/findById/{id}",Student.class,id);
    }

    @PostMapping("save")
    public void save(@RequestBody Student student){
        restTemplate.postForObject("http://localhost:8010/student/save",student,null);
    }

    @PostMapping("save2")
    public void save2(@RequestBody Student student){
        restTemplate.postForEntity("http://localhost:8010/student/save",student,null);
    }

    @PutMapping("/update")
    public void update(@RequestBody Student student){
        restTemplate.put("http://localhost:8010/student/update",student);
    }

    @DeleteMapping("/deleteById/{id}")
    public void  deleteById(@PathVariable("id") long id){
        restTemplate.delete("http://localhost:8010/student/deleteById/{id}",id);
    }
}
启动注册中心,服务提供者,服务消费者,启动成功
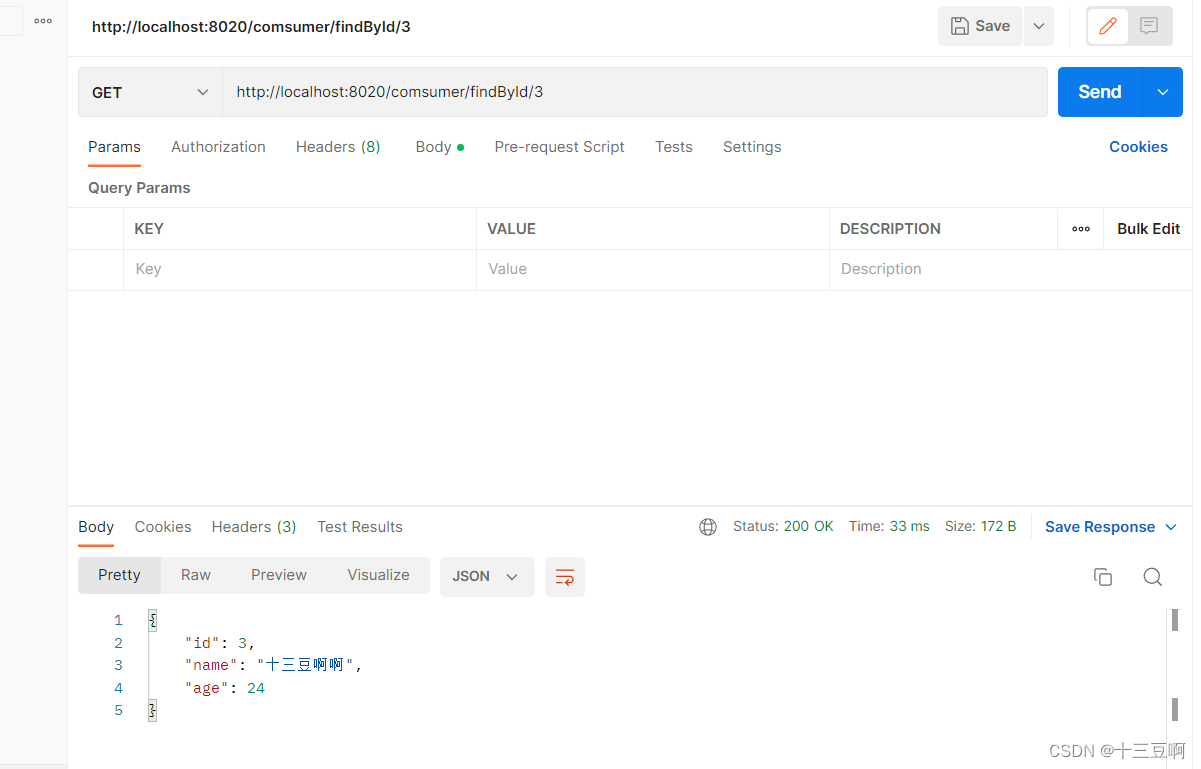
自我总结:从代码上看,其实comsumer和resttemplate的实现过程区别不大,唯一的区别就是comsumer在注册中心注册了。
12.服务网关
SpringCloud集成了Zuul组件,实现服务网管。
什么是Zuul?
Zuul是Netflix提供的一个开源的API的网关服务器,是客户端和网站后端所有请求的中间层,对外开放一个API。将所有请求导入统一的入口,屏蔽了服务端的具体实现逻辑,Zuul可以实现反向代理的功能,在网管内部实现动态路由、身份认证、IP过滤,数据监控等。
创建maven,pom.xml
    <dependencies>
        <dependency>
            <groupId>org.springframework.cloud</groupId>
            <artifactId>spring-cloud-starter-netflix-eureka-client</artifactId>
            <version>2.0.2.RELEASE</version>
        </dependency>

        <dependency>
            <groupId>org.springframework.cloud</groupId>
            <artifactId>spring-cloud-starter-netflix-zuul</artifactId>
            <version>2.0.2.RELEASE</version>
        </dependency>
    </dependencies>
创建配置文件Application.yml
server:
  port: 8030
spring:
  application:
    name: getway
eureka:
  client:
    service-url:
      defaultZone: http://localhost:8761/eureka/
zuul:
  routes:
    provider: /p/**
属性说明?:
zuul.route.provider:给服务提供者provider设置映射,provider是自己在启动类写的application.name。
创建启动类
@EnableZuulProxy
@EnableAutoConfiguration
public class ZuulApplication {
    public static void main(String[] args) {
        SpringApplication.run(ZuulApplication.class,args);
    }
}
注解说明:
@EnableZuulProxy:包含了@EnableZuulServer,设置该类是网管的启动类
@EnableAutoConfiguration:可以帮助SpringBoot 应用将所有符合条件的@Configuration配置加载到当前SpringBoot创建并使用的IoC容器中
查看使用别名是否能通过网关映射到不同请求里:

Zuul自带负载均衡功能,修改provider代码
1.关闭所有服务,启动注册中心和服务提供者
2.将yml的端口从8010改成8011
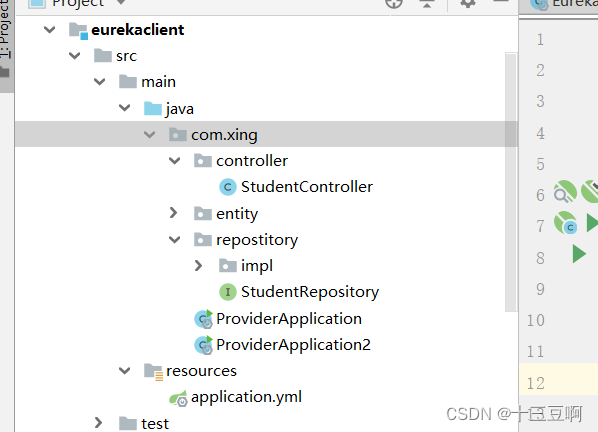
3.创建ProviderApplication2
    @SpringBootApplication
    public class ProviderApplication2 {
        public static void main(String[] args) {
            SpringApplication.run(com.xing.ProviderApplication.class,args);
        }
    }
4.启动创建ProviderApplication2
8010和8011同时存在
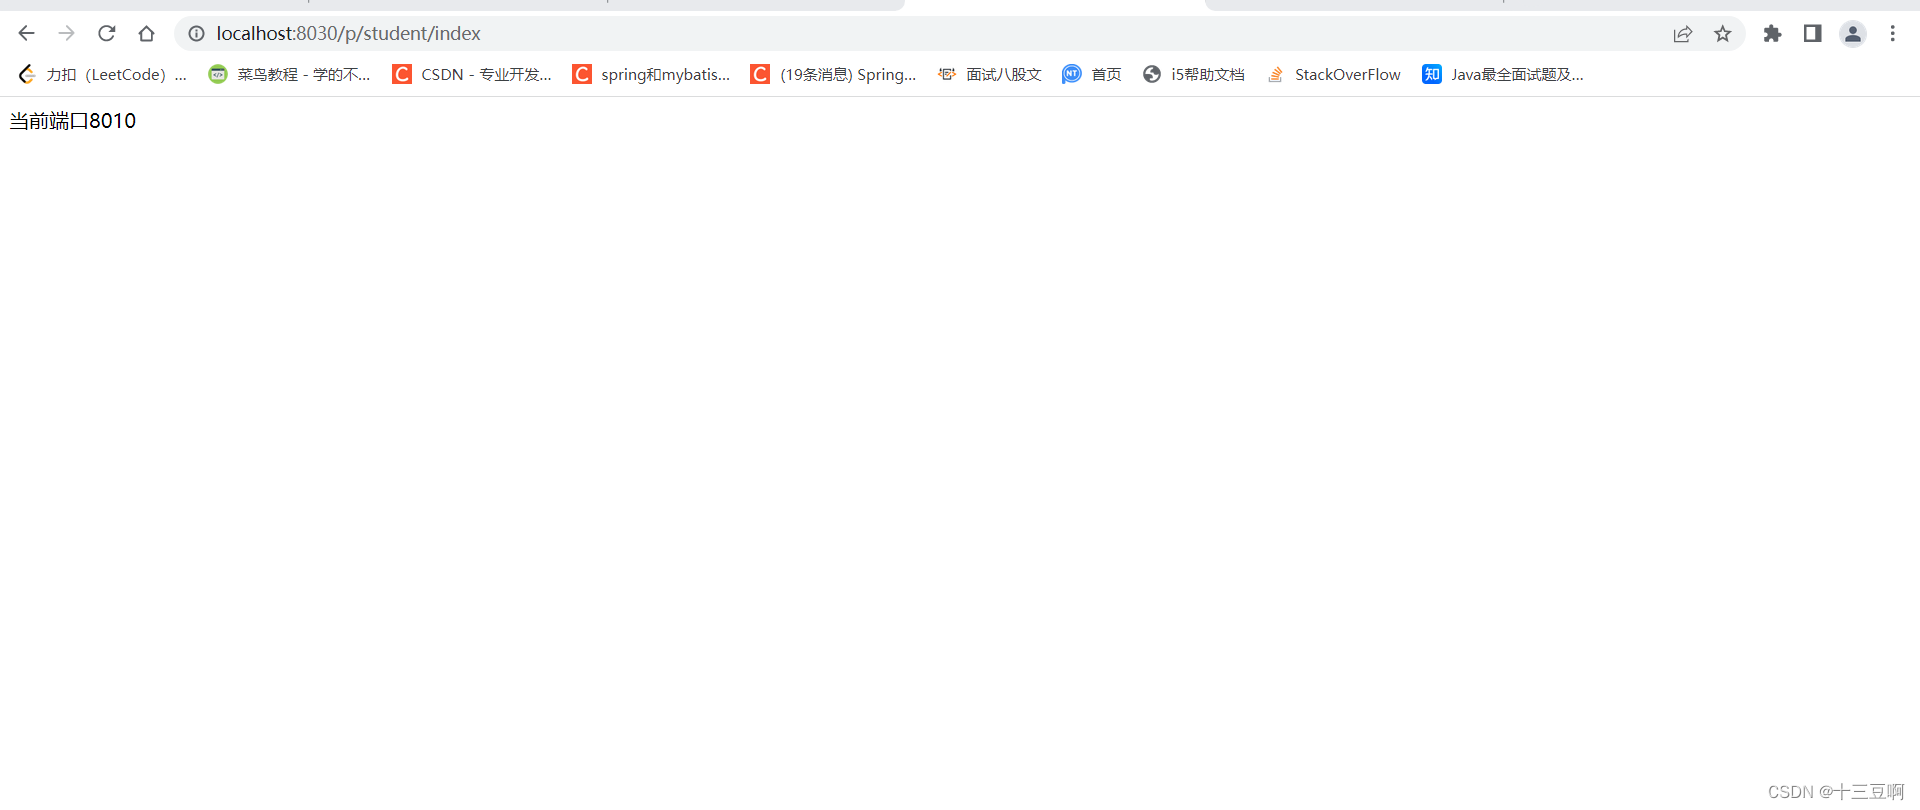
5.启动网关
(为了更好的验证,加入端口的代码,修改StudentControlle的代码)
@RestController
@RequestMapping("/student")
public class StudentController {
    @Autowired
    private StudentRepository studentRepository;

    @Value("${server.port}")
    private String port;

    @GetMapping("/findAll")
    public Collection<Student> findAll(){
        return studentRepository.findAll();
    }

    @GetMapping("/findById/{id}")
    public Student findById(@PathVariable("id") long id){
        return studentRepository.findById(id);
    }

    @PostMapping("/save")
    public void save(@RequestBody Student student){
        studentRepository.saveOrUpdate(student);
    }

    @PutMapping("/update")
    public void update(@RequestBody Student student){
        studentRepository.saveOrUpdate(student);
    }

    @DeleteMapping("deleteById/{id}")
    public  void deleteById(@PathVariable("id") long id){
        studentRepository.deleteById(id);
    }

    @GetMapping("/index")
    public String index(){
        return "当前端口" + this.port;
    }
}
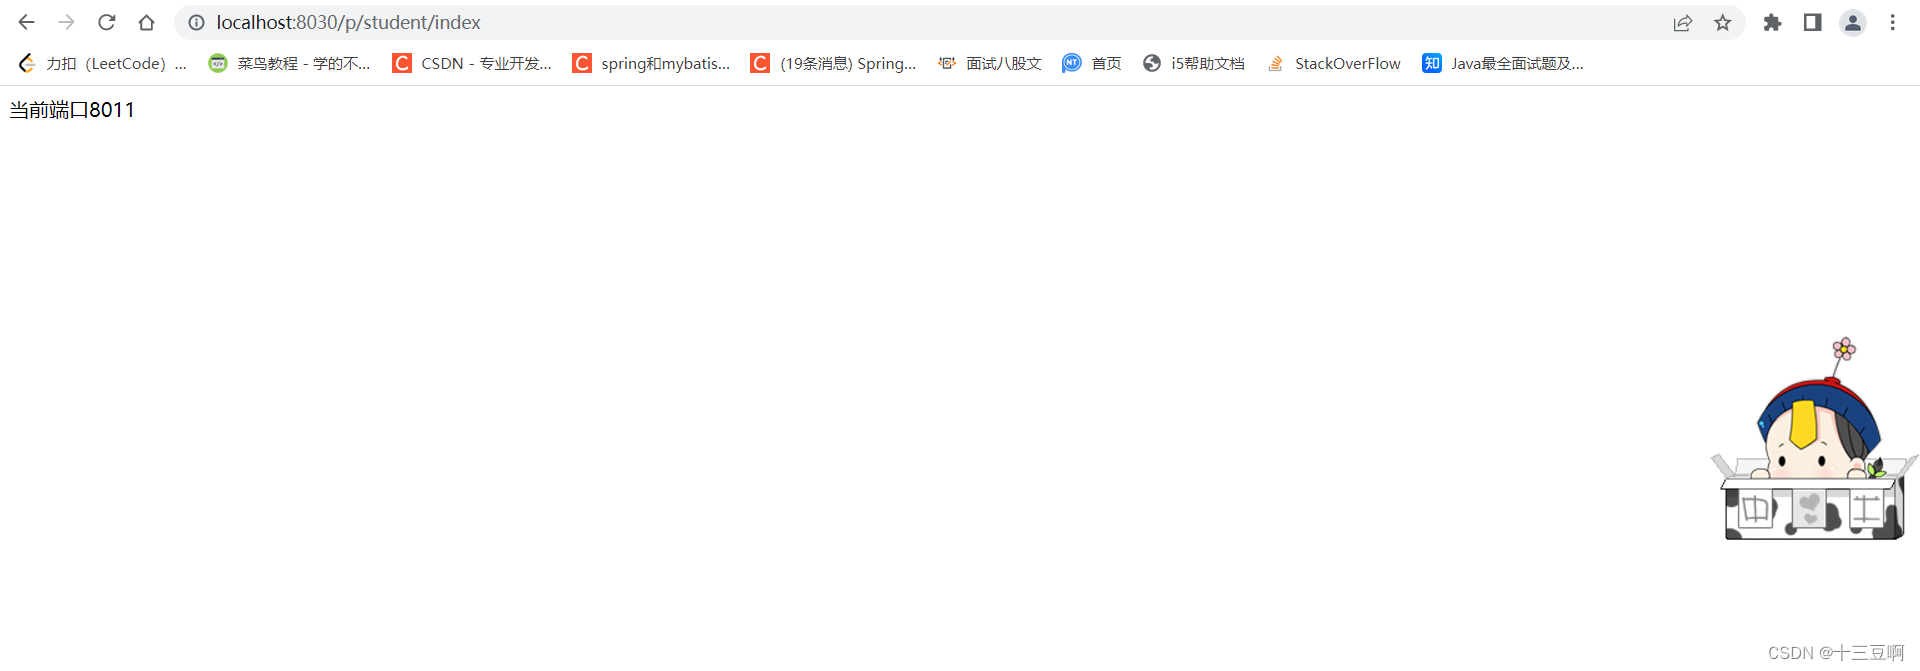
进入http://localhost:8030/p/student/index查看,不断刷新发现,8010和8011端口交替出现。说明Zuul实现了负载均衡
Ribbon实现负载均衡
SpringCloud Ribbon是一个负载均衡的解决方案,Ribbon是Netflix发布的一款负载均衡器,Spring Cloud Ribbon是基于Netflix Ribbon实现的,是一个用于对HTTP请求进行控制的负载均衡客户端。
在注册中心对Ribbon进行注册之后,Ribbon就可以基于负载均衡算法,如轮询,随机,加权轮询,加权随机等自动帮助服务消费者调用接口。开发者也可以根据具体需求来自定义Ribbon的负载均衡算法,实际开发中,SpringCloud Ribbon需要结合SpringCloud Eureka来使用。EurekaServer提供所有可以调用的服务提供者列表,Ribbon基于特定的负载均衡算法从这些服务提供者中选择要调用的具体实例。
创建moudle和pom.xml
    <dependencies>
        <dependency>
            <groupId>org.springframework.cloud</groupId>
            <artifactId>spring-cloud-starter-netflix-eureka-client</artifactId>
            <version>2.0.2.RELEASE</version>
        </dependency>
    </dependencies>
</project>
创建配置文件
server:
  port: 8040
spring:
  application:
    name: ribbon
eureka:
  client:
    service-url:
      defaultZone: http://localhost:8761/eureka/
  instance:
    ip-address: true
创建启动类
@SpringBootApplication
public class RibbonApplication {
    public static void main(String[] args) {
        SpringApplication.run(RibbonApplication.class,args);
    }

    @Bean
    @LoadBalanced
    public RestTemplate restTemplate(){
        return new RestTemplate();
    }
}
注解说明:@LoadBalanced:声明一个基于Ribbon的负载均衡。
创建handler
@RestController
@RequestMapping("/ribbon")
public class RibbonHandler {
    @Autowired
    private RestTemplate restTemplate;

    @GetMapping("/findAll")
    public Collection<Student> findAll(){
        return restTemplate.getForObject("http://provider/student/findAll",Collection.class);
    }

    @GetMapping("/index")
    public String index(){
        return restTemplate.getForObject("http://provider/student/index",String.class);
    }
}
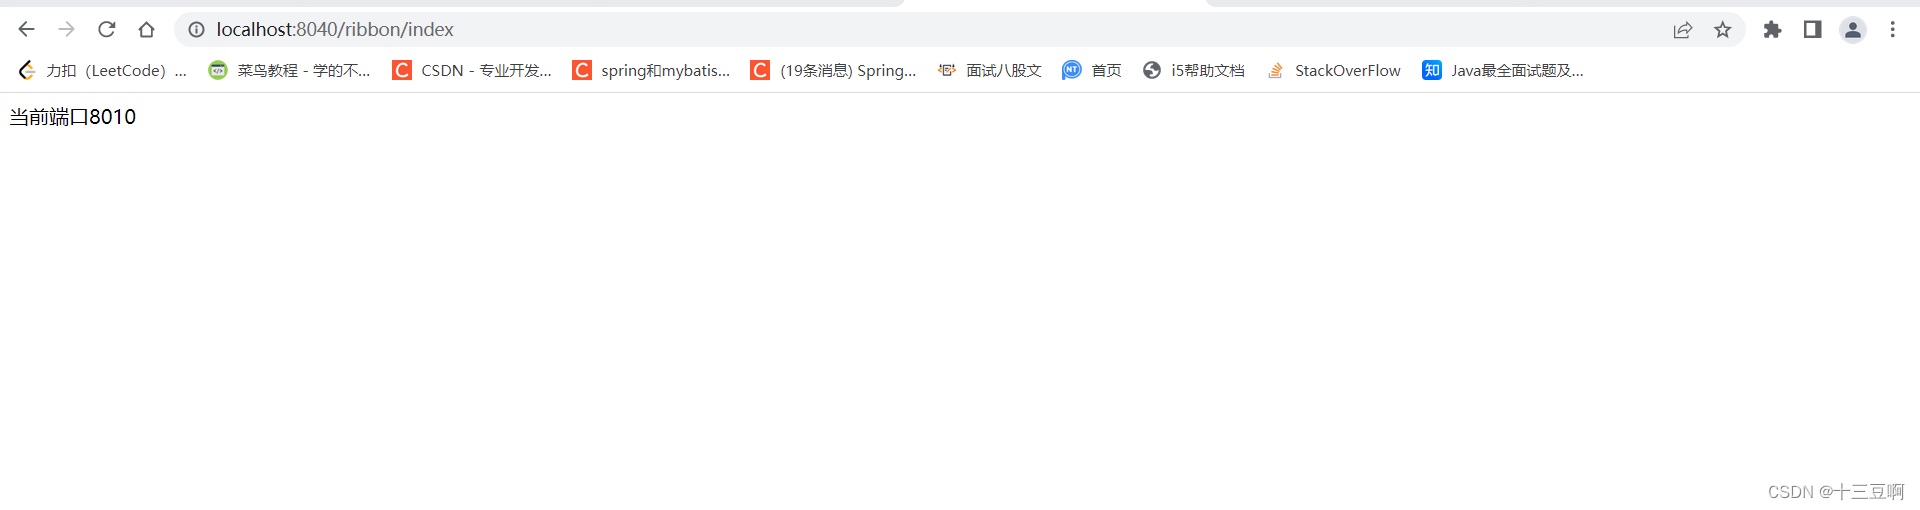
启动注册中心和服务提供者还有Ribbon
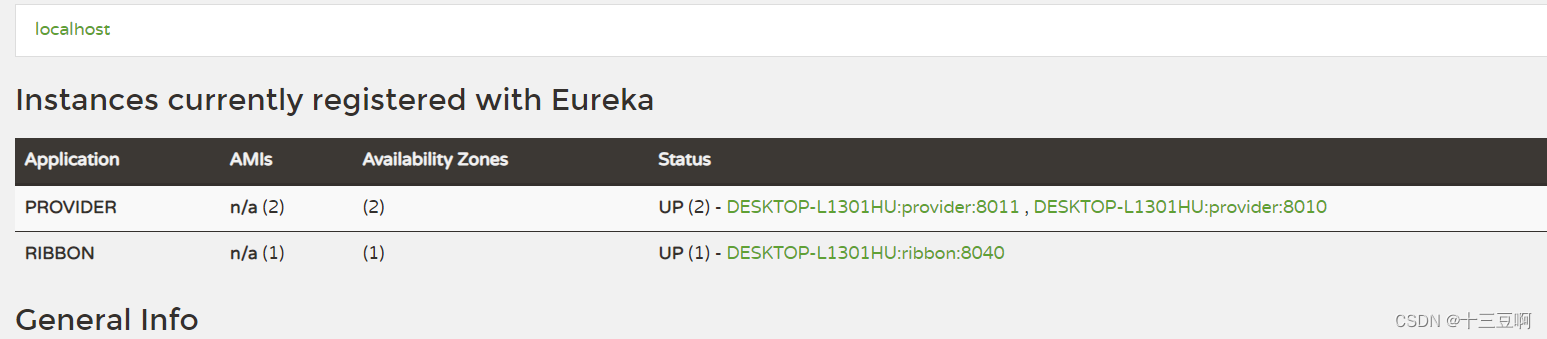
并进入http://localhost:8040/ribbon/index刷新查看

Feign
什么是Feign
与Ribbon一样,Feign也是由Netflix提供的,Feign是一个声明式的,模板化的Web Service客户端,它简化了开发者编写web服务客户端的操作,开发者通过简单的接口和注解来调用HTTP API,使开发变得简化,Spring Cloud Feign它整合了Ribbon和Hystrix,具有可插拔,基于注解,负载均衡,服务熔断等一系列便捷功能
相比较于Ribbon + RestTemplate的方式,Feign大大简化了代码的开发。Feign支持多种注解,包括Feign自身的注解,JAX-RS注解、SpringMVC注解等,SpringCloud对Feign进行了优化了,整合了Ribbon和Eureka,从而使Feign的使用更加方便。
Ribbon和Feign的区别:
Ribbon是一个通用的HTTP客户端工具,Feign是基于Ribbon实现的。
Feign的优点
1.Feign是一个声明式的,模板化的Web Service客户端。
2.支持Feign注解,SpringMVC注解,JAX-RS注解。
3.Feign基于Ribbon实现,使用起来更加简单。
4.Feign集成了Hystrix,具备服务熔断的功能。
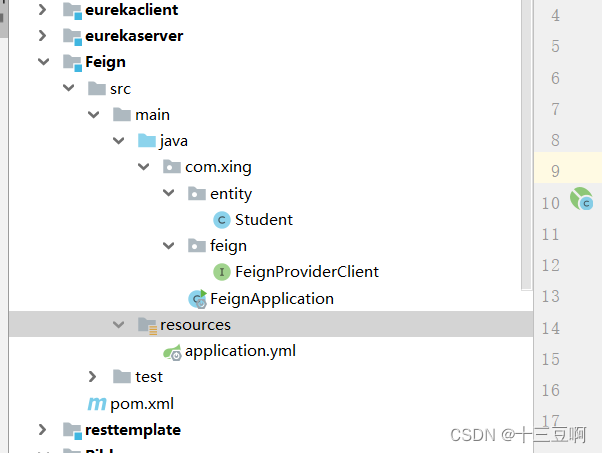
创建一个moudle和pom.xml
    <dependencies>
        <dependency>
            <groupId>org.springframework.cloud</groupId>
            <artifactId>spring-cloud-starter-netflix-eureka-client</artifactId>
            <version>2.0.2.RELEASE</version>
        </dependency>

        <dependency>
            <groupId>org.springframework.cloud</groupId>
            <artifactId>spring-cloud-starter-openfeign</artifactId>
            <version>2.0.2.RELEASE</version>
            <exclusions>
                <exclusion>
                    <groupId>javax.servlet</groupId>
                    <artifactId>servlet-api</artifactId>
                </exclusion>
            </exclusions>
        </dependency>
    </dependencies>
创建application.yml
server:
  port: 8050
eureka:
  client:
    service-url:
      defaultZone: http://localhost:8761/eureka/
  instance:
    prefer-ip-address: true
创建启动类
@SpringBootApplication
@EnableFeignClients
public class FeignApplication {
    public static void main(String[] args) {
        SpringApplication.run(FeignApplication.class,args);
    }
}
创建声明式接口
@FeignClient(value = "provider")
public interface FeignProviderClient {
    @GetMapping("/student/findAll")
    public Collection<Student> findAll();

    @GetMapping("/student/index")
    public String index();
}
创建Handler
@RestController
@RequestMapping("/feign")
public class FeignHandler {
    @Autowired
    private FeignProviderClient feignProviderClient;

    @GetMapping("/findAll")
    public Collection<Student> findAll(){
        return feignProviderClient.findAll();
    }

    @GetMapping("/index")
    public String index(){
        return feignProviderClient.index();
    }
}
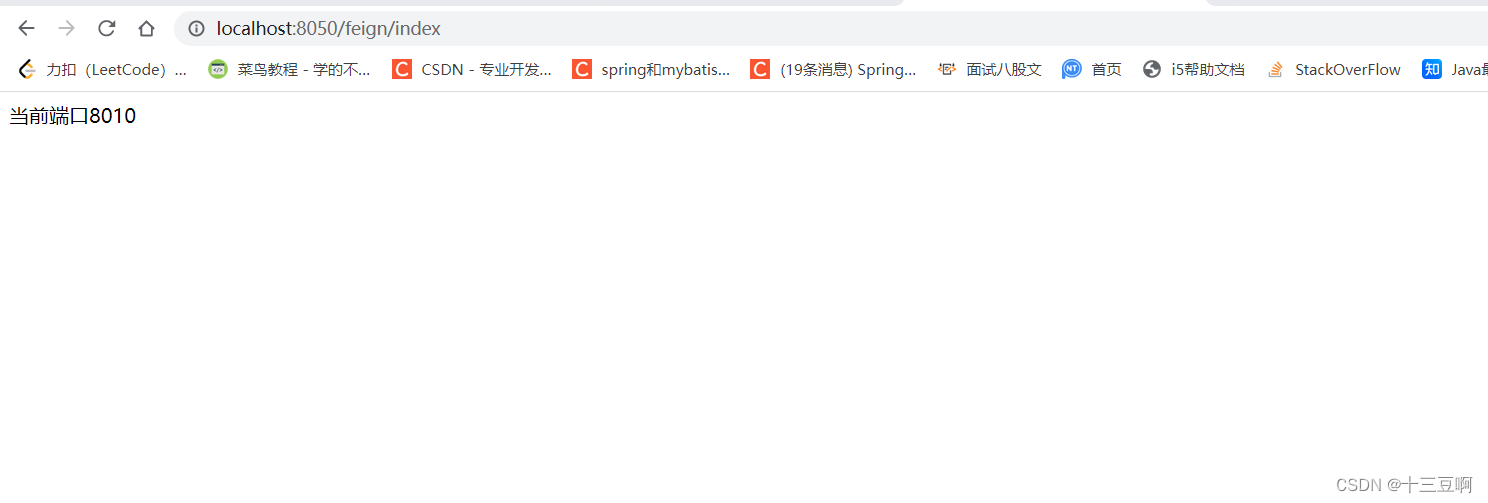
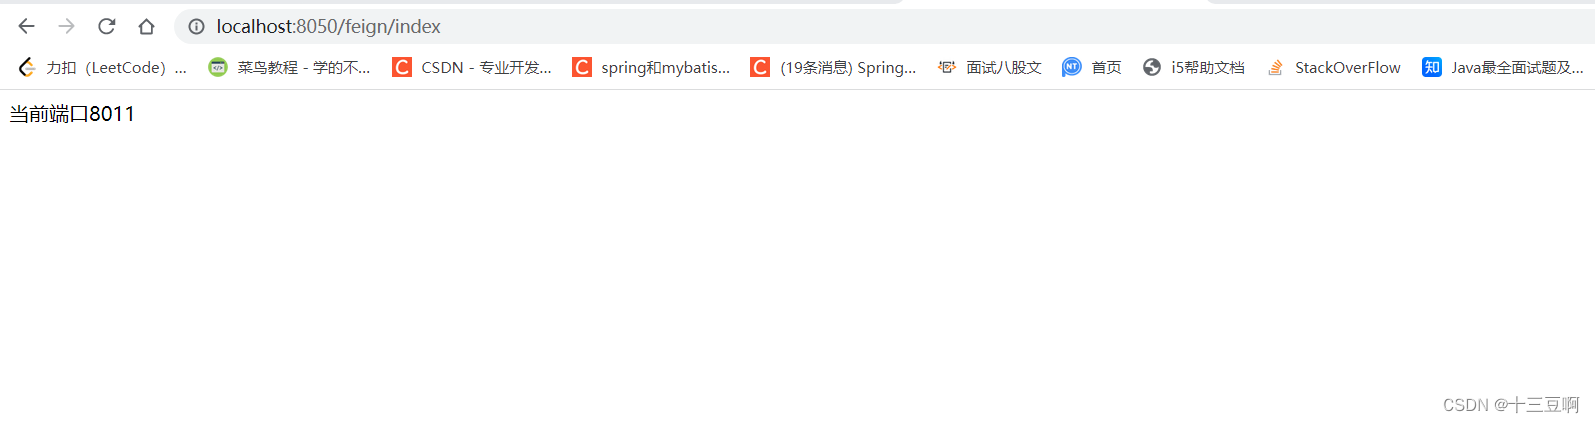
启动Feign,进入http://localhost:8050/feign/index
服务熔断,application.yml里面添加熔断机制
server:
  port: 8050
eureka:
  client:
    service-url:
      defaultZone: http://localhost:8761/eureka/
  instance:
    prefer-ip-address: true
feign:
  hystrix:
    enabled: true
属性
feign.hystrix.enabled:是否开启熔断器
创建FeignProviderClient接口的实现类FeignError,定义容错处理逻辑,通过@Component注解将FeignError实例注入IoC中。
@Component
public class FeignError implements FeignProviderClient {
    @Override
    public Collection<Student> findAll() {
        return null;
    }

    @Override
    public String index() {
        return "服务器维护中....";
    }
}
在FeignProviderClient接口的定义处通过‘@FeignClient’的fallback属性设置映射
@FeignClient(value = "provider",fallback = FeignError.class)
public interface FeignProviderClient {
    @GetMapping("/student/findAll")
    public Collection<Student> findAll();

    @GetMapping("/student/index")
    public String index();
}
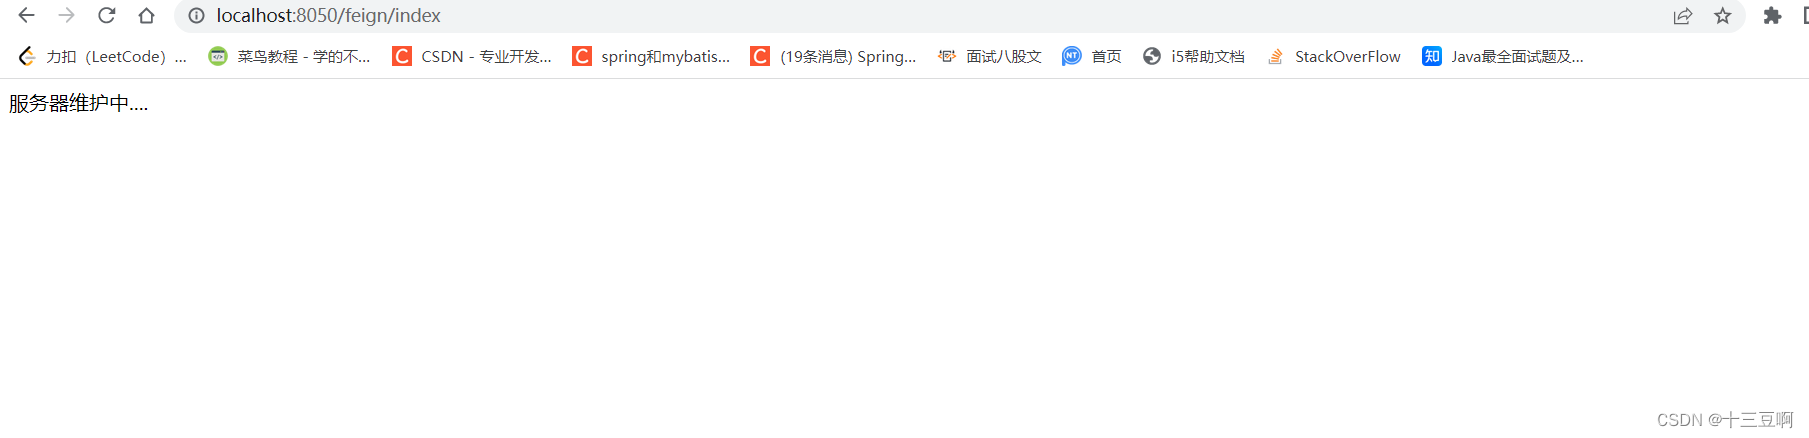
暂停服务提供者,重新启动Feign的启动类,再进入路径看,发现不跑provider而是跑FeignError。
Hystrix容错机制
在不改变各个微服务调用关系的前提下,针对错误情况进行预先处理。
设计原则
1.服务隔离机制,防止某个服务提供者出问题而影响整个系统运行。
2.服务降级机制,服务出现故障时,向服务消费者返回FallBack的降级处理。
3.熔断机制,当服务消费者请求失败率达到某个数值的时候,会迅速启动熔断机制并进行修复。
4.提供实时的监控和报警功能。
5.提供实时的配置修改功能。
Hystrix数据监控
Hystrix数据监控需要结合Spring Boot Actuator来使用,Actuator提供了对服务的健康监控、数据统计,可以通过hystrix.stream节点获取监控的请求数据,提供了可视化的监控界面
创建moudle和pom.xml
    <dependencies>
        <dependency>
            <groupId>org.springframework.cloud</groupId>
            <artifactId>spring-cloud-starter-netflix-eureka-client</artifactId>
            <version>2.0.2.RELEASE</version>
        </dependency>

        <dependency>
            <groupId>org.springframework.cloud</groupId>
            <artifactId>spring-cloud-starter-openfeign</artifactId>
            <version>2.0.2.RELEASE</version>
        </dependency>

        <dependency>
            <groupId>org.springframework.boot</groupId>
            <artifactId>spring-boot-starter-actuator</artifactId>
            <version>2.0.7.RELEASE</version>
        </dependency>

        <dependency>
            <groupId>org.springframework.cloud</groupId>
            <artifactId>spring-cloud-starter-netflix-hystrix</artifactId>
            <version>2.0.2.RELEASE</version>
        </dependency>

        <dependency>
            <groupId>org.springframework.cloud</groupId>
            <artifactId>spring-cloud-starter-netflix-hystrix-dashboard</artifactId>
            <version>2.0.2.RELEASE</version>
        </dependency>
    </dependencies>
创建配置文件application.yml
server:
  port: 8060
spring:
  application:
    name: hystrix

eureka:
  client:
    service-url:
      defaultZone: http://localhost:8761/eureka/
  instance:
    prefer-ip-address: true
feign:
  hystrix:
    enabled: true
management:
  endpoints:
    web:
      exposure:
        include: 'hystrix.stream'
创建启动类
@SpringBootApplication
@EnableFeignClients
@EnableCircuitBreaker
@EnableHystrixDashboard
public class HystrixApplication {
    public static void main(String[] args) {
        SpringApplication.run(HystrixApplication.class,args);
    }
}
注解讲解
@EnableCircuitBreaker:声明启动数据监控
@EnableHystrixDashboard:声明启用可视化数据监控
创建controller
@RestController
@RequestMapping("/hystrix")
public class HystrixHandler {
    @Autowired
    private FeignProviderClient feignProviderClient;

    @GetMapping("/findAll")
    public Collection<Student> findAll(){
        return feignProviderClient.findAll();
    }

    @GetMapping("/index")
    public String index(){
        return feignProviderClient.index();
    }
}
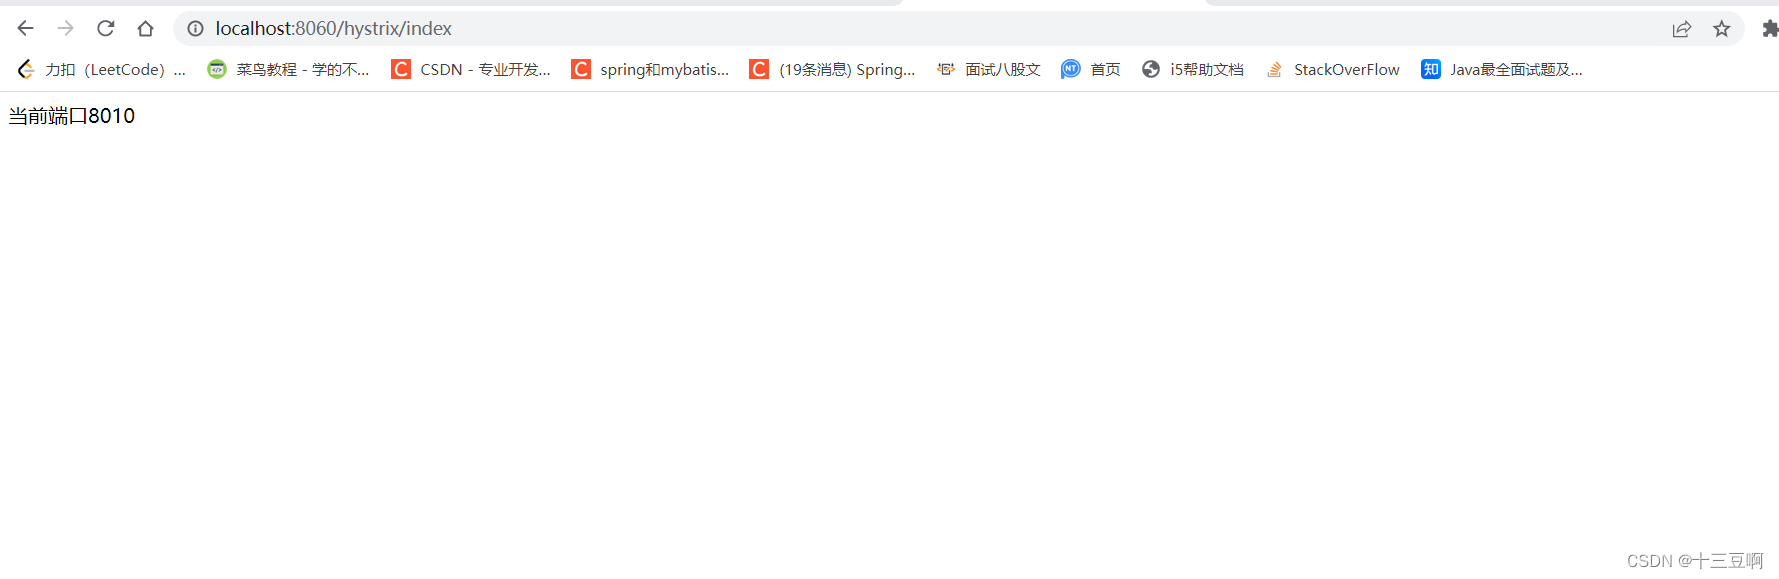
启动注册中心、服务提供者和Hystrix,检验数据监控功能
先进入http://localhost:8060/hystrix/index
再用http://localhost:8060/actuator/hystrix.stream查看数据监控

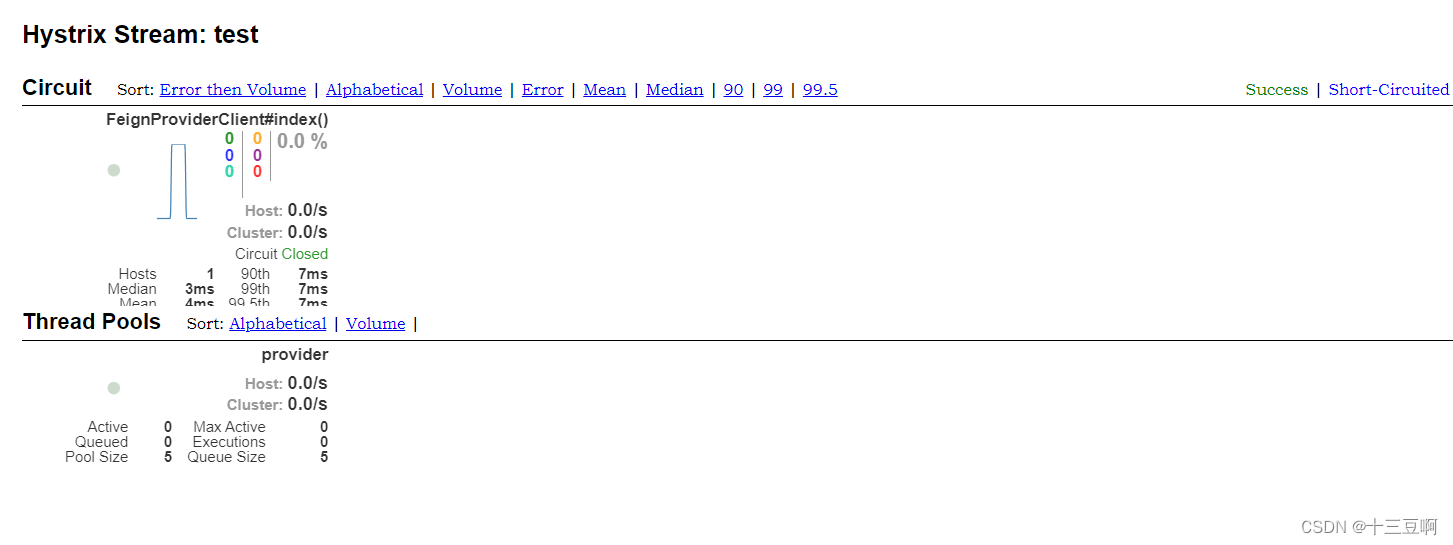
进入http://localhost:8060/hystrix可视化界面尝试数据监控

SpringCloud 配置中心
Spring Cloud Config
Spring Cloud Config: 通过服务端可以为多个客户端提供配置服务,Spring Cloud Config可以将配置文件存储在本地,也可以将配置文件存储在远程的 Git 仓库里面。创建Config Server,通过它管理所有的配置文件。
本地config系统文件配置
架构图:
创建maven工程和pom.xml
    <dependencies>
        <dependency>
            <groupId>org.springframework.cloud</groupId>
            <artifactId>spring-cloud-config-server</artifactId>
            <version>2.0.2.RELEASE</version>
        </dependency>
    </dependencies>
创建application.yml
server:
port: 8762
spring:
application:
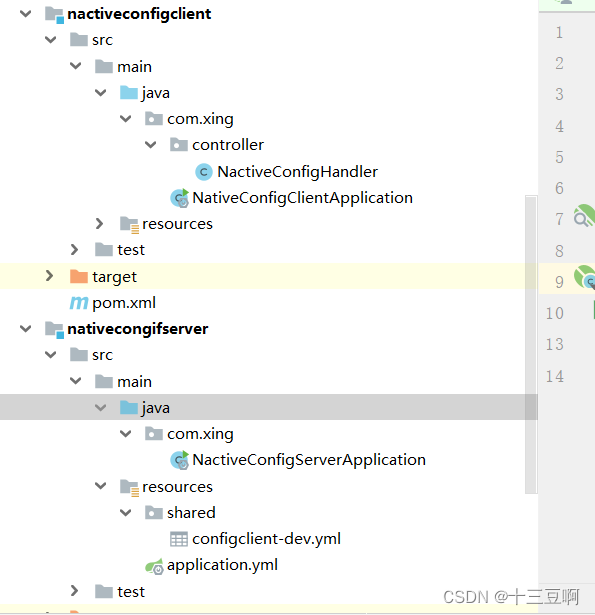
name: nativeconfigserver
profiles:
active: native
cloud:
config:
server:
native:
search-locations: classpath:/shared
注解说明
profiles.active:配置文件的获取方式
cloud.config.server.native.search-locations:本地配置文件存放路径
resources路径下创建shared文件夹,并在次路径下创建configclient-dev.yml
server:
  port: 8070
foo: foo version 1
创建启动类
@SpringBootApplication
@EnableConfigServer
public class NactiveConfigServerApplication {
    public static void main(String[] args) {
        SpringApplication.run(NactiveConfigServerApplication.class,args);
    }
}
注解说明:
@EnableConfigServer: 声明配置中心。
创建客户端来读取本地配置中心的配置文件
创建maven过程和pom文件
    <dependencies>
        <dependency>
            <groupId>org.springframework.cloud</groupId>
            <artifactId>spring-cloud-starter-config</artifactId>
            <version>2.0.2.RELEASE</version>
        </dependency>
    </dependencies>
创建bootstrap.yml配置文件,配置读取本地配置中心的相关信息
spring:
  application:
    name: configclient
  profiles:
    active: dev
  cloud:
    config:
      uri: http://localhost:8762
      fail-fast: true
注解说明
cloud.config.uri:配置本地Config Server的访问路径
cloud.config.fail-fase; 设置客户端优先判断Config Server获取是否正常
通过 spring.application.name 结合 spring.profiles.active拼接目标配置文件,configclient-dev.yml,去Config Server中查找文件
创建客户端启动类
@SpringBootApplication
public class NativeConfigClientApplication {
public static void main(String[] args) {
SpringApplication.run(NativeConfigClientApplication.class,args);
}
}
创建controller
@RestController
@RequestMapping("/native")
public class NactiveConfigHandler {
@Value("${server.port}")
private String port;
@Value("${foo}")
private String foo;
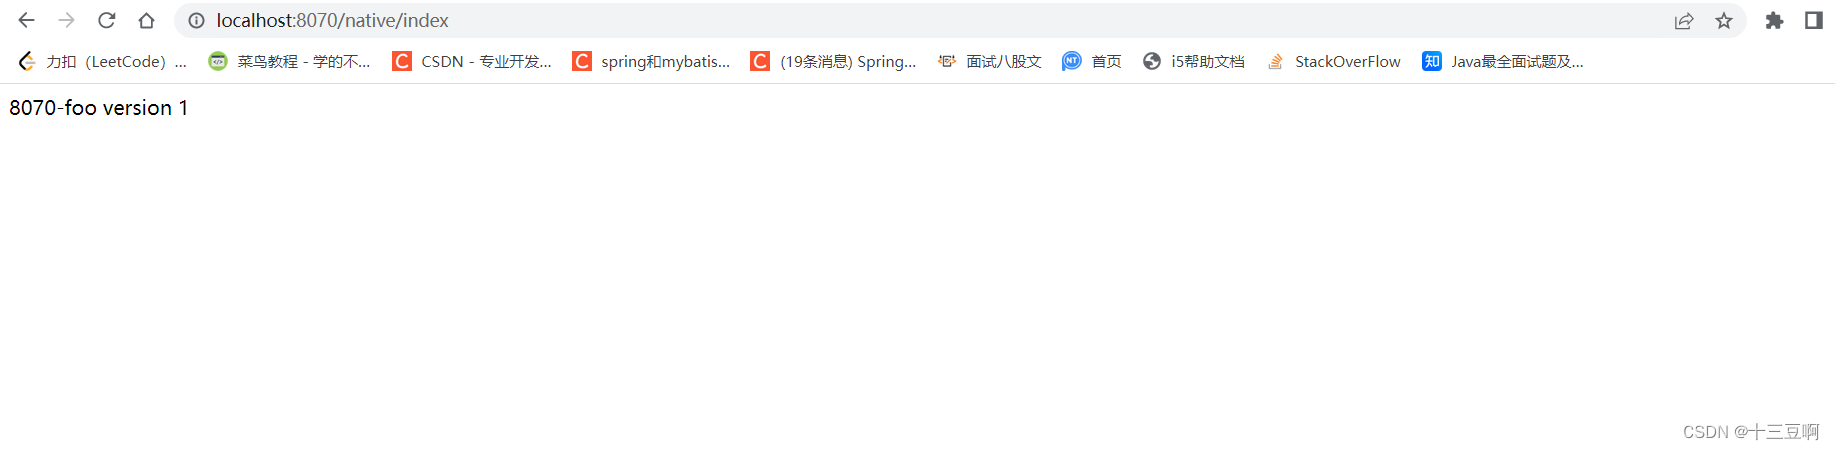
@GetMapping("/index")
public String index(){
return this.port+"-"+this.foo;
}
}
启动
启动eureka、NactiveConfigServerApplication、NativeConfigClientApplication的启动类
进入路径:http://localhost:8070/native/index
Spring Cloud Config远程配置
创建配置文件,上传到github
server:
  port: 8070
eureka:
  client:
    service-url:
      defaultZone: http:localhost:8761/eureka/
spring:
  application:
    name: configclient
创建Config Server,新建maven工程和pom依赖
    <dependencies>
        <dependency>
            <groupId>org.springframework.cloud</groupId>
            <artifactId>spring-cloud-config-server</artifactId>
            <version>2.0.2.RELEASE</version>
        </dependency>
    </dependencies>
创建配置文件application.yml
server:
  port: 8888
spring:
  application:
    name: configserver
  cloud:
    config:
      server:
        git:
          uri: https://github.com/331496117/springcloud.git
          search-paths: config
          username: 你自己github的账户
          password: 你自己github的密码
      label: master
eureka:
  client:
    serviceUrl:
      defaultZone: http://localhost:8761/eureka/
创建启动类
@SpringBootApplication
@EnableConfigServer
public class ConfigServerApplication {
    public static void main(String[] args) {
        SpringApplication.run(ConfigServerApplication.class,args);
    }
}
创建ConfigClient
创建maven工程,pom.xml
    <dependencies>
        <dependency>
            <groupId>org.springframework.boot</groupId>
            <artifactId>spring-boot-starter-web</artifactId>
        </dependency>
        <dependency>
            <groupId>io.zipkin.java</groupId>
            <artifactId>zipkin-server</artifactId>
            <version>2.9.4</version>
        </dependency>

        <dependency>
            <groupId>io.zipkin.java</groupId>
            <artifactId>zipkin-autoconfigure-ui</artifactId>
            <version>2.9.4</version>
        </dependency>
    </dependencies>
创建bootstrap.yml
spring:
  cloud:
    config:
      name: configclient
      label: master
      discovery:
        enabled: true
        service-id: configserver
eureka:
  client:
    service-url:
      defaultZone: http://localhost:8761/eureka/
注解说明
spring.cloud.config.name:当前服务注册在Eureka Server上的名称,与远程仓库配置文件的spring.application.name对应。
spring.cloud.config.label: Git Repository的分支。
spring.cloud.config.discovery.enabled:是否开启config服务发现支持。
spring.cloud.config.service-id:配置中心在Eureka Server上注册的名称。
创建启动类
@SpringBootApplication
public class ConfigClientApplication {
    public static void main(String[] args) {
        SpringApplication.run(ConfigClientApplication.class,args);
    }
}
创建controller
@RestController
@RequestMapping("/hello")
public class HelloHandler {
    @Value("${server.port}")
    private String port;

    @Value("${foo}")
    private String foo;

    @GetMapping("/index")
    public String index(){
        return this.port+foo;
    }
}
服务跟踪
架构图
Spring Cloud Zipkin
Zipkin是一个可以采集并且跟踪分布式系统中请求数据的组件,让开发者可以更加直观的监控到请求在各个微服务所耗费的时间等
Zipkin的两部分:Zipkin Server、 Zipkin Cllient。
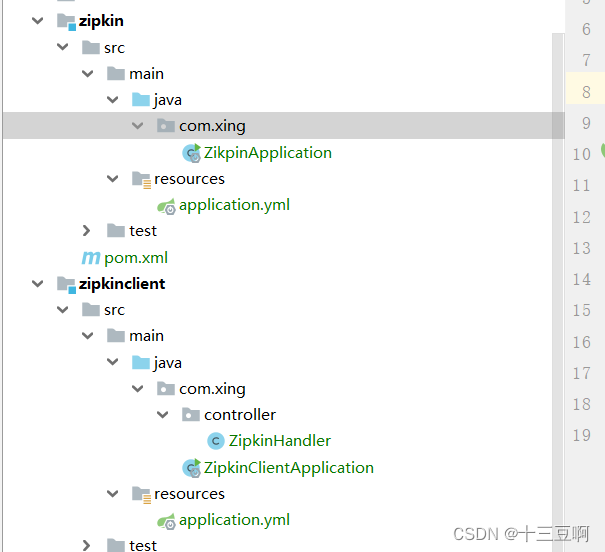
创建Zipkin Server
创建maven过程和pom.xml
    <dependencies>
        <dependency>
            <groupId>io.zipkin.java</groupId>
            <artifactId>zipkin-server</artifactId>
            <version>2.9.4</version>
        </dependency>

        <dependency>
            <groupId>io.zipkin.java</groupId>
            <artifactId>zipkin-autoconfigure-ui</artifactId>
            <version>2.9.4</version>
        </dependency>
    </dependencies>
创建配置文件application.yml
server:
  port: 9090
management:
  metrics:
    web:
      server:
        auto-time-requests: false
创建启动类
@SpringBootApplication
@EnableZipkinServer
public class ZikpinApplication {
    public static void main(String[] args) {
        SpringApplication.run(ZikpinApplication.class,args);
    }
}
注解说明
@EnableZipkinServer:声明启动Zipkin Server
创建Zipkin Client
创建maven工程和pom.xml
    <dependencies>
        <dependency>
            <groupId>org.springframework.cloud</groupId>
            <artifactId>spring-cloud-starter-Zipkin</artifactId>
            <version>2.0.2.RELEASE</version>
        </dependency>
    </dependencies>
创建配置文件application.yml
server:
  port: 8090
spring:
  application:
    name: ZipkinClient
  sleuth:
    web:
      client:
        enabled: true
    samler:
      probability: 1.0
  zipkin:
    base-url: http://localhost:9090/
eureka:
  client:
    service-url:
      defaultZone: http://localhost:8761/eureka/
注解说明
spring.sleuth.web.client.enabled:设置开启请求跟踪
spring.sleuth.sampler.probability: 设置采样比例,默认是1:0
spring.zipkin.base-url: Zipkin Server的地址
创建启动类
@SpringBootApplication
public class ZipkinClientApplication {
    public static void main(String[] args) {
        SpringApplication.run(ZipkinClientApplication.class,args);
    }
}
创建controller
@RestController
@RequestMapping("/zipkin")
public class ZipkinHandler {
    @Value("${server.port}")
    private String port;

    @GetMapping("/index")
    public String index(){
        return this.port;
    }
}
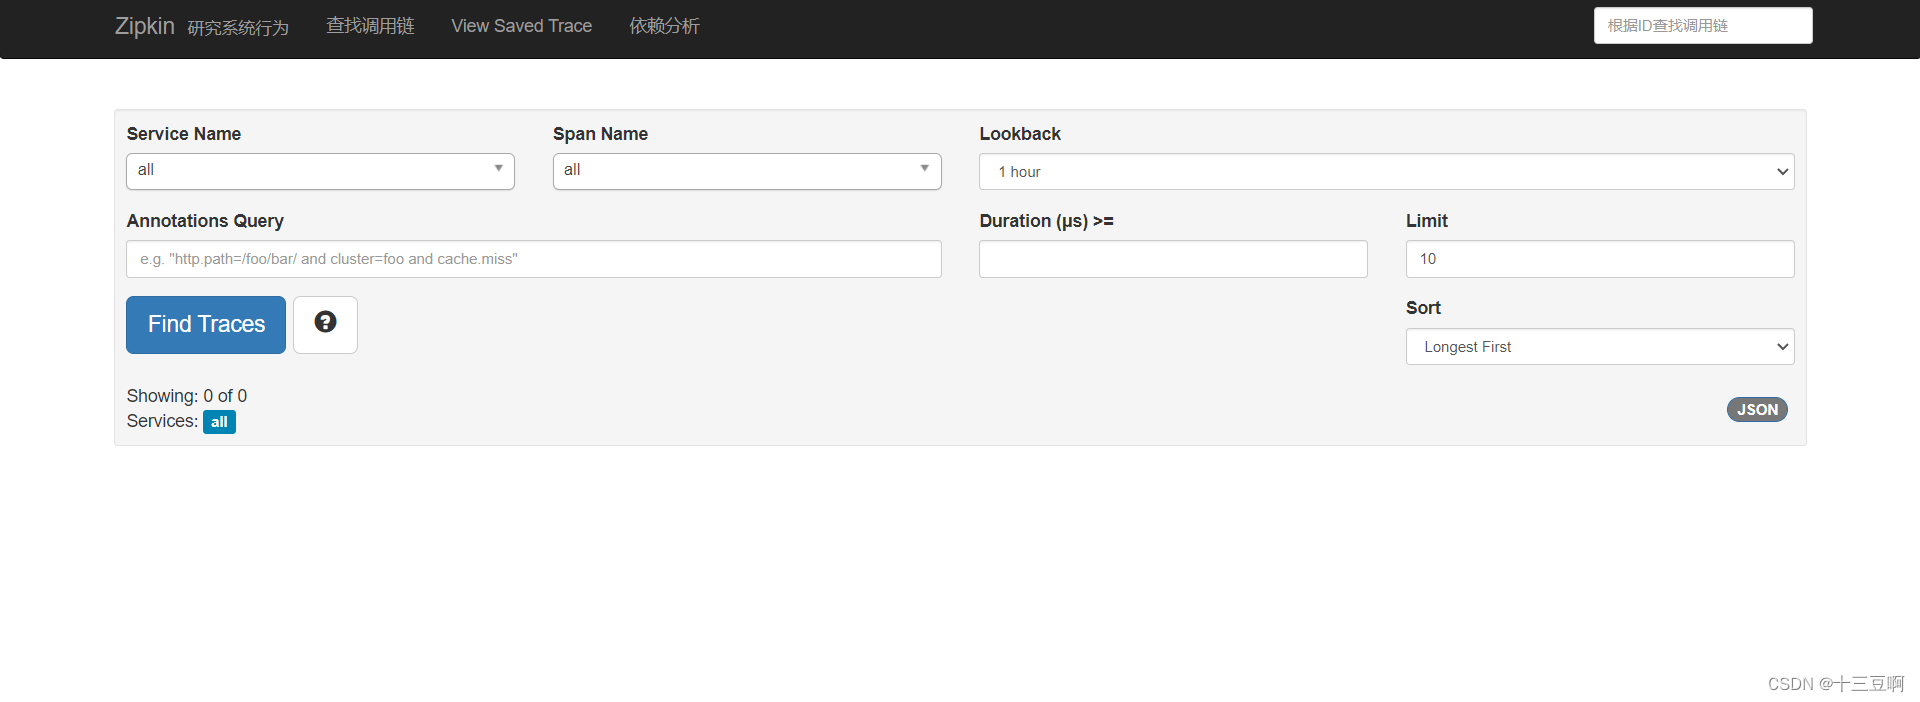
启动注册中心Eureka,还有Zipkin客户端和服务端的启动类
进入http://localhost:9090/zipkin/,查看监控数据的界面
总结
学完这篇文章Spring Cloud就入门啦,但这仅仅只是开始,还需要不断地去学习


 413
413


 被折叠的 条评论
为什么被折叠?
被折叠的 条评论
为什么被折叠?
 到【灌水乐园】发言


