


本文主要介绍 Spring Security 是什么以及其核心功能如身份验证、授权
介绍
Spring Security 是 Spring家族中负责安全认证的一员 那么不难要问什么是安全认证这也是接下来一直贯彻全文的,
在这里我们先提出一个问题再来解决它:在一个web工程中如何做到认证和授权,认证的话相信大家也不会陌生 当我们登录系统时会提供 账号密码这个时候系统就会判断你是不是你从而判断能不能让你登录。
一个系统中可能会存在管理员和用户这两种角色 (实际上会更多 比如说收银员,仓库管理员…)他们虽然都能被认证但是所拥有的权限是大大不同滴
- 管理员可能登录后台但是用户却不行。
- 管理员可能可以删除一个商品,用户却不行。
- …
现在我们来解答这个问题并正式走入Spring Security
1.Servlet 过滤器
任何的spring web都是由servlet组成的这一点毋庸置疑,所有的权限请求都会通过DispatcherServlet转发到指定的Controller进行处理,正常的话我们是不会在Controller里面处理认证和权限等判断的这会使代码看起来很臃肿,有幸的是当http发送一个请求的是servlet并不是第一个接收到的,在他之前还需要经过过滤器这就给我们的开发带来了简洁性使权限认证等在到达Controller之前被处理
比如说
public class SecurityServletFilter extends HttpFilter {

    @Override
    protected void doFilter(HttpServletRequest request, HttpServletResponse response, FilterChain chain) throws IOException, ServletException {
		//通过request获取登录用户信息账号密码
        UsernamePasswordToken token = getUsernameAndPasswordFrom(request);
		//认证
        if (notAuthenticated(token)) {
            // 没有或错误的用户名/密码
            response.setStatus(HttpServletResponse.SC_UNAUTHORIZED); // HTTP 401.
            return;
        }
		//判断有没有授权
        if (notAuthorized(token, request)) {
            // 没有相应的权限
            response.setStatus(HttpServletResponse.SC_FORBIDDEN); // HTTP 403
            return;
        }

        // 允许HttpRequest转到Spring的DispatcherServlet
        // and @RestControllers/@Controllers.
        chain.doFilter(request, response);
    }

    private UsernamePasswordToken extractUsernameAndPasswordFrom(HttpServletRequest request) {
        // 尝试读入基本认证HTTP头,找到用户名和密码
        return checkVariousLoginOptions(request);
    }

    private boolean notAuthenticated(UsernamePasswordToken token) {
        //将令牌与数据库中的令牌进行比较…… 或者内存… 或者在LDAP中…
        return false;
    }

    private boolean notAuthorized(UsernamePasswordToken token, HttpServletRequest request) {
      //检查当前认证的用户是否有权限/角色访问这个请求的/URI
    //例如/admin需要一个ROLE_ADMIN, /callcenter需要ROLE_CALLCENTER,等等。
       return false;
    }
}
这样写的话看起来还是有点臃肿我们可以将其分离成多个过滤器在通过FilterChain chain.doFilter(request, response);放行到下一个过滤器
Spring Security原理
Spring Security正式基于过滤器来实现权限认证的它一共拥有15个过滤器

分析 Spring 的 FilterChain
详细查看此链的每个过滤器可能太过分了,但这里是对其中一些过滤器的解释。随意查看Spring Security 的源代码以了解其他过滤器。
- BasicAuthenticationFilter:尝试在请求中查找 Basic Auth HTTP 标头,如果找到,则尝试使用标头的用户名和密码对用户进行身份验证。
- UsernamePasswordAuthenticationFilter:尝试查找用户名/密码请求参数/POST 正文,如果找到,则尝试使用这些值对用户进行身份验证。
- DefaultLoginPageGeneratingFilter:如果您没有明确禁用该功能,则为您生成登录页面。这个过滤器是启用 Spring Security 时获得默认登录页面的原因。
- DefaultLogoutPageGeneratingFilter:如果您没有明确禁用该功能,则为您生成注销页面。
- FilterSecurityInterceptor : 你的授权。
因此,通过这两个过滤器,Spring Security 为您提供了一个登录/注销页面,以及使用 Basic Auth 或 Form Logins 登录的能力,以及一些额外的好东西,例如 CsrfFilter
下面我们使用Springboot来引入Spring Security, 引入他非常的简单只需要导入
<dependency>
    <groupId>org.springframework.boot</groupId>
    <artifactId>spring-boot-starter-security</artifactId>
</dependency>
然后启动项目访问就发现有一个登录页面 但是我们并没有任何的配置和代码这是Spring Security自带的
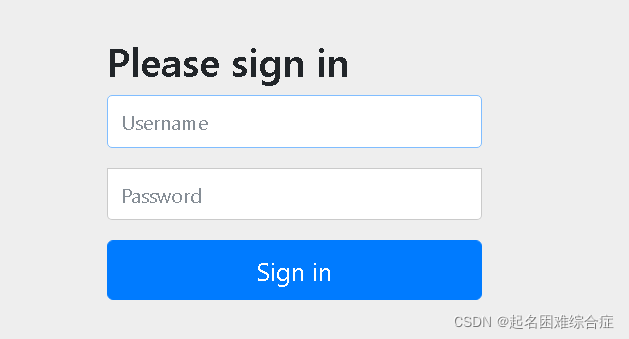
他有一个默认的账号和密码
账号是 user 密码在项目启动的时候会打印在控制台。如果我们想访问该应用的资源就必须先登录
如果我们想自定义登录页面和完成相应的登录逻辑办呢?
配置 Spring Security:WebSecurityConfigurerAdapter
这里我们主要看第三个重写方法configure(HttpSecurity http) 提供配置 DSL/方法。使用这些方法,您可以指定应用程序中要保护的 URI 或要启用/禁用的漏洞利用保护 如 csrf 这个我们在后面会讲
- 保护哪些 URL (authenticated()) 和允许哪些 URL (permitAll())。
- 允许使用哪些身份验证方法(formLogin()、httpBasic())以及它们的配置方式。
- 简而言之:您的应用程序的完整安全配置。
@Configuration
@EnableWebSecurity
@Order(1)
public class SecurityConfig  extends WebSecurityConfigurerAdapter {

    @Override
    protected void configure(AuthenticationManagerBuilder auth) throws Exception {
        //使用内存保存用户信息
        auth.inMemoryAuthentication()
                .withUser("sgp")
                .password("{noop}123")
                .roles("admin");
    }

    @Override
    public void configure(WebSecurity web) throws Exception {
        //解决静态资源被拦截的问题
        web.ignoring().antMatchers("/templates/**");
        web.ignoring().antMatchers("/asserts/**");
        web.ignoring().antMatchers("/img/**");
    }

    @Override
    protected void configure(HttpSecurity http) throws Exception {
        http

            // 配置登录页并允许访问
                .formLogin()
            	.loginPage("/login").permitAll()
        		// 配置Basic登录允许 Basic Auth,即发送 HTTP Basic Auth Header 进行身份验证
                .and().httpBasic()
                // 配置登出页面
                .and().logout().logoutUrl("/logout").logoutSuccessUrl("/")
                // 配置允许访问的链接
                .and().authorizeRequests().antMatchers("/oauth/**", "/login/**", "/logout/**", "/api/**").permitAll()
            			                  .and().authorizeRequests().antMatchers("/admin/**").hasRole("ADMIN")
            .antMatchers("/admin").hasAuthority("ROLE_ADMIN") //访问/admin下的资源需要admin的权限
            .antMatchers("/callcenter").hasAnyAuthority("ROLE_ADMIN", "ROLE_CALLCENTER")
                // 其余所有请求全部需要认证 但是不需要角色权限
                .anyRequest().authenticated()
                // 关闭跨域保护;
                .and().csrf().disable();

    }
}
我们不需要完全覆盖这个配置因为他已经为我们提供了一下基础的如下
public abstract class WebSecurityConfigurerAdapter implements
		WebSecurityConfigurer<WebSecurity> {

    protected void configure(HttpSecurity http) throws Exception {
            http
                .authorizeRequests()
                    .anyRequest().authenticated()
                    .and()
                .formLogin().and()
                .httpBasic();
        }
}
总结
Spring Security的链路管理是由一个自定义spring配置类 继承WebSecurityConfigurerAdapter并重写protected void configure(HttpSecurity http)方法 并且需要在类上加上@EnableWebSecurity注解
解决了Spring Security是如何设置链路管理我们不免思考 那他是如何来进行用户认证和鉴权
使用 Spring Security 进行身份验证
使用 Spring Security 进行身份验证有三种情况:
- 默认值:您可以访问用户的(散列)密码,因为您将他的详细信息(用户名、密码)保存在例如数据库表中。
- 不太常见:您无法访问用户的(散列)密码。如果您的用户和密码存储在其他地方,例如在提供 REST 服务进行身份验证的第 3 方身份管理产品中,就会出现这种情况。微服务下用户服务独立 但是访问其他的服务也需要认证鉴权
- **OAuth2 **:使用 OAuth2 与 JWT 结合使用。
注意:根据您的场景,您需要指定不同的@Beans 以使 Spring Security 正常工作,否则您最终会遇到非常混乱的异常(例如,如果您忘记指定 PasswordEncoder(用于密码加密),则会出现 NullPointerException)。记住这一点。
对于第一种情况我们使用
1. UserDetailsService:有权访问用户的密码
我们现在有一个user表包含了username和password
在这种情况下,Spring Security 需要您定义两个 bean 来启动和运行身份验证。
- 一个用户详细信息服务。
- 密码编码器。
在注册这两个bean之前我们先来了解一下Spring Security 给我们提供的接口UserDetails 他提供了查询用户名和密码等方法
public interface UserDetails extends Serializable {
   // ~ Methods
   // ========================================================================================================

   /**
    * Returns the authorities granted to the user. Cannot return <code>null</code>.
    *
    * @return the authorities, sorted by natural key (never <code>null</code>)
    */
   Collection<? extends GrantedAuthority> getAuthorities();

   /**
    * Returns the password used to authenticate the user.
    *
    * @return the password
    */
   String getPassword();

   /**
    * Returns the username used to authenticate the user. Cannot return <code>null</code>.
    *
    * @return the username (never <code>null</code>)
    */
   String getUsername();

   /**
    * Indicates whether the user's account has expired. An expired account cannot be
    * authenticated.
    *
    * @return <code>true</code> if the user's account is valid (ie non-expired),
    * <code>false</code> if no longer valid (ie expired)
    */
   boolean isAccountNonExpired();

   /**
    * Indicates whether the user is locked or unlocked. A locked user cannot be
    * authenticated.
    *
    * @return <code>true</code> if the user is not locked, <code>false</code> otherwise
    */
   boolean isAccountNonLocked();

   /**
    * Indicates whether the user's credentials (password) has expired. Expired
    * credentials prevent authentication.
    *
    * @return <code>true</code> if the user's credentials are valid (ie non-expired),
    * <code>false</code> if no longer valid (ie expired)
    */
   boolean isCredentialsNonExpired();

   /**
    * Indicates whether the user is enabled or disabled. A disabled user cannot be
    * authenticated.
    *
    * @return <code>true</code> if the user is enabled, <code>false</code> otherwise
    */
   boolean isEnabled();
}
UserDetailsService接口
它是加载用户特定数据的核心接口。它在整个框架中作为用户 DAO 使用,该接口只有一种只读方法,这简化了对新数据访问策略的支持。
public interface UserDetailsService {
   // ~ Methods
   // ========================================================================================================

   /**
    * Locates the user based on the username. In the actual implementation, the search
    * may possibly be case sensitive, or case insensitive depending on how the
    * implementation instance is configured. In this case, the <code>UserDetails</code>
    * object that comes back may have a username that is of a different case than what
    * was actually requested..
    *
    * @param username the username identifying the user whose data is required.
    *
    * @return a fully populated user record (never <code>null</code>)
    *
    * @throws UsernameNotFoundException if the user could not be found or the user has no
    * GrantedAuthority
    */
   UserDetails loadUserByUsername(String username) throws UsernameNotFoundException;
}
User 官方提供的不要与自定义的混淆
public class User implements UserDetails, CredentialsContainer {

   private static final long serialVersionUID = SpringSecurityCoreVersion.SERIAL_VERSION_UID;

   private static final Log logger = LogFactory.getLog(User.class);

   // ~ Instance fields
   // ================================================================================================
   private String password;
   private final String username;
   private final Set<GrantedAuthority> authorities;
   private final boolean accountNonExpired;
   private final boolean accountNonLocked;
   private final boolean credentialsNonExpired;
   private final boolean enabled;

   // ~ Constructors
   // ===================================================================================================

   /**
    * Calls the more complex constructor with all boolean arguments set to {@code true}.
    */
   public User(String username, String password,
         Collection<? extends GrantedAuthority> authorities) {
      this(username, password, true, true, true, true, authorities);
   }
    ........
}
指定 UserDetailsService
我们可以通过继承来实现loadUserByUsername方法比如
@Bean //只要注册到容器后 会自动的调用不用做任何处理
public UserDetailsService userDetailsService() {
    return new MyDatabaseUserDetailsService();
}
public class MyDatabaseUserDetailsService implements UserDetailsService {

	UserDetails loadUserByUsername(String username) throws UsernameNotFoundException {
         // 1. Load the user from the users table by username. If not found, throw UsernameNotFoundException.
         // 2. Convert/wrap the user to a UserDetails object and return it.
        return someUserDetails;
    }
}
但是做demo的时候大可不必因为Spring Security 为我们提供好了一些UserDetailsService的实现类
-
JdbcUserDetailsManager,它是一个基于 JDBC(数据库)的 UserDetailsService。您可以对其进行配置以匹配您的用户表/列结构。
/* 指定dataSource即可 查询验证等交由JdbcUserDetailsManager完成其内部有大量的sql */ @Bean public UserDetailsService getUserDetailsService(){ JdbcUserDetailsManager manager = new JdbcUserDetailsManager(dataSource); manager.createUser(new User("sgp",passwordEncoder.encode("123"), AuthorityUtils.commaSeparatedStringToAuthorityList("read,ROLE_USER"))); return manager; } //AuthorityUtils.commaSeparatedStringToAuthorityList("read,ROLE_USER")设置权限 -
InMemoryUserDetailsManager,它将所有用户详细信息保存在内存中,非常适合测试。
@Bean public UserDetailsService getUserDetailsService(){ InMemoryUserDetailsManager manager = new InMemoryUserDetailsManager(); manager.createUser(new User("sgp",passwordEncoder.encode("123"), AuthorityUtils.commaSeparatedStringToAuthorityList("read,ROLE_USER"))); return manager; } -
org.springframework.security.core.userdetail.User,这是您可以使用的合理的默认 UserDetails 实现。这意味着可能在您的实体/数据库表和此用户类之间进行映射/复制。或者,您可以简单地让您的实体实现 UserDetails 接口。
密码编码器(多种可选)
@Bean
public BCryptPasswordEncoder bCryptPasswordEncoder() {
    return new BCryptPasswordEncoder();
}
完整的 UserDetails 工作流程:HTTP 基本身份验证
现在回想一下您的 HTTP 基本身份验证,当我们执行到 UserDetailsService 并尝试登录时发生的情况:
- 从过滤器中的 HTTP Basic Auth 标头中提取用户名/密码组合。
- 调用您的MyDatabaseUserDetailsService 以从数据库加载相应的用户,包装为 UserDetails 对象,该对象公开用户的哈希密码,使用如JdbcUserDetailsManager则只需要注入 就行。
- 从 HTTP Basic Auth 标头中提取密码,自动对其进行哈希处理,并将其与您的 UserDetails 对象中的哈希密码进行比较。如果两者都匹配,则用户成功通过身份验证。
如果你不喜欢使用bean注入JdbcUserDetailsManager可以重写protected void configure(AuthenticationManagerBuilder auth)方法
@Override
protected void configure(AuthenticationManagerBuilder auth) throws Exception {
    //auth.jdbcAuthentication().dataSource(dataSource).getUserDetailsService();
    //使用内存保存用户信息
        auth.inMemoryAuthentication()
                .withUser("sgp")
                .password("{noop}123")
            .roles("admin");
}
无权访问用户的密码
AuthenticationProvider:无权访问用户密码
现在,假设您正在使用一个微服务进行集中式身份管理。这意味着您所有应用程序的所有用户和密码都存储在该微服务中,而不再存储在您的数据库表中。
这有两个含义:
- 您的应用程序中不再有用户密码,因为您不能要求系统给您这些密码。
- 但是,您确实有一个 REST API,您可以使用您的用户名和密码登录。
*/rest/usermanagement/authentication*(对REST 端点的 POST 请求 )。
我们需要一个继承AuthenticationProvider类的子类
@Component
public class AtlassianCrowdAuthenticationProvider implements AuthenticationProvider {
    //验证逻辑
    @Override
    public Authentication authenticate(Authentication authentication) throws AuthenticationException {
        String username = authentication.getPrincipal().toString();
        String password = authentication.getCredentials().toString();
        //一系列判断 你可以使用rest接口或者本地接口来验证
        User user = isFlag(username, password);
        if (user==null){
            throw new UsernameNotFoundException("错误");
        }
        return new UsernamePasswordAuthenticationToken(user.getUsername(),user.getPassword(),user.getAuthorities());
    }
    public User isFlag(String username,String password){
            if (username.equals("sgp")&&password.equals("123")){
                return new User(username,password, AuthorityUtils.commaSeparatedStringToAuthorityList("read,ROLE_USER"));
            }
            return null;
    }
    @Override
    public boolean supports(Class<?> authentication) {
        //选择验证方式 这里使用账号密码
        return authentication.equals(UsernamePasswordAuthenticationToken.class);
    }

}
然后再配置类中配置
 @Override
    protected void configure(AuthenticationManagerBuilder auth) throws Exception {
        auth.authenticationProvider(authenticationProvider);
    }
这样就可以使用了
从上面内容不难看出 authenticationProvider 来处理认证了
接下来我们要说权限管理
使用SpringSecurity进行授权管理
之前我们已经在下面这个方法中配置了一些权限相关的 你还记得吗?
protected void configure(HttpSecurity http)
这里我们不在描述使用配置类来设置URL的访问权限而使用注解
首先我们在在配置类上添加注解
@EnableGlobalMethodSecurity(prePostEnabled=true)
prePostEnabled=true表示启用@PreAuthorize/@PostAuthorize
前者是在访问前验证后者在访问后验证
@RequestMapping("/admin")
//表示需要ADMIN这个角色用户才可以访问该方法 且可带ROLE_可不带在配置类中必须要带上ROLE
@PreAuthorize("hasRole('ADMIM')")
public String getAuthentication(){
   SecurityContext context = SecurityContextHolder.getContext();
        Authentication user = context.getAuthentication();//获取认证对象
        System.out.println(user.getCredentials()+"  "+user.getAuthorities()+" "+user.getPrincipal());
    return "main";
}
类似的注解还有@Secured 和 @RolesAllowed 这里就不在描述了
tAuthorize
前者是在访问前验证后者在访问后验证
@RequestMapping("/admin")
//表示需要ADMIN这个角色用户才可以访问该方法 且可带ROLE_可不带在配置类中必须要带上ROLE
@PreAuthorize("hasRole('ADMIM')")
public String getAuthentication(){
   SecurityContext context = SecurityContextHolder.getContext();
        Authentication user = context.getAuthentication();//获取认证对象
        System.out.println(user.getCredentials()+"  "+user.getAuthorities()+" "+user.getPrincipal());
    return "main";
}
类似的注解还有@Secured 和 @RolesAllowed 这里就不在描述了


 114
114


 被折叠的 条评论
为什么被折叠?
被折叠的 条评论
为什么被折叠?
 到【灌水乐园】发言


