


一、spring IOC
1.spring IOC定义
IOC 是 Inversion of Control 的缩写,多数书籍翻译成“控制反转”。简单来说就是把复杂系统分解成相互合作的对象,这些对象类通过封装以后,内部实现对外部是透明的,从⽽降低了解决问题的复杂度,⽽且可以灵活地被᯿⽤和扩展。IOC 理论提出的观点⼤体是这样的:借助于“第三⽅”实现具有依赖关系的对象之间的解耦。如下图:
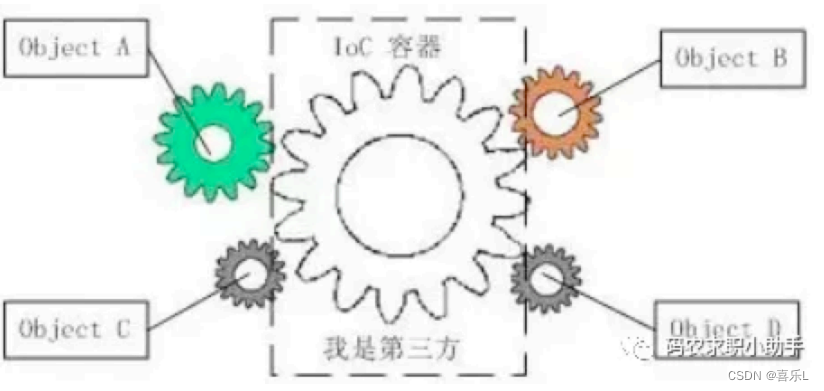
由于引进了中间位置的“第三⽅”,也就是 IOC 容器,使得 A、B、C、D 这 4 个对象没有了耦合关系,⻮轮之间的传动全部依靠“第三⽅”了,全部对象的控制权全部上缴给“第三⽅”IOC 容器,所以,IOC 容器成了整个系统的关键核⼼,它起到了⼀种类似“粘合剂”的作⽤,把系统中的所有对象粘合在⼀起发ഀ作⽤,如果没有这个“粘合剂”,对象与对象之间会彼此失去联系,这就是有⼈把 IOC 容器⽐喻成“粘合剂”的由来。
把上图中间的 IOC 容器拿掉,然后再来看看这套系统:
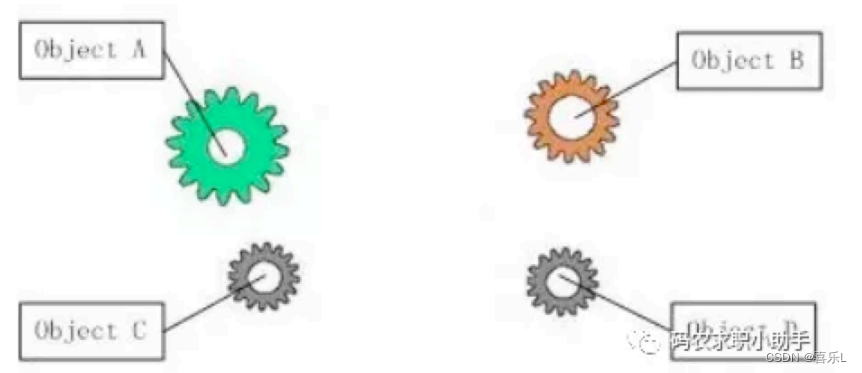
现在看到的画⾯,就是我们要实现整个系统所需要完成的全部内容。这时候,A、B、C、D 这 4 个对象之间已经没有了耦合关系,彼此毫⽆联系,这样的话,当你在实现 A 的时候,根本⽆须再去考虑 B、C 和 D了,对象之间的依赖关系已经降低到了最低程度。所以,如果真能实现 IOC 容器,对于系统开发⽽⾔,这将是⼀件多么美好的事情,参与开发的每⼀成员只要实现⾃⼰的类就可以了,跟别⼈没有任何关系!我们再来看看,控制反转(IOC)到底为什么要起这么个名字?我们来对⽐⼀下:
软件系统在没有引⼊ IOC 容器之前,对象 A 依赖于对象 B,那么对象 A 在初始化或者运⾏到某⼀点的时候,⾃⼰必须主动去创建对象 B 或者使⽤已经创建的对象 B。⽆论是创建还是使⽤对象 B,控制权都在⾃⼰⼿上。软件系统在引⼊ IOC 容器之后,这种情形就完全改变了,由于 IOC 容器的加⼊,对象 A 与对象 B 之间失去了直接联系,所以,当对象 A 运⾏到需要对象 B 的时候,IOC 容器会主动创建⼀个对象 B 注⼊到对象 A 需要的地⽅。通过前后的对⽐,我们不难看出来:对象 A 获得依赖对象 B 的过程,由主动⾏为变为了被动⾏为,控制权颠倒过来了,这就是“控制反转”这个名称的由来。
spring IOC 容器
一、节省内存 十万个用户在注册:
new User(name, age, height, sex){........}
工具类对象:
new xxxObj() 如果IOC容器中有这个 唯一的对象 xxxObj
机器性能更好
2、松耦合: 面向抽象
Student 对象需要 vehicle对象
交通工具 Vehicle
car
bus
plane
bike
3、bean容器的创建
3.1.导包
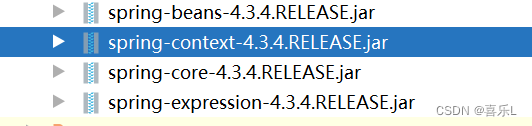
3.1.1.导入spring核心依赖包
aop:jdk 语法、代理类
1.
2.![]()
编写application-context.xml文件
<?xml version="1.0" encoding="utf-8" ?>
<beans xmlns="http://www.springframework.org/schema/beans"
       xmlns:xsi="http://www.w3.org/2001/XMLSchema-instance"
       xsi:schemaLocation="http://www.springframework.org/schema/beans
        https://www.springframework.org/schema/beans/spring-beans.xsd">

    <bean id="s" class="com.hqyj.model.Student">

    </bean>

</beans>
3.1.2编写语句
-
package com.hqyj; import com.hqyj.model.Student; import org.springframework.beans.factory.BeanFactory; import org.springframework.context.ApplicationContext; import org.springframework.context.support.AbstractApplicationContext; import org.springframework.context.support.ClassPathXmlApplicationContext; import org.springframework.context.support.FileSystemXmlApplicationContext; public class MyTest1 { public static void main(String[] args) { //应用程序上下文,创建容器 //BeanFactory,ApplicationContext,AbstractApplicationContext是接口,不能new //方法一: // ClassPathXmlApplicationContext context = new ClassPathXmlApplicationContext("application-context.xml"); //方法二: BeanFactory context = new ClassPathXmlApplicationContext("application-context.xml"); //方法三: // ApplicationContext context = new ClassPathXmlApplicationContext("application-context.xml"); //方法四: // AbstractApplicationContext context = new ClassPathXmlApplicationContext("application-context.xml"); //写法一:返回值Object // Student student = (Student) context.getBean("s"); //写法二:获取类 Student student = context.getBean(Student.class); student.work(); } } -
测试
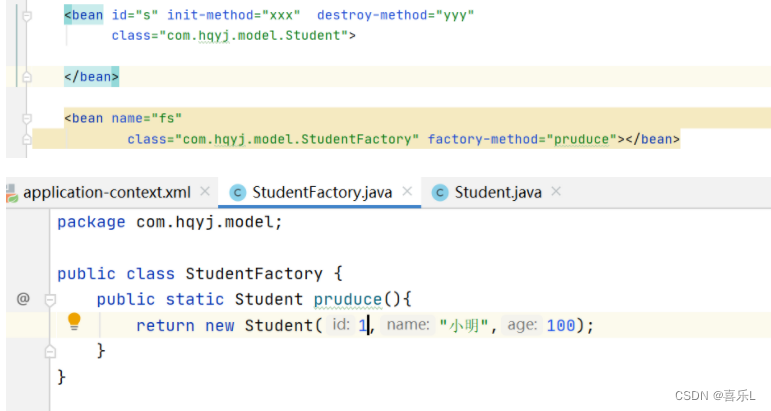
3.2.容器bean对象创建的方式
1、直接调 bean类 的构造方法
2、调用静态工厂的静态方法创建bean对象
3、调用实例工厂的   方法创建bean对象
主要表现为:
3.2.1 方法一
ClassPathXmlApplicationContext context = new ClassPathXmlApplicationContext("application-context.xml");
BeanFactory context = new ClassPathXmlApplicationContext("application-context.xml");
BeanFactory context = new FileSystemXmlApplicationContext("D:/hqyj/ssm/spring/studyIOC/src/application-context.xml");
ApplicationContext context = new ClassPathXmlApplicationContext("application-context.xml");
AbstractApplicationContext context = new ClassPathXmlApplicationContext("application-context.xml");
Resource rs=new FileSystemResource("D:\\Java\\chentaoWorkspace\\studySping-IOC\\src\\application-context.xml");
BeanFactory beanFactory=new XmlBeanFactory(rs);
beanFactory.getBean("student");
BeanFactory context = new XmlBeanFactory(new FileSystemResource("D:/hqyj/ssm/spring/studyIOC/src/application-context.xml"));
获取类写法:
 //写法一:返回值Object
        Student student1 = (Student) context.getBean("s");
        Student student2 = (Student) context.getBean("s");
        Student student3 = (Student) context.getBean("s");
//写法二:获取类
//      Student student1 = context.getBean(Student.class);
//      Student student2 = context.getBean(Student.class);
//      Student student3 = context.getBean(Student.class);
3.2.2 方法二
<!-- 静态工厂建立--> <bean name="fs" class="com.hqyj.model.StudentFactory" factory-method="pruduce"></bean>
3.2.3 方法三
调用实例工厂,创建bean对象
<!-- 实例创建-->
<bean id="maker" class="com.hqyj.model.StudentMaker" ></bean>
<bean name="ms" factory-bean="maker" factory-method="make"></bean>
<bean id="maker" class="com.hqyj.model.StudentMaker"></bean>
<bean name="ms" factory-bean="maker" factory-method="make"></bean>3.3.bean会创建多少个对象
3.3.1.singleton—1个 单例
创建一个对象
<bean id="s" scope="singleton" class="com.hqyj.model.Student">3.3.2.prototype—多个 原型
创建多个对象
<bean id="s" scope="prototype" class="com.hqyj.model.Student">3.3.3.测试
public static void main(String[] args) {
//应用程序上下文,创建容器
//BeanFactory,ApplicationContext,AbstractApplicationContext是接口,不能new
BeanFactory context = new ClassPathXmlApplicationContext("application-context.xml");
//返回值Object
Student student1 = (Student) context.getBean("s");
Student student2 = (Student) context.getBean("s");
Student student3 = (Student) context.getBean("s");
System.out.println(student1);
System.out.println(student2);
System.out.println(student3);
student1.work();
}3.4.bean 对象何时被创建
3.4.1.容器创建时创建
容器创建时就创建了,改为容器创建时不创建。设置为懒加载方式:
lazy-init="true"

3.4.2.获取的时候创建
在getBean()时创建,必然是懒加载的

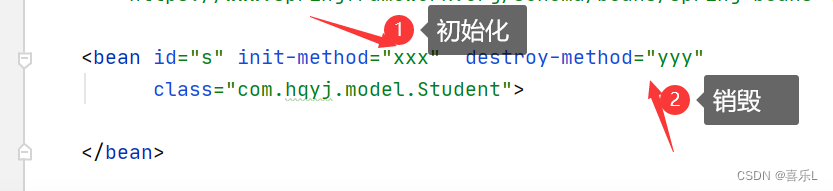
3.5.bean对象的初始化和销毁
二、IOC-DI依赖注入—给属性设置值
DI: dependency Injection
1、 DI依赖注入—xml文件注入方式
1.1.简单数据注入
1.1.1 使用set方法进行注入,spting自己调用
1.1.2直接调用bean类的构造方法
<bean name="s"
      class="com.hqyj.model.Student">
</bean>
第三方可能提供一个student.class 文件
class StudentFactory{
Student produce(){
return new Studen t();
}
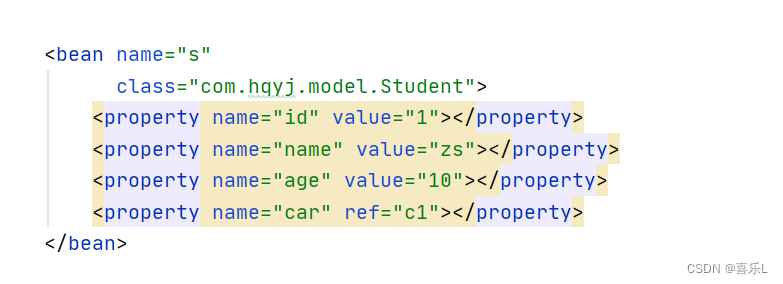
}1.1.3 引用别的bean对象
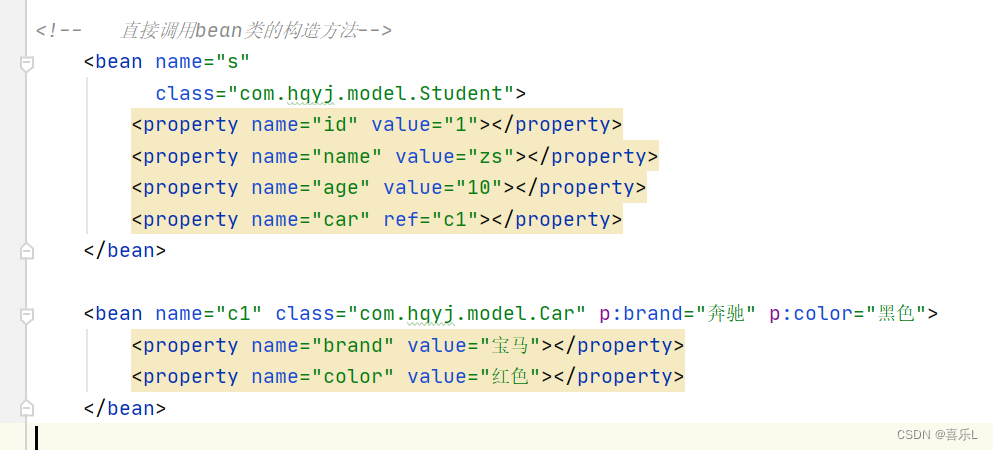

1.1.4.名称空间注入
namespace(XML文件)不常用
 <bean name="c1" class="com.hqyj.model.Car" p:brand="奔驰" p:color="黑色">

 </bean>
1.2.复杂数据注入
1.2.1.引入其他的bean的值
使用ref关键字——ref = "其他bean的name"
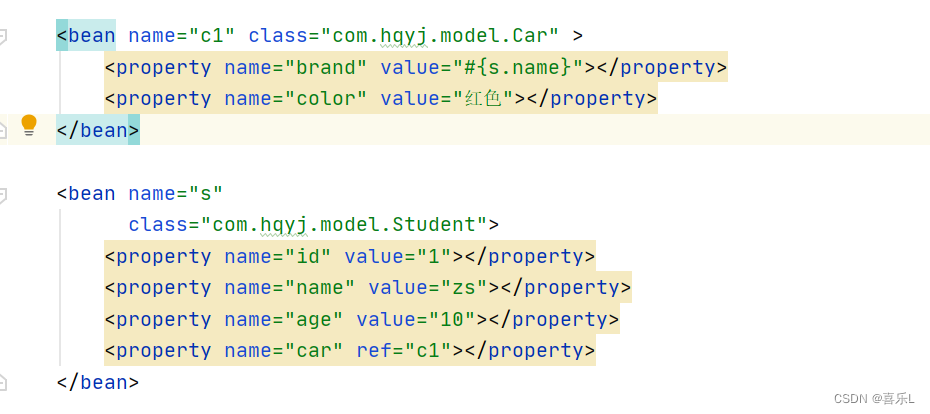
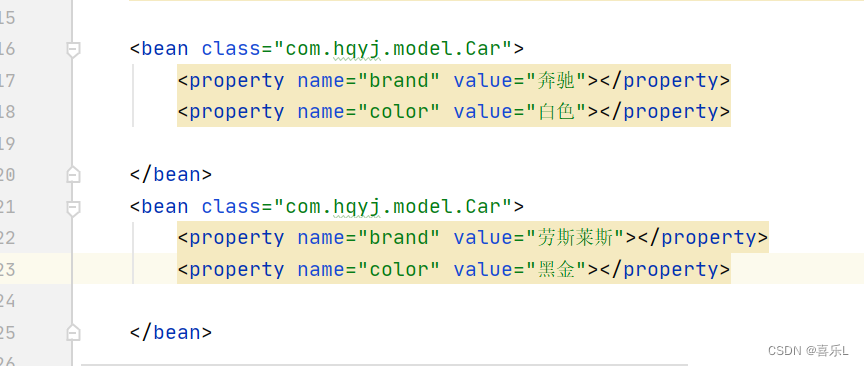
1.2.2 注入数组
<bean name="c1" class="com.hqyj.model.Car" >
<property name="brand" value="宝马"></property>
<property name="color" value="红色"></property>
</bean>
<bean name="s" class="com.hqyj.model.Student">
<property name="id" value="1"></property>
<property name="name" value="zs"></property>
<property name="age" value="10"></property>
<property name="car" ref="c1"></property>
<property name="objs">
<array>
<value>香蕉</value>
<value>西瓜</value>
<value>葡萄</value>
<value>草莓</value>
<ref bean="c1"></ref>
</array>
</property>
</bean>

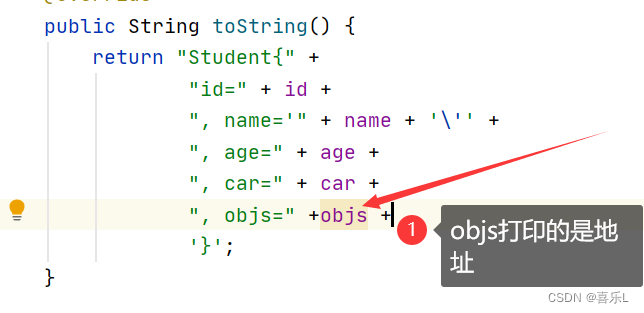
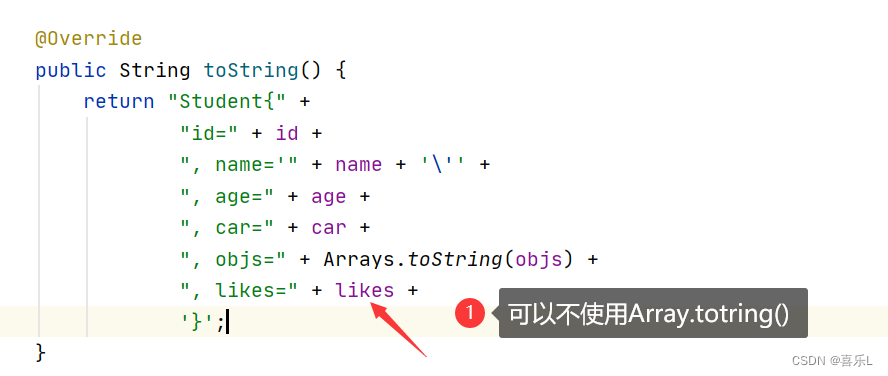
以上的方法不建议使用
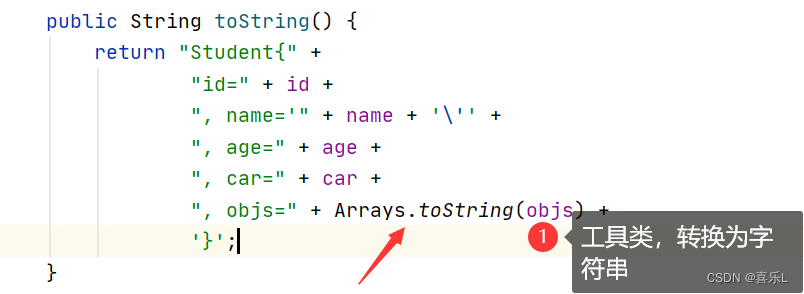
通常要使用Arraay.tostring()方法对元素进行转化,转化后就显示的是具体的值。
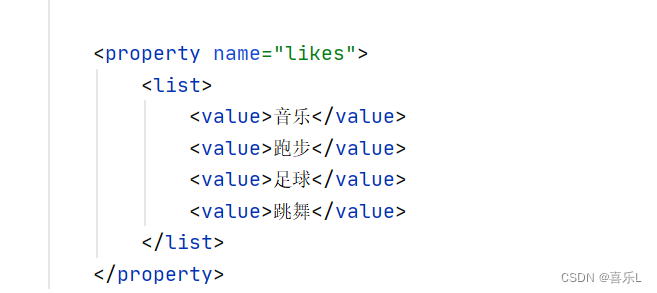
1.2.3 注入集合—list
tostring()方法中不需要使用Array.tostring()方法,可以打印其元素:

<bean name="c1" class="com.hqyj.model.Car" >
<property name="brand" value="宝马"></property>
<property name="color" value="红色"></property>
</bean>
<bean name="s" class="com.hqyj.model.Student">
<property name="id" value="1"></property>
<property name="name" value="zs"></property>
<property name="age" value="10"></property>
<property name="car" ref="c1"></property>
<property name="objs">
<array>
<value>香蕉</value>
<value>西瓜</value>
<value>葡萄</value>
<value>草莓</value>
<ref bean="c1"></ref>
</array>
</property>
<property name="likes">
<list>
<value>音乐</value>
<value>跑步</value>
<value>足球</value>
<value>跳舞</value>
</list>
</property>
</bean>
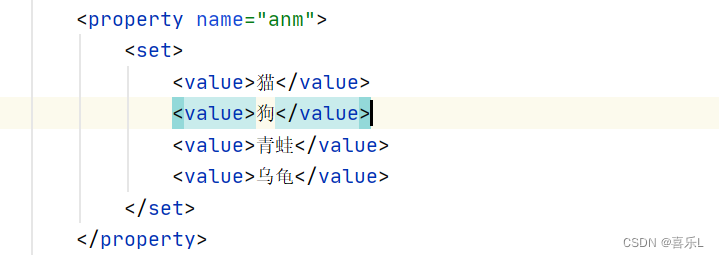
1.2.4.注入集合—set集合


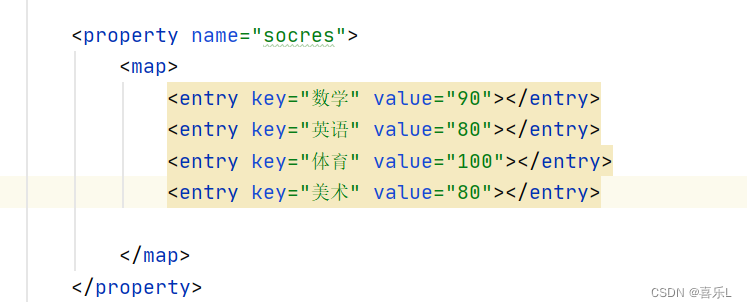
1.2.5.注入集合—map映射
格式:
<property name="属性名">
 <map>
     <entry key="key" value="value"></entry>
 </map>
</property>

1.2.6.注入集合—Properties
会自动排序,与map相似


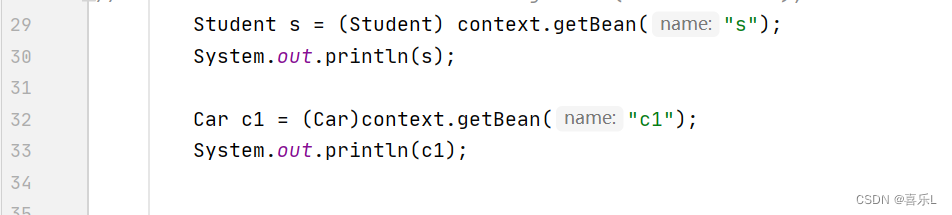
1.3. DI依赖注入——xm文件方式的代码
application-context.xml:
<bean name="c1" class="com.hqyj.model.Car" >
<property name="brand" value="宝马"></property>
<property name="color" value="红色"></property>
</bean>
<bean name="s" class="com.hqyj.model.Student">
<property name="id" value="1"></property>
<property name="name" value="zs"></property>
<property name="age" value="10"></property>
<property name="car" ref="c1"></property>
<property name="objs">
<array>
<value>香蕉</value>
<value>西瓜</value>
<value>葡萄</value>
<value>草莓</value>
<ref bean="c1"></ref>
</array>
</property>
<property name="likes">
<list>
<value>音乐</value>
<value>跑步</value>
<value>足球</value>
<value>跳舞</value>
</list>
</property>
<property name="anm">
<set>
<value>猫</value>
<value>狗</value>
<value>青蛙</value>
<value>乌龟</value>
</set>
</property>
<property name="socres">
<map>
<entry key="数学" value="90"></entry>
<entry key="英语" value="80"></entry>
<entry key="体育" value="100"></entry>
<entry key="美术" value="80"></entry>
</map>
</property>
<property name="health">
<props>
<prop key="height">170厘米</prop>
<prop key="weight">40千克</prop>
<prop key="视力">5.2</prop>
<prop key="血压">正常</prop>
</props>
</property>
</bean>
实体类:Student:
import java.util.*;
public class Student {
private int id;
private String name;
private int age;
private Car car;
private Object[] objs; //数组
private List likes;
private Set anm;
private Map socres;
private Properties health;
public Student(int id, String name, int age) {
System.out.println("id,name,age被调用了");
this.id = id;
this.name = name;
this.age = age;
}
public Student(String name,int id, int age) {
System.out.println("name,id,age被调用了");
this.id = id;
this.name = name;
this.age = age;
}
public Properties getHealth() {
return health;
}
public void setHealth(Properties health) {
this.health = health;
}
public Map getSocres() {
return socres;
}
public void setSocres(Map socres) {
this.socres = socres;
}
public Set getAnm() {
return anm;
}
public void setAnm(Set anm) {
this.anm = anm;
}
public List getLikes() {
return likes;
}
public void setLikes(List likes) {
this.likes = likes;
}
public Object[] getObjs() {
return objs;
}
public void setObjs(Object[] objs) {
this.objs = objs;
}
public int getId() {
return id;
}
public void setId(int id) {
this.id = id;
}
public String getName() {
return name;
}
public void setName(String name) {
this.name = name;
}
public int getAge() {
return age;
}
public void setAge(int age) {
this.age = age;
}
public Car getCar() {
return car;
}
public void setCar(Car car) {
this.car = car;
}
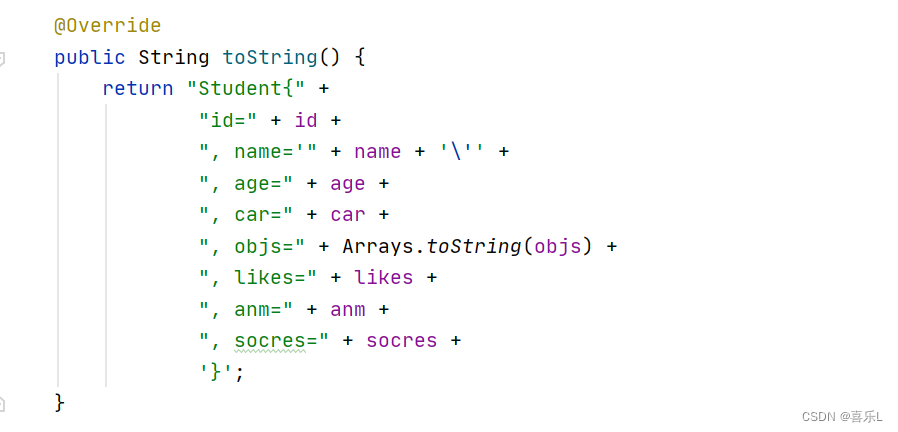
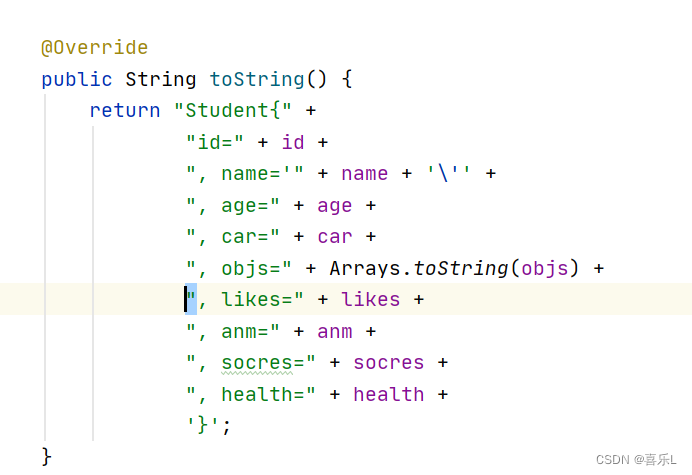
@Override
public String toString() {
return "Student{" +
"id=" + id +
", name='" + name + '\'' +
", age=" + age +
", car=" + car +
", objs=" + Arrays.toString(objs) +
", likes=" + likes +
", anm=" + anm +
", socres=" + socres +
", health=" + health +
'}';
}
public Student() {
System.out.println("构造方法被调用");
}
public void work(){
System.out.println("干活");
}
public void xxx(){
System.out.println("初始化");
}
public void yyy(){
System.out.println("销毁");
}
}
测试类:MyTest1:
import com.hqyj.model.Car;
import com.hqyj.model.Student;
import org.springframework.beans.factory.BeanFactory;
import org.springframework.beans.factory.xml.XmlBeanFactory;
import org.springframework.context.ApplicationContext;
import org.springframework.context.support.AbstractApplicationContext;
import org.springframework.context.support.ClassPathXmlApplicationContext;
import org.springframework.context.support.FileSystemXmlApplicationContext;
import org.springframework.core.io.FileSystemResource;
import org.springframework.core.io.Resource;
public class MyTest1 {
public static void main(String[] args) {
//应用程序上下文,创建容器
//BeanFactory,ApplicationContext,AbstractApplicationContext是接口,不能new
AbstractApplicationContext context = new ClassPathXmlApplicationContext("application-context.xml");
context.getBean(Student.class);
Student s = (Student) context.getBean("s");
System.out.println(s);
}
}2、DI依赖注入—注解注入方式
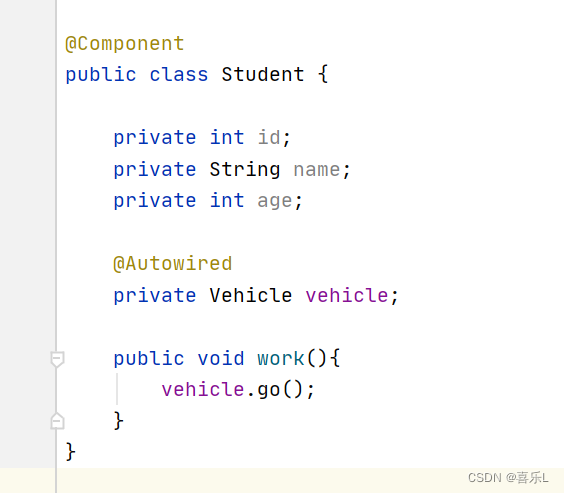
2.1.@Component注解—修饰了一个类
2.1.1 组件
@Component:组件,以下属于其组件
@Controller 控制器
@Service 服务层
@Repository 持久层
以上三者都继承于@Component
@Component(value = "s")
@Controller(value = "s")
@Service(value = "s")
@Repository(value = "s")
这就相当于在xml文件里面定义了一个<bean>组件
容器创建,查看其创建了没?
@Component
public class Student {
private int id;
private String name;
private int age;
public Student() {
System.out.println("无参构造方法执行");
}
}
<?xml version="1.0" encoding="utf-8" ?>
<beans xmlns="http://www.springframework.org/schema/beans"
xmlns:xsi="http://www.w3.org/2001/XMLSchema-instance"
xmlns:context="http://www.springframework.org/schema/context"
xsi:schemaLocation="
http://www.springframework.org/schema/beans
http://www.springframework.org/schema/beans/spring-beans-4.0.xsd
http://www.springframework.org/schema/context
http://www.springframework.org/schema/context/spring-context.xsd">
<!--annotation:注解的配置,使用注解需要使用这个关键字-->
<context:annotation-config/>
<context:component-scan base-package="com.hqyj.model"></context:component-scan>
</beans>
2.1.2 给属性赋值
package com.hqyj.model;
import org.springframework.beans.factory.annotation.Value;
import org.springframework.stereotype.Component;
@Component(value = "s")
public class Student {
@Value("1")
private int id;
@Value("zs")
private String name = "i";
@Value("10")
private int age;
public Student() {
System.out.println("无参构造方法执行");
}
public String getName() {
return name;
}
@Override
public String toString() {
return "Student{" +
"id=" + id +
", name='" + name + '\'' +
", age=" + age +
'}';
}
}
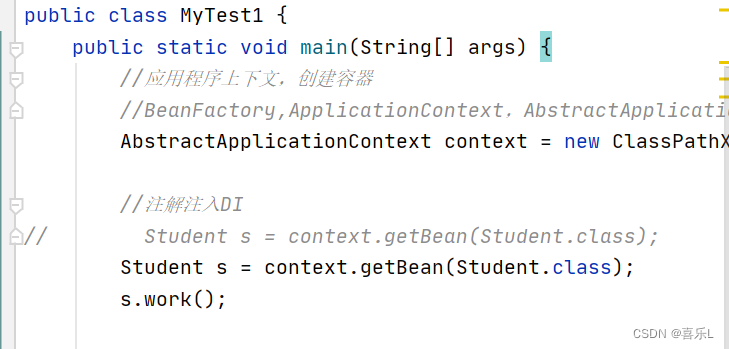
public class MyTest1 {
public static void main(String[] args) {
//应用程序上下文,创建容器
//BeanFactory,ApplicationContext,AbstractApplicationContext是接口,不能new
AbstractApplicationContext context = new ClassPathXmlApplicationContext("application-context.xml");
//注解注入DI
Student s = (Student) context.getBean("s");
System.out.println(s);
}
}
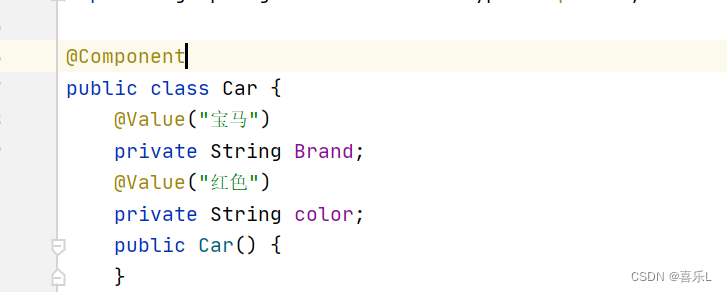
2.2.@Value注解—设置属性
package com.hqyj.model;
import org.springframework.beans.factory.annotation.Value;
import org.springframework.stereotype.Component;
@Component()
public class Student {
@Value("1")
private int id;
@Value("zs")
private String name = "i";
@Value("10")
private int age;
public Student() {
System.out.println("无参构造方法执行");
}
public String getName() {
return name;
}
@Override
public String toString() {
return "Student{" +
"id=" + id +
", name='" + name + '\'' +
", age=" + age +
'}';
}
}
//注解注入DI
Student s = context.getBean(Student.class);
System.out.println(s);   //zs
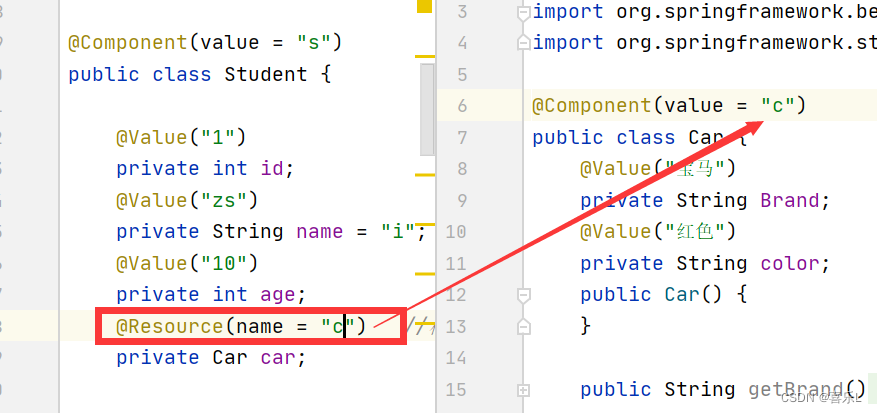
2.3.@Resource注解—获得对象
不是spring框架下的注解,包不同,是属于其他的特有功能的注解
2.3.1 根据类型注入

package com.hqyj.model;
import org.springframework.beans.factory.annotation.Value;
import org.springframework.stereotype.Component;
import javax.annotation.Resource;
import javax.annotation.Resources;
@Component(value = "s")
public class Student {
@Value("1")
private int id;
@Value("zs")
private String name = "i";
@Value("10")
private int age;
@Resource()
private Car car;
public Student() {
System.out.println("无参构造方法执行");
}
}
2.3.2 name指定资源
注意:一一对应
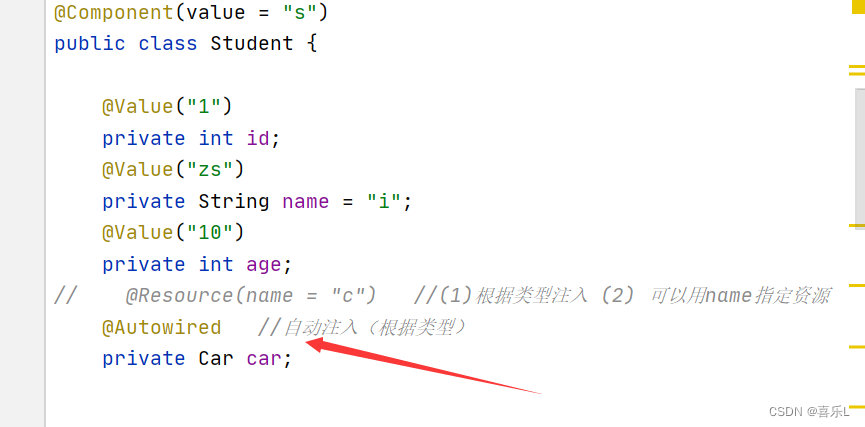
2.4.Autowired—自动注入,根据类型
当容器中有两个一样的对象时,拿到哪一个对象呢?
2.4.1 bean声明两个car
报错,两个bean表示时,有冲突
2.4.2.当注解有一个car对象,bean有一个car对象
注解优先,起作用,不会报错
2.4.3.解决问题—配合使用
@Autowired 和 @Qualifier(value = "c2") 配合使用@Qualifier(value = "c2") //候选的合格者
@Qualifier("c2") //候选的合格者
功能相同:
2.5.java Configuration
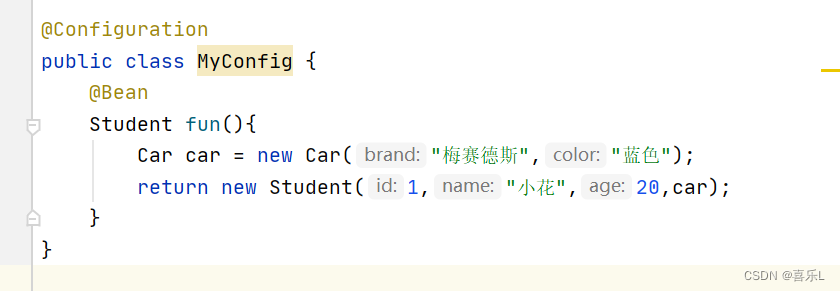
2.5.1 容器创建——放入容器
创建容器的时候就直接加载这个类MyConfig.class
@Configutation //相当于一个xml文件
Class MyConfig{
@Bean
Student fun(){
return new Student("","");
}
}
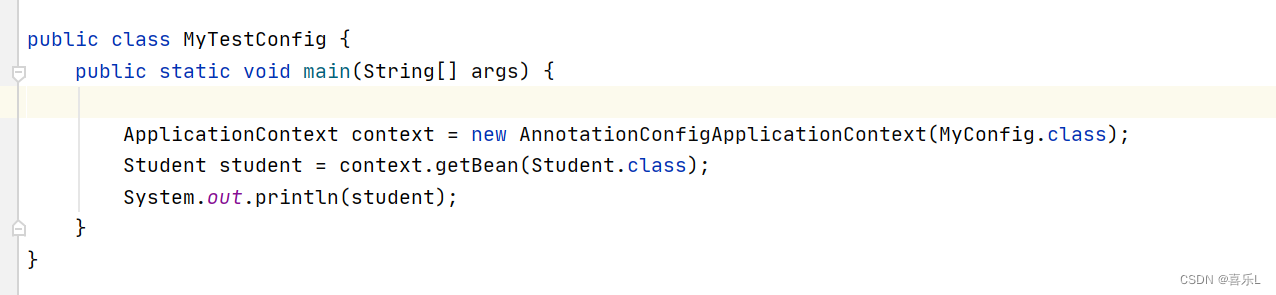
2.5.2 从容器中取
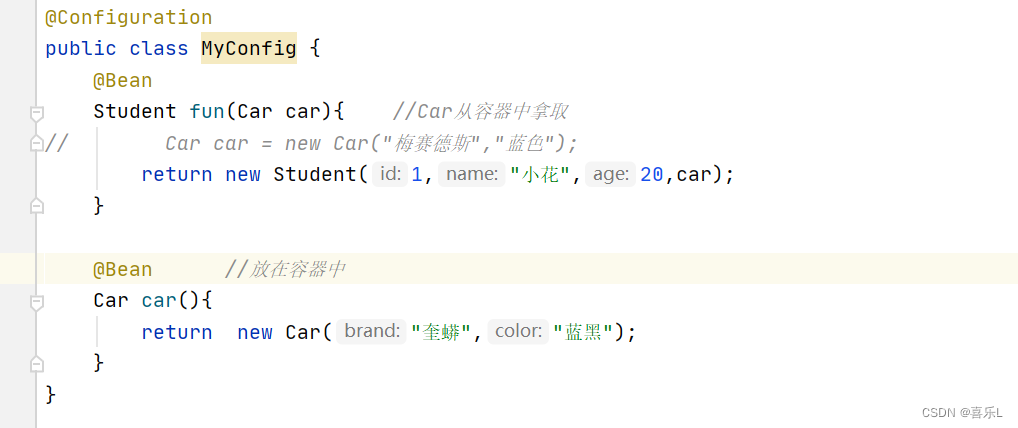
@Configuration
public class MyConfig {
@Bean
Student fun(Car car){ //Car从容器中拿取
// Car car = new Car("梅赛德斯","蓝色");
return new Student(1,"小花",20,car);
}
@Bean //放在容器中
Car car(){
return new Car("奎蟒","蓝黑");
}
}2.6、松耦合
2.6.1 vehice对象
Student 需要 vehice对象?
交通工具vehicle:
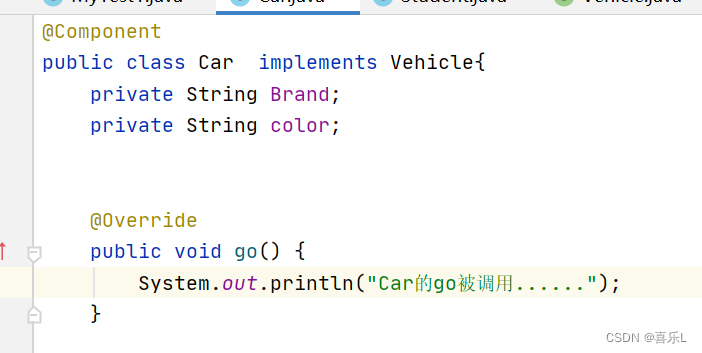
car
bus
plane
bike
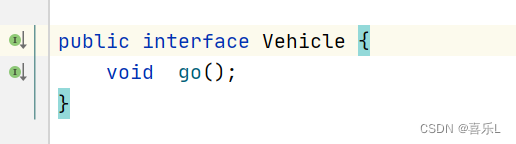
interface vehicle(){
go(); //抽象
}
三.(重点)IOC-DI依赖注入- 面试题
IOC / DI: IOC不是一种技术,主要是一种设计思想。在项目中,传统创建方法是new一个对象,但这样会使得对象间的耦合度增加。 Spring将所有的对象都登机在Spring容器中,并且在系统运行适当的时候通过DI注入到对象当中。 控制反转就是将对象的注册从对象中创建 反转为 Spring统一注册。
四、spring AOP
改变对象原有的行为,但又无法改变源代码
aop:面向切面编程:与过滤器filter相似
1、Aop概念
| 连接点Joinpoint | 可以进行切入开发的点。如一个方法、一个代码块、一个try块(AspectJ中原本规定可以有这些)。但是spring**只支持把方法作为连接点**。 |
|---|---|
| 切入点Pointcut | 已经被选定作为切面开发的点。 |
| 通知/增强Advice | 对切入点可以做的各种事情。如前置通知before()、后置通知after()、环绕通知around()、异常通知exception()等。 java程序中,往往把这些通知放入到一个额外的类中书写。 |
| 目标对象Target | (略) 目标对象是被切入的对象。但是由于类是对象的模板,是由类new()出来的,所以目标当然就是一个个的类了。 |
| 代理对象Proxy | (略)由于本章节,是spring自行内在完成代理对象的所有工作,我们只管用就好,所以不必专门学习。如果要知道原理请学习动态代理。 |
| 切面Aspect | 切入点被融入通知后,产生的整体效应。(不必强行理解这个词) |
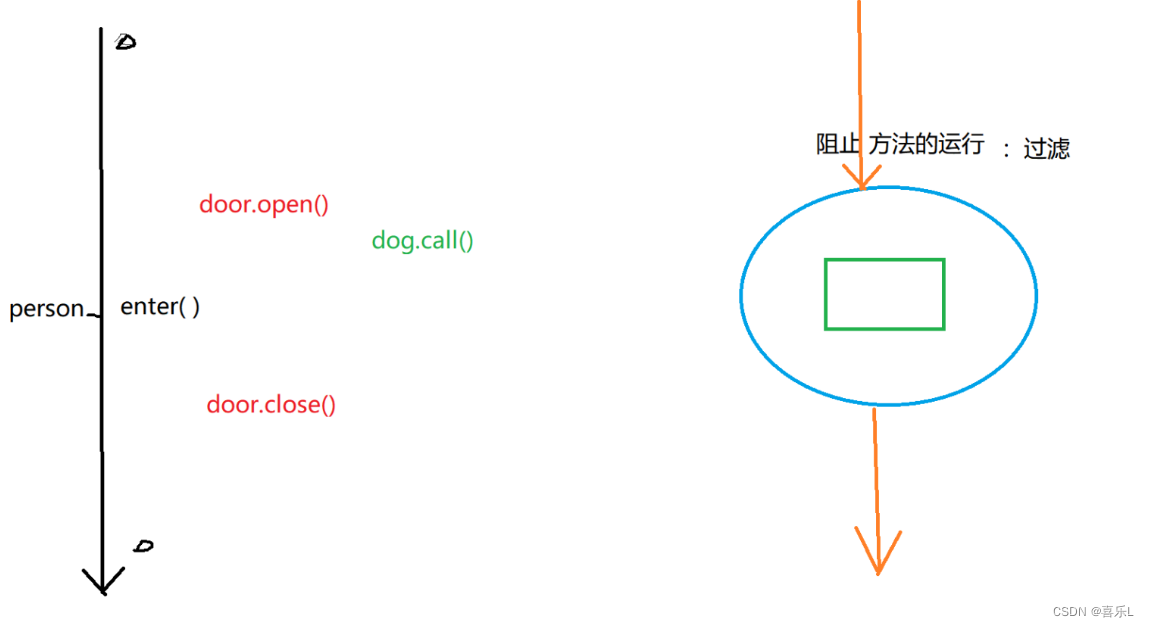
2、面向切面编程
2.1. 定义——画图方式理解
AsprctJ:定义了非常丰富的面向切面,各种切法
spring:Interceptor 拦截器
开门 person.openDoor()---自动--->door.open()
进入 person.enter();
关门 person.close()---自动----->door.close()
2.2. 步骤
2.2.1.导包
*aspectj*下载的地方:
AspectJ Downloads | The Eclipse Foundation
aspectjweaver下载的地方:
http://mvnrepository.com/artifact/org.aspectj/aspectjweaver/1.8.7
我用的是其中这两个包
| aspectj-1.8.13.jar aspectjweaver-1.8.7.jar |
|---|
| AspectJ的高版本可能一个包就可以了 |
当然spring的aop包也得有,我用的是
spring-aop-4.3.4.RELEASE.jar
spring-aspects-4.3.4.RELEASE.jar

2.2.2.编写代码
1.Person.java
package com.hqyj.model;
public class Person {
public void enter(){
System.out.println("enter()方法被调用...");
}
}2.DoorAdvice.java
package com.hqyj.model;
public class DoorAdvice {
void open(){
System.out.println("开门");
}
void close(){
System.out.println("关门");
}
}3.Application-context.xml
<?xml version="1.0" encoding="utf-8" ?>
<beans xmlns="http://www.springframework.org/schema/beans"
xmlns:xsi="http://www.w3.org/2001/XMLSchema-instance"
xmlns:context="http://www.springframework.org/schema/context"
xmlns:aop="http://www.springframework.org/schema/aop"
xsi:schemaLocation="
http://www.springframework.org/schema/beans
http://www.springframework.org/schema/beans/spring-beans-4.0.xsd
http://www.springframework.org/schema/aop
http://www.springframework.org/schema/aop/spring-aop.xsd
http://www.springframework.org/schema/context
http://www.springframework.org/schema/context/spring-context.xsd">
<bean class="com.hqyj.model.Person"></bean>
<bean id="doorAdvice" class="com.hqyj.model.DoorAdvice"></bean>
<!-- 做切面编程的配置-->
<aop:config>
<aop:pointcut id="enter" expression="execution(public void com.hqyj.model.Person.enter())"/>
<aop:aspect ref="doorAdvice">
<aop:before method="open" pointcut-ref="enter"></aop:before>
<aop:after method="close" pointcut-ref="enter"></aop:after>
</aop:aspect>
</aop:config>
</beans>4.MyTestDoor.java
package com.hqyj;
import com.hqyj.model.Person;
import org.springframework.context.support.ClassPathXmlApplicationContext;
public class MyTestDoor {
public static void main(String[] args) {
ClassPathXmlApplicationContext context = new ClassPathXmlApplicationContext("application-context.xml");
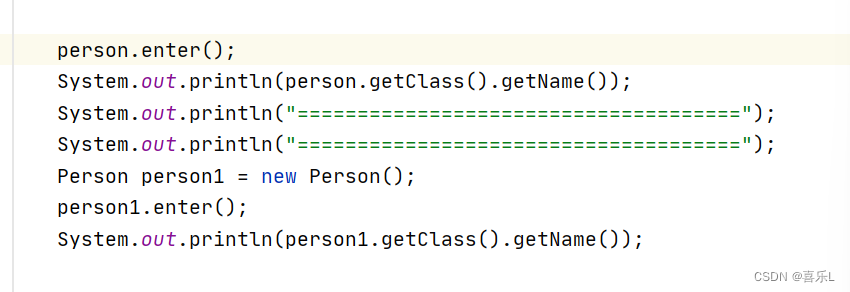
Person person = context.getBean(Person.class);
person.enter();
}
}结果
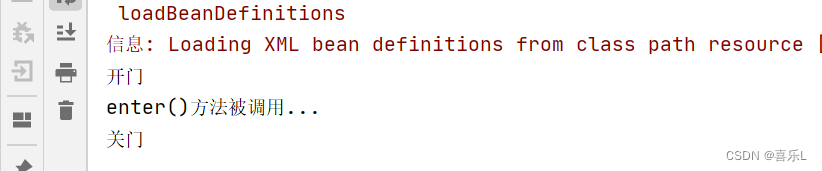
2.2.3.对比结果
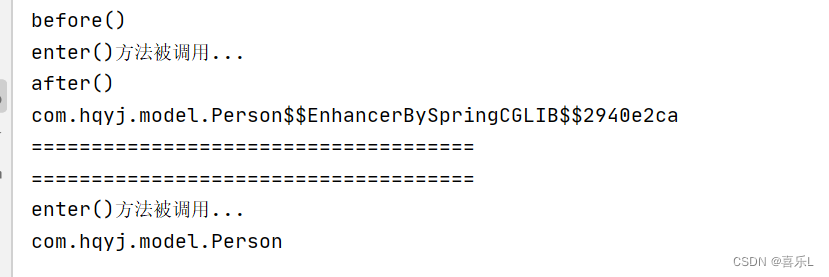
3.面向切面编程的方式
3.1.配置文件xml方式
3.1.1 解释
Before() 前置通知
After() 后置通知
After-returning() //后置通知,出现异常不调用
After_throwing() /后置通知,发生了异常才执行,否则不执行
Around() 环绕
特殊功能:有过滤性质,会过滤掉目标方法
3.1.2 代码
package com.hqyj.model;
import org.aspectj.lang.ProceedingJoinPoint;
public class DoorAdvice {
void before(){ //前置通知
System.out.println("before()");
}
void after(){ //后置通知
System.out.println("after()");
}
void after_returning(){ //异常通知,出现异常不调用
System.out.println("after_returning()");
}
void after_throwing(){ //发生了异常才执行,否则不执行
System.out.println("发生了异常");
}
Object around(ProceedingJoinPoint point) throws Throwable {
System.out.println("环绕通知1"); //前置环绕
Object proceed = point.proceed(); //调用目标方法
System.out.println("环绕通知2"); //后置环绕
return proceed; //返回去
}
}
<!-- 做切面编程的配置-->
<aop:config>
<aop:pointcut id="enter" expression="execution(public void com.hqyj.model.Person.enter())"/>
<aop:aspect ref="doorAdvice">
<aop:before method="before" pointcut-ref="enter"></aop:before>
<aop:after method="after" pointcut-ref="enter"></aop:after>
<aop:after-returning method="after_returning" pointcut-ref="enter"></aop:after-returning>
<aop:after-throwing method="after_throwing" pointcut-ref="enter"></aop:after-throwing>
<aop:around method="around" pointcut-ref="enter" ></aop:around>
</aop:aspect>
</aop:config>3.2.使用注解的方式
xml中  声明了通知类和被切入的person
    <aop:config>
        通知类 door
        被切入的 person
注解:
    @Aspect:放在通知类的上面
    Pointcut:切入点
3.2.1.加入aop自动代理
<!--    开启aop自动代理:注解-->
    <aop:aspectj-autoproxy/>
3.2.2.代码
DoorAdvice.java:
package com.hqyj.model;
import org.aspectj.lang.ProceedingJoinPoint;
import org.aspectj.lang.annotation.*;
@Aspect
class DoorAdvice {
@Pointcut("execution(public void com.hqyj.model.Person.enter())")
void point(){ //代表切点,空方法
}
@Before("DoorAdvice.point()")
void before(){ //开始方法
System.out.println("before()");
}
@After("DoorAdvice.point()")
void after(){ //结束方法
System.out.println("after()");
}
@AfterReturning("DoorAdvice.point()")
void after_returning(){ //异常
System.out.println("after_returning()");
}
@AfterThrowing("DoorAdvice.point()")
void after_throwing(){ //发生了异常才执行,否则不执行
System.out.println("发生了异常");
}
@Around("DoorAdvice.point()")
Object around(ProceedingJoinPoint point) throws Throwable {
System.out.println("环绕通知1"); //前环绕
Object proceed = point.proceed(); //调用目标方法
System.out.println("环绕通知2"); //后环绕
return proceed; //返回去
}
}
Person.java
package com.hqyj.model;
public class Person {
public void enter(){
System.out.println("enter()方法被调用...");
}
}
2.3.注解执行的顺序

4、面试题
友情提示:
面向切面编程,面试要问哈,AOP是在OOP基础之上的一种更高级的设计思想。 java这个方向,IOC/DI/、AOP不问的话没有什么问的了,重要的框架都是基于这些思想设计的
1.around和过滤器filter的区别
只有@Around方法能够达到“拦截住而不放行”的效果。
@Around会强制要求所修饰的方法含有参数(ProceedingJoinPoint point),因为这个参数就是用于控制是否放行的。
point.proceed()代表放行,有点类似Servlet规范中的Filter的Chain.doFilter(req,resp)。下表来对比一下写法
| @Around | @Around("TransactionAdvice.pointCut()")*public* Object around(ProceedingJoinPoint point) *throws* Throwable { System.*out***.println("环绕 前通知被执行"); Object proceed = point.proceed();//放行,实际是它可以调用目标方法 System.*out***.println("环绕 后通知被执行"); *return* proceed;} |
|---|---|
| 过滤器Filter | *public* *class* AllFilter *implements* Filter{ @Override*public* *void* doFilter(ServletRequest request, ServletResponse response, FilterChain chain) *throws* IOException, ServletException { System.*out***.println("时间1=" + System.currentTimeMillis()); chain.doFilter(request, response); //放行 将请求传递下去 System.*out***.println("时间2=" + System.currentTimeMillis());}} |
五、事务
一般指的是数据库操作
也指的是不可分割的操作(要么都完成,要么都不完成)
一条sql语句 是不是一个事务?
是一个事务。单条sql相当于自动提交了。
1.原生—事务步骤
开启事务(关闭自动提交):
connection.set()connection.begin.Transaction()conn.setAutoCommit(false);
操作1 sql1
操作2 sql2
操作3 sql3
操作4 sql4
提交事务:submit()
2.代码
package com.hqyj;
import java.sql.Connection;
import java.sql.DriverManager;
import java.sql.SQLException;
import java.sql.Statement;
public class MyTest1 {
private static final String DIRVER = "com.mysql.jdbc.Driver";
private static final String URL = "jdbc:mysql://localhost:3306/shop";
private static final String USER = "root";
private static final String PASSWORD = "123456";
public static void main(String[] args) throws Exception{
Class.forName(DIRVER);
Connection conn = DriverManager.getConnection(URL,USER,PASSWORD);
conn.setAutoCommit(false); //关闭自动提交
Statement stmt = conn.createStatement();
try {
int num1= stmt.executeUpdate("update book set price = price-100 where id = 1");
System.out.println("num1=" + num1);
int a = 5/0; //异常
int num2= stmt.executeUpdate("update book set price = price+100 where id = 2");
System.out.println("num2=" + num2);
conn.commit(); //提交事务
} catch (Exception throwables) {
conn.rollback(); //事务发生异常,数据要回滚
throwables.printStackTrace();
System.out.println("发生了运行时异常");
} finally {
stmt.close();
conn.close();
}
}
}
3.代码繁琐,化简
解决办法,切入事务,利用AOP
需要用到c3p0数据源来用,需要写成一个bean。
切入点:只支持方法
3.1导包
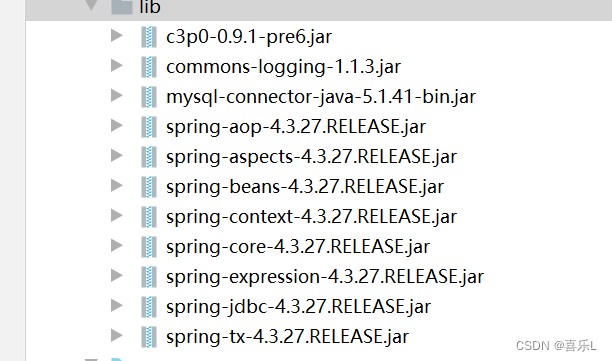
3.2代码
package com.hqyj.Teansaction;
import com.mchange.v2.c3p0.ComboPooledDataSource;
import org.springframework.jdbc.core.JdbcTemplate;
public class MyTest2 {
public static void main(String[] args) throws Exception {
ComboPooledDataSource dataSource = new ComboPooledDataSource();
dataSource.setDriverClass("com.mysql.jdbc.Driver");
dataSource.setJdbcUrl("jdbc:mysql://localhost:3306/shop");
dataSource.setUser("root");
dataSource.setPassword("123456");
//spring有一个轻量级的数据 访问框架jdbc Template
JdbcTemplate jdbcTemplate = new JdbcTemplate(dataSource);
int num1 = jdbcTemplate.update("Update book set price = price-100 where id=1");
int num2 = jdbcTemplate.update("Update book set price = price+100 where id=2");
System.out.println("num1="+num1);
System.out.println("num2="+num2);
}
}4、切入事务,xml文件方式
4.1新建一个bean对象—Account.java
application-context.xml:
<bean id="dataSource" class="com.mchange.v2.c3p0.ComboPooledDataSource">
<property name="driverClass" value="com.mysql.jdbc.Driver"></property>
<property name="jdbcUrl" value="jdbc:mysql://localhost:3306/shop?useSSL=false&Timezone=GMT"></property>
<property name="user" value="root"></property>
<property name="password" value="123456"></property>
</bean>
<bean class="org.springframework.jdbc.core.JdbcTemplate">
<property name="dataSource" ref="dataSource"></property>
</bean>
<context:component-scan base-package="com.hqyj.model"></context:component-scan>
Account类:
package com.hqyj.model;
import com.mchange.v2.c3p0.ComboPooledDataSource;
import org.springframework.beans.factory.annotation.Autowired;
import org.springframework.jdbc.core.JdbcTemplate;
import org.springframework.stereotype.Component;
import javax.sql.DataSource;
@Component
public class Account {
@Autowired
DataSource dataSource;
@Autowired
JdbcTemplate jdbcTemplate;
//转账
public void teansfer() throws Exception {
System.out.println(dataSource);
//spring有一个轻量级的数据 访问框架jdbc Template
int num1 = jdbcTemplate.update("Update book set price = price-100 where id=1");
int num2 = jdbcTemplate.update("Update book set price = price+100 where id=2");
System.out.println("num1="+num1);
System.out.println("num2="+num2);
}
}
测试类:
package com.hqyj.Teansaction;
import com.hqyj.model.Account;
import org.springframework.context.support.ClassPathXmlApplicationContext;
public class MyTest2 {
public static void main(String[] args) throws Exception {
ClassPathXmlApplicationContext context = new ClassPathXmlApplicationContext("Application-context.xml");
Account account = context.getBean(Account.class);
account.teansfer();
}
}
4.2 通知配置
4.3 事务的传递性
read-only = "true"
性能1:读
性能2:写
1.读 2.可以改
1000 , 1500
1.改 2.不能改
1000 , 500
配置文件:
<?xml version="1.0" encoding="utf-8" ?>
<beans xmlns="http://www.springframework.org/schema/beans"
xmlns:xsi="http://www.w3.org/2001/XMLSchema-instance"
xmlns:context="http://www.springframework.org/schema/context"
xmlns:aop="http://www.springframework.org/schema/aop"
xmlns:tx="http://www.springframework.org/schema/tx"
xsi:schemaLocation="
http://www.springframework.org/schema/beans
http://www.springframework.org/schema/beans/spring-beans-4.0.xsd
http://www.springframework.org/schema/aop
http://www.springframework.org/schema/aop/spring-aop.xsd
http://www.springframework.org/schema/tx
http://www.springframework.org/schema/tx/spring-tx.xsd
http://www.springframework.org/schema/context
http://www.springframework.org/schema/context/spring-context.xsd">
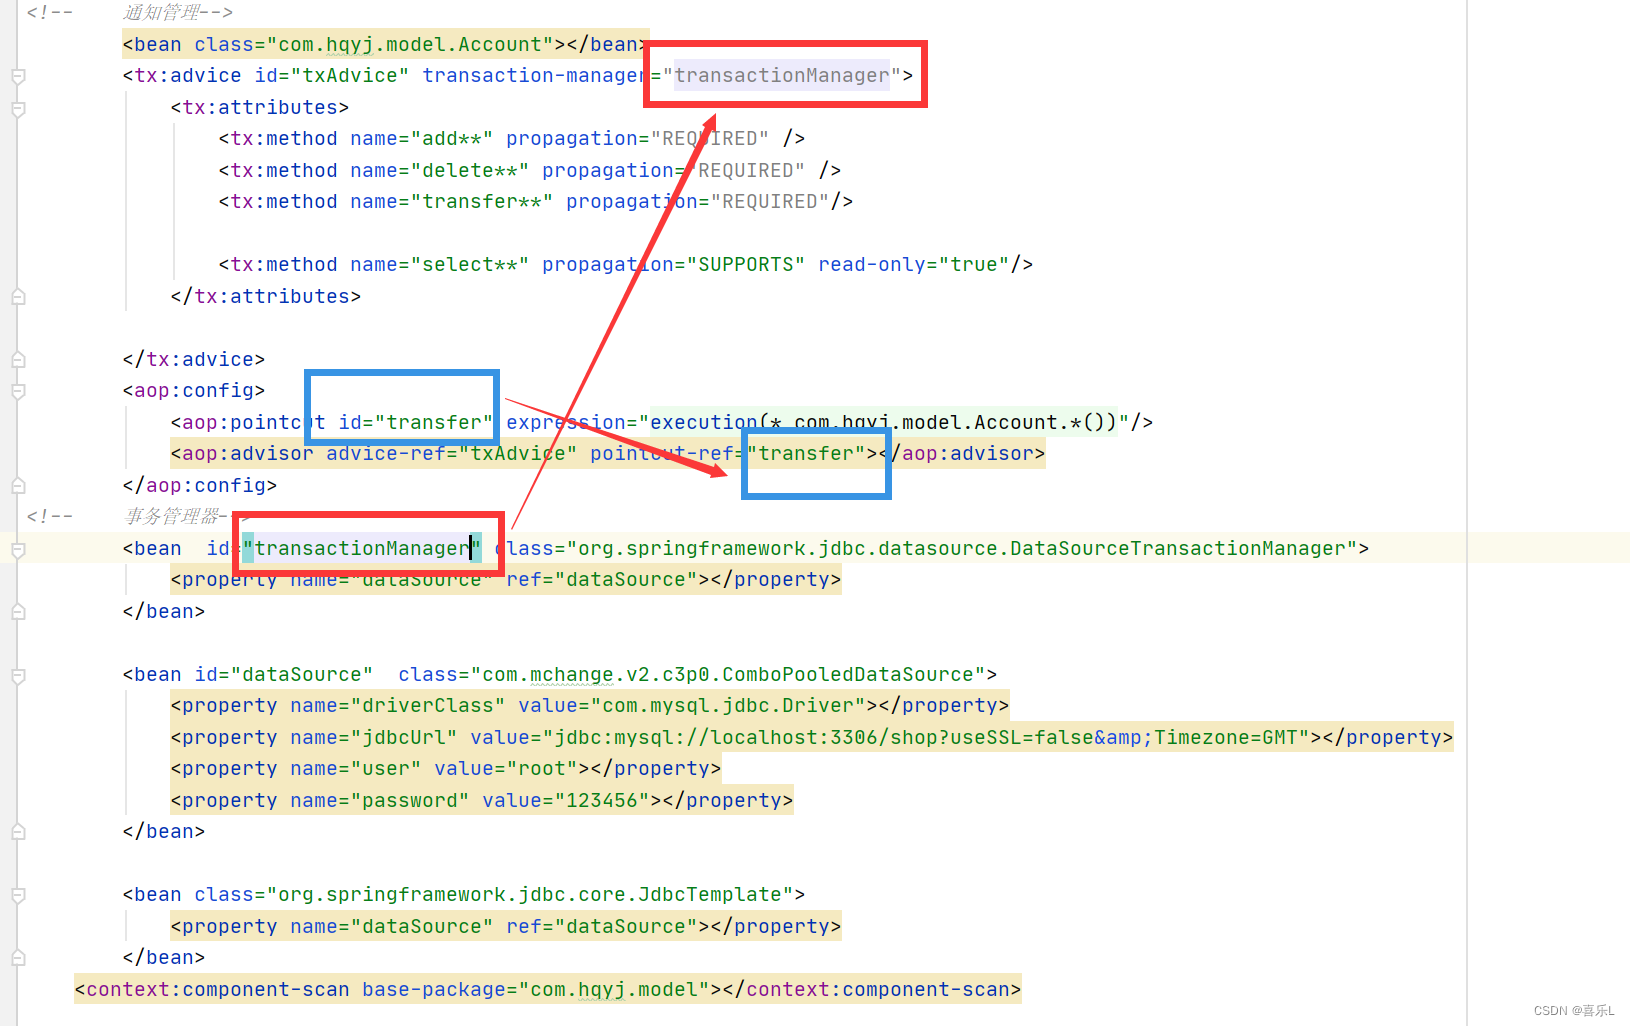
<!-- 通知管理-->
<!-- <bean class="com.hqyj.model.AccountService"></bean>-->
<tx:advice id="txAdvice" transaction-manager="transactionManager">
<tx:attributes>
<tx:method name="add**" propagation="REQUIRED" />
<tx:method name="delete**" propagation="REQUIRED" />
<tx:method name="transfer**" propagation="REQUIRED"/>
<tx:method name="select**" propagation="SUPPORTS" read-only="true"/>
</tx:attributes>
</tx:advice>
<aop:config>
<aop:pointcut id="serviceMethod" expression="execution(* com.hqyj.service..*.*(..))"/>
<aop:advisor advice-ref="txAdvice" pointcut-ref="serviceMethod"></aop:advisor>
</aop:config>
<!-- 事务管理器-->
<bean id="transactionManager" class="org.springframework.jdbc.datasource.DataSourceTransactionManager">
<property name="dataSource" ref="dataSource"></property>
</bean>
<bean id="dataSource" class="com.mchange.v2.c3p0.ComboPooledDataSource">
<property name="driverClass" value="com.mysql.jdbc.Driver"></property>
<property name="jdbcUrl" value="jdbc:mysql://localhost:3306/shop?useSSL=false&Timezone=GMT"></property>
<property name="user" value="root"></property>
<property name="password" value="123456"></property>
</bean>
<bean class="org.springframework.jdbc.core.JdbcTemplate">
<property name="dataSource" ref="dataSource"></property>
</bean>
<context:component-scan base-package="com.hqyj.service"></context:component-scan>
</beans>
AccountService.java
package com.hqyj.service;
import org.springframework.beans.factory.annotation.Autowired;
import org.springframework.beans.factory.annotation.Qualifier;
import org.springframework.jdbc.core.JdbcTemplate;
import org.springframework.stereotype.Component;
import javax.sql.DataSource;
@Component
public class AccountService {
@Autowired()
@Qualifier("dataSource")
DataSource dataSource;
@Autowired
JdbcTemplate jdbcTemplate;
//转账
public void teansfer() throws Exception {
System.out.println(dataSource);
//spring有一个轻量级的数据 访问框架jdbc Template
int num1 = jdbcTemplate.update("Update book set price = price-100 where id=1");
// int i = 5/0;
int num2 = jdbcTemplate.update("Update book set price = price+100 where id=2");
System.out.println("num1="+num1);
System.out.println("num2="+num2);
}
}
测试类:
package com.hqyj.Teansaction;
import com.hqyj.service.AccountService;
import org.springframework.context.support.ClassPathXmlApplicationContext;
public class MyTest2 {
public static void main(String[] args) throws Exception {
ClassPathXmlApplicationContext context = new ClassPathXmlApplicationContext("Application-context.xml");
AccountService account = context.getBean(AccountService.class);
account.teansfer();
}
}
#####
5.切入,注解方式

@Transactional标在方法上,如果每一个方法都是一样的直接标在类上
package com.hqyj.service;
import org.springframework.beans.factory.annotation.Autowired;
import org.springframework.beans.factory.annotation.Qualifier;
import org.springframework.jdbc.core.JdbcTemplate;
import org.springframework.stereotype.Component;
import org.springframework.transaction.annotation.Propagation;
import org.springframework.transaction.annotation.Transactional;
import javax.sql.DataSource;
@Component
public class AccountService {
@Autowired()
DataSource dataSource;
@Autowired
JdbcTemplate jdbcTemplate;
//转账
@Transactional(propagation = Propagation.REQUIRED,readOnly = false)
public void teansfer() throws Exception {
System.out.println(dataSource);
//spring有一个轻量级的数据 访问框架jdbc Template
int num1 = jdbcTemplate.update("Update book set price = price-100 where id=1");
int i = 5/0;
int num2 = jdbcTemplate.update("Update book set price = price+100 where id=2");
System.out.println("num1="+num1);
System.out.println("num2="+num2);
}
}
web开发:servlet + jsp (html,css,js) ajax
六、建立web项目
1.MVC
1.1.MVC思想
C : controller 控制器 接收用户的请求(Tomcat)
M: model 多个模型 数据库
V : view 视图 用户看到的内容(jsp)
@Reposiary
@controller
@service
@Repository
1.2.java项目结构
1.2.1一般的Java项目:idea支持多模块的
src: 源代码
out: (bin) 编译后的字节码文件
1.2.2web项目
web项目要放到tomcat中执行
maven:
src: 源代码
web: 里面的东西会发布到tomcat中
WEB-INF
class: 编译后的字节码文件
lib: jar包(spring...)
web.xml: 描述了整个项目
METE-INF
任意文件: jsp文件、HTML文件、css文件、js文件
2、建立web项目
2.1.idea建web项目
创建web项目
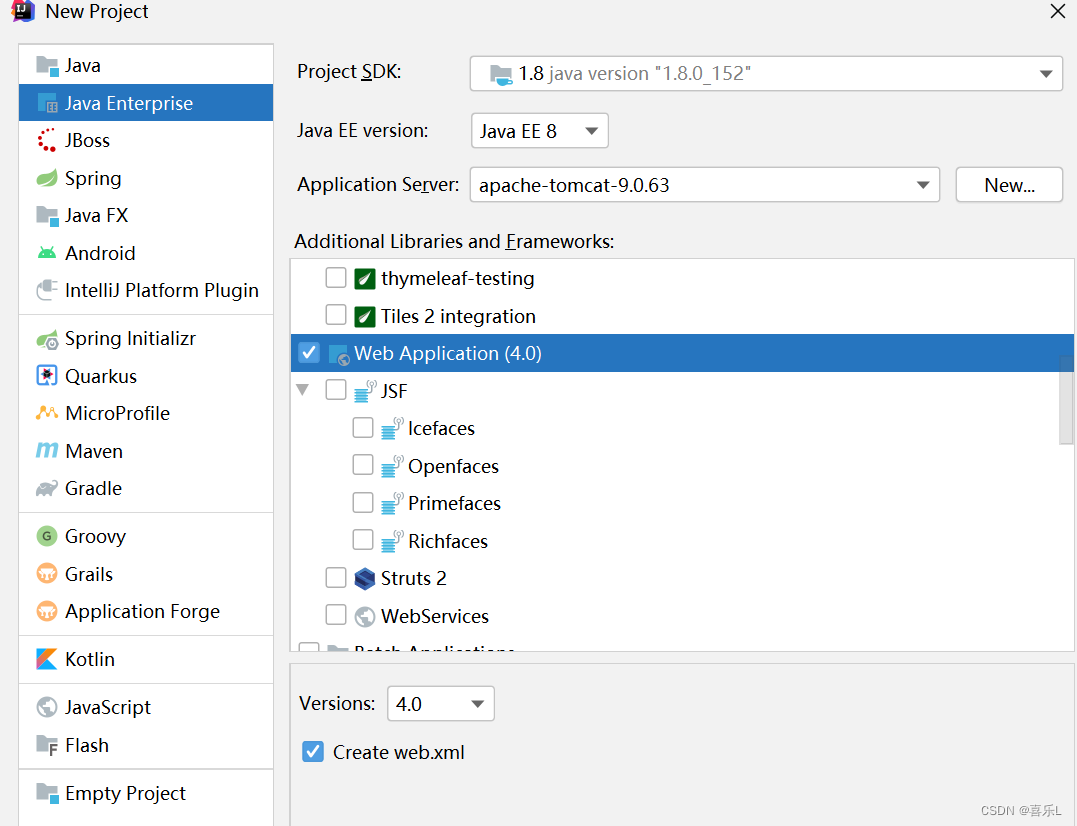
部署tomcat服务器
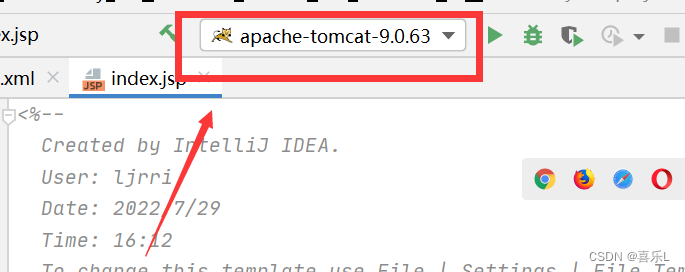
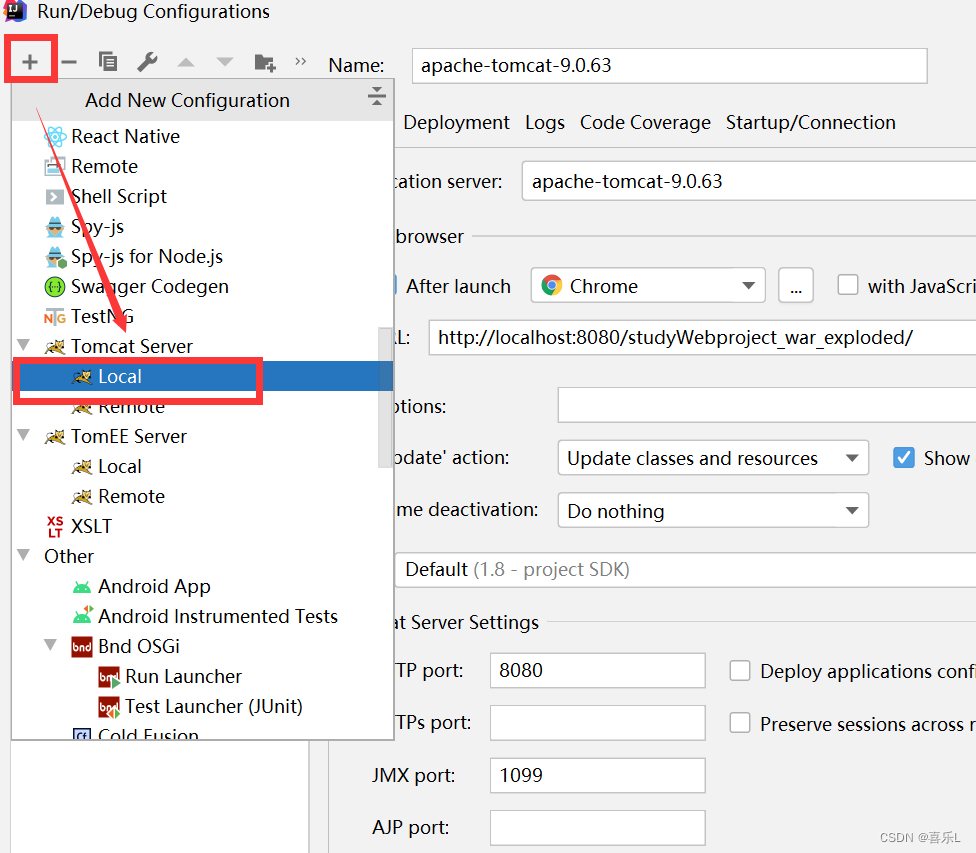
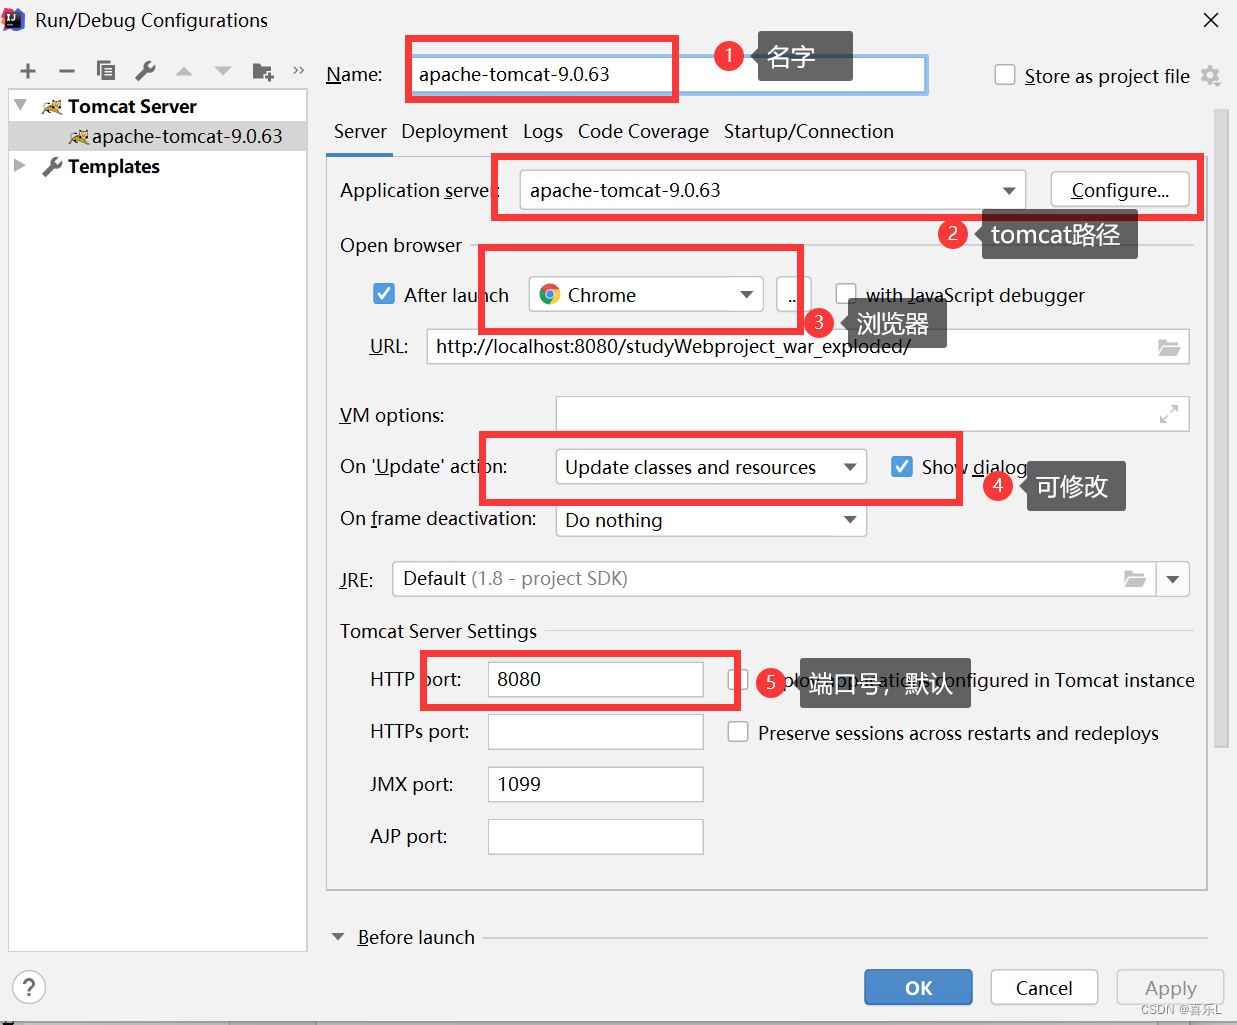
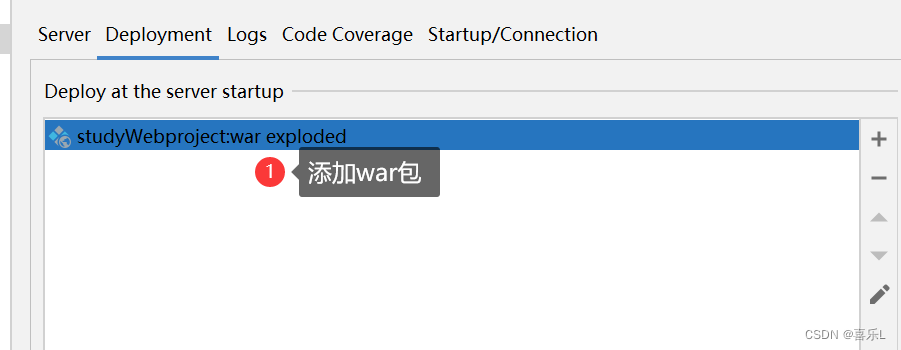
解释:
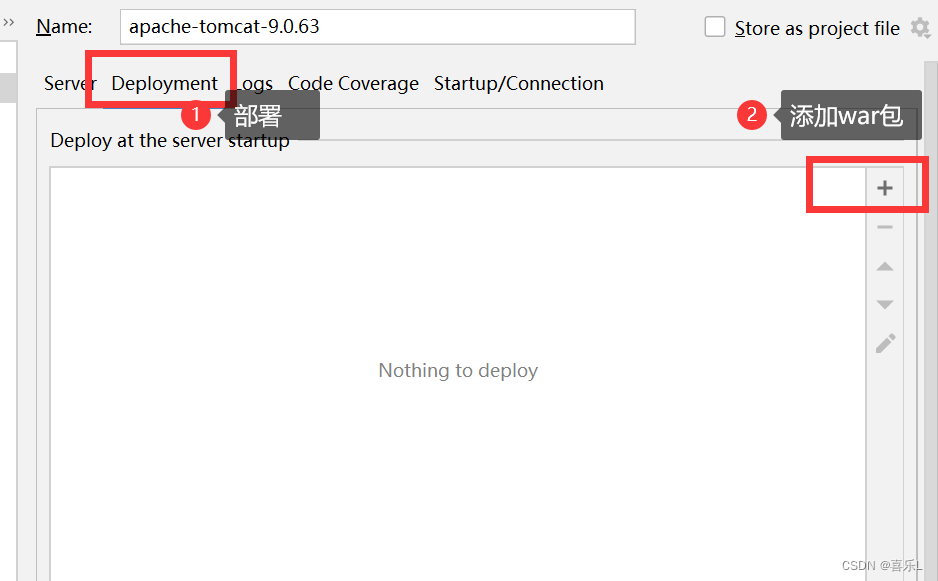
Deployment:部署
war:添加需要运行的项目,war包----->war exploded
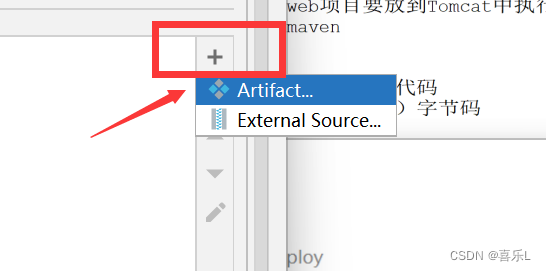
Artifacts:
一个目录
一个jar包
一个war包
apk文件
Application context : 访问项目的路径 http://localhost:8080/项目名/index.jsp
部署到tomcat上,以什么名字访问
2.2.idea建maven项目
3.控制器类
3.1.接口分析
Servlet1 /abc
Servlet2 z
Servlet3 /mn
Servlet4
ServletN
安全性??? 单入口
单个Servlet case '/aaa' 调用 功能1 case 'b' 调用 功能2 case '/ccc' 调用· 功能3 case '/ddd' 调用 功能4 case 'e' 调用 功能5
3.2.控制器——url路径
url-------方法
发送过来的请求都被DispatcherServlet接收了,DispatcherServlet可以去查找控制器,需要去指定对应的文件
@Controller
public class BookController {
@RequestMapping("/abc")
String work(){
System.out.println("work----干活");
return "/index.jsp";
}
}
<?xml version="1.0" encoding="UTF-8"?>
<beans xmlns="http://www.springframework.org/schema/beans"
xmlns:xsi="http://www.w3.org/2001/XMLSchema-instance"
xmlns:context="http://www.springframework.org/schema/context"
xmlns:mvc="http://www.springframework.org/schema/mvc"
xmlns:aop="http://www.springframework.org/schema/aop"
xsi:schemaLocation="
http://www.springframework.org/schema/mvc
http://www.springframework.org/schema/mvc/spring-mvc-4.3.xsd
http://www.springframework.org/schema/beans
http://www.springframework.org/schema/beans/spring-beans-4.3.xsd
http://www.springframework.org/schema/context
http://www.springframework.org/schema/context/spring-context-4.3.xsd
http://www.springframework.org/schema/aop
http://www.springframework.org/schema/aop/spring-aop-4.3.xsd">
<!-- 扫描主键,控制器是主键的一种-->
<context:component-scan base-package="com.hqyj.controller"/>
</beans><?xml version="1.0" encoding="UTF-8"?>
<web-app xmlns="http://xmlns.jcp.org/xml/ns/javaee"
xmlns:xsi="http://www.w3.org/2001/XMLSchema-instance"
xsi:schemaLocation="http://xmlns.jcp.org/xml/ns/javaee http://xmlns.jcp.org/xml/ns/javaee/web-app_4_0.xsd"
version="4.0">
<welcome-file-list>
<welcome-file>index.html</welcome-file>
</welcome-file-list>
<!-- 单入口-->
<servlet>
<servlet-name>DispatcherServlet</servlet-name>
<servlet-class>org.springframework.web.servlet.DispatcherServlet</servlet-class>
<init-param>
<param-name>contextConfigLocation</param-name>
<param-value>classpath:config/spring-mvc.xml</param-value>
</init-param>
<load-on-startup>1</load-on-startup>
</servlet>
<servlet-mapping>
<servlet-name>DispatcherServlet</servlet-name>
<url-pattern>/</url-pattern>
</servlet-mapping>
</web-app>使用注解时,如果不起作用
<!--用于注解起作用,注解驱动-->
    <mvc:annotation-driven/>
3.3.静态资源
3.3.1常见的静态资源
图片
html文件
Css文件
用来spring框架后静态资源直接访问时访问不了的,原因:
DispatcheServlet接收所有的请求,/,都走RequestMapping
所以走RequestMapping指定的文件才能访问,唯一特殊的时index.jsp文件,因为时单入口y.
3.3.2 静态资源访问解决方式
法一:
使用给mvc:resource,对静态资源进行配置,不被deispatcher按默认方式处理。可以直接访问
<mvc:resources mapping="/css/**" location="/css/"/>
<mvc:resources mapping="/js/**" location="/js/"/>
<mvc:resources mapping="/img/**" location="/img/"/>
<mvc:resources mapping="/html/**" location="/html/"/>
<mvc:resources mapping="/**" location="/"/>
<!--用于注解起作用,注解驱动-->
<mvc:annotation-driven/>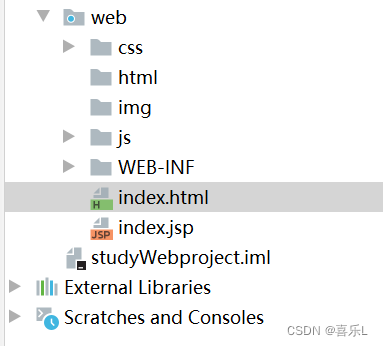
法二:
静态资源同一放在static目录下
<mvc:resources mapping="/static/**" location="/static/"/>
<mvc:resources mapping="/**" location="/"/>
<!--用于注解起作用,注解驱动-->
<mvc:annotation-driven/> 
3.4.视图解析器
3.4.1方式1 直接写
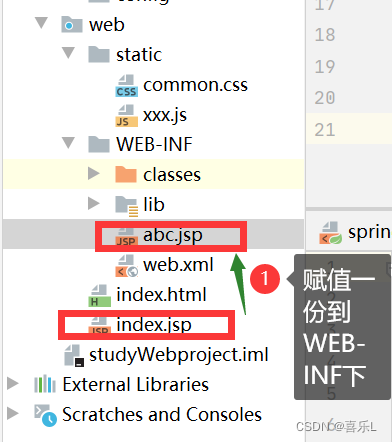
因为直接访问视图文件会导致报错或者不完整,所有要隐藏视图文件
将视图文件藏起来——藏在WEB-INF,黑客访问的话,就不会访问到。
package com.hqyj.controller;
import org.springframework.stereotype.Component;
import org.springframework.stereotype.Controller;
import org.springframework.web.bind.annotation.RequestMapping;
import javax.servlet.http.HttpServletRequest;
import javax.xml.ws.RequestWrapper;
@Controller
public class BookController {
@RequestMapping("/abc")
String work(HttpServletRequest request){
System.out.println("work----干活");
String name = "安其拉";
request.setAttribute("name",name);
return "/WEB-INF/abc.jsp"; //那视图文件
}
}
3.4.2 简化管理
然后为了方便管理,在WEB-INF下建立一个jsp文件夹,里面再建立一个用来表示时哪一个项目的文件,此项目是Book的。book里面存放jsp文件,记得要改动return的路径哟
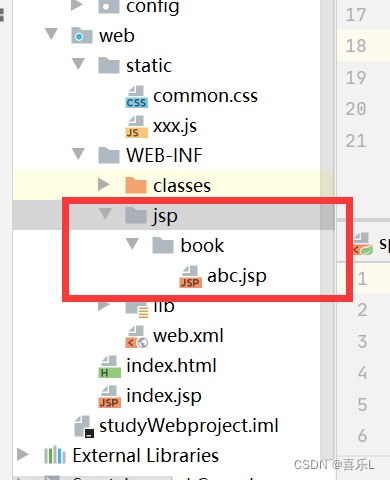

3.4.3 设置视图解析器
return "/WEB-INF/jsp/book/abc.jsp";
太复杂,有公共的部分,所以运用视图解析器更方便
设置视图解析器前缀和后缀
<bean class="org.springframework.web.servlet.view.InternalResourceViewResolver">
    <property name="prefix" value="/WEB-INF/jsp/"></property>
    <property name="suffix" value=".jsp"></property>
</bean>

3.5.缓解控制冲突
因为如果路径就设置为/add的话,有很多个添加操作,就会冲突,所以需要在控制器上使用RequestMapping("/book")
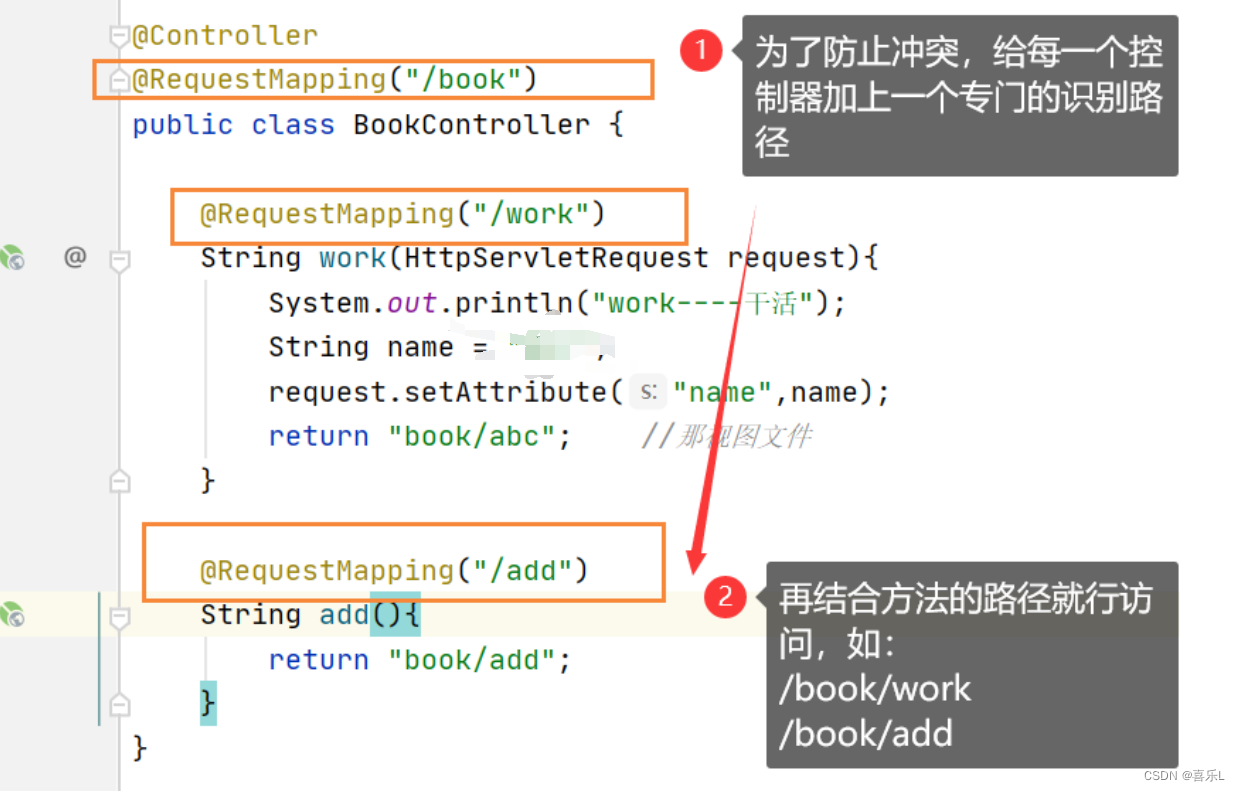
@Controller
@RequestMapping("/book")
public class BookController {
@RequestMapping("/work")
String work(HttpServletRequest request){
System.out.println("work----干活");
String name = "安其拉";
request.setAttribute("name",name);
return "book/abc"; //那视图文件
}
@RequestMapping("/add")
String add(){
return "book/add";
}
}
3.6.设置addAttribute属性
3.6.1 request.setAttribute
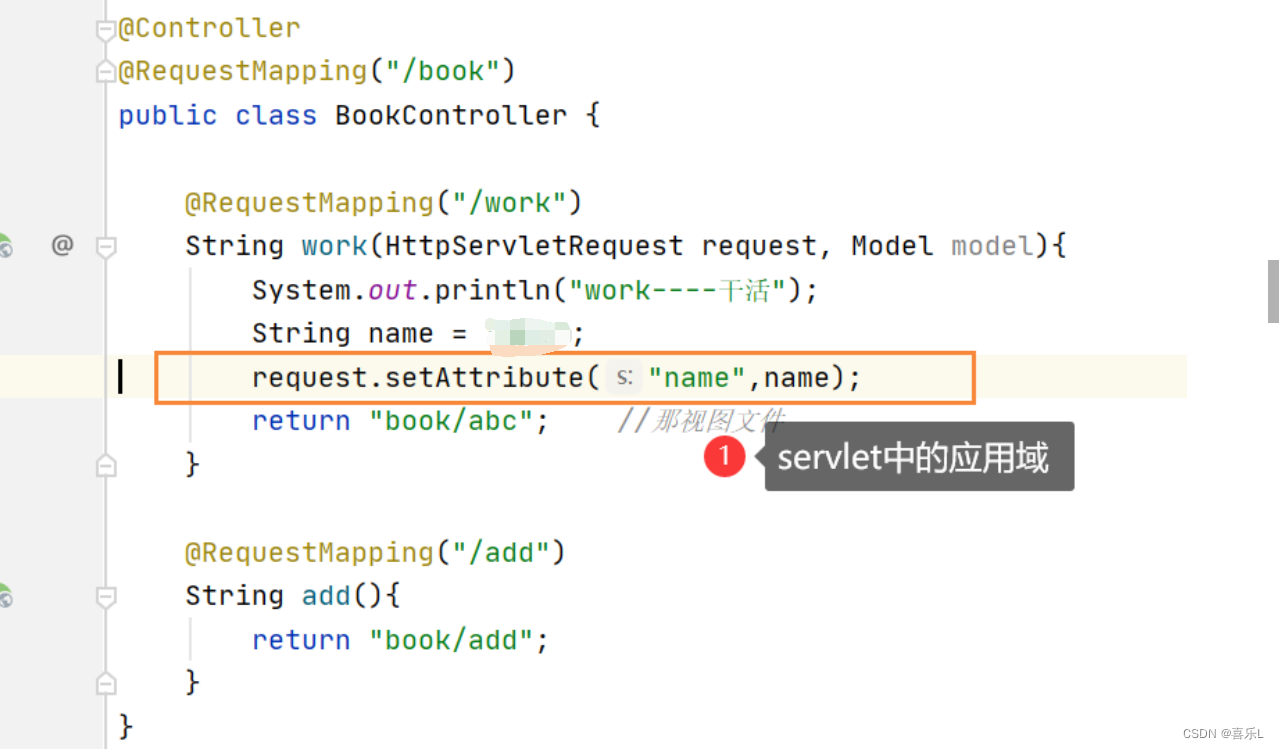
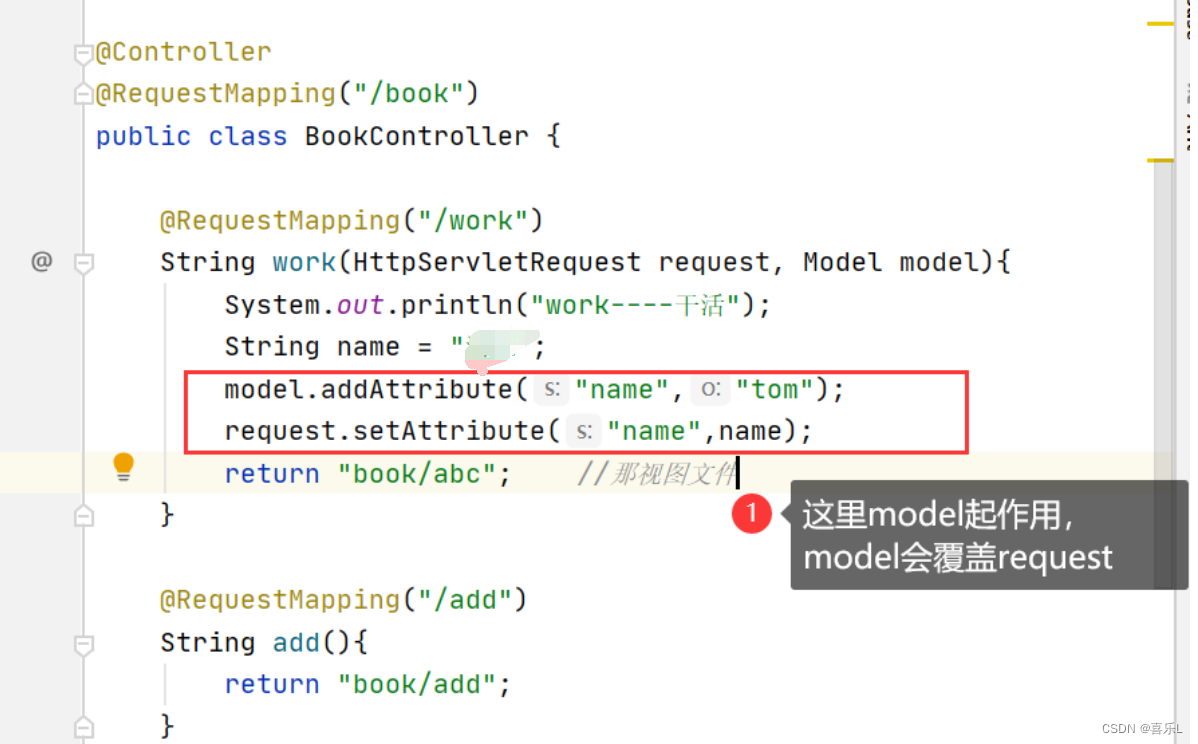
3.6.2 model.addAttribute
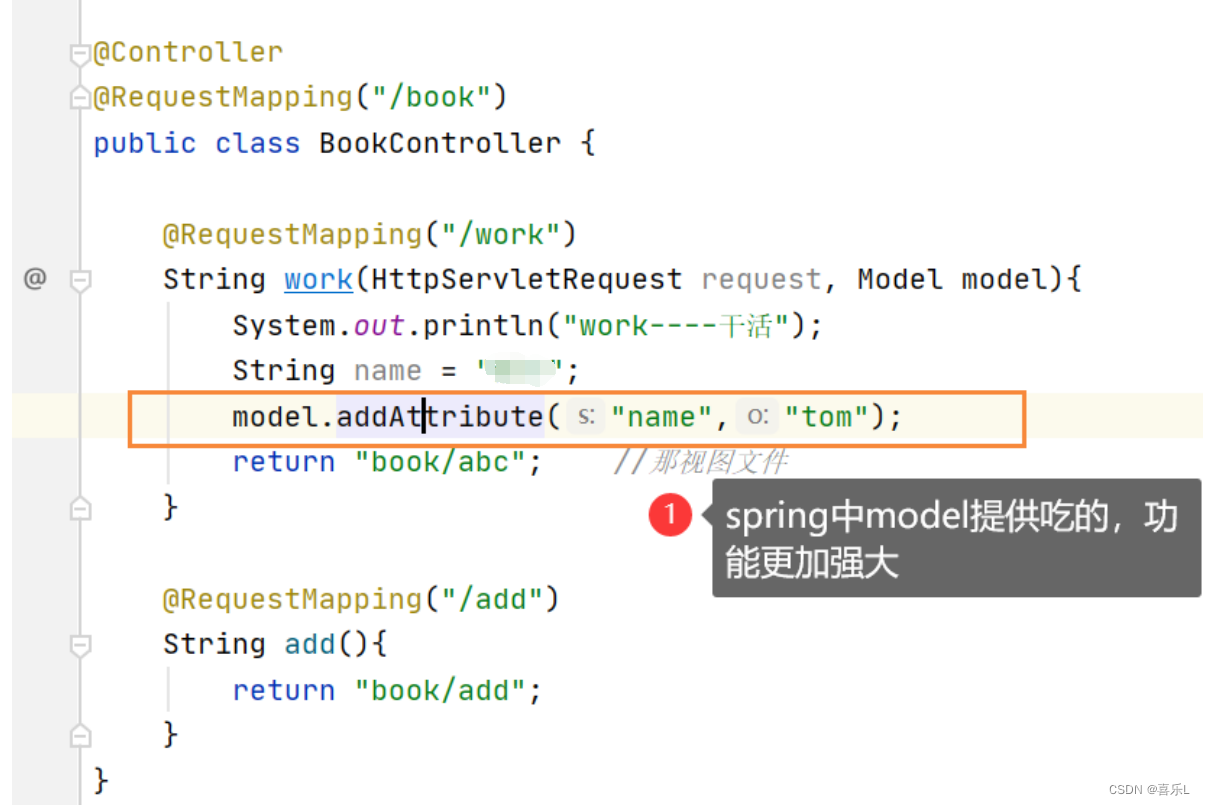
3.6.3当两个都存在时,model起作用

package com.hqyj.controller;
import org.springframework.stereotype.Component;
import org.springframework.stereotype.Controller;
import org.springframework.ui.Model;
import org.springframework.web.bind.annotation.RequestMapping;
import javax.servlet.http.HttpServletRequest;
import javax.xml.ws.RequestWrapper;
@Controller
@RequestMapping("/book")
public class BookController {
@RequestMapping("/work")
String work(HttpServletRequest request, Model model){
System.out.println("work----干活");
String name = "潘江";
model.addAttribute("name","tom");
request.setAttribute("name",name);
return "book/abc"; //那视图文件
}
@RequestMapping("/add")
String add(){
return "book/add";
}
}
3.7.控制器类
3.7.1控制器类型

3.7.2 控制器的返回值
http 状态码
200 运行成功,正常
301,302,303 资源转移了,重定向
404 资源不存在
500 服务器运行出错
405 资源不存在
3.7.2.1.String
返回的String类型 ,其中只要含有redirect,就是一个重定向
重定向:分为相对定位和绝对定位,详看7.3重定向
3.7.2.2.ModelAndersonView
new ModelAndView(页面的地址,传递的数据名,传递的数据)
 @RequestMapping("sleep")
    ModelAndView sleep(Model model){

        String nick = "张三";
        return new ModelAndView("book/sleep","nick",nick);     //拿页面
    }
也可以传递对象Book
@RequestMapping("/sleep")
ModelAndView sleep(Model model){
Book book = new Book(1,"成都的街头","爱尔华斯",200);
return new ModelAndView("book/sleep","book",book); //拿页面
}package com.hqyj.model;
public class Book {
private int id;
private String name;
private String author;
private double price;
public Book() {
}
public Book(int id, String name, String author, double price) {
this.id = id;
this.name = name;
this.author = author;
this.price = price;
}
public int getId() {
return id;
}
public void setId(int id) {
this.id = id;
}
public String getName() {
return name;
}
public void setName(String name) {
this.name = name;
}
public String getAuthor() {
return author;
}
public void setAuthor(String author) {
this.author = author;
}
public double getPrice() {
return price;
}
public void setPrice(double price) {
this.price = price;
}
@Override
public String toString() {
return "Book{" +
"id=" + id +
", name='" + name + '\'' +
", author='" + author + '\'' +
", price=" + price +
'}';
}
}
<%@ page contentType="text/html;charset=UTF-8" language="java" %>
<html>
<head>
<title>Title</title>
</head>
<body>
sleep----ModelAndView <br>
${book.id}
${book.name}
${book.author}
${book.price}
</body>
</html>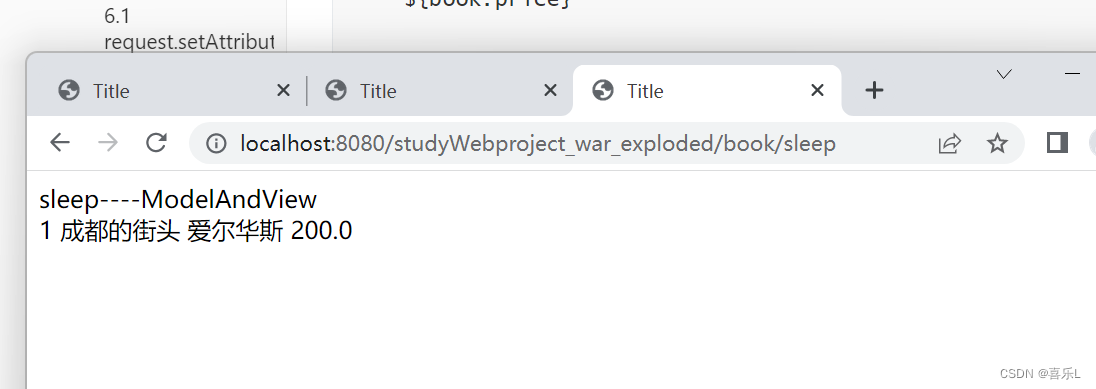
3.7.2.3.Object对象
Object对象默认拿取jsp界面
object对象添加@ResponseBody表示不拿jsp页面,纯数据,可以用js插入到html页面
浏览器就直接看到了对象转变成的字符串
Convertor:如 Gson,Jackson,FastJson
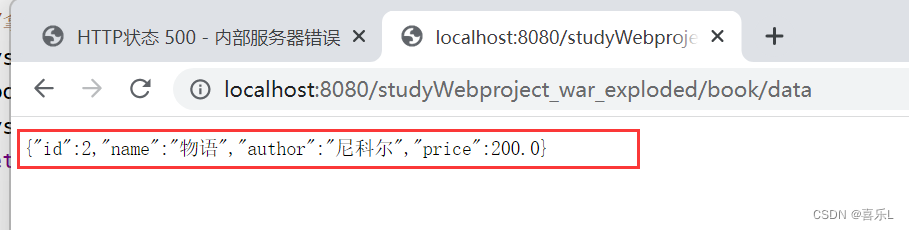
@RequestMapping("/data")
@ResponseBody //不拿页面
Object data(){
//拿页面
System.out.println("data-------调用");
return new Book(2,"物语","尼科尔",200);
}book对象转换成字符串:
1.tostring()
2.json
 @RequestMapping("/data")
    @ResponseBody      //不拿页面
    Object data(){
        //拿页面
        System.out.println("data-------调用");
        Book book = new Book(2, "物语", "尼科尔", 200);
        System.out.println(book);
        return book;
    }
######
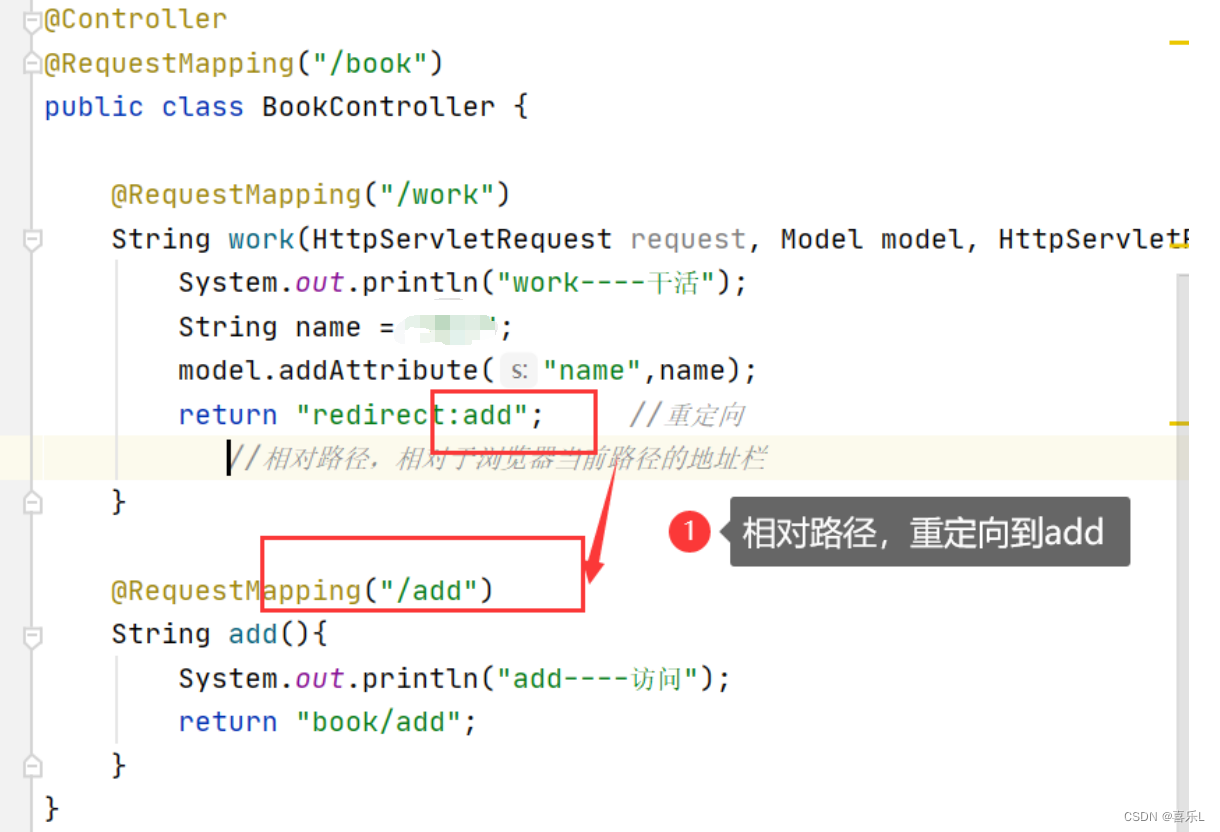
3.7.3 重定向
涉及面试题:
重定向:服务器叫浏览器去访问另外一个url
response.sendRedirect("另一个url");
3.7.3.1.相对路径
相对于浏览器地址栏
package com.hqyj.controller;
import org.springframework.stereotype.Component;
import org.springframework.stereotype.Controller;
import org.springframework.ui.Model;
import org.springframework.web.bind.annotation.RequestMapping;
import javax.servlet.http.HttpServletRequest;
import javax.servlet.http.HttpServletResponse;
import javax.servlet.http.HttpSession;
import javax.xml.ws.RequestWrapper;
@Controller
@RequestMapping("/book")
public class BookController {
@RequestMapping("/work")
String work(HttpServletRequest request, Model model, HttpServletResponse response, HttpSession session){
System.out.println("work----干活");
String name = "潘江";
model.addAttribute("name",name);
return "redirect:add"; //重定向
//相对路径,相对于浏览器当前路径的地址栏
}
@RequestMapping("/add")
String add(){
System.out.println("add----访问");
return "book/add";
}
}
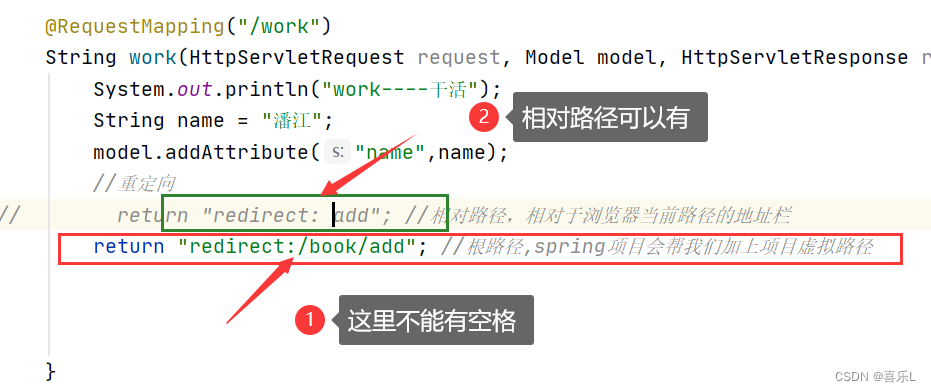
3.7.3.2 根路径
根路径方式,spring项目会帮我们加上项目虚拟路径
从当前路径来看
根路径为:
http://localhost:8080/studyWebproject_war_exploded/book/work
根路径重定向为: 抹掉项目名
http://localhost:8080/book/add
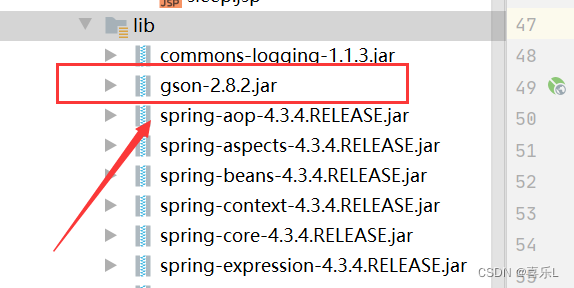
4. conbertor转换器
conbertor 转换器:jackson(三个jar,版本配对)、gson谷歌(一个jar包)、fasthson阿里
有接口,spring会自动再jar中去寻找实现类
这里使用了gson谷歌
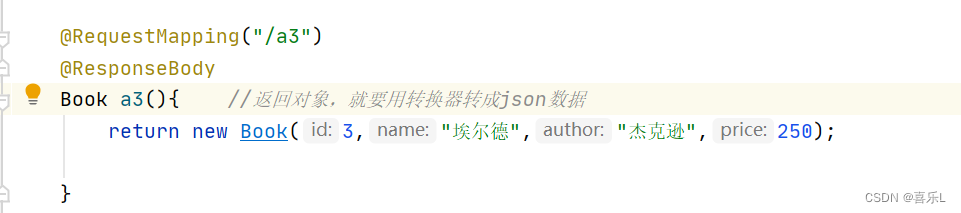
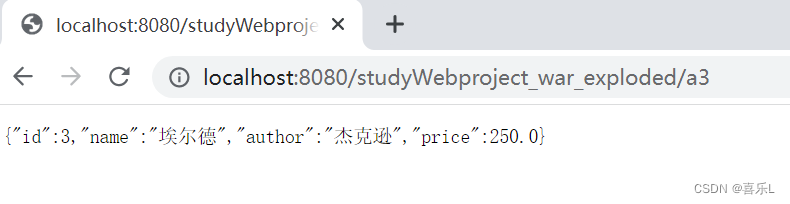
    @RequestMapping("/data")
    @ResponseBody      //不拿页面
    Book data(){
        //拿页面
        System.out.println("data-------调用");
        Book book = new Book(2, "物语", "尼科尔", 200);
        System.out.println(book);
        return book;
    }
5.全分离开发方式
5.1.不分离开发方式
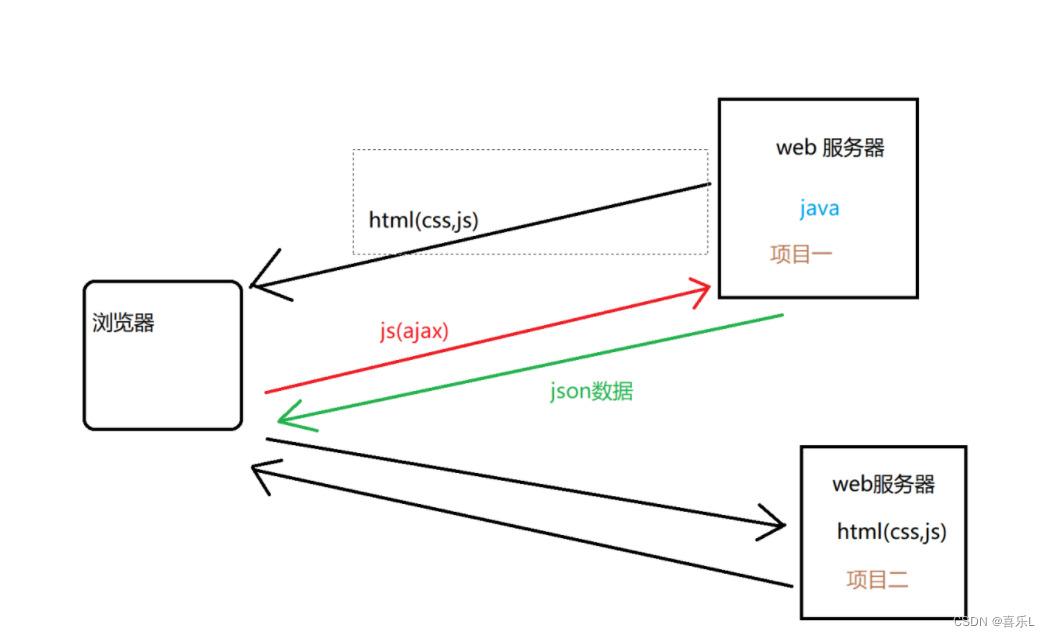
转变为:
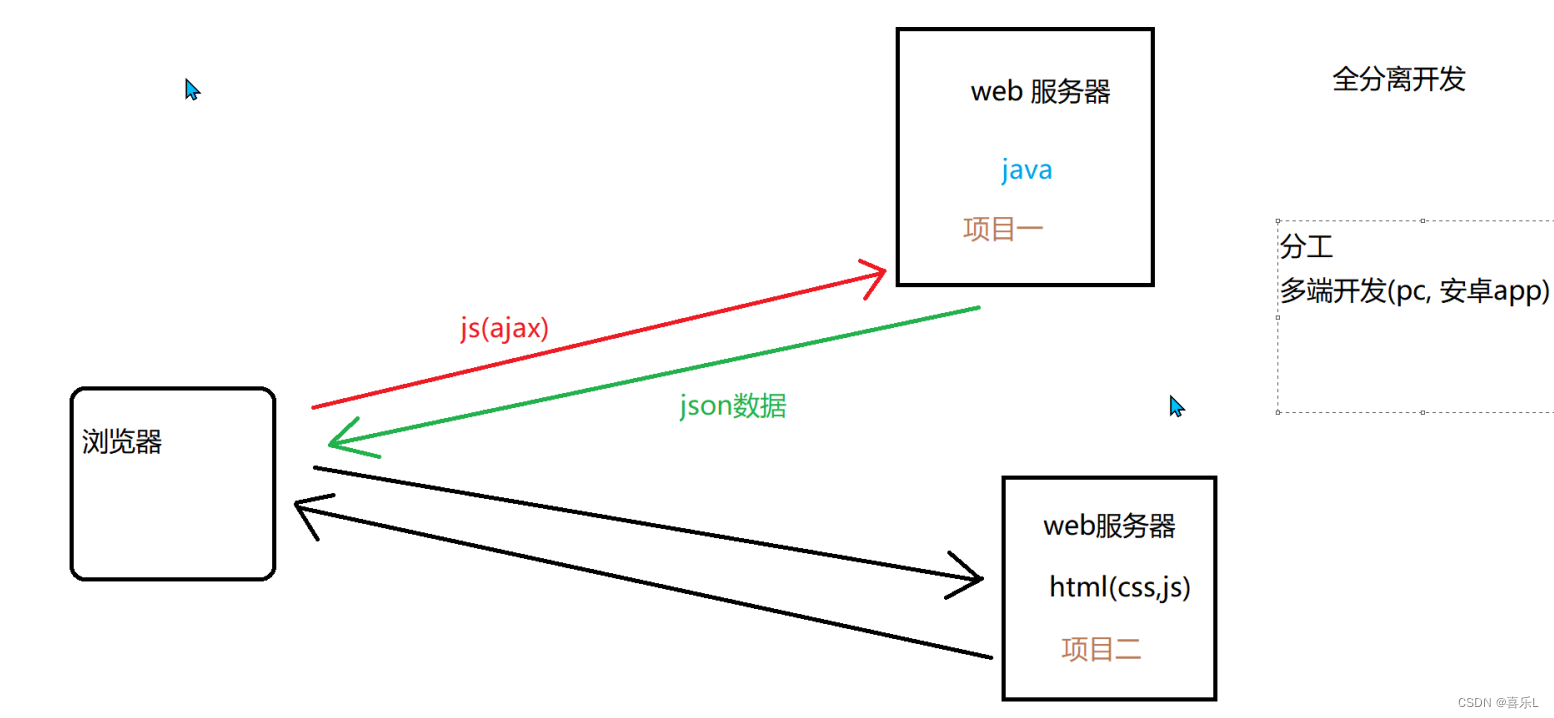
5.2.全分离开发方式
6、日志
6.1.动态查找机制
mybatis:log4j
不好用,不会输出提示,原因是
spring:
一旦有log4j的jar包,spring就用的是log4j的jar包,但是现在找不到log4j的配置文件,所以控制台没有输出
解决方法:
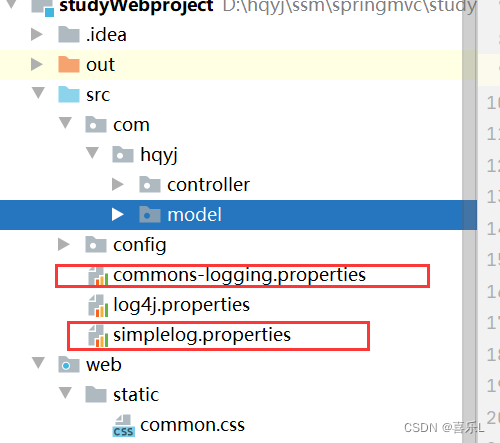
6.2.spring使用common-logging
1.强制让spring使用common-logging 加两个文件


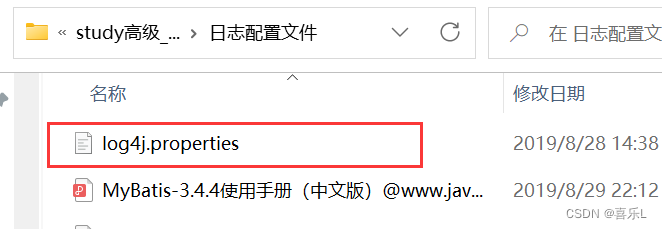
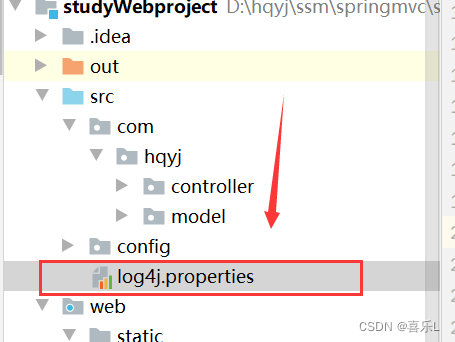
6.3.log4j
2.把log4j的配置文件拷贝进来(不建议用这个,不好排错)
拷贝一个log4j.properties拷贝进来

6.4.logback
spring5使用logback日志系统
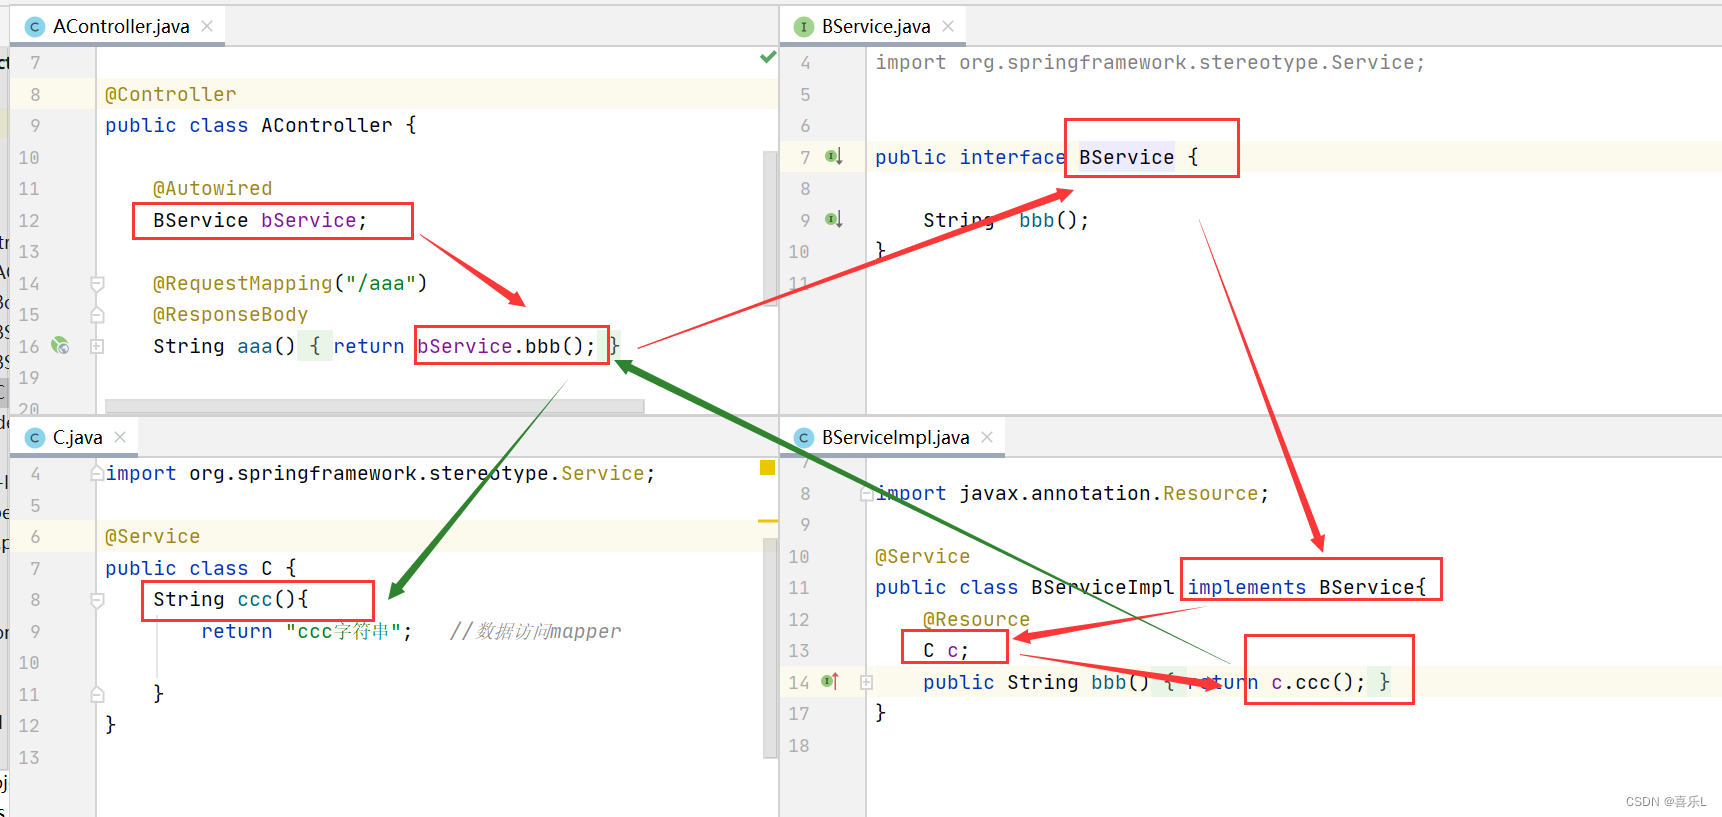
7、分层
A------------>B(B封装分层为B和C)
A------------>B------------>C
A------------>B------------>C------------>D
这种情况容易出现可读性的问题:可读性不能太深
7.1.三层结构
A------------>B------------>C (可读性稍微要好一点,可读性客观)
Controller层-------->service层---------->mapper/Dao
Controller:控制层
service层: 业务逻辑层
需要接口实现
为了松耦合(vehicle,car)
mapper/Dao: 数据访问层
例如:
x-----调用------> T
y-----调用------> T
z-----调用------> T
如果将来T发生改变,x\y\z也会发生变化,改动就发生了变化,需要维护

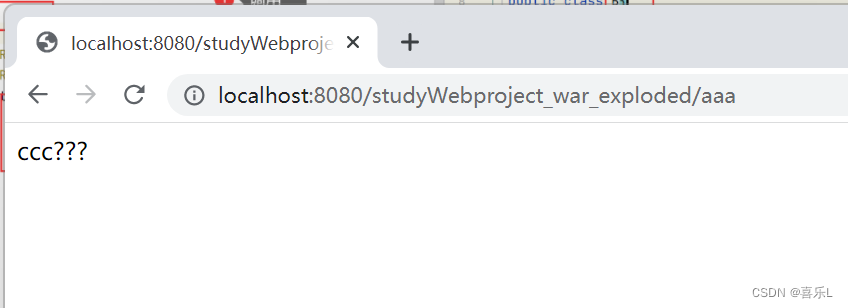
发生了乱码
7.2.多层结构
7.3.中文乱码问题

解决方法:
7.3.1.解决 POST 请求乱码问题:
(1)在 web.xml 中配置⼀个 CharacterEncodingFilter 过滤器,设置成 utf-8;
<filter>
<filter-name>characterEncodingFilter</filter-name>
<filter-class>org.springframework.web.filter.CharacterEncodingFilter</filter-class>
<init-param>
<param-name>endcoding</param-name>
<param-value>UTF-8</param-value>
</init-param>
<init-param>
<param-name>forceEncoding</param-name>
<param-value>true</param-value>
</init-param>
</filter>
<filter-mapping>
<filter-name>characterEncodingFilter</filter-name>
<url-pattern>/*</url-pattern>
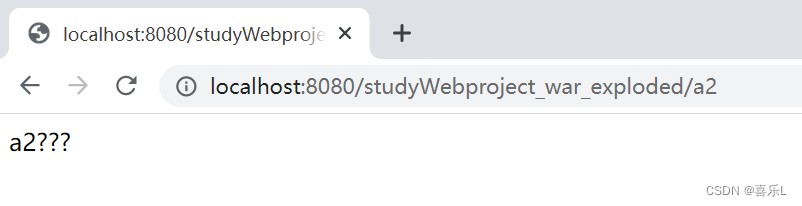
</filter-mapping>(2)再方法上放加上生成器和字符集,json格式,只能单个设置
@RequestMapping(value = "/a2",produces = "application/json;charset=utf-8")
    @ResponseBody
    String a2(){   //返回字符串,默认,消息转换器MeessageConvertor
        return "a2字符串";
    }
(3)使用mvc:message-converters
    <!-- SpringMVC注解驱动 -->
    <mvc:annotation-driven>
        <mvc:message-converters>
            <bean class="org.springframework.http.converter.json.MappingJacksonHttpMessageConverter"/>
            <bean class="org.springframework.http.converter.StringHttpMessageConverter">
                <property name="supportedMediaTypes">
                    <list>
                        <value>text/plain;charset=utf-8</value>
                        <value>text/html;charset=UTF-8</value>
                    </list>
                </property>
            </bean>
        </mvc:message-converters>
    </mvc:annotation-driven>
7.3.2 GET 请求中⽂参数出现乱码解决⽅法有两个:
(1)修改 tomcat 配置⽂件添加编码与⼯程编码⼀致,如下:
<ConnectorURIEncoding="utf-8" connectionTimeout="20000" port="8080" protocol="HTTP/1.1"
redirectPort
2)对参数进⾏重新编码:
String userName = new String(request.getParamter("userName").getBytes("ISO8859-1"),"utf-8")


 8万+
8万+


 被折叠的 条评论
为什么被折叠?
被折叠的 条评论
为什么被折叠?
 到【灌水乐园】发言


