


目录
1 JDBC概述
JDBC是什么:是Java语言连接数据库
JDBC的本质是什么:是SUN公司定义的一个接口
为什么SUN指定这样一套接口:因为每个数据库底层实现原理不同,所以SUN统一了规则,相当于有人统一手机充电接口一样,这样更方便。
2 模拟JDBC本质
jdbc接口由SUN公司编写
package com.itzw.jdbc;

/**
 * SUN公司负责写这个接口
 */
public interface JDBC {
    void getConnection();
}
各种厂家负责编写对JDBC接口的实现类:
package com.itzw.jdbc;

/**
 MySQL厂家负责编写JDBC接口的实现类
 */
public class MySQL implements JDBC{
    @Override
    public void getConnection() {
        System.out.println("连接MYSQL数据库成功");
    }
}
package com.itzw.jdbc;

/**
 Oracle厂家负责编写JDBC接口的实现类
 */
public class Oracle implements JDBC{
    @Override
    public void getConnection() {
        System.out.println("连接Oracle数据库成功");
    }
}
package com.itzw.jdbc;
/**
SQLServer厂家负责编写JDBC接口的实现类
*/
public class SQLServer implements JDBC{
@Override
public void getConnection() {
System.out.println("连接SQLServer数据库成功");
}
}
Java程序员负责的部分:
package com.itzw.jdbc;

import java.util.ResourceBundle;

/**
 * Java程序员负责写部分
 */
public class JavaProgrammer {
    public static void main(String[] args) throws Exception {
        //JDBC jdbc = new MySQL();
        //jdbc.getConnection();

        //创建对象也可以用反射机制
        ResourceBundle bundle = ResourceBundle.getBundle("jdbc");
        String className = bundle.getString("className");
        Class c = Class.forName(className);
        JDBC jdbc = (JDBC)c.newInstance();
        jdbc.getConnection();

    }
}
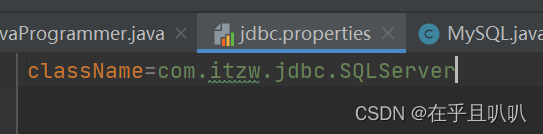
配置文件:
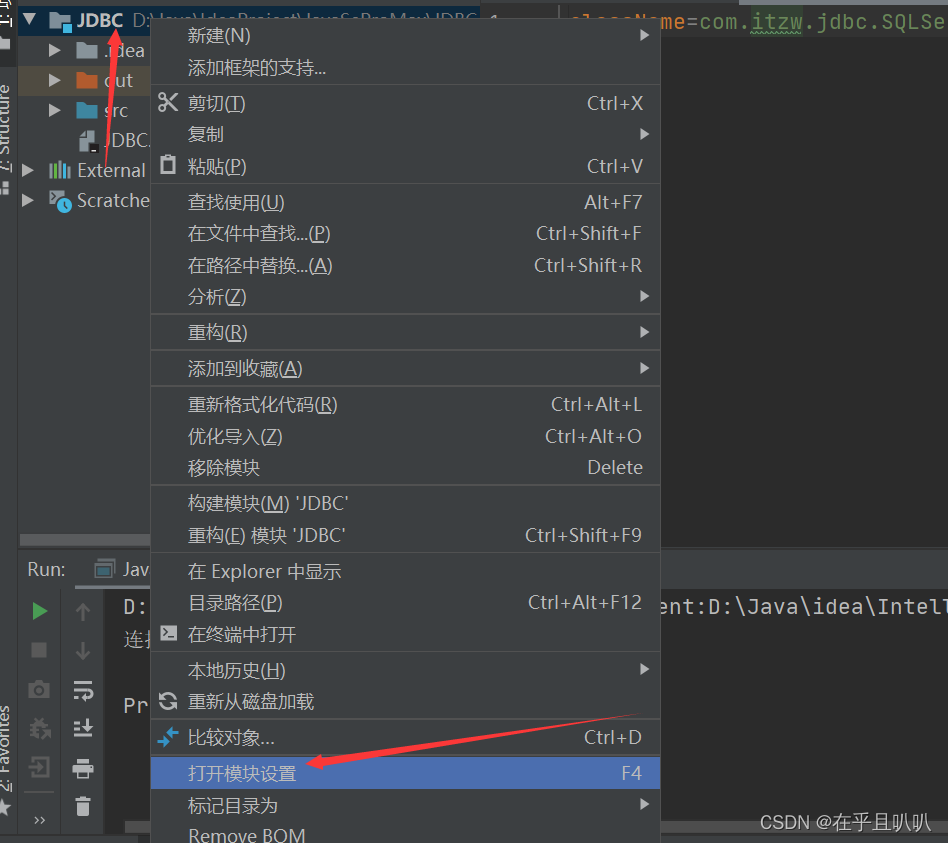
3 使用IDEA开发JDBC驱动配置
右击项目或模块选中打开模块设置
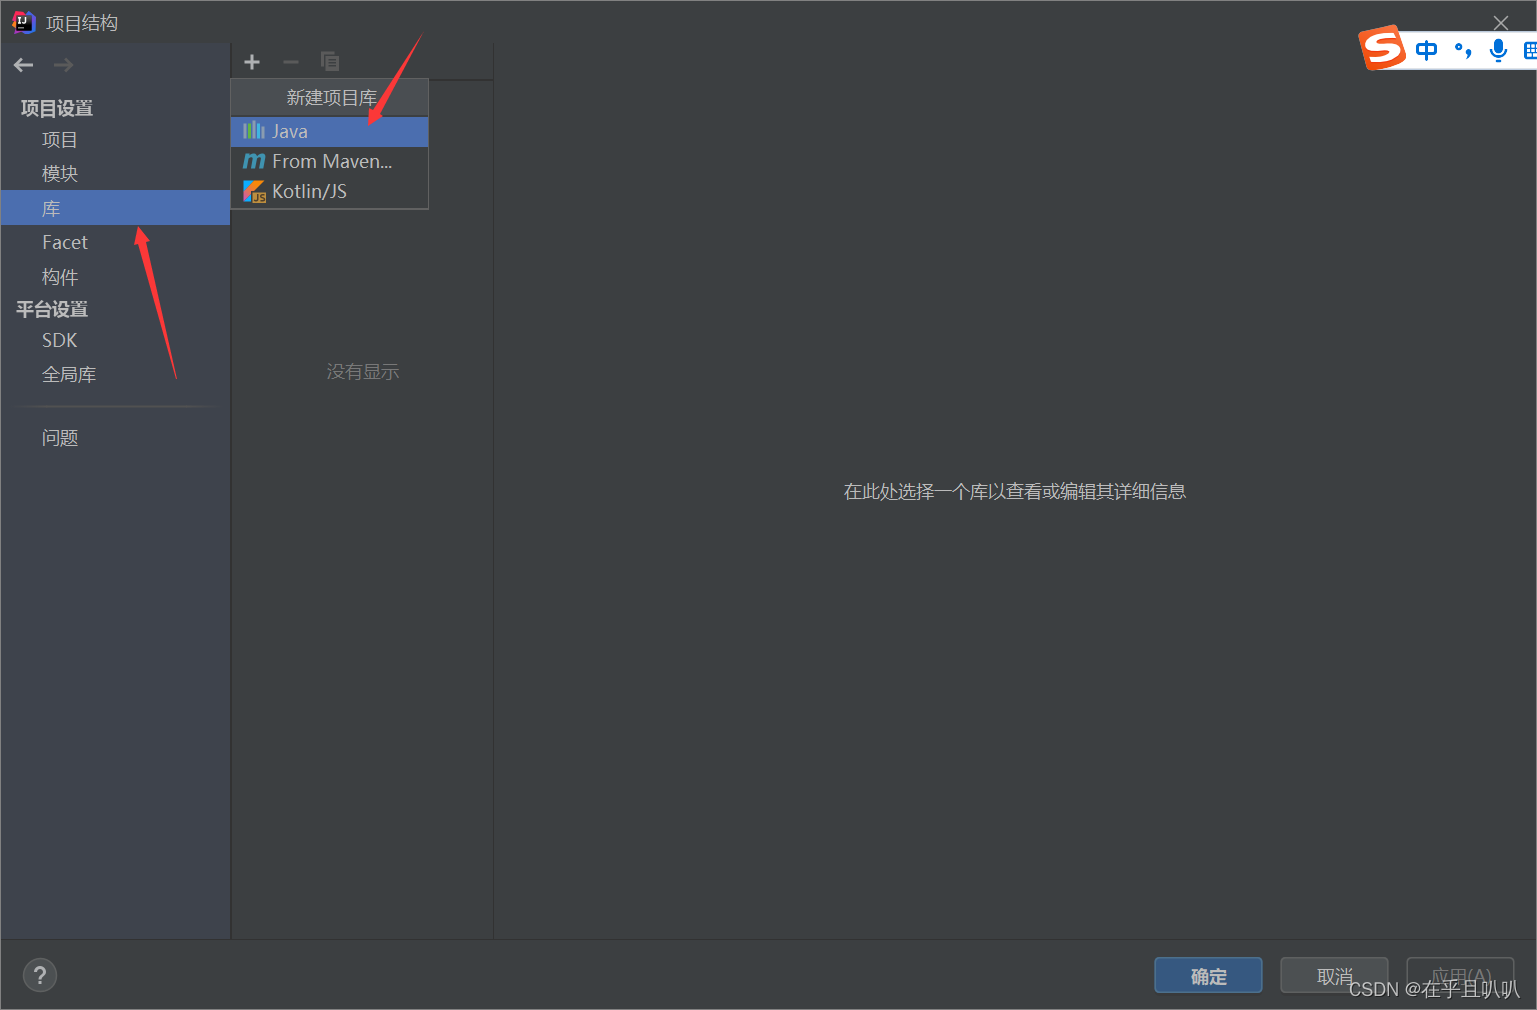
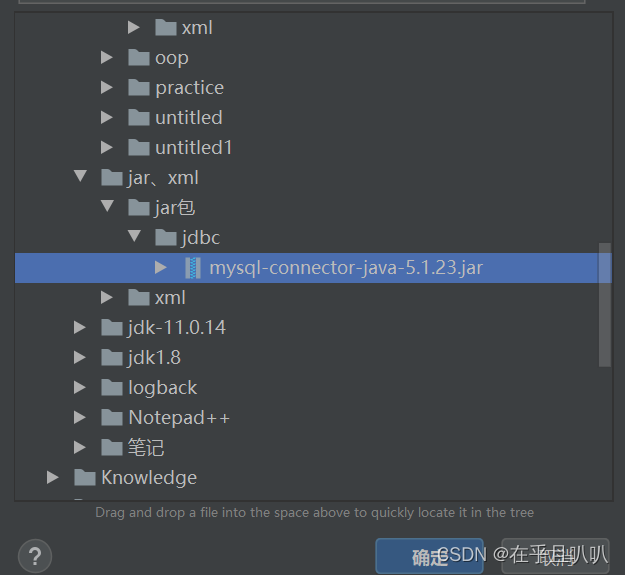
选中库点击加号点击java添加jar包
4 JDBC编程六步
第一步:注册驱动(告诉Java程序,即将连接的是哪个品牌的数据库)
第二步:获取连接(表示JVM的进程和数据库进程之间的通道打开了,这属于进程间的通信,使用完一定要关闭)
第三步:获取数据库操作对象(专门执行SQL语句的对象)
第四步:执行SQL语句(DQL DML...)
第五步:处理查询结果集(只有第四步执行的是select语句的时候,才有第五步处理查询结果集)
第六步:释放资源(使用完资源后一定要关闭资源)
5 idea进行jdbc连接
5.1 插入信息
package com.itzw.jdbc2;
import java.sql.*;
public class JDBCTest01 {
public static void main(String[] args) {
Connection conn = null;
Statement stmt = null;
try {
//1.注册驱动
Driver driver = new com.mysql.jdbc.Driver();//多态
DriverManager.registerDriver(driver);
//2.获取连接
String url = "jdbc:mysql://127.0.0.1:3306/db1";
String user = "root";
String password = "123456";
conn = DriverManager.getConnection(url, user, password);
System.out.println(conn);
//3.获取数据库操作对象(Statement专门执行SQL语句)
stmt = conn.createStatement();
//4.执行SQL
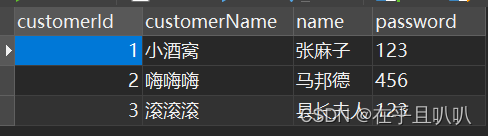
String sql = "insert into customer(customerId,customerName,name,password) values(3,'滚滚滚','县长夫人',123)";
//返回值是影响数据库的条数
int count = stmt.executeUpdate(sql);
System.out.println(count);
//5.处理查询结果集
} catch (SQLException throwables) {
throwables.printStackTrace();
}finally {
//6.释放资源
//为了保证资源一定释放,在finally语句块中关闭资源
//并且要遵循从小到大依次关闭
if (stmt != null){
try {
stmt.close();
} catch (SQLException throwables) {
throwables.printStackTrace();
}
}
if (conn != null){
try {
conn.close();
} catch (SQLException throwables) {
throwables.printStackTrace();
}
}
}
}
}
5.2 删除信息
package com.itzw.jdbc2;

import com.mysql.jdbc.Driver;

import java.sql.Connection;
import java.sql.DriverManager;
import java.sql.SQLException;
import java.sql.Statement;

public class JDBCDelete {
    public static void main(String[] args) {
        Statement stmt = null;
        Connection conn = null;
        try {
            //1.注册驱动
            DriverManager.registerDriver(new Driver());
            //2.获取连接
            String url = "jdbc:mysql://127.0.0.1:3306/db1";
            String user = "root";
            String password = "123456";
            conn = DriverManager.getConnection(url, user, password);
            //3.获取数据库操作对象
            stmt = conn.createStatement();
            //4.执行SQL语句
            String sql = "delete from customer where customerId = 3";
            int count = stmt.executeUpdate(sql);
            System.out.println(count == 1 ? "删除成功" : "删除失败");
            //5.处理查询结果
        } catch (SQLException throwables) {
            throwables.printStackTrace();
        }finally {
            //6.释放资源
            if (stmt != null){
                try {
                    stmt.close();
                } catch (SQLException throwables) {
                    throwables.printStackTrace();
                }
            }
            if (conn != null){
                try {
                    conn.close();
                } catch (SQLException throwables) {
                    throwables.printStackTrace();
                }
            }
        }

    }
}
6 类加载的方式注册驱动
使用反射机制进行类加载
            try {
                Class.forName("com.mysql.jdbc.Driver");
            } catch (ClassNotFoundException e) {
                e.printStackTrace();
            }
7 从配置文件中获取连接数据库信息
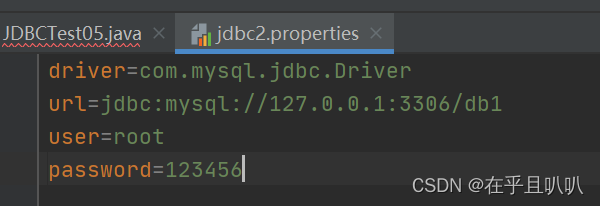
//使用资源管理器获取配置文件信息
            ResourceBundle bundle = ResourceBundle.getBundle("jdbc2");
            String driver = bundle.getString("driver");
            String url = bundle.getString("url");
            String user = bundle.getString("user");
            String password = bundle.getString("password");
            //1.注册驱动
            Class.forName(driver);
            //2.获取连接
            conn = DriverManager.getConnection(url, user, password);
以后只需要修改配置文件信息,java代码不需要修改,大大增加了程序的解耦合
8 处理查询结果集
package com.itzw.jdbc2;

import java.sql.*;
import java.util.ResourceBundle;

public class JDBCSelect {
    public static void main(String[] args) {
        Connection conn = null;
        Statement stmt = null;
        ResultSet rs = null;

        ResourceBundle bundle = ResourceBundle.getBundle("jdbc2");
        String driver = bundle.getString("driver");
        String url = bundle.getString("url");
        String user = bundle.getString("user");
        String password = bundle.getString("password");

        try {
            //1.注册驱动
            Class.forName(driver);
            //2.获取连接
            conn = DriverManager.getConnection(url,user,password);
            //3.获取操作数据库对象
            stmt = conn.createStatement();
            //4.执行SQL语句
            String sql = "select customerId,customerName,name,password from customer";
            rs = stmt.executeQuery(sql);
            //5.处理查询结果
            while (rs.next()){
                //可以用下标取出数据
                /*String customerId = rs.getString(1);
                String customerName = rs.getString(2);
                String name = rs.getString(3);
                String passwd = rs.getString(4);*/

                //参数可以用列名(注意:如果SQL语句修改了列名,列名则是SQL语句中的列名不是数据库中的列名)
                //不仅有getSring获取Sring类型数据,还可以获取int、double等数据,根据需要来
                int customerId = rs.getInt("customerId");
                String customerName = rs.getString("customerName");
                String name = rs.getString("name");
                String passwd = rs.getString("password");
                System.out.println(customerId + " " + customerName + " " + name + " " + passwd);
            }
        } catch (Exception e) {
            e.printStackTrace();
        }finally {
            if (rs != null){
                try {
                    rs.close();
                } catch (SQLException throwables) {
                    throwables.printStackTrace();
                }
            }
            if (stmt != null){
                try {
                    stmt.close();
                } catch (SQLException throwables) {
                    throwables.printStackTrace();
                }
            }
            if (conn != null){
                try {
                    conn.close();
                } catch (SQLException throwables) {
                    throwables.printStackTrace();
                }
            }
        }
    }
}
9 使用JDBC模拟用户登录功能
需求:
模拟用户登录功能的实现。
业务描述:
程序运行的时候,提供一个输入的入口,可以让用户输入用户名和密码,用户输入用户名和密码后,提交信息,Java程序收集到用户信息,连接数据库验证信息是否合法,合法显示登陆成功,不合法显示登陆失败。
数据准备:
在实际开发中,表的设计会使用专业的建模工具,我们这里安装一个建模工具:powerDesigner,使用PD工具进行数据库表的设计。
PD工具的使用:
先安装:网盘有资源:链接:https://pan.baidu.com/s/14k1K9Kv4d12uQS64BvFZ3g
提取码:s7pp
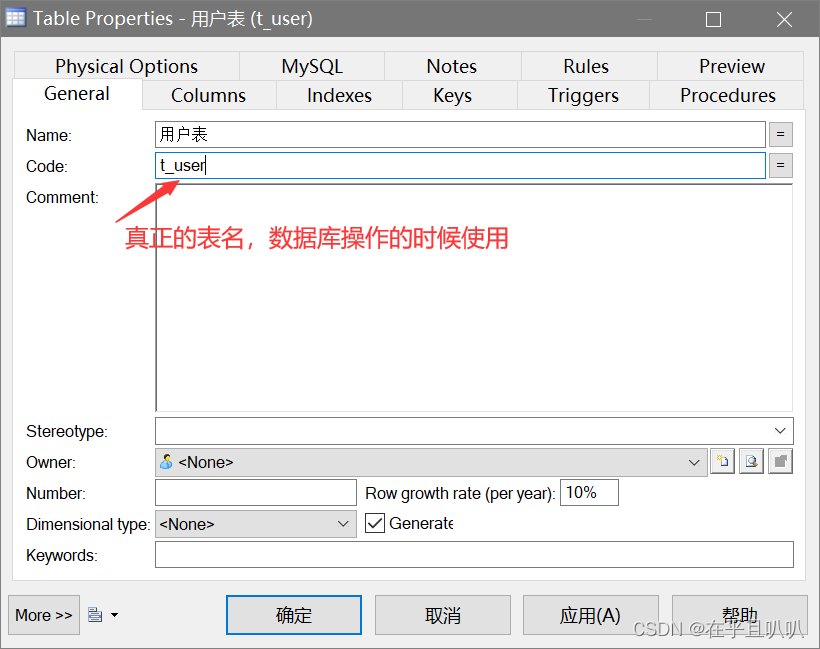
9.1 使用PD工具设计数据库表
打开PD工具选择创建模块

选择物理模型,使用的数据库是MySQL,模型命名一般是项目名称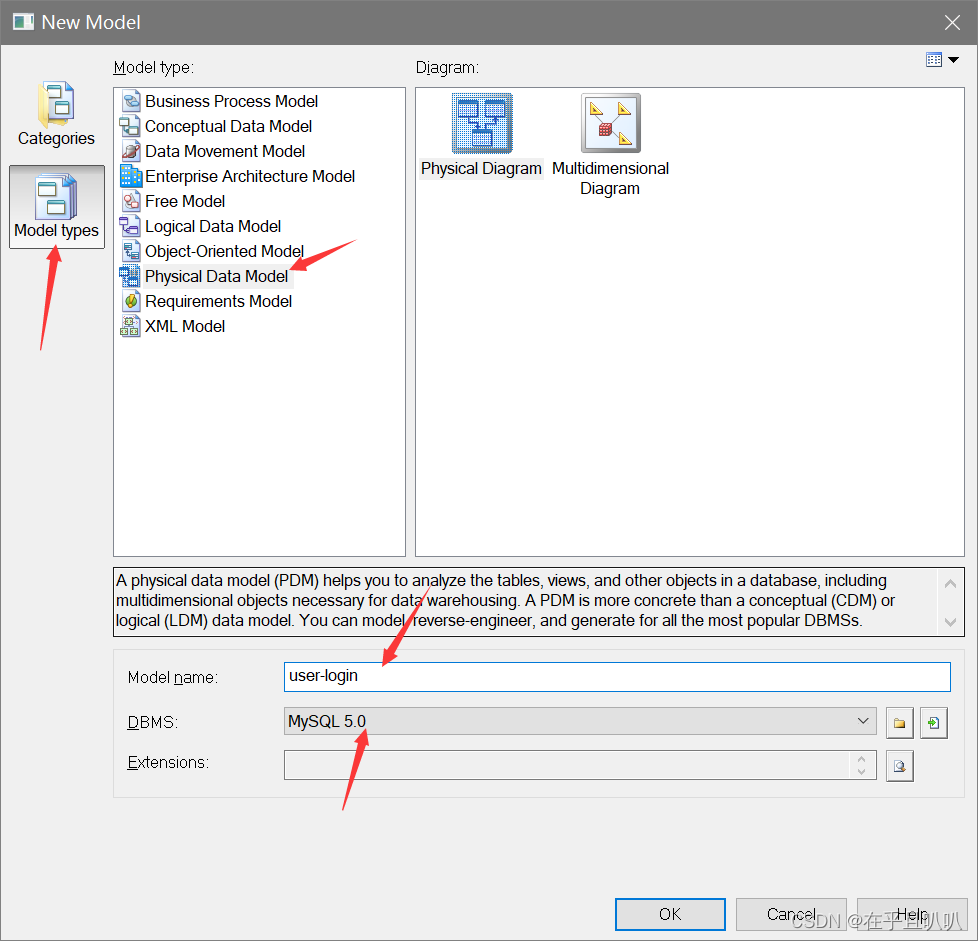
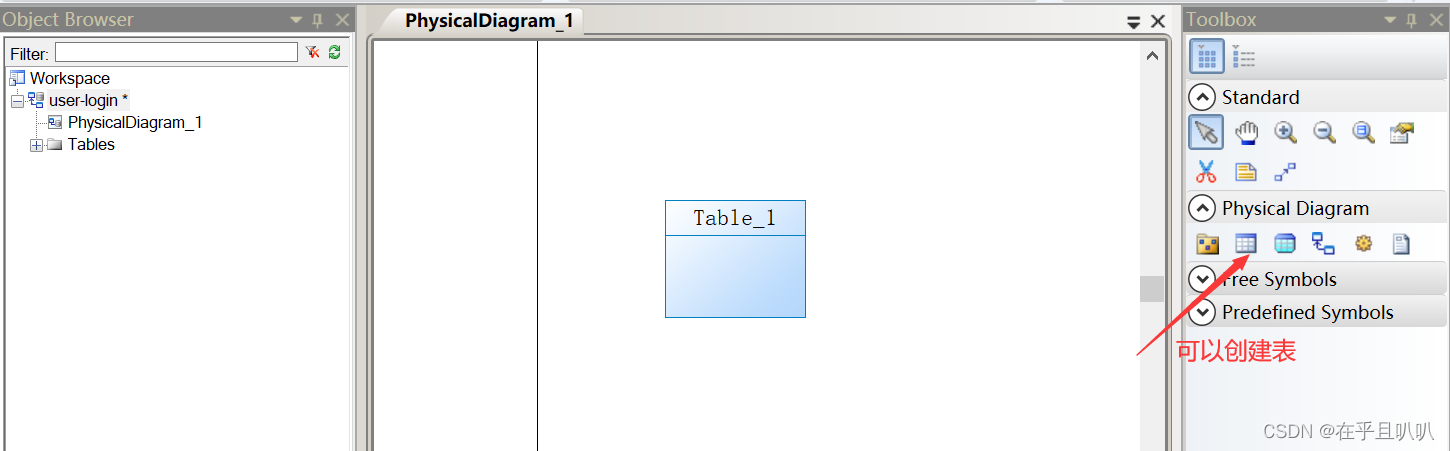
双击表可以编辑
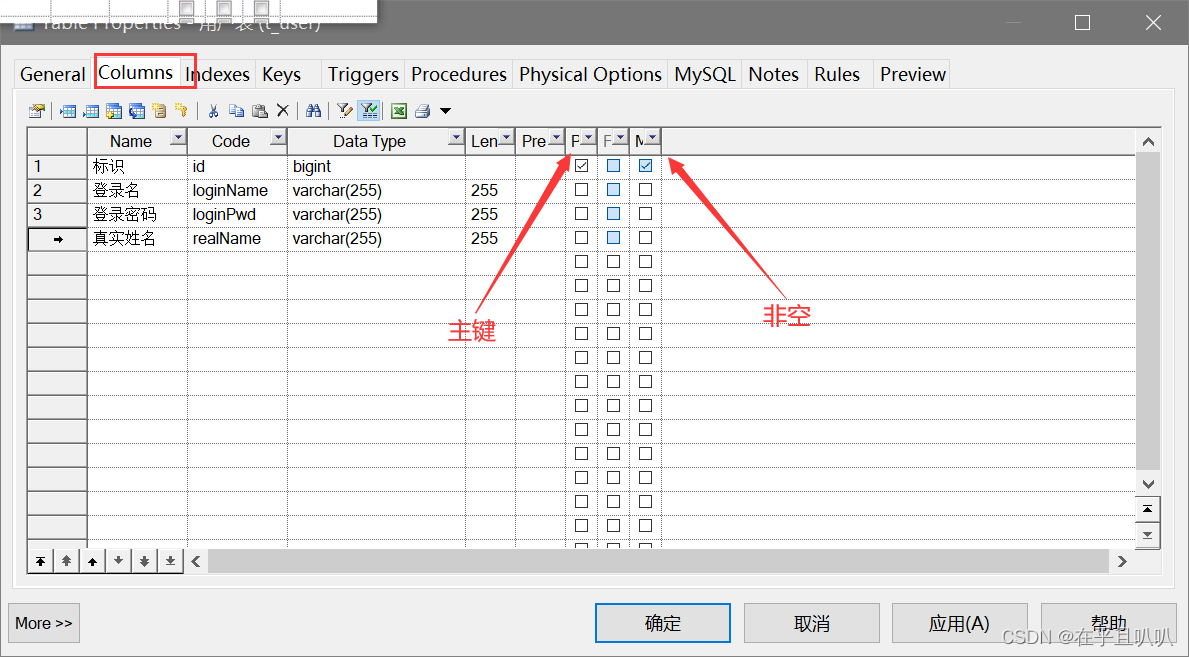
自动生成SQL语句
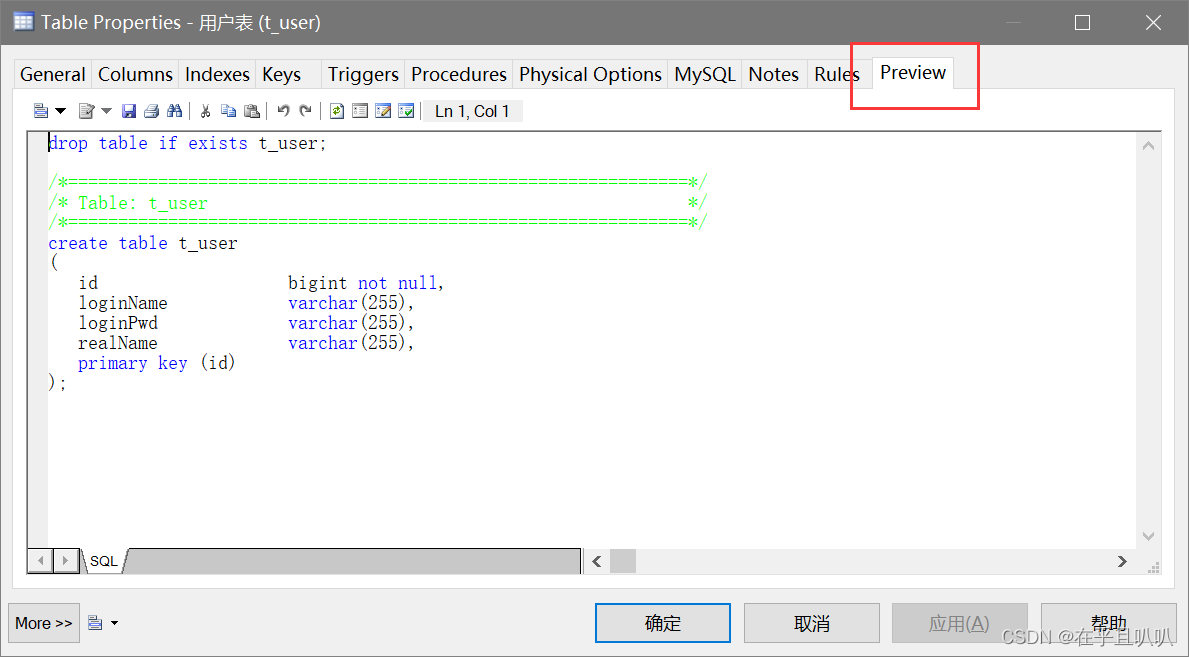
将上访sql语句保存并自行添加语句插入两条信息
drop table if exists t_user;
/*==============================================================*/
/* Table: t_user */
/*==============================================================*/
create table t_user
(
id bigint auto_increment,
loginName varchar(255),
loginPwd varchar(255),
realName varchar(255),
primary key (id)
);
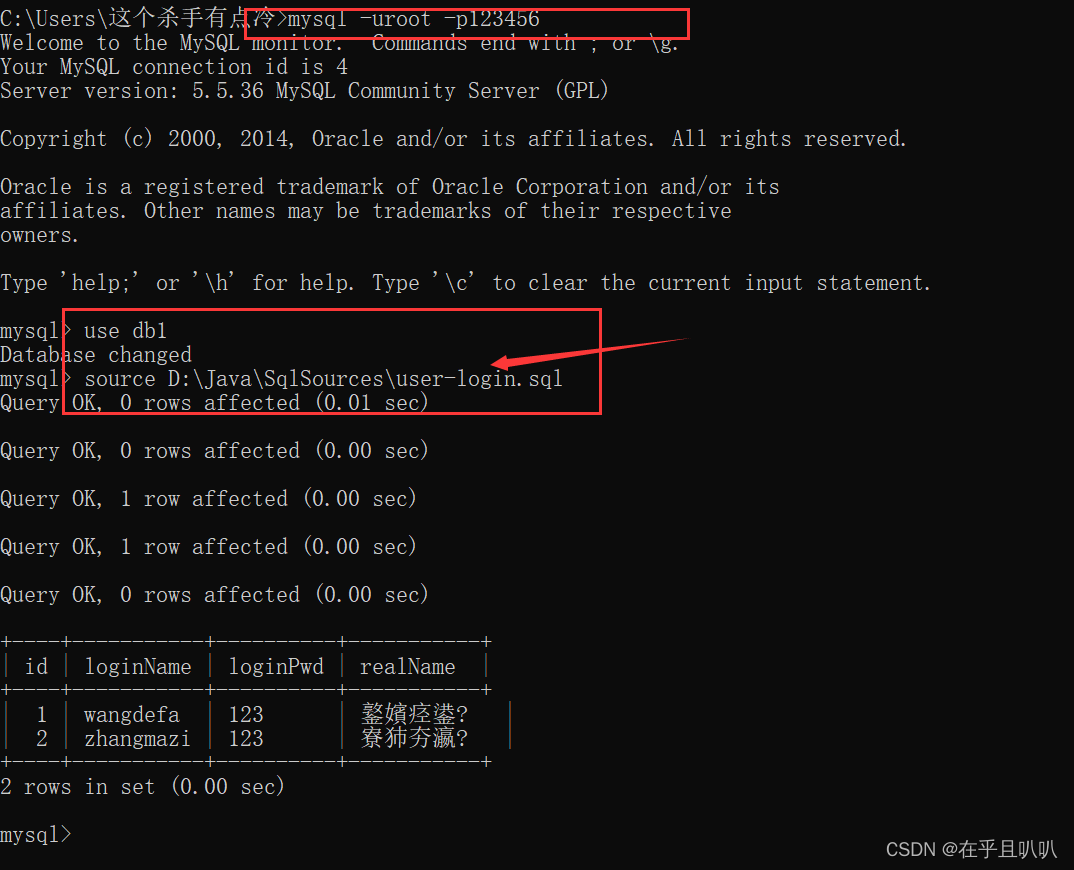
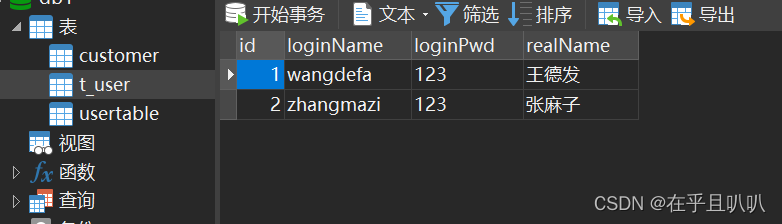
INSERT INTO t_user(loginName,loginPwd,realName) VALUES('wangdefa','123','王德发');
INSERT INTO t_user(loginName,loginPwd,realName) VALUES('zhangmazi','123','张麻子');
commit;
SELECT * FROM t_user;将SQL文件格式修改为utf-8,使用source命令将SQL文件导入数据库db1
9.2 用户功能界面初始化
/**
     * 用户登录界面
     * @return
     */
    private static Map<String, String> initUI() {
        Scanner sc = new Scanner(System.in);
        System.out.print("用户名:");
        String loginName = sc.nextLine();
        System.out.print("密码:");
        String loginPwd = sc.nextLine();

        Map<String,String> userLoginInfo = new HashMap<>();
        userLoginInfo.put("loginName",loginName);
        userLoginInfo.put("loginPwd",loginPwd);
        return userLoginInfo;
    }
9.3 验证登录
package com.itzw.jdbc3;

import java.sql.*;
import java.util.HashMap;
import java.util.Map;
import java.util.ResourceBundle;
import java.util.Scanner;

public class JDBCLogin {
    public static void main(String[] args) {
        //初始化一个界面
        Map<String,String> userLoginInfo = initUI();
        //验证用户名和密码
        boolean loginSuccessful = login(userLoginInfo);
        //输出结果
        System.out.println(loginSuccessful ? "登录成功" : "登录失败");
    }

    /**
     * 验证是否登陆成功
     * @param userLoginInfo
     * @return
     */
    private static boolean login(Map<String, String> userLoginInfo) {
        //打标记
        boolean loginSuccessful = false;
        //JDBC代码
        Connection conn = null;
        Statement stmt = null;
        ResultSet rs = null;

        ResourceBundle bundle = ResourceBundle.getBundle("jdbc2");
        String driver = bundle.getString("driver");
        String url = bundle.getString("url");
        String user = bundle.getString("user");
        String password = bundle.getString("password");

        //单独定义变量
        String loginName = userLoginInfo.get("loginName");
        String loginPwd = userLoginInfo.get("loginPwd");

        try {
            //1.注册驱动
            Class.forName(driver);
            //2.获取连接
            conn = DriverManager.getConnection(url,user,password);
            //3.获取数据库操作对象
            stmt = conn.createStatement();
            //4.执行sql语句
            String sql = "select * from t_user where loginName = '"+loginName+"' and loginPwd = '"+loginPwd+"'";
            rs = stmt.executeQuery(sql);
            //5.处理查询结果
            //若没有对应用户名和密码则差不到,若有也只有一条记录
            if (rs.next()){
                //有记录,返回true
                loginSuccessful = true;
                return loginSuccessful;
            }

        } catch (Exception e) {
            e.printStackTrace();
        } finally {
            if (rs != null){
                try {
                    rs.close();
                } catch (SQLException throwables) {
                    throwables.printStackTrace();
                }
            }
            if (stmt != null){
                try {
                    stmt.close();
                } catch (SQLException throwables) {
                    throwables.printStackTrace();
                }
            }
            if (conn != null){
                try {
                    conn.close();
                } catch (SQLException throwables) {
                    throwables.printStackTrace();
                }
            }
        }
        return loginSuccessful;
    }

    /**
     * 用户登录界面
     * @return
     */
    private static Map<String, String> initUI() {
        Scanner sc = new Scanner(System.in);
        System.out.print("用户名:");
        String loginName = sc.nextLine();
        System.out.print("密码:");
        String loginPwd = sc.nextLine();

        Map<String,String> userLoginInfo = new HashMap<>();
        userLoginInfo.put("loginName",loginName);
        userLoginInfo.put("loginPwd",loginPwd);
        return userLoginInfo;
    }
}
测试:
用户名:wangdefa
密码:123
登录成功
用户名:wangdefa
密码:12
登录失败目前看来没什么毛病
9.4 SQL注入问题
巴特,下面这样也登陆成功,怎么回事捏。。。
用户名:wdf
密码:wdf' or '1'='1
登录成功这种现行成为SQL注入,存在安全隐患(黑客经常使用)
存在这个问题的根本原因是什么???
我们来调试一下代码,看看程序在执行的时候发生了肾摸事。
select * from t_user where loginName = 'wdf' and loginPwd = 'wdf' or '1'='1'
我们发现这段密码的输入直接修改了SQL语句 1=1自然是true,所以结果肯定是true
根本原因就是:用户输入的信息含有sql关键字,导致原意被扭曲,进而达到SQL注入。
解决SQL注入问题
将原来的代码进行修改
修改一:获取数据库操作对象将createStatement替换为PrepareStatement,并将sql语句交给PrepareStatement处理,然后DBMS进行SQL语句的预编译,后面执行SQL语句时不需要再传入SQL语句。
修改二:将SQL语句接收数据的部分替换为占位符?
修改三:给占位符?传值(第一个?下表是1,第二个?下标是2,JDBC所有下标从1开始)
我们会发现此时当代码接收用户的数据时,SQL语句已经进行了预编译,不管传什么值,也都只是一个值而已,并不会影响SQL语句
演示:
package com.itzw.jdbc3;

import java.sql.*;
import java.util.HashMap;
import java.util.Map;
import java.util.ResourceBundle;
import java.util.Scanner;

public class JDBCLogin2 {
    public static void main(String[] args) {
        //初始化一个界面
        Map<String,String> userLoginInfo = initUI();
        //验证用户名和密码
        boolean loginSuccessful = login(userLoginInfo);
        //输出结果
        System.out.println(loginSuccessful ? "登录成功" : "登录失败");
    }

    /**
     * 验证是否登陆成功
     * @param userLoginInfo
     * @return
     */
    private static boolean login(Map<String, String> userLoginInfo) {
        //打标记
        boolean loginSuccessful = false;
        //JDBC代码
        Connection conn = null;
        PreparedStatement ps = null;
        ResultSet rs = null;

        ResourceBundle bundle = ResourceBundle.getBundle("jdbc2");
        String driver = bundle.getString("driver");
        String url = bundle.getString("url");
        String user = bundle.getString("user");
        String password = bundle.getString("password");

        //单独定义变量
        String loginName = userLoginInfo.get("loginName");
        String loginPwd = userLoginInfo.get("loginPwd");

        try {
            //1.注册驱动
            Class.forName(driver);
            //2.获取连接
            conn = DriverManager.getConnection(url,user,password);
            //3.获取预编译的数据库操作对象
            //一个?表示一个占位符,一个?将来接受一个值,占位符不能用引号括起来
            String sql = "select * from t_user where loginName = ? and loginPwd = ?";
            //程序执行到此处会发送SQL语句框子给DBMS,然后DBMS进行SQL语句的预先编译。
            ps = conn.prepareStatement(sql);
            //给占位符传值
            ps.setString(1,loginName);
            ps.setString(2,loginPwd);
            //4.执行sql语句
            rs = ps.executeQuery();
            //5.处理查询结果
            //若没有对应用户名和密码则差不到,若有也只有一条记录
            if (rs.next()){
                //有记录,返回true
                loginSuccessful = true;
                return loginSuccessful;
            }

        } catch (Exception e) {
            e.printStackTrace();
        } finally {
            if (rs != null){
                try {
                    rs.close();
                } catch (SQLException throwables) {
                    throwables.printStackTrace();
                }
            }
            if (ps != null){
                try {
                    ps.close();
                } catch (SQLException throwables) {
                    throwables.printStackTrace();
                }
            }
            if (conn != null){
                try {
                    conn.close();
                } catch (SQLException throwables) {
                    throwables.printStackTrace();
                }
            }
        }
        return loginSuccessful;
    }

    /**
     * 用户登录界面
     * @return
     */
    private static Map<String, String> initUI() {
        Scanner sc = new Scanner(System.in);
        System.out.print("用户名:");
        String loginName = sc.nextLine();
        System.out.print("密码:");
        String loginPwd = sc.nextLine();

        Map<String,String> userLoginInfo = new HashMap<>();
        userLoginInfo.put("loginName",loginName);
        userLoginInfo.put("loginPwd",loginPwd);
        return userLoginInfo;
    }
}
用户名:wdf
密码:wdf' or '1'='1
登录失败
由此可见,百分之99的情况都是用的PreparedStatement。只有在需要进行SQL注入的时候才使用Statement,比如在逛淘宝的时候对价格进行升序和降序,这时就需要传入一个SQL关键字asc或desc进行升序或降序,若还是使用占位符的话,只能传个字符串,无法完成这种业务。
10 PreparedStatement实现增删改
package com.itzw.jdbc3;
import java.sql.Connection;
import java.sql.DriverManager;
import java.sql.PreparedStatement;
import java.sql.SQLException;
import java.util.ResourceBundle;
public class JDBCTest {
public static void main(String[] args) {
Connection conn = null;
PreparedStatement ps = null;
ResourceBundle bundle = ResourceBundle.getBundle("jdbc2");
String driver = bundle.getString("driver");
String url = bundle.getString("url");
String user = bundle.getString("user");
String password = bundle.getString("password");
try {
//1.注册驱动
Class.forName(driver);
//2.获取连接
conn = DriverManager.getConnection(url,user,password);
//3.获取预处理的数据库操作对象
//插入数据
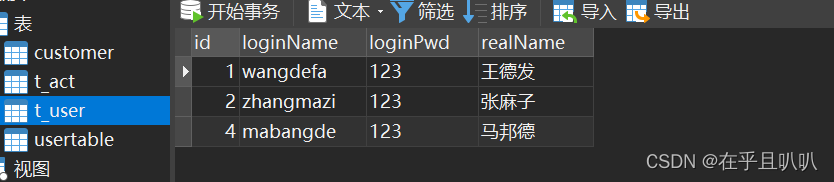
/*String sql = "insert into t_user(loginName,loginPwd,realName) values (?,?,?)";
ps = conn.prepareStatement(sql);
ps.setString(1,"mabangde");
ps.setString(2,"123");
ps.setString(3,"马邦德");*/
//修改数据
/*String sql = "update t_user set loginPwd = ? where id = ?";
ps = conn.prepareStatement(sql);
ps.setString(1,"456");
ps.setInt(2,3);*/
//删除数据
String sql = "delete from t_user where id = ?";
ps = conn.prepareStatement(sql);
ps.setInt(1,3);
//4.执行SQL
int count = ps.executeUpdate();
System.out.println(count);
} catch (Exception e) {
e.printStackTrace();
}finally {
if (conn != null){
try {
conn.close();
} catch (SQLException throwables) {
throwables.printStackTrace();
}
}
if (ps != null){
try {
ps.close();
} catch (SQLException throwables) {
throwables.printStackTrace();
}
}
}
}
}
11 JDBC事务自动提交问题
11.1 回顾什么是事务
一个事务是一个完整的业务逻辑单元,不可再分。
比如:银行账户,从A账户向B账户转账10000,需要执行两条update语句,分别给A账户减少10000,给B账户加10000元。以上两条DML语句必须同时成功,或者同时失败,若一个成功一个失败就会平白无故多出10000或少10000元。
和事务相关的只有DML语句(insert,update,delete)
11.2 事务原理
事务步骤:
开启事务机制(开始)
执行insert语句...执行update语句...等等(这些语句执行只是记录历史操作,不会真正的修改硬盘上的数据)
提交事务或者回滚事务(结束)
提交:以上语句都完成成功就会提交,将磁盘数据修改
回滚:有语句出现错误就会回滚,将数据恢复到原样,不会修改磁盘数据
11.3 JDBC使用事务
在JDBC中的数据每次执行一条就会自动提交,上面说了,这样不安全。
下面进行JDBC中的事务的设置
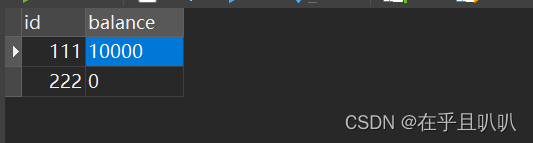
先在数据库中创建一个表

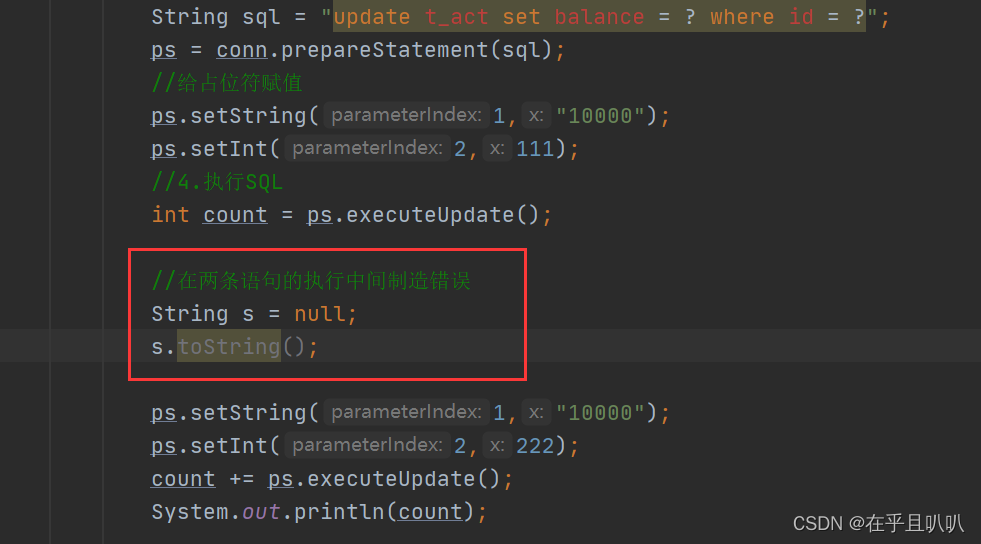
在两条语句执行中间加上一个错误,查看结果,平白无故少了10000元。
使用事务关键的三个代码
coon.setAutoComit(false) conn.commit(); conn.rollback();
完整代码:
package com.itzw.jdbc3;

import java.sql.Connection;
import java.sql.DriverManager;
import java.sql.PreparedStatement;
import java.sql.SQLException;
import java.util.ResourceBundle;

public class JDBCTest2 {
    public static void main(String[] args) {
        Connection conn = null;
        PreparedStatement ps = null;

        ResourceBundle bundle = ResourceBundle.getBundle("jdbc2");
        String driver = bundle.getString("driver");
        String url = bundle.getString("url");
        String user = bundle.getString("user");
        String password = bundle.getString("password");


        try {
            //1.注册驱动
            Class.forName(driver);
            //2.获取连接
            conn = DriverManager.getConnection(url,user,password);
            //将自动提交关闭
            conn.setAutoCommit(false);
            //3.获取预处理的数据库操作对象
            String sql = "update t_act set balance = ? where id = ?";
            ps = conn.prepareStatement(sql);
            //给占位符赋值
            ps.setString(1,"10000");
            ps.setInt(2,111);
            //4.执行SQL
            int count = ps.executeUpdate();

            //在两条语句的执行中间制造错误
            /*String s = null;
            s.toString();*/

            ps.setString(1,"10000");
            ps.setInt(2,222);
            count += ps.executeUpdate();
            System.out.println(count);

            //提交事务
            conn.commit();
        } catch (Exception e) {
            //回滚事务
            if (conn != null){
                try {
                    conn.rollback();
                } catch (SQLException throwables) {
                    throwables.printStackTrace();
                }
            }
            e.printStackTrace();
        }finally {
            if (conn != null){
                try {
                    conn.close();
                } catch (SQLException throwables) {
                    throwables.printStackTrace();
                }
            }
            if (ps != null){
                try {
                    ps.close();
                } catch (SQLException throwables) {
                    throwables.printStackTrace();
                }
            }
        }

    }
}
遇到异常就会回滚,没异常才会提交执行。
12 JDBC工具类的封装
package com.itzw.utils;

import java.sql.*;

public class DBUtil {
    /**
     * 工具类中的构造方法都是私有的
     * 因为工具类当中的方法都是静态的,不需要new对象,直接采用类名调用
     */
    private DBUtil(){}

    //静态代码块在类加载时执行,并且只执行一次
    static {
        try {
            Class.forName("com.mysql.jdbc.Driver");
        } catch (ClassNotFoundException e) {
            e.printStackTrace();
        }
    }

    /**
     * 获取数据库连接对象
     * @return
     * @throws Exception
     */
    public static Connection getConnection() throws Exception{
        return DriverManager.getConnection("jdbc:mysql://127.0.0.1:3306/db1","root","123456");
    }

    public static void closs(Connection conn, Statement stmt, ResultSet rs){
        if (rs != null){
            try {
                rs.close();
            } catch (SQLException throwables) {
                throwables.printStackTrace();
            }
        }
        if (stmt != null){
            try {
                stmt.close();
            } catch (SQLException throwables) {
                throwables.printStackTrace();
            }
        }
        if (conn != null){
            try {
                conn.close();
            } catch (SQLException throwables) {
                throwables.printStackTrace();
            }
        }
    }

}
使用工具类模糊查询
查询t_user表中loginName第二个字母为a的数据
package com.itzw.jdbc3;

import com.itzw.utils.DBUtil;

import java.sql.*;
import java.util.ResourceBundle;

public class JDBCTest3 {
    public static void main(String[] args) {
        Connection conn = null;
        PreparedStatement ps = null;
        ResultSet rs = null;

        try {
            //注册驱动、获取数据库连接
            conn = DBUtil.getConnection();
            //获取数据库操作对象
            String sql = "select * from t_user where loginName like ?";
            ps = conn.prepareStatement(sql);
            //给占位符传值
            ps.setString(1,"_a%");
            //执行SQL
            rs = ps.executeQuery();
            //处理查询结果集
            while (rs.next()){
                System.out.println(rs.getString("loginName"));
            }
        } catch (Exception e) {
            e.printStackTrace();
        }finally {
            //释放资源
            DBUtil.closs(conn,ps,rs);
        }

    }
}


 226
226


 被折叠的 条评论
为什么被折叠?
被折叠的 条评论
为什么被折叠?
 到【灌水乐园】发言


