


 本文详细介绍了如何在更换苹果设备后,在MacOS12.3及以上版本的M1Mac上设置CUDA环境,包括安装Anaconda、验证Xcode、创建PyTorchGPU环境,以及使用MetalPerformanceShaders进行PyTorch模型训练的步骤。
毕业前换了苹果,环境重新更新,用来跑自然语言处理相关模型,主要基于PyTorch
参考代码链接1
参考文章链接1
先确认电脑配置是否在12.3+
Mac 上的加速 PyTorch 训练环境要求如下:
- 配备 Apple Silicon 或 AMD GPU 的 Mac 电脑
- macOS 12.3 或更高版本
- Python 3.7 或更高版本
- Xcode 命令行工具:xcode-select --install
PyTorch使用 Apple 的Metal Performance Shaders ( MPS )作为后端。
M1-GPU 支持功能仅在 MacOS Monterey (12.3+) 中受支持。
01 Anaconda对应版本安装
anaconda官网
选择Download for Mac(M1/M2/M3)
在终端命令行验证Anaconda是否成功
conda --version
02 安装 Xcode
据说大部分默认安装了Xcode,我们需要验证一下,没有的话就更新下。
	1.运行以下命令来检查 Xcode 命令行工具的版本:
		xcode-select -p

	2.更新Xcode 命令行工具是最新版本,可以运行以下命令更新:
		 sudo softwareupdate --install -a
03 创建cuda环境
torch-gpu为环境名称(按意愿修改),python3.8和3.9都被验证可以用的。
conda create -n torch-gpu python=3.8
conda activate torch-gpu
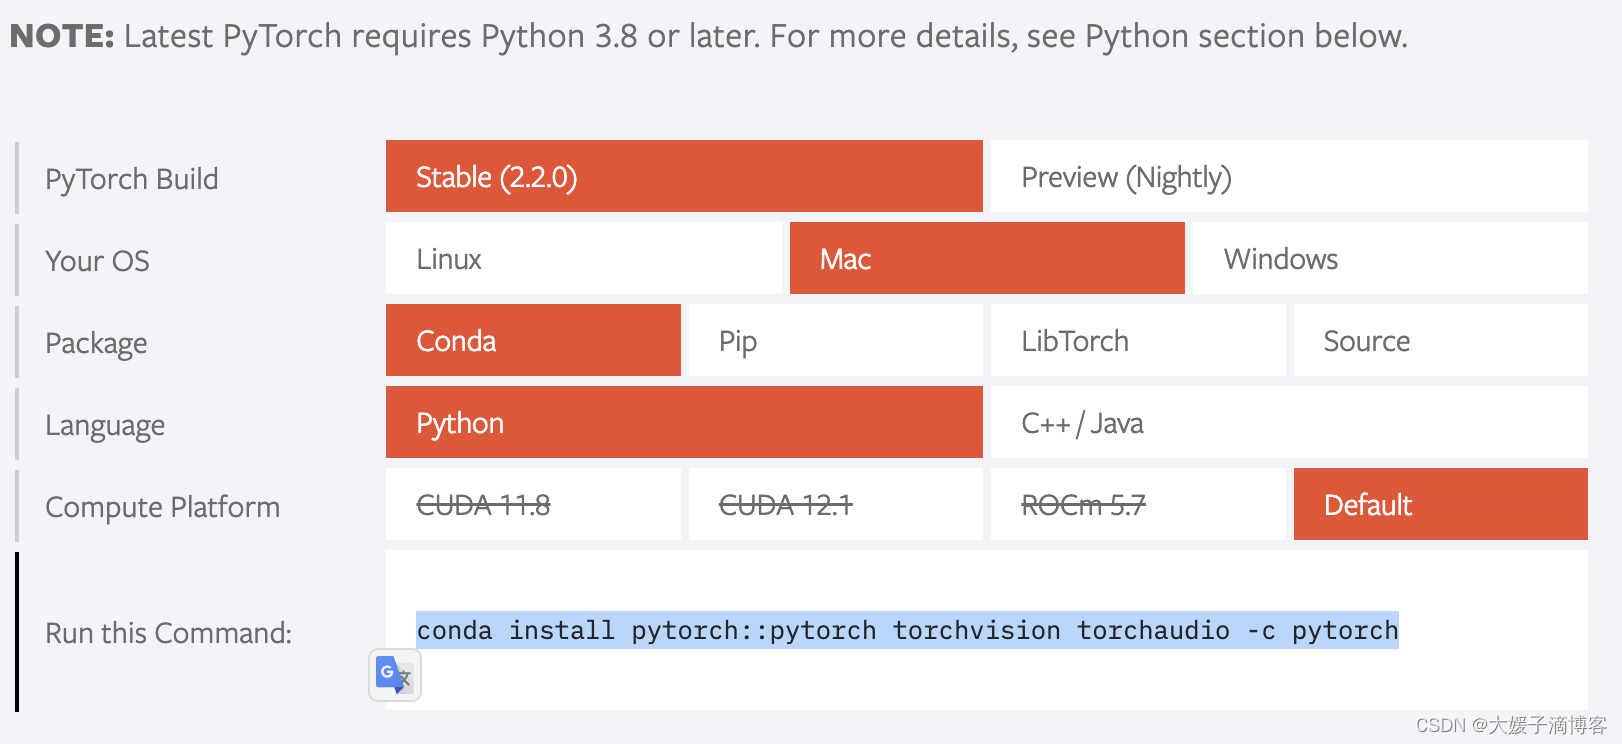
04 PyTorch环境
点击PyTorch官网链接,选择合适版本命令复制,犯懒就直接复制我这个。conda install pytorch::pytorch torchvision torchaudio -c pytorch
检验Pytorch环境,终端命令行输入 python,进入python环境
import torch
import math
print(torch.backends.mps.is_available())
# True
print(torch.backends.mps.is_built())
# True
返回True,OK啦。
05 整体验证下
To run PyTorch code on the GPU, use torch.device(“mps”) analogous to torch.device(“cuda”) on an Nvidia GPU. Hence, in this example, we move all computations to the GPU:
dtype = torch.float
device = torch.device("mps")

# Create random input and output data
x = torch.linspace(-math.pi, math.pi, 2000, device=device, dtype=dtype)
y = torch.sin(x)

# Randomly initialize weights
a = torch.randn((), device=device, dtype=dtype)
b = torch.randn((), device=device, dtype=dtype)
c = torch.randn((), device=device, dtype=dtype)
d = torch.randn((), device=device, dtype=dtype)

learning_rate = 1e-6
for t in range(2000):
    # Forward pass: compute predicted y
    y_pred = a + b * x + c * x ** 2 + d * x ** 3

    # Compute and print loss
    loss = (y_pred - y).pow(2).sum().item()
    if t % 100 == 99:
        print(t, loss)

# Backprop to compute gradients of a, b, c, d with respect to loss
    grad_y_pred = 2.0 * (y_pred - y)
    grad_a = grad_y_pred.sum()
    grad_b = (grad_y_pred * x).sum()
    grad_c = (grad_y_pred * x ** 2).sum()
    grad_d = (grad_y_pred * x ** 3).sum()

    # Update weights using gradient descent
    a -= learning_rate * grad_a
    b -= learning_rate * grad_b
    c -= learning_rate * grad_c
    d -= learning_rate * grad_d


print(f'Result: y = {a.item()} + {b.item()} x + {c.item()} x^2 + {d.item()} x^3')


 1678
1678

 被折叠的 条评论
为什么被折叠?
被折叠的 条评论
为什么被折叠?
 到【灌水乐园】发言


