


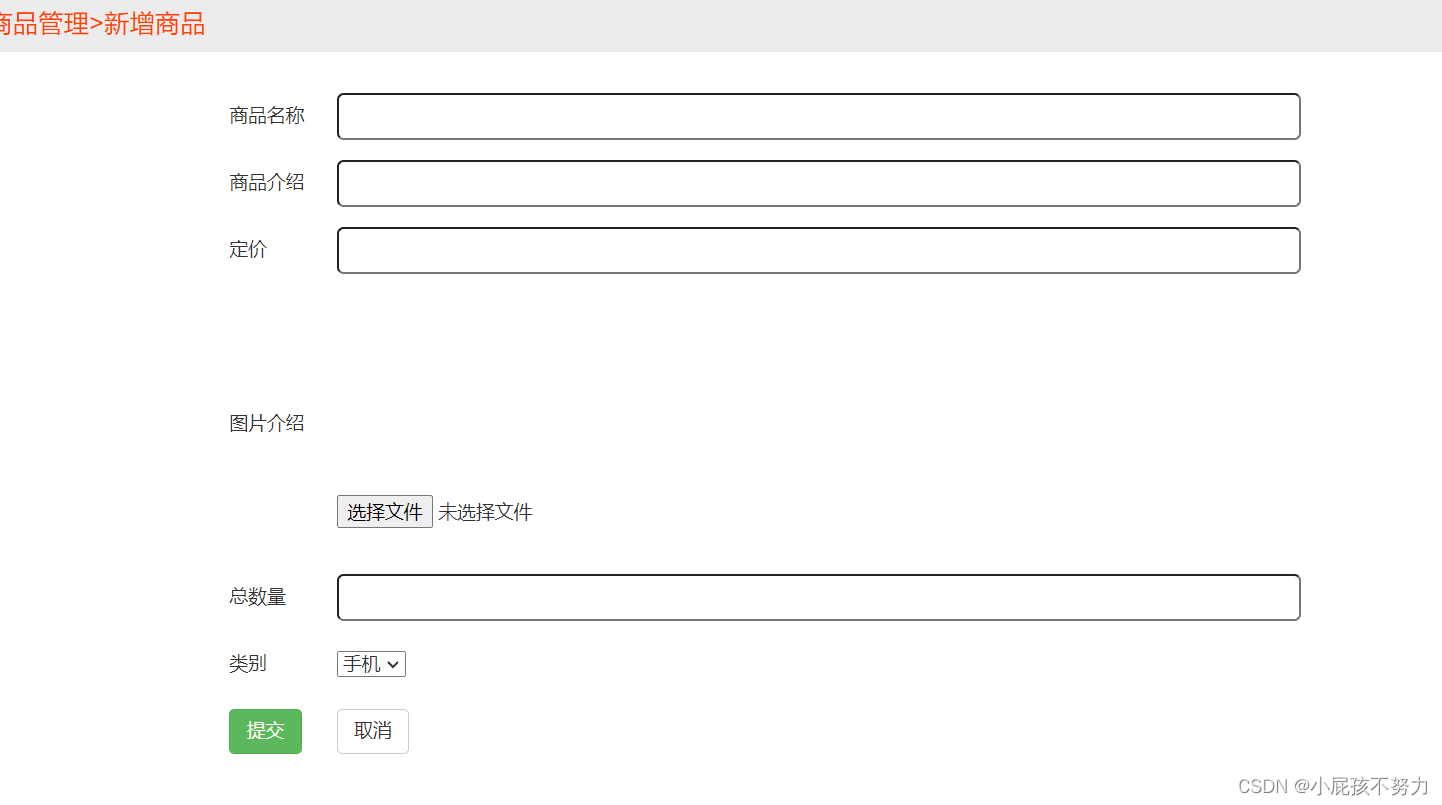
如图所示我们想要在选择图片上传时把图片在提交前上传到服务器 并且回显到这个位置时 需要使用ajax的异步上传操作
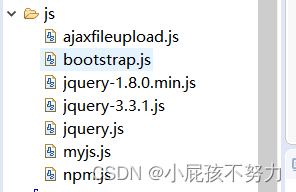
1.需要导入要使用的jquery 和 ajax 专门处理异步文件上传js文件
jsp页面引入
	<script type="text/javascript" src="${pageContext.request.contextPath}/js/jquery-3.3.1.js"></script>
        <script type="text/javascript" src="${pageContext.request.contextPath }/js/jquery.js"></script>
        <script type="text/javascript" src="${pageContext.request.contextPath }/js/ajaxfileupload.js"></script>
ajaxfileupload.js
jQuery.extend({

    createUploadIframe: function(id, uri)
	{
			//create frame
            var frameId = 'jUploadFrame' + id;

            if(window.ActiveXObject) {
                var io = document.createElement('<iframe id="' + frameId + '" name="' + frameId + '" />');
                if(typeof uri== 'boolean'){
                    io.src = 'javascript:false';
                }
                else if(typeof uri== 'string'){
                    io.src = uri;
                }
            }
            else {
                var io = document.createElement('iframe');
                io.id = frameId;
                io.name = frameId;
            }
            io.style.position = 'absolute';
            io.style.top = '-1000px';
            io.style.left = '-1000px';

            document.body.appendChild(io);

            return io
    },
    createUploadForm: function(id, fileElementId)
	{
		//create form
		var formId = 'jUploadForm' + id;
		var fileId = 'jUploadFile' + id;
		var form = $('<form  action="" method="POST" name="' + formId + '" id="' + formId + '" enctype="multipart/form-data"></form>');
		var oldElement = $('#' + fileElementId);
		var newElement = $(oldElement).clone();
		$(oldElement).attr('id', fileId);
		$(oldElement).before(newElement);
		$(oldElement).appendTo(form);
		//set attributes
		$(form).css('position', 'absolute');
		$(form).css('top', '-1200px');
		$(form).css('left', '-1200px');
		$(form).appendTo('body');
		return form;
    },

    ajaxFileUpload: function(s) {
        // TODO introduce global settings, allowing the client to modify them for all requests, not only timeout
        s = jQuery.extend({}, jQuery.ajaxSettings, s);
        var id = s.fileElementId;
		var form = jQuery.createUploadForm(id, s.fileElementId);
		var io = jQuery.createUploadIframe(id, s.secureuri);
		var frameId = 'jUploadFrame' + id;
		var formId = 'jUploadForm' + id;
        // Watch for a new set of requests
        if ( s.global && ! jQuery.active++ )
		{
			jQuery.event.trigger( "ajaxStart" );
		}
        var requestDone = false;
        // Create the request object
        var xml = {}
        if ( s.global )
            jQuery.event.trigger("ajaxSend", [xml, s]);
        // Wait for a response to come back
        var uploadCallback = function(isTimeout)
		{
			var io = document.getElementById(frameId);
            try
			{
				if(io.contentWindow)
				{
					 xml.responseText = io.contentWindow.document.body?io.contentWindow.document.body.innerHTML:null;
                	 xml.responseXML = io.contentWindow.document.XMLDocument?io.contentWindow.document.XMLDocument:io.contentWindow.document;

				}else if(io.contentDocument)
				{
					 xml.responseText = io.contentDocument.document.body?io.contentDocument.document.body.innerHTML:null;
                	xml.responseXML = io.contentDocument.document.XMLDocument?io.contentDocument.document.XMLDocument:io.contentDocument.document;
				}
            }catch(e)
			{
				jQuery.handleError(s, xml, null, e);
			}
            if ( xml || isTimeout == "timeout")
			{
                requestDone = true;
                var status;
                try {
                    status = isTimeout != "timeout" ? "success" : "error";
                    // Make sure that the request was successful or notmodified
                    if ( status != "error" )
					{
                        // process the data (runs the xml through httpData regardless of callback)
                        var data = jQuery.uploadHttpData( xml, s.dataType );
                        // If a local callback was specified, fire it and pass it the data
                        if ( s.success )
                            s.success( data, status );

                        // Fire the global callback
                        if( s.global )
                            jQuery.event.trigger( "ajaxSuccess", [xml, s] );
                    } else
                        jQuery.handleError(s, xml, status);
                } catch(e)
				{
                    status = "error";
                    jQuery.handleError(s, xml, status, e);
                }

                // The request was completed
                if( s.global )
                    jQuery.event.trigger( "ajaxComplete", [xml, s] );

                // Handle the global AJAX counter
                if ( s.global && ! --jQuery.active )
                    jQuery.event.trigger( "ajaxStop" );

                // Process result
                if ( s.complete )
                    s.complete(xml, status);

                jQuery(io).unbind()

                setTimeout(function()
									{	try
										{
											$(io).remove();
											$(form).remove();

										} catch(e)
										{
											jQuery.handleError(s, xml, null, e);
										}

									}, 100)

                xml = null

            }
        }
        // Timeout checker
        if ( s.timeout > 0 )
		{
            setTimeout(function(){
                // Check to see if the request is still happening
                if( !requestDone ) uploadCallback( "timeout" );
            }, s.timeout);
        }
        try
		{
           // var io = $('#' + frameId);
			var form = $('#' + formId);
			$(form).attr('action', s.url);
			$(form).attr('method', 'POST');
			$(form).attr('target', frameId);
            if(form.encoding)
			{
                form.encoding = 'multipart/form-data';
            }
            else
			{
                form.enctype = 'multipart/form-data';
            }
            $(form).submit();

        } catch(e)
		{
            jQuery.handleError(s, xml, null, e);
        }
        if(window.attachEvent){
            document.getElementById(frameId).attachEvent('onload', uploadCallback);
        }
        else{
            document.getElementById(frameId).addEventListener('load', uploadCallback, false);
        }
        return {abort: function () {}};

    },

    uploadHttpData: function( r, type ) {
        var data = !type;
        data = type == "xml" || data ? r.responseXML : r.responseText;
        // If the type is "script", eval it in global context
        if ( type == "script" )
            jQuery.globalEval( data );
        // Get the JavaScript object, if JSON is used.
        if ( type == "json" )
            eval( "data = " + data );
        // evaluate scripts within html
        if ( type == "html" )
            jQuery("<div>").html(data).evalScripts();
			//alert($('param', data).each(function(){alert($(this).attr('value'));}));
        return data;
    }
})
jquery-3.3.1.js
jquery-1.8.0.min.js
去下载

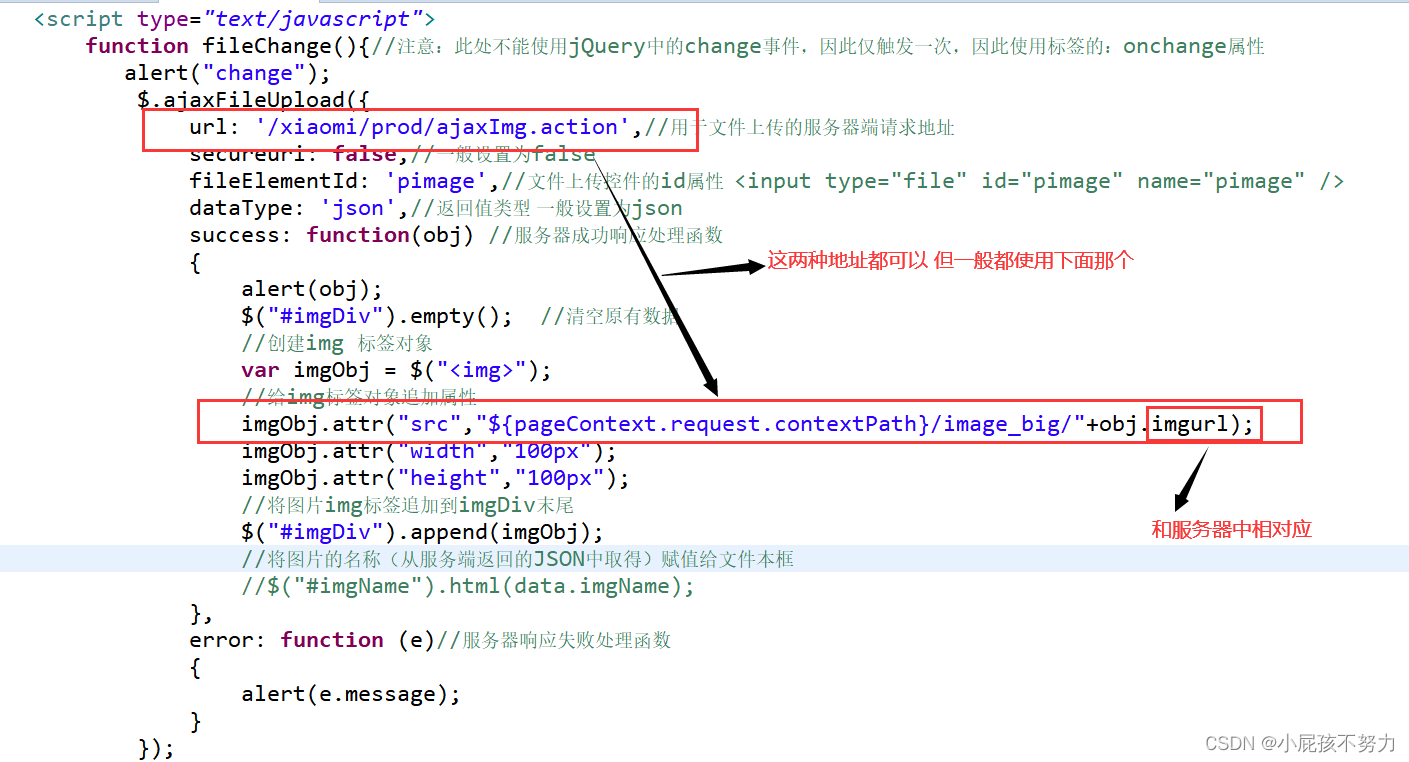
     <script type="text/javascript">
        function fileChange(){//注意:此处不能使用jQuery中的change事件,因此仅触发一次,因此使用标签的:onchange属性
           alert("change");
            $.ajaxFileUpload({
                url: '/xiaomi/prod/ajaxImg.action',//用于文件上传的服务器端请求地址
                secureuri: false,//一般设置为false
                fileElementId: 'pimage',//文件上传控件的id属性  <input type="file" id="pimage" name="pimage" />
                dataType: 'json',//返回值类型 一般设置为json
                success: function(obj) //服务器成功响应处理函数
                {
                	alert(obj);
                    $("#imgDiv").empty();  //清空原有数据
                    //创建img 标签对象
                    var imgObj = $("<img>");
                    //给img标签对象追加属性
                    imgObj.attr("src","${pageContext.request.contextPath}/image_big/"+obj.imgurl);
                    imgObj.attr("width","100px");
                    imgObj.attr("height","100px");
                    //将图片img标签追加到imgDiv末尾
                    $("#imgDiv").append(imgObj);
                    //将图片的名称(从服务端返回的JSON中取得)赋值给文件本框
                    //$("#imgName").html(data.imgName);
                },
                error: function (e)//服务器响应失败处理函数
                {
                    alert(e.message);
                }
            });
        }
    </script>
    </script>
为了使用方便我们导入一个工具类自己手写也可以
package com.bjpowernode.utils;

import java.util.UUID;

public class FileNameUtil {
	//根据UUID生成文件名
	public static String getUUIDFileName() {
		UUID uuid = UUID.randomUUID();
		return uuid.toString().replace("-", "");
	}
	//从请求头中提取文件名和类型
	public static String getRealFileName(String context) {
		// Content-Disposition: form-data; name="myfile"; filename="a_left.jpg"
		int index = context.lastIndexOf("=");
		String filename = context.substring(index + 2, context.length() - 1);
		return filename;
	}
	//根据给定的文件名和后缀截取文件名
	public static String getFileType(String fileName){
		//9527s.jpg
		int index = fileName.lastIndexOf(".");
		return fileName.substring(index);
	}
}
在SringMVC中配置文件上传的核心配置 我当前是叫springDispatcherServlet-servlet.xml
<bean  id="multipartResolver"  class="org.springframework.web.multipart.commons.CommonsMultipartResolver">

</bean>
加入json的依赖
    <dependency>
    <groupId>org.json</groupId>
    <artifactId>json</artifactId>
    <version>20140107</version>
</dependency>
	@ResponseBody
	@RequestMapping("/ajaxImg")
	public Object  ajaxImg(MultipartFile pimage,HttpServletRequest req){
		//1.提取生成文件名UUID随机生成 加上上传图片的后缀
		String   savaName =FileNameUtil.getUUIDFileName()+FileNameUtil.getFileType(pimage.getOriginalFilename());
		//2.得到项目中存储的路径
		System.out.println("savename"+savaName);
		   String path=  req.getServletContext().getRealPath("/image_big");

		//3.转存
		   try {
			pimage.transferTo(new File(path+File.separator+savaName));
		} catch (Exception e) {
			// TODO Auto-generated catch block
			System.out.println("存储失败");
		}
	   //返回客户端json对象,封装图片的路径,为了在页面实现立即回显

		   JSONObject object =new JSONObject();
		   object.put("imgurl", savaName);
		return object.toString();
	}


和文件的那个< input >标签的那个name相对应


 300
300


 被折叠的 条评论
为什么被折叠?
被折叠的 条评论
为什么被折叠?
 到【灌水乐园】发言


