


 文章展示了如何在小程序中创建一个模拟键盘,包括数字输入、删除和清空功能。使用Vue.js的数据绑定和事件处理,以及CSS动画实现光标的闪烁效果。虽然在Android手机上运行流畅,但未测试iOS端兼容性。
这个是找工作的时候一个boss给的考察题,后续是题做出来了那个boss不理人,一点没有礼貌
最后效果演示,已经算是比较流畅的了。不知道ios端会不会有问题,自己手机是安卓的。不完美的就是光标没有拖拽效果
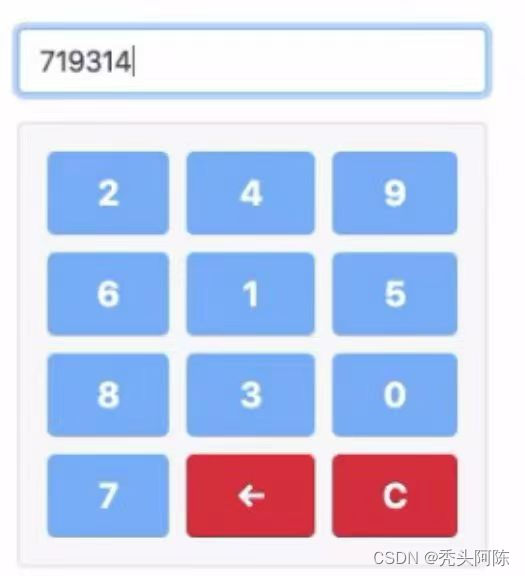
小程序模拟键盘效果演示
首先分析一下效果图
- 样式排版比较简单,flex布局
- 键盘部分只有删除和清空是固定值,数值应该随机生成
html代码
<view class="content">
		<!-- <view class="imput_box">
			<input type="number" v-model="numVal" @focus="inputFocus" @blur="inputBlur" @input="handlerInput">
		</view> -->

		<view class="imput_box" @click="inputFocus">

			<view v-for="(item,index) in content" :key="index" :data-str-index="index+1" @click="getStrPosition">
				<view class="number-block">
					{{item}}
					<view class="cursor cursor-insert" v-if="cursorIndex === index + 1"></view>
				</view>
			</view>
			<view class="cursor" v-if="!cursorIndex"></view>
		</view>

		<view class="keyboard" :class="{'show_active':boardShow}">
			<view class="key_box">
				<p class="keys" v-for="item in originKey" :key="item" @click="handlerClick(item)">
					{{item}}
				</p>

				<p class="keys bg_color" @click="handlerDel">
					<u-icon name="arrow-leftward" color="#fff" size="28"></u-icon>
				</p>
				<p class="keys bg_color" @click="handlerClear">C</p>
			</view>
		</view>

	</view>
css代码
<style lang="scss">
	::v-deep .u-icon--right {
		justify-content: center;
		height: 90rpx;
	}

	.content {
		width: 100%;
		height: 100%;
		display: flex;
		flex-direction: column;
		align-items: center;
	}

	.imput_box {
		width: 90%;
		height: 90rpx;
		line-height: 90rpx;
		display: flex;
		border-radius: 5px;
		border: 2px solid #aeccef;
	}

	.number-block {
		position: relative;
	}

	/* 光标 */
	.cursor-insert {
		position: absolute;
		top: 0;
		right: -1rpx;
	}

	.cursor {
		width: 2rpx;
		height: 90rpx;
		background: #666;
		border-radius: 6rpx;
		animation: twinkling 0.9s infinite;
	}

	@keyframes twinkling {
		0% {
			background: #fff;
		}

		100% {
			background: #666;
		}
	}


	// * 键盘 */
	.keyboard {
		max-height: 0;
		width: 90%;
		background: #f8f6f9;
		position: fixed;
		bottom: 0;
		border: 2px solid #eae8eb;
		border-radius: 5px;
		transition: height 0.3s;
	}

	.show_active {
		max-height: 500px;
	}

	.key_box {
		display: flex;
		justify-content: flex-start;
		align-items: center;
		flex-wrap: wrap;
	}

	.keys {
		box-sizing: border-box;
		flex: 1;
		height: 90rpx;
		line-height: 90rpx;
		text-align: center;
		margin: 10px;
		width: calc((100% - 60px) / 3);
		min-width: calc((100% - 60px) / 3);
		max-width: calc((100% - 60px) / 3);
		background: #77adf7;
		border-radius: 5px;
		color: #fff;
		font-size: 14px;
	}

	.bg_color {
		background: #d32d3e;

	}
</style>
其实这里的假光标是后来才写的。刚开始用input标签,基本的输入、删除、清空都是可以做到的,但是移动光标后再做这些操作有些问题。因为我拿不到光标的位置,上网搜的方法也没用,不知道是哪里除了问题。后来不想找了就直接写假光标
模拟input框的话就需要多一些操作
- 模拟光标元素自定义属性下标必须要+1,不然判断的时候会有问题
- 光标处添加、删除光标位置也要自增自减
- 删除到第一个元素后光标自动跳转到最后
js代码
<script>
	export default {
		data() {
			return {
				// originKey: [1, 2, 3, 4, 5, 6, 7, 8, 9, 0],
				originKey: [],
				boardShow: false,
				// numVal: "",
				content: [],
				cursorIndex: '',
			}
		},
		watch: {
			boardShow(val) {
				if (val) {
					this.randomArr()
				}
			},

		},
		onLoad() {
			// this.randomArr()
		},
		methods: {
			inputFocus(e) {
				this.boardShow = true
			},
			//随机数组
			randomArr() {
				const arr = [1, 2, 3, 4, 5, 6, 7, 8, 9, 0]
				let i = arr.length;
				while (i) {
					let j = Math.floor(Math.random() * i--);
					[arr[j], arr[i]] = [arr[i], arr[j]];
				}
				this.originKey = JSON.parse(JSON.stringify(arr))
				console.log(this.originKey, 333)

			},
			// 添加事件
			handlerClick(val) {
				if (val == 0 && this.content.length == 0) {
					return
				} else {
					if (this.cursorIndex > 0 && this.cursorIndex !== this.content.length) {
						this.content.splice(this.cursorIndex, 0, val)
						this.cursorIndex++
					} else {
						this.content.push(val)
					}
				}
			},
			//删除事件
			handlerDel() {
				console.log(this.cursorIndex)
				if (this.cursorIndex > 0 && this.cursorIndex !== this.content.length) {
					this.content.splice(this.cursorIndex-1, 1)
					this.cursorIndex--
				} else {
					this.content.pop()
				}
			},
			//清空
			handlerClear() {
				// this.numVal = ''
				this.content = []
			},
			// 获取插入光标位置
			getStrPosition(e) {
				let {
					strIndex
				} = e.currentTarget.dataset
				this.cursorIndex = strIndex
				console.log(this.cursorIndex,11)
			},
		}
	}
</script>


 3873
3873

 被折叠的 条评论
为什么被折叠?
被折叠的 条评论
为什么被折叠?
 到【灌水乐园】发言


