


Spring Security快速入门
官方文档: https://docs.spring.io/spring-security/reference/index.html
功能:
- 身份认证(authentication)
- 授权(authorization)
- 防御常见攻击(protection against common attacks)
身份认证:
- 身份认证是验证
谁正在访问系统资源,判断用户是否为合法用户。认证用户的常见方式是要求用户输入用户名和密码。
授权:
- 用户进行身份认证后,系统会控制
谁能访问哪些资源,这个过程叫做授权。用户无法访问没有权限的资源。
身份认证
官方代码示例:GitHub - spring-projects/spring-security-samples
项目的基本搭建
项目搭建完成后,默认端口是8080,直接访问localhost:8080即可。
**浏览器自动跳转到登录页面:**http://localhost:8080/login
项目结构
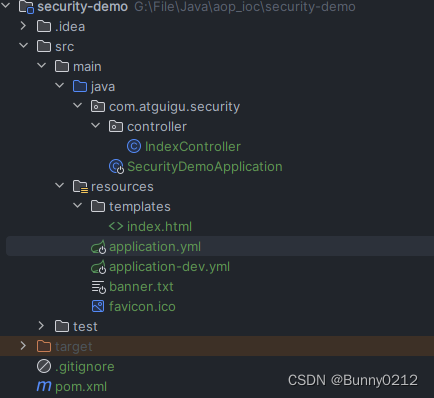
基本包
这里用到了数据库但是在项目刚开始启动时,是没有配置数据库的,这时候启动肯定会报错,所以我们现在启动类上排出连接数据库的类。
<project xmlns:xsi="http://www.w3.org/2001/XMLSchema-instance" xmlns="http://maven.apache.org/POM/4.0.0"
         xsi:schemaLocation="http://maven.apache.org/POM/4.0.0 http://maven.apache.org/xsd/maven-4.0.0.xsd">
    <modelVersion>4.0.0</modelVersion>
    <parent>
        <groupId>org.springframework.boot</groupId>
        <artifactId>spring-boot-starter-parent</artifactId>
        <version>3.2.0</version>
    </parent>

    <groupId>com.atguigu</groupId>
    <artifactId>security-demo</artifactId>
    <version>1.0-SNAPSHOT</version>
    <packaging>jar</packaging>

    <name>security-demo</name>
    <url>https://maven.apache.org</url>

    <properties>
        <project.build.sourceEncoding>UTF-8</project.build.sourceEncoding>
        <maven.compiler.source>21</maven.compiler.source>
        <maven.compiler.target>21</maven.compiler.target>
    </properties>

    <dependencies>
        <dependency>
            <groupId>org.springframework.boot</groupId>
            <artifactId>spring-boot-starter-web</artifactId>
        </dependency>
        <dependency>
            <groupId>org.springframework.boot</groupId>
            <artifactId>spring-boot-starter-security</artifactId>
        </dependency>
        <dependency>
            <groupId>org.thymeleaf.extras</groupId>
            <artifactId>thymeleaf-extras-springsecurity6</artifactId>
        </dependency>

        <dependency>
            <groupId>org.springframework.boot</groupId>
            <artifactId>spring-boot-starter-test</artifactId>
        </dependency>
        <dependency>
            <groupId>org.springframework.security</groupId>
            <artifactId>spring-security-test</artifactId>
        </dependency>
        <dependency>
            <groupId>org.springframework.boot</groupId>
            <artifactId>spring-boot-starter-thymeleaf</artifactId>
        </dependency>

        <dependency>
            <groupId>mysql</groupId>
            <artifactId>mysql-connector-java</artifactId>
            <version>8.0.30</version>
        </dependency>
        <dependency>
            <groupId>com.baomidou</groupId>
            <artifactId>mybatis-plus-boot-starter</artifactId>
            <version>3.5.4.1</version>
            <exclusions>
                <exclusion>
                    <groupId>org.mybatis</groupId>
                    <artifactId>mybatis-spring</artifactId>
                </exclusion>
            </exclusions>
        </dependency>
        <dependency>
            <groupId>org.mybatis</groupId>
            <artifactId>mybatis-spring</artifactId>
            <version>3.0.3</version>
        </dependency>
        <dependency>
            <groupId>org.projectlombok</groupId>
            <artifactId>lombok</artifactId>
        </dependency>
    </dependencies>
</project>
创建启动类
在启动类上排出数据库的类。
import org.springframework.boot.SpringApplication;
import org.springframework.boot.autoconfigure.SpringBootApplication;
import org.springframework.boot.autoconfigure.jdbc.DataSourceAutoConfiguration;

@SpringBootApplication(exclude = DataSourceAutoConfiguration.class)
public class SecurityDemoApplication {
    public static void main(String[] args) {
        SpringApplication.run(SecurityDemoApplication.class, args);
    }
}
创建IndexController
import org.springframework.stereotype.Controller;
import org.springframework.web.bind.annotation.GetMapping;

@Controller
public class IndexController {
    @GetMapping("/")
    public String index() {
        return "index";
    }
}
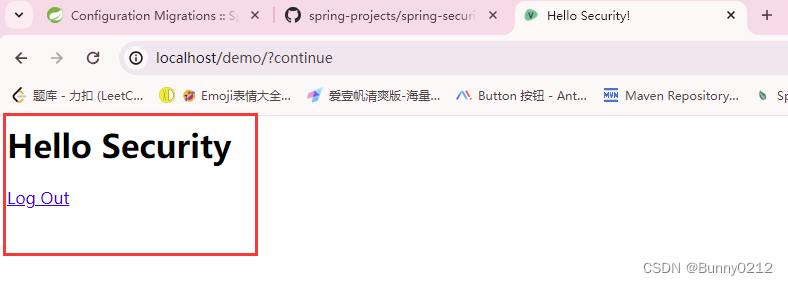
创建index.html
这里使用的动态标签th:href="@{/logout}"目的是可以自动检测路径变化,比如我们在配置文件中配置了全局路径参数。这时候动态标签会自动匹配。
这时需要访问根路径localhost:8080/demo
server:
  servlet:
    context-path: /demo
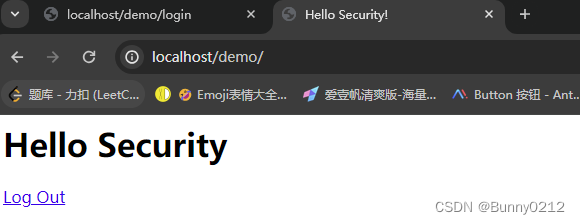
HTML模板
<html lang="zh" xmlns:th="https://www.thymeleaf.org">
<head>
    <title>Hello Security!</title>
</head>
<body>
<h1>Hello Security</h1>
<!--通过使用@{/logout},Thymeleaf将自动处理生成正确的URL,以适应当前的上下文路径。
这样,无论应用程序部署在哪个上下文路径下,生成的URL都能正确地指向注销功能。-->
<a th:href="@{/logout}">Log Out</a>
</body>
</html>
比如点击下面按钮会自动匹配路径并退出。
自定义Security配置
SecurityProperties修改默认用户和密码。
spring:
  security:
    user:
      name: user
      password: admin123
使用配置类
@Configuration
@EnableWebSecurity//Spring项目总需要添加此注解,SpringBoot项目中不需要
public class WebSecurityConfig {
@Bean
public UserDetailsService userDetailsService() {
    InMemoryUserDetailsManager manager = new InMemoryUserDetailsManager();
    manager.createUser( //此行设置断点可以查看创建的user对象
        User
        .withDefaultPasswordEncoder()
        .username("huan") //自定义用户名
        .password("password") //自定义密码
        .roles("USER") //自定义角色
        .build()
    );
    return manager;
}
基于数据库的数据源
环境准备
创建三个数据库表并插入测试数据
-- 创建数据库
CREATE DATABASE `security-demo`;
USE `security-demo`;

-- 创建用户表
CREATE TABLE `user`(
	`id` INT NOT NULL AUTO_INCREMENT PRIMARY KEY,
	`username` VARCHAR(50) DEFAULT NULL ,
	`password` VARCHAR(500) DEFAULT NULL,
	`enabled` BOOLEAN NOT NULL
);
-- 唯一索引
CREATE UNIQUE INDEX `user_username_uindex` ON `user`(`username`);

-- 插入用户数据(密码是 "abc" )
INSERT INTO `user` (`username`, `password`, `enabled`) VALUES
('admin', '{bcrypt}$2a$10$GRLdNijSQMUvl/au9ofL.eDwmoohzzS7.rmNSJZ.0FxO/BTk76klW', TRUE),
('Helen', '{bcrypt}$2a$10$GRLdNijSQMUvl/au9ofL.eDwmoohzzS7.rmNSJZ.0FxO/BTk76klW', TRUE),
('Tom', '{bcrypt}$2a$10$GRLdNijSQMUvl/au9ofL.eDwmoohzzS7.rmNSJZ.0FxO/BTk76klW', TRUE);
引入依赖
这个在之前也引用过了。
<dependency>
    <groupId>mysql</groupId>
    <artifactId>mysql-connector-java</artifactId>
    <version>8.0.30</version>
</dependency>

<dependency>
    <groupId>com.baomidou</groupId>
    <artifactId>mybatis-plus-boot-starter</artifactId>
    <version>3.5.4.1</version>
    <exclusions>
        <exclusion>
            <groupId>org.mybatis</groupId>
            <artifactId>mybatis-spring</artifactId>
        </exclusion>
    </exclusions>
</dependency>

<dependency>
    <groupId>org.mybatis</groupId>
    <artifactId>mybatis-spring</artifactId>
    <version>3.0.3</version>
</dependency>

<dependency>
    <groupId>org.projectlombok</groupId>
    <artifactId>lombok</artifactId>
</dependency>
配置文件中
datasource:
  type: com.zaxxer.hikari.HikariDataSource
  driver-class-name: com.mysql.cj.jdbc.Driver
  url: jdbc:mysql://${bunny.datasource.host}:${bunny.datasource.port}/${bunny.datasource.sqlData}?serverTimezone=GMT%2B8&useSSL=false&characterEncoding=utf-8&allowPublicKeyRetrieval=true
  username: ${bunny.datasource.username}
  password: ${bunny.datasource.password}
启动类
启动类记得删除排出数据库源的类。
@SpringBootApplication
public class SecurityDemoApplication {
    public static void main(String[] args) {
        SpringApplication.run(SecurityDemoApplication.class, args);
    }
}
配置数据库查询
创建DBUserDetailsManager类实现UserDetailsManager, UserDetailsPasswordService方法。
查询数据库字段进行匹配,如果查询到并且密码正确就可以放行。记得在方法上加上@Configuration注解。
@Configuration
public class DBUserDetailsManager implements UserDetailsManager, UserDetailsPasswordService {

    @Resource
    private UserMapper userMapper;

    @Override
    public UserDetails loadUserByUsername(String username) throws UsernameNotFoundException {

        QueryWrapper<User> queryWrapper = new QueryWrapper<>();
        queryWrapper.eq("username", username);
        User user = userMapper.selectOne(queryWrapper);
        if (user == null) {
            throw new UsernameNotFoundException(username);
        } else {
            Collection<GrantedAuthority> authorities = new ArrayList<>();
            return new org.springframework.security.core.userdetails.User(
                    user.getUsername(),
                    user.getPassword(),
                    user.getEnabled(),
                    true, // 用户账号是否过期
                    true, // 用户凭证是否过期
                    true, // 用户是否未被锁定
                    authorities); // 权限列表
        }
    }

    @Override
    public UserDetails updatePassword(UserDetails user, String newPassword) {
        return null;
    }

    @Override
    public void createUser(UserDetails user) {

    }

    @Override
    public void updateUser(UserDetails user) {

    }

    @Override
    public void deleteUser(String username) {

    }

    @Override
    public void changePassword(String oldPassword, String newPassword) {

    }

    @Override
    public boolean userExists(String username) {
        return false;
    }
}
配置Security默认配置
formLogin(withDefaults())提供默认的登录模拟页面。- 如果开启了
formLogin(withDefaults())可以httpBasic(withDefaults())屏蔽。
import org.springframework.context.annotation.Bean;
import org.springframework.context.annotation.Configuration;
import org.springframework.security.config.annotation.web.builders.HttpSecurity;
import org.springframework.security.config.annotation.web.configuration.EnableWebSecurity;
import org.springframework.security.web.SecurityFilterChain;

import static org.springframework.security.config.Customizer.withDefaults;

@Configuration
@EnableWebSecurity// Spring项目总需要添加此注解,SpringBoot项目中不需要
public class WebSecurityConfig {
    @Bean
    public SecurityFilterChain filterChain(HttpSecurity httpSecurity) throws Exception {
        // authorizeRequests():开启授权保护
        // anyRequest():对所有请求开启授权保护
        // authenticated():已认证请求会自动被授权
        httpSecurity
                .authorizeRequests(authorize -> authorize
                        .anyRequest()
                        .authenticated())
                // .formLogin(withDefaults())// 表单授权方式
                .httpBasic(withDefaults());// 基本授权方式

        return httpSecurity.build();
    }
}
添加用户
在Controller层添加接口,写入添加用户的方法,之后在实现接口中添加这个方法接口。
@RestController
@RequestMapping("/user")
@Tag(name = "用户请求接口")
public class UserController {
    @Autowired
    private UserService userService;

    @Operation(summary = "添加用户")
    @PostMapping("/add")
    public void addUser(@RequestBody User user) {
        userService.addUserDetails(user);
    }
}
在实现接口中实现这个方法。
- 注入
DBUserDetailsManager之后创建这个user。
import com.atguigu.security.config.DBUserDetailsManager;
import com.atguigu.security.entity.User;
import com.atguigu.security.mapper.UserMapper;
import com.atguigu.security.service.UserService;
import com.baomidou.mybatisplus.extension.service.impl.ServiceImpl;
import org.springframework.beans.factory.annotation.Autowired;
import org.springframework.security.core.userdetails.UserDetails;
import org.springframework.security.crypto.bcrypt.BCryptPasswordEncoder;
import org.springframework.stereotype.Service;

@Service
public class UserServiceImpl extends ServiceImpl<UserMapper, User> implements UserService {
    @Autowired
    private DBUserDetailsManager manager;

    /**
     * 添加用户
     *
     * @param user 用户信息
     */
    @Override
    public void addUserDetails(User user) {
        BCryptPasswordEncoder encoder = new BCryptPasswordEncoder();

        // 这里的User使用的是springSecurity中的User
        UserDetails userDetails = org.springframework.security.core.userdetails.User
                .withDefaultPasswordEncoder()
                .username(user.getUsername())
                .password(user.getPassword())
                .build();

        manager.createUser(userDetails);
    }
}
在方法中添加以下内容createUser这个方法
- 导入了一些需要使用的类,包括
User实体类和UserMapper接口。 - 声明了一个
UserMapper类型的字段userMapper。 - 实现了
createUser方法,该方法用于创建用户。在这个示例中,该方法将传入的UserDetails对象中的用户名和密码插入到数据库中。 - 实现了
userExists方法,该方法用于检查用户是否存在。在这个示例中,该方法始终返回false。
import com.atguigu.security.entity.User;
import com.atguigu.security.mapper.UserMapper;
import com.baomidou.mybatisplus.core.conditions.query.QueryWrapper;
import jakarta.annotation.Resource;
import org.springframework.context.annotation.Configuration;
import org.springframework.security.core.GrantedAuthority;
import org.springframework.security.core.userdetails.UserDetails;
import org.springframework.security.core.userdetails.UserDetailsPasswordService;
import org.springframework.security.core.userdetails.UsernameNotFoundException;
import org.springframework.security.provisioning.UserDetailsManager;

import java.util.ArrayList;
import java.util.Collection;

@Configuration
public class DBUserDetailsManager implements UserDetailsManager, UserDetailsPasswordService {

    @Resource
    private UserMapper userMapper;

    @Override
    public UserDetails loadUserByUsername(String username) throws UsernameNotFoundException {

        QueryWrapper<User> queryWrapper = new QueryWrapper<>();
        queryWrapper.eq("username", username);
        User user = userMapper.selectOne(queryWrapper);
        if (user == null) {
            throw new UsernameNotFoundException(username);
        } else {
            Collection<GrantedAuthority> authorities = new ArrayList<>();
            return new org.springframework.security.core.userdetails.User(
                    user.getUsername(),
                    user.getPassword(),
                    user.getEnabled(),
                    true, // 用户账号是否过期
                    true, // 用户凭证是否过期
                    true, // 用户是否未被锁定
                    authorities); // 权限列表
        }
    }

    @Override
    public void createUser(UserDetails userDetails) {
        // 插入数据库方法
        User user = new User();
        user.setUsername(userDetails.getUsername());
        user.setPassword(userDetails.getPassword());
        user.setEnabled(true);
        userMapper.insert(user);
    }

    @Override
    public boolean userExists(String username) {
        return false;
    }
    // 略...
}
为了方便调试,springSecurity默认开启了csrf(这要求请求参数中必须有一个隐藏的**_csrf**字段),为了测试这里就暂时关闭。
在filterChain方法中添加如下代码,关闭csrf攻击防御
//关闭csrf攻击防御
http.csrf((csrf) -> {
    csrf.disable();
});
代码示例:
@Configuration
@EnableWebSecurity// Spring项目总需要添加此注解,SpringBoot项目中不需要
public class WebSecurityConfig {
    @Bean
    public SecurityFilterChain filterChain(HttpSecurity httpSecurity) throws Exception {
        // authorizeRequests():开启授权保护
        // anyRequest():对所有请求开启授权保护
        // authenticated():已认证请求会自动被授权
        httpSecurity
                .authorizeRequests(authorize -> authorize
                        .anyRequest()
                        .authenticated())
                .formLogin(withDefaults())// 表单授权方式
                .httpBasic(withDefaults());// 基本授权方式

        // 关闭csrf攻击
        httpSecurity.csrf(AbstractHttpConfigurer::disable);
        return httpSecurity.build();
    }
}
密码加密测试
创建测试方法:
@Slf4j
public class PasswordTest {
    @Test
    void testPassword() throws Exception {
        BCryptPasswordEncoder encoder = new BCryptPasswordEncoder();

        String password = encoder.encode("password");
        log.info("Password===>:{}", password);

        // 密码校验
        Assert.isTrue(encoder.matches("password", password), "密码不一致");
    }
}
自定义登录页面
创建登录页
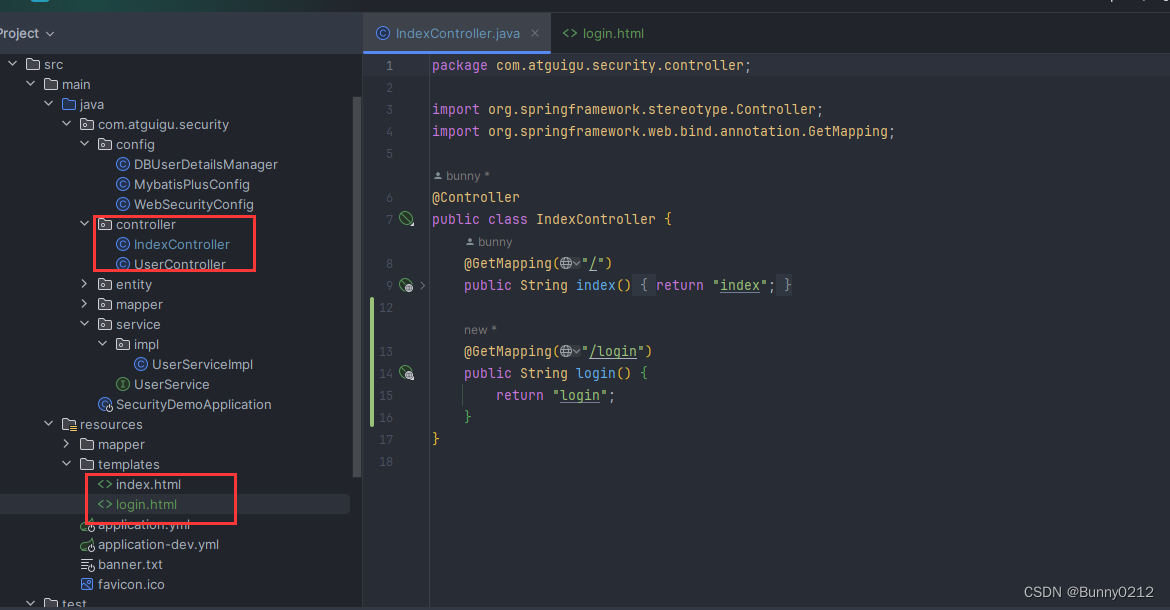
第一步:创建Controller
import org.springframework.stereotype.Controller;
import org.springframework.web.bind.annotation.GetMapping;

@Controller
public class IndexController {
    @GetMapping("/login")
    public String login() {
        return "login";
    }
}
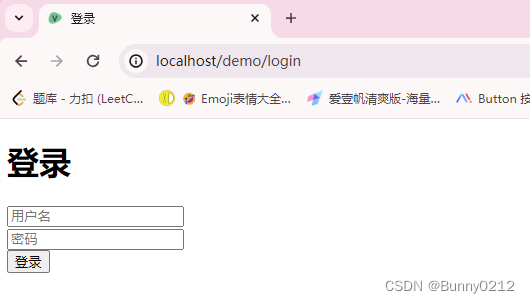
第二步:创建HTML
<!DOCTYPE html>
<html xmlns:th="https://www.thymeleaf.org">
<head>
    <title>登录</title>
</head>
<body>
<h1>登录</h1>
<div th:if="${param.error}">
    错误的用户名和密码.
</div>

<!--method必须为"post"-->
<!--th:action="@{/login}" ,
使用动态参数,表单中会自动生成_csrf隐藏字段,用于防止csrf攻击
login: 和登录页面保持一致即可,SpringSecurity自动进行登录认证-->
<form method="post" th:action="@{/login}">
    <div>
        <!--name必须为"username"-->
        <input name="username" placeholder="用户名" type="text"/>
    </div>
    <div>
        <!--name必须为"password"-->
        <input name="password" placeholder="密码" type="password"/>
    </div>
    <input type="submit" value="登录"/>
</form>
</body>
</html>
第三步:配置Security
import org.springframework.context.annotation.Bean;
import org.springframework.context.annotation.Configuration;
import org.springframework.security.config.annotation.web.builders.HttpSecurity;
import org.springframework.security.config.annotation.web.configuration.EnableWebSecurity;
import org.springframework.security.config.annotation.web.configurers.AbstractHttpConfigurer;
import org.springframework.security.web.SecurityFilterChain;

import static org.springframework.security.config.Customizer.withDefaults;

@Configuration
@EnableWebSecurity// Spring项目总需要添加此注解,SpringBoot项目中不需要
public class WebSecurityConfig {
    @Bean
    public SecurityFilterChain filterChain(HttpSecurity httpSecurity) throws Exception {
        // authorizeRequests():开启授权保护
        // anyRequest():对所有请求开启授权保护
        // authenticated():已认证请求会自动被授权
        httpSecurity
                .authorizeRequests(authorize -> authorize
                        .anyRequest()
                        .authenticated())
                .formLogin(withDefaults())// 表单授权方式
                .httpBasic(withDefaults());// 基本授权方式

        // 关闭csrf攻击
        httpSecurity.csrf(AbstractHttpConfigurer::disable);

        // 配置SecurityFilterChain-自定义登录页
        httpSecurity.formLogin(form -> {
            form.loginPage("/login").permitAll()// 登录页面无需授权即可访问
                    .usernameParameter("username")// 自定义表单用户名参数,默认是username
                    .passwordParameter("password")// 自定义表单密码参数,默认是password
                    .failureUrl("/login?error"); // 登录失败的返回地址
        });

        return httpSecurity.build();
    }
}
登录页的细节
在WebSecurityConfig中自定义前端传递值,默认传递用户名和密码为username和password,在下面示例中可以修改为自定义的用户名和密码参数。
// 配置SecurityFilterChain-自定义登录页
httpSecurity.formLogin(form -> {
    form.loginPage("/login").permitAll()// 登录页面无需授权即可访问
            .usernameParameter("username")// 自定义表单用户名参数,默认是username
            .passwordParameter("password")// 自定义表单密码参数,默认是password
            .failureUrl("/login?error"); // 登录失败的返回地址
});
自定义前端传递参数
// 配置SecurityFilterChain-自定义登录页
httpSecurity.formLogin(form -> {
    form.loginPage("自定义登录页").permitAll()// 登录页面无需授权即可访问
            .usernameParameter("自定义用户名")// 自定义表单用户名参数,默认是username
            .passwordParameter("自定义密码")// 自定义表单密码参数,默认是password
            .failureUrl("自定义错误页"); // 登录失败的返回地址
});
认证响应结果
移入fastjson
<dependency>
    <groupId>com.alibaba.fastjson2</groupId>
    <artifactId>fastjson2</artifactId>
    <version>2.0.37</version>
</dependency>
认证成功返回
import com.alibaba.fastjson2.JSON;
import com.atguigu.security.result.Result;
import jakarta.servlet.ServletException;
import jakarta.servlet.http.HttpServletRequest;
import jakarta.servlet.http.HttpServletResponse;
import org.springframework.security.core.Authentication;
import org.springframework.security.web.authentication.AuthenticationSuccessHandler;

import java.io.IOException;

public class MyAuthenticationSuccessHandler implements AuthenticationSuccessHandler {
    @Override
    public void onAuthenticationSuccess(HttpServletRequest request, HttpServletResponse response, Authentication authentication) throws IOException, ServletException {
        // 获取用户身份信息
        Object principal = authentication.getPrincipal();
        // 获取用户凭证信息
        // Object credentials = authentication.getCredentials();
        // 获取用户权限信息
        // Collection<? extends GrantedAuthority> authorities = authentication.getAuthorities();

        Result<Object> result = Result.success(principal);

        // 返回
        response.setContentType("application/json;charset=UTF-8");
        response.getWriter().println(JSON.toJSON(result));
    }
}
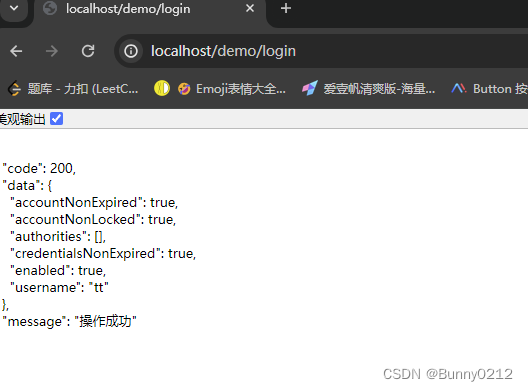
在WebSecurityConfig类中添加以下.successHandler(new MyAuthenticationSuccessHandler());表示成功的返回结果,自定义结果。
如果想看Result的类翻到最下面附录。
// 配置SecurityFilterChain-自定义登录页
httpSecurity.formLogin(form -> {
    form.loginPage("/login").permitAll()// 登录页面无需授权即可访问
            .usernameParameter("username")// 自定义表单用户名参数,默认是username
            .passwordParameter("password")// 自定义表单密码参数,默认是password
            .failureUrl("/login?error") // 登录失败的返回地址
            .successHandler(new MyAuthenticationSuccessHandler());// 认证成功时的处理
});
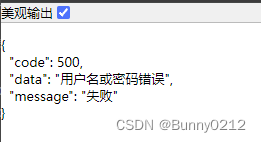
认证失败返回
和成功的返回相似,只需要修改两个地方即可。
认证失败的类
import com.alibaba.fastjson2.JSON;
import com.atguigu.security.result.Result;
import jakarta.servlet.ServletException;
import jakarta.servlet.http.HttpServletRequest;
import jakarta.servlet.http.HttpServletResponse;
import org.springframework.security.core.AuthenticationException;
import org.springframework.security.web.authentication.AuthenticationFailureHandler;

import java.io.IOException;

public class MyAuthenticationFailureHandler implements AuthenticationFailureHandler {
    @Override
    public void onAuthenticationFailure(HttpServletRequest request, HttpServletResponse response, AuthenticationException exception) throws IOException, ServletException {
        // 错误消息
        String localizedMessage = exception.getLocalizedMessage();
        Result<String> result = Result.error(localizedMessage);

        // 转成JSON
        Object json = JSON.toJSON(result);

        // 返回响应
        response.setContentType("application/json;charset=UTF-8");
        response.getWriter().println(json);
    }
}
在WebSecurityConfig类中添加failureHandler即可.failureHandler(new MyAuthenticationFailureHandler());
// 配置SecurityFilterChain-自定义登录页
httpSecurity.formLogin(form -> {
    form.loginPage("/login").permitAll()// 登录页面无需授权即可访问
            .usernameParameter("username")// 自定义表单用户名参数,默认是username
            .passwordParameter("password")// 自定义表单密码参数,默认是password
            .failureUrl("/login?error") // 登录失败的返回地址
            .successHandler(new MyAuthenticationSuccessHandler())// 认证成功时的处理
            .failureHandler(new MyAuthenticationFailureHandler());// 认证失败的处理
});
注销响应
和前面成功和失败过程相似,只需要在from中再添加即可。
import com.alibaba.fastjson2.JSON;
import com.atguigu.security.result.Result;
import jakarta.servlet.ServletException;
import jakarta.servlet.http.HttpServletRequest;
import jakarta.servlet.http.HttpServletResponse;
import org.springframework.security.core.Authentication;
import org.springframework.security.web.authentication.logout.LogoutSuccessHandler;

import java.io.IOException;

public class MyLogoutSuccessHandler implements LogoutSuccessHandler {
    @Override
    public void onLogoutSuccess(HttpServletRequest request, HttpServletResponse response, Authentication authentication) throws IOException, ServletException {
        // 创建结果对象
        Result<Object> result = Result.success();

        // 转为JSON
        Object json = JSON.toJSON(result);

        // 返回响应
        response.setContentType("application/json;charset=UTF-8");
        response.getWriter().println(json);
    }
}
在WebSecurityConfig类中添加以下。
// 注销响应
httpSecurity.logout(logout -> {
    logout.logoutSuccessHandler(new MyLogoutSuccessHandler());// 注销成功时的处理
});

之后访问:http://localhost/demo
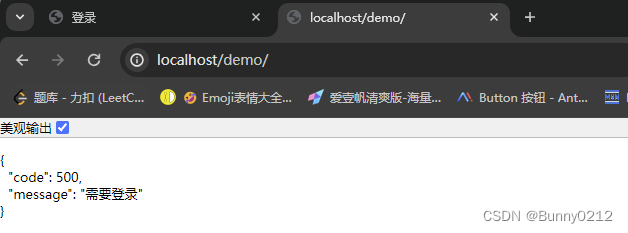
请求未认证接口
import com.alibaba.fastjson2.JSON;
import com.atguigu.security.result.Result;
import com.atguigu.security.result.ResultCodeEnum;
import jakarta.servlet.ServletException;
import jakarta.servlet.http.HttpServletRequest;
import jakarta.servlet.http.HttpServletResponse;
import lombok.extern.slf4j.Slf4j;
import org.springframework.security.core.AuthenticationException;
import org.springframework.security.web.AuthenticationEntryPoint;

import java.io.IOException;

/**
 * 请求未认证接口
 */
@Slf4j
public class MyAuthenticationEntryPoint implements AuthenticationEntryPoint {
    @Override
    public void commence(HttpServletRequest request, HttpServletResponse response, AuthenticationException authException) throws IOException, ServletException {
        // 错误信息
        String localizedMessage = authException.getLocalizedMessage();
        log.error("请求未认证接口:{}", localizedMessage);

        // 创建结果对象
        Result<Object> result = Result.error(ResultCodeEnum.FAIL_NEED_LOGIN);

        // 返回响应
        response.setContentType("application/json;charset=UTF-8");
        response.getWriter().println(JSON.toJSON(result));
    }
}
在WebSecurityConfig类中添加以下。
// 请求未认证接口
httpSecurity.exceptionHandling(exception -> {
    // 请求未认证的接口
    exception.authenticationEntryPoint(new MyAuthenticationEntryPoint());
});
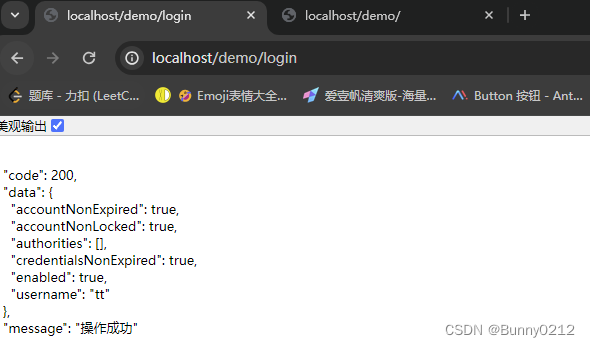
访问:http://localhost/demo/
登录后
跨域访问
在WebSecurityConfig类中添加以下。
// 跨域访问权限
httpSecurity.cors(withDefaults());
获取用户认证信息
USerVo类见附录。
@RestController
public class IndexController {
    @GetMapping("/")
    public Result<UserVo> index() {
        SecurityContext context = SecurityContextHolder.getContext();
        Authentication authentication = context.getAuthentication();

        // 用户名
        String username = authentication.getName();
        // 身份
        Object principal = authentication.getPrincipal();
        // 凭证(脱敏)
        Object credentials = authentication.getCredentials();
        // 权限
        Collection<? extends GrantedAuthority> authorities = authentication.getAuthorities();

        // 整理返回参数
        UserVo userVo = UserVo.builder().authorities(authorities).credentials(credentials)
                .principal(principal).username(username).build();

        return Result.success(userVo);
    }
}
会话并发处理
后登录的账号会使先登录的账号失效。实现方式和之前的差不多也是实现一个接口。
import com.alibaba.fastjson2.JSON;
import com.atguigu.security.result.Result;
import com.atguigu.security.result.ResultCodeEnum;
import jakarta.servlet.ServletException;
import jakarta.servlet.http.HttpServletResponse;
import org.springframework.security.web.session.SessionInformationExpiredEvent;
import org.springframework.security.web.session.SessionInformationExpiredStrategy;

import java.io.IOException;

public class MySessionInformationExpiredStrategy implements SessionInformationExpiredStrategy {
    @Override
    public void onExpiredSessionDetected(SessionInformationExpiredEvent event) throws IOException, ServletException {
        // 创建结果对象
        Result<Object> result = Result.error(ResultCodeEnum.LOGGED_IN_FROM_ANOTHER_DEVICE);

        // 转为JSON
        Object json = JSON.toJSON(result);

        // 返回响应
        HttpServletResponse response = event.getResponse();
        response.setContentType("application/json;charset=UTF-8");
        response.getWriter().println(json);
    }
}
在WebSecurityConfig类中添加以下。
// 后登录的账号会使先登录的账号失效
httpSecurity.sessionManagement(session -> {
    session.maximumSessions(1)
            .expiredSessionStrategy(new MySessionInformationExpiredStrategy());
});
授权访问
授权管理的实现在SpringSecurity中非常灵活,可以帮助应用程序实现以下两种常见的授权需求:
-
用户-权限-资源:例如张三的权限是添加用户、查看用户列表,李四的权限是查看用户列表
-
用户-角色-权限-资源:例如 张三是角色是管理员、李四的角色是普通用户,管理员能做所有操作,普通用户只能查看信息
基于request的授权
需求:
- 具有USER_LIST权限的用户可以访问/user/list接口
- 具有USER_ADD权限的用户可以访问/user/add接口
在WebSecurityConfig添加下面内容。
// authorizeRequests():开启授权保护
httpSecurity.authorizeRequests(authorize -> {
    // 具有USER_LIST权限的用户可以访问/user/list,访问路径是Controller中的路径
    authorize.requestMatchers("/user/list").hasAuthority("USER_LIST")
            // 具有USER_ADD权限的用户可以访问/user/add
            .requestMatchers("/user/add").hasAuthority("USER_ADD")
            // 对所有请求开启授权保护
            .anyRequest()
            // 已认证请求会自动被授权
            .authenticated();
});
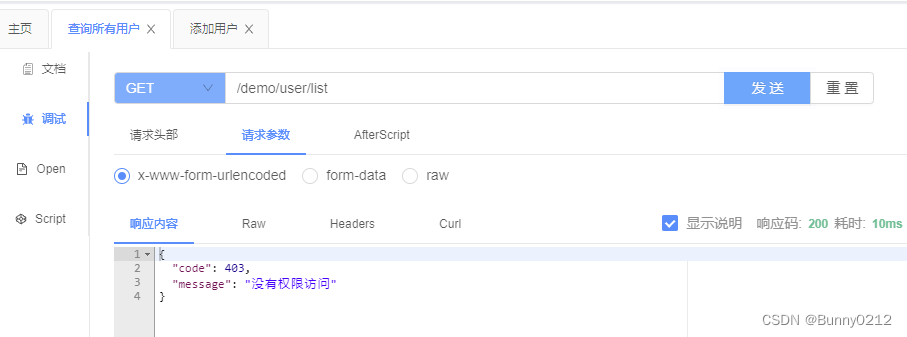
之后在DBUserDetailsManager中授予访问权限。
在其中注释authorities.add(() -> "USER_LIST")会发现没有权限访问。
// 授予访问权限
authorities.add(() -> "USER_LIST");
authorities.add(() -> "USER_ADD");
完整代码
import com.atguigu.security.mapper.UserMapper;
import com.atguigu.security.model.entity.User;
import com.baomidou.mybatisplus.core.conditions.query.QueryWrapper;
import jakarta.annotation.Resource;
import org.springframework.context.annotation.Configuration;
import org.springframework.security.core.GrantedAuthority;
import org.springframework.security.core.userdetails.UserDetails;
import org.springframework.security.core.userdetails.UserDetailsPasswordService;
import org.springframework.security.core.userdetails.UsernameNotFoundException;
import org.springframework.security.provisioning.UserDetailsManager;

import java.util.ArrayList;
import java.util.Collection;

@Configuration
public class DBUserDetailsManager implements UserDetailsManager, UserDetailsPasswordService {

    @Resource
    private UserMapper userMapper;

    @Override
    public UserDetails loadUserByUsername(String username) throws UsernameNotFoundException {
        QueryWrapper<User> queryWrapper = new QueryWrapper<>();
        queryWrapper.eq("username", username);
        User user = userMapper.selectOne(queryWrapper);
        if (user == null) {
            throw new UsernameNotFoundException(username);
        } else {
            Collection<GrantedAuthority> authorities = new ArrayList<>();
            // 授予访问权限
            authorities.add(() -> "USER_LIST");
            authorities.add(() -> "USER_ADD");
            return new org.springframework.security.core.userdetails.User(
                    user.getUsername(),
                    user.getPassword(),
                    user.getEnabled(),
                    true, // 用户账号是否过期
                    true, // 用户凭证是否过期
                    true, // 用户是否未被锁定
                    authorities); // 权限列表
        }
    }
}
请求未授权的接口
创建未授权访问类,返回对象。
import com.alibaba.fastjson2.JSON;
import com.atguigu.security.result.Result;
import com.atguigu.security.result.ResultCodeEnum;
import jakarta.servlet.ServletException;
import jakarta.servlet.http.HttpServletRequest;
import jakarta.servlet.http.HttpServletResponse;
import org.springframework.security.access.AccessDeniedException;
import org.springframework.security.web.access.AccessDeniedHandler;

import java.io.IOException;

public class MyAccessDeniedHandler implements AccessDeniedHandler {
    @Override
    public void handle(HttpServletRequest request, HttpServletResponse response, AccessDeniedException accessDeniedException) throws IOException, ServletException {
        Result<Object> result = Result.error(ResultCodeEnum.FAIL_NO_ACCESS_DENIED);

        Object json = JSON.toJSON(result);

        // 返回响应
        response.setContentType("application/json;charset=UTF-8");
        response.getWriter().println(json);
    }
}
在WebSecurityConfig添加下面内容。
// 请求未授权的接口
httpSecurity.exceptionHandling(exception -> {
    exception.authenticationEntryPoint(new MyAuthenticationEntryPoint());
    // 没有权限访问
    exception.accessDeniedHandler(new MyAccessDeniedHandler());
});
更多的例子:Method Security :: Spring Security
用户-角色-资源
**需求:**角色为ADMIN的用户才可以访问/user/**路径下的资源
配置角色
在filterChain方法中配置;将之前的手动添加的路径注释。
hasRole("ADMIN")可以自定义内容。
// authorizeRequests():开启授权保护
httpSecurity.authorizeRequests(authorize -> {
    // 具有USER_LIST权限的用户可以访问/user/list,访问路径是Controller中的路径
    authorize
            // 具有管理员角色的用户可以访问/user/**
            .requestMatchers("/user/**").hasRole("ADMIN")
            // .requestMatchers("/user/list").hasAuthority("USER_LIST")
            // 具有USER_ADD权限的用户可以访问/user/add
            // .requestMatchers("/user/add").hasAuthority("USER_ADD")
            // 对所有请求开启授权保护
            .anyRequest()
            // 已认证请求会自动被授权
            .authenticated();
});
配置DBUserDetailsManager,改变roles("USER")
- 如果为
roles("ADMIN")表示都可以访问 - 如果为
roles("USER")表示只是普通用户。
@Override
public UserDetails loadUserByUsername(String username) throws UsernameNotFoundException {
    QueryWrapper<User> queryWrapper = new QueryWrapper<>();
    queryWrapper.eq("username", username);
    User user = userMapper.selectOne(queryWrapper);
    if (user == null) {
        throw new UsernameNotFoundException(username);
    } else {
        // Collection<GrantedAuthority> authorities = new ArrayList<>();
        // // 授予访问权限
        // authorities.add(() -> "USER_LIST");
        // authorities.add(() -> "USER_ADD");
        // return new org.springframework.security.core.userdetails.User(
        //         user.getUsername(),
        //         user.getPassword(),
        //         user.getEnabled(),
        //         true, // 用户账号是否过期
        //         true, // 用户凭证是否过期
        //         true, // 用户是否未被锁定
        //         authorities); // 权限列表

        return org.springframework.security.core.userdetails.User
                .withUsername(user.getUsername())
                .password(user.getPassword())
                .disabled(!user.getEnabled())
                .credentialsExpired(false)
                .accountLocked(false)
                // SecurityFilterChain中配置hasRole("ADMIN")来判断的
                .roles("USER")
                .build();
    }
}
为roles("ADMIN")时全部可以访问。

为普通用户时。
RBAC设置权限表方式
RBAC(Role-Based Access Control,基于角色的访问控制)是一种常用的数据库设计方案,它将用户的权限分配和管理与角色相关联。以下是一个基本的RBAC数据库设计方案的示例:
- 用户表(User table):包含用户的基本信息,例如用户名、密码和其他身份验证信息。
| 列名 | 数据类型 | 描述 |
|---|---|---|
| user_id | int | 用户ID |
| username | varchar | 用户名 |
| password | varchar | 密码 |
| varchar | 电子邮件地址 | |
| … | … | … |
- 角色表(Role table):存储所有可能的角色及其描述。
| 列名 | 数据类型 | 描述 |
|---|---|---|
| role_id | int | 角色ID |
| role_name | varchar | 角色名称 |
| description | varchar | 角色描述 |
| … | … | … |
- 权限表(Permission table):定义系统中所有可能的权限。
| 列名 | 数据类型 | 描述 |
|---|---|---|
| permission_id | int | 权限ID |
| permission_name | varchar | 权限名称 |
| description | varchar | 权限描述 |
| … | … | … |
- 用户角色关联表(User-Role table):将用户与角色关联起来。
| 列名 | 数据类型 | 描述 |
|---|---|---|
| user_role_id | int | 用户角色关联ID |
| user_id | int | 用户ID |
| role_id | int | 角色ID |
| … | … | … |
- 角色权限关联表(Role-Permission table):将角色与权限关联起来。
| 列名 | 数据类型 | 描述 |
|---|---|---|
| role_permission_id | int | 角色权限关联ID |
| role_id | int | 角色ID |
| permission_id | int | 权限ID |
| … | … | … |
在这个设计方案中,用户可以被分配一个或多个角色,而每个角色又可以具有一个或多个权限。通过对用户角色关联和角色权限关联表进行操作,可以实现灵活的权限管理和访问控制。
当用户尝试访问系统资源时,系统可以根据用户的角色和权限决定是否允许访问。这样的设计方案使得权限管理更加简单和可维护,因为只需调整角色和权限的分配即可,而不需要针对每个用户进行单独的设置。
基于方法的授权
开启方法授权
在配置文件中添加如下注解,或者在启动类上添加都可以。
- 默认如果开启了方法授权访问同时也配置了全局角色为
roles("ADMIN")那么所有接口都是可以访问的。
@EnableMethodSecurity
给用户授予角色和权限
DBUserDetailsManager中的loadUserByUsername方法,添加authorities("USER_ADD", "USER_UPDATE")
roles("ADMIN"):与authorities不能同时使用
@Override
public UserDetails loadUserByUsername(String username) throws UsernameNotFoundException {
    QueryWrapper<User> queryWrapper = new QueryWrapper<>();
    queryWrapper.eq("username", username);
    User user = userMapper.selectOne(queryWrapper);
    if (user == null) {
        throw new UsernameNotFoundException(username);
    } else {
        // Collection<GrantedAuthority> authorities = new ArrayList<>();
        // // 授予访问权限
        // authorities.add(() -> "USER_LIST");
        // authorities.add(() -> "USER_ADD");
        // return new org.springframework.security.core.userdetails.User(
        //         user.getUsername(),
        //         user.getPassword(),
        //         user.getEnabled(),
        //         true, // 用户账号是否过期
        //         true, // 用户凭证是否过期
        //         true, // 用户是否未被锁定
        //         authorities); // 权限列表

        return org.springframework.security.core.userdetails.User
                .withUsername(user.getUsername())
                .password(user.getPassword())
                .disabled(!user.getEnabled())
                .credentialsExpired(false)
                .accountLocked(false)
                // SecurityFilterChain中配置hasRole("ADMIN")来判断的
                // .roles("ADMIN")// 与authorities不能同时使用
                // 给用户授予角色和权限
                .authorities("USER_ADD", "USER_UPDATE")
                .build();
    }
}
常用授权注解
hasAnyRole('ADMIN')当前角色权限为ADMIN同时访问用户也要为authentication.name == 'admin'
@RestController
@RequestMapping("/user")
@Tag(name = "用户请求接口")
public class UserController {
    @Autowired
    private UserService userService;

    @Operation(summary = "查询所有用户")
    // @PreAuthorize("hasAnyRole('ADMIN')")
    @PreAuthorize("hasAnyRole('ADMIN') and authentication.name == 'admin'")// 编写逻辑表达式
    @GetMapping("/list")
    public List<User> getList() {
        return userService.list();
    }

    // 用户必须有 USER_ADD 权限 才能访问此方法
    @Operation(summary = "添加用户")
    @PreAuthorize("hasAuthority('USER_ADD')")
    @PostMapping("/add")
    public void addUser(@RequestBody User user) {
        userService.addUserDetails(user);
    }
}
如果当前用户不是admin用户访问不了。

附录
Result类
import lombok.AllArgsConstructor;
import lombok.Data;
import lombok.NoArgsConstructor;

@Data
@AllArgsConstructor
@NoArgsConstructor
public class Result<T> {
    // 状态码
    private Integer code;
    // 返回消息
    private String message;
    // 返回数据
    private T data;

    /**
     * * 自定义返回体
     *
     * @param data 返回体
     * @return Result<T>
     */
    protected static <T> Result<T> build(T data) {
        Result<T> result = new Result<>();
        if (data != null) {
            result.setData(data);
        }
        return result;
    }

    /**
     * * 自定义返回体,使用ResultCodeEnum构建
     *
     * @param body     返回体
     * @param codeEnum 返回状态码
     * @return Result<T>
     */
    public static <T> Result<T> build(T body, ResultCodeEnum codeEnum) {
        Result<T> result = build(body);
        result.setCode(codeEnum.getCode());
        result.setMessage(codeEnum.getMessage());
        return result;
    }

    /**
     * * 自定义返回体
     *
     * @param body    返回体
     * @param code    返回状态码
     * @param message 返回消息
     * @return Result<T>
     */
    public static <T> Result<T> build(T body, Integer code, String message) {
        Result<T> result = build(body);
        result.setCode(code);
        result.setMessage(message);
        return result;
    }

    /**
     * * 操作成功
     *
     * @return Result<T>
     */
    public static <T> Result<T> success() {
        return Result.success(null, ResultCodeEnum.SUCCESS);
    }

    /**
     * * 操作成功
     *
     * @param data baseCategory1List
     */
    public static <T> Result<T> success(T data) {
        return build(data, ResultCodeEnum.SUCCESS);
    }

    /**
     * * 操作成功-状态码
     *
     * @param codeEnum 状态码
     */
    public static <T> Result<T> success(ResultCodeEnum codeEnum) {
        return success(null, codeEnum);
    }

    /**
     * * 操作成功-自定义返回数据和状态码
     *
     * @param data     返回体
     * @param codeEnum 状态码
     */
    public static <T> Result<T> success(T data, ResultCodeEnum codeEnum) {
        return build(data, codeEnum);
    }

    /**
     * * 操作失败-自定义返回数据和状态码
     *
     * @param data    返回体
     * @param message 错误信息
     */
    public static <T> Result<T> success(T data, String message) {
        return build(data, 200, message);
    }

    /**
     * * 操作失败-自定义返回数据和状态码
     *
     * @param data    返回体
     * @param code    状态码
     * @param message 错误信息
     */
    public static <T> Result<T> success(T data, Integer code, String message) {
        return build(data, code, message);
    }

    /**
     * * 操作失败
     */
    public static <T> Result<T> error() {
        return Result.build(null);
    }

    /**
     * * 操作失败-自定义返回数据
     *
     * @param data 返回体
     */
    public static <T> Result<T> error(T data) {
        return build(data, ResultCodeEnum.FAIL);
    }

    /**
     * * 操作失败-状态码
     *
     * @param codeEnum 状态码
     */
    public static <T> Result<T> error(ResultCodeEnum codeEnum) {
        return build(null, codeEnum);
    }

    /**
     * * 操作失败-自定义返回数据和状态码
     *
     * @param data     返回体
     * @param codeEnum 状态码
     */
    public static <T> Result<T> error(T data, ResultCodeEnum codeEnum) {
        return build(data, codeEnum);
    }

    /**
     * * 操作失败-自定义返回数据和状态码
     *
     * @param data    返回体
     * @param code    状态码
     * @param message 错误信息
     */
    public static <T> Result<T> error(T data, Integer code, String message) {
        return build(data, code, message);
    }

    /**
     * * 操作失败-自定义返回数据和状态码
     *
     * @param data    返回体
     * @param message 错误信息
     */
    public static <T> Result<T> error(T data, String message) {
        return build(null, 500, message);
    }
}
ResultCodeEnum类
import lombok.Getter;

/**
 * 统一返回结果状态信息类
 */
@Getter
public enum ResultCodeEnum {

    SUCCESS(200, "操作成功"),
    SUCCESS_LOGIN(200, "登录成功"),
    FAIL(500, "失败"),
    FAIL_NEED_LOGIN(500, "需要登录"),
    LOGGED_IN_FROM_ANOTHER_DEVICE(403, "该账号已从其他设备登录"),
    ;

    private final Integer code;

    private final String message;

    ResultCodeEnum(Integer code, String message) {
        this.code = code;
        this.message = message;
    }
}
USerVo类
import lombok.AllArgsConstructor;
import lombok.Builder;
import lombok.Data;
import lombok.NoArgsConstructor;
import org.springframework.security.core.GrantedAuthority;

import java.util.Collection;

@Data
@Builder
@AllArgsConstructor
@NoArgsConstructor
public class UserVo {
    // 用户名
    private String username;
    // 身份
    private Object principal;
    // 凭证(脱敏)
    private Object credentials;
    // 权限
    private Collection<? extends GrantedAuthority> authorities;
}


 157
157

 被折叠的 条评论
为什么被折叠?
被折叠的 条评论
为什么被折叠?
 到【灌水乐园】发言


