


目录
一、Zabbix 介绍
Zabbix 是由 Alexei Vladishev 开发的一种网络监视、管理系统,基于 Server-Client 架构。可用于监视各种网络服务、服务器和网络机器等状态。
使用各种 Database-end 如 MySQL,PostgreSQL,SQLite,Oracle 或 IBM DB2 储存资料。Server 端基于 C 语言、Web 管理端 frontend 则是基于 PHP 所制作的。
Zabbix 可以使用多种方式监视。可以只使用 Simple Check 不需要安装 Client 端,亦可基于SMTP或 HTTP.…各种协议定制监视。
在客户端如 UNIX,Windows 中安装 Zabbix Agent 之后,可监视 CPU Load、网络使用状况、硬盘容量等各种状态。而就算没有安装 Agent 在监视对象中,Zabbix 也可以经由 SNMP、TCP、ICMP、利用 IPMI、SSH、telnet 对目标进行监视。
Zabbbix 自带的 ltem 足够满足普通小公司的监控需求,对于大公司也可以设定自定义的ltem,自动生成报表,也有 API 可以和其他系统集成。
二、为何是 zabbix 而不是其他监控
zabbix 可以满足理想化的监控系统需求:
- 支持自定义监控脚本,提供需要输出的值即可
- zabbix 存储的数据库表结构稍有复杂但是逻辑清晰
- zabbix 存在模板的概念,可以方便的将一组监控项进行部署
- zabbix 每一个item也就是监控项,都可以看到历史记录,且web界面友好
- zabbix 有强大的Trigger(触发器)定义规则,可以定义复杂的报警逻辑
- zabbix 提供了ack报警确认机制
- zabbix 支持邮件,短信,微信等告警
- zabbix 在触发告警后,可以远程执行系统命令
- zabbix 有原生的PHP绘图模块
三、zabbix 专有名词
- zabbix server:服务端,收集数据,写入数据
- zabbix agent:部署在被监控的机器上,是一个进程,和zabbix server进行交互,以及负责执行命令
- Host:服务器的概念,指zabbix监控的实体,服务器,交换机等
- Hosts:主机组
- Applications:应用
- Events:事件
- Media:发送通知的通道
- Remote command:远程命令
- Template:模板
- ltem:对于某一个指标的监控,称之为ltems,如某台服务器的内存使用状况,就是一个item监控项
- Trigger:触发器,定义报警的逻辑,有正常,异常,未知三个状态
- Action:当Trigger符合设定值后,zabbix指定的动作,如发个邮件,说服务器有问题了
四、zabbix 程序组件
- Zabbix_server:服务端守护进程
- Zabbix_agentd:agent守护进程
- Zabbix_proxy:代理服务器
- Zabbix_database:存储系统,mysql,pgsql
- Zabbix_web:web GUI图形化界面
- Zabbix_get:命令行工具,测试向agent发起数据采集请求
- Zabbix_sender:命令行工具,测试向server发送数据
- Zabbix_java_gateway:java网关
五、zabbix 5.0 安装
首先初始化系统环境,可以看我下面这篇文章
1.# 下载 zabbix yum 源
[root@server02 ~]# rpm -Uvh https://mirrors.aliyun.com/zabbix/zabbix/5.0/rhel/7/x86_64/zabbix-release-5.0-1.el7.noarch.rpm
2.# 更换 zabbix.repo 为阿里源
[root@server02 ~]# sed -i 's#http://repo.zabbix.com#https://mirrors.aliyun.com/zabbix#' /etc/yum.repos.d/zabbix.repo
3.# 清空旧缓存,生成新缓存
[root@server02 ~]# yum clean all
[root@server02 ~]# yum makecache
4.# 下载 zabbix 服务端、客户端(可用于监控自己)
[root@server02 ~]# yum install -y zabbix-server-mysql zabbix-agent
5.# 安装 Software Collections,便于后续安装高版本的php,默认 yum 安装的 php 版本为 5.4过低。
SCL(Software Collections)可以让你在同一个操作系统上安装和使用多个版本的软件,而不会影响整个系统的安装包。
软件包会安装在/opt/rh目录下
[root@server02 ~]# yum install -y centos-release-scl
6.# 修改 zabbix.repo 前端源参数
[zabbix-frontend]
name=Zabbix Official Repository frontend - $basearch
baseurl=https://mirrors.aliyun.com/zabbix/zabbix/5.0/rhel/7/$basearch/frontend
enabled=1 # 把0改为1
gpgcheck=1
gpgkey=file:///etc/pki/rpm-gpg/RPM-GPG-KEY-ZABBIX-A14FE591
7.# 安装 zabbix 前端环境,且是安装到 scl 环境下
[root@server02 ~]# yum install -y zabbix-web-mysql-scl zabbix-apache-conf-scl
8.# 安装数据库 mariadb
[root@server02 ~]# yum install -y mariadb-server
[root@server02 ~]# systemctl start mariadb.service
[root@server02 ~]# systemctl enable mariadb.service
9.# 初始化数据库
[root@server02 ~]# mysql_secure_installation
10.# 添加数据库用户和zabbix 所需数据库
[root@server02 ~]# mysql -u root -proot
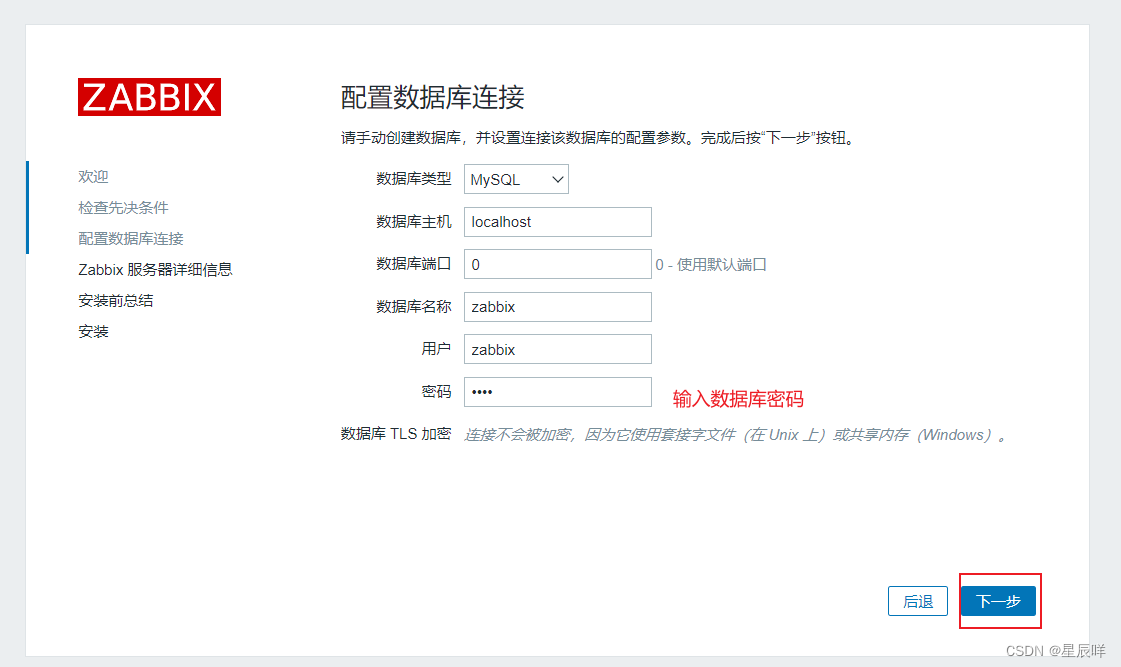
MariaDB [(none)]> create database zabbix character set utf8 collate utf8_bin; # 创建数据库名 zabbix
Query OK, 1 row affected (0.01 sec)
MariaDB [(none)]> create user zabbix@localhost identified by 'root'; # 创建用户和密码
Query OK, 0 rows affected (0.00 sec)
MariaDB [(none)]> grant all privileges on zabbix.* to zabbix@localhost; # 添加权限
Query OK, 0 rows affected (0.00 sec)
MariaDB [(none)]> flush privileges; # 刷新授权表
Query OK, 0 rows affected (0.00 sec)
MariaDB [(none)]> exit;
Bye
11.# 导入数据库信息
[root@server02 ~]# zcat /usr/share/doc/zabbix-server-mysql*/create.sql.gz | mysql -uzabbix -proot zabbix
12.# 在 zabbix_server 配置文件 添加数据库密码
[root@server02 ~]# vim /etc/zabbix/zabbix_server.conf
DBUser=zabbix
### Option: DBPassword
# Database password.
# Comment this line if no password is used.
#
# Mandatory: no
# Default:
DBPassword=root # 去掉#输入数据库密码
13.# 修改 zabbix 中的 PHP 配置文件
[root@server02 ~]# vim /etc/opt/rh/rh-php72/php-fpm.d/zabbix.conf
php_value[date.timezone] = Asia/Shanghai # 修改时区
14.# 启动 zabbix 相关服务
[root@server02 ~]# systemctl restart zabbix-server zabbix-agent httpd rh-php72-php-fpm
[root@server02 ~]# systemctl enable zabbix-server zabbix-agent httpd rh-php72-php-fpm
9.# 初始化数据库操作说明
[root@server02 ~]# mysql_secure_installation
NOTE: RUNNING ALL PARTS OF THIS SCRIPT IS RECOMMENDED FOR ALL MariaDB
SERVERS IN PRODUCTION USE! PLEASE READ EACH STEP CAREFULLY!In order to log into MariaDB to secure it, we'll need the current
password for the root user. If you've just installed MariaDB, and
you haven't set the root password yet, the password will be blank,
so you should just press enter here.Enter current password for root (enter for none): # 输入回车即可
OK, successfully used password, moving on...Setting the root password ensures that nobody can log into the MariaDB
root user without the proper authorisation.Set root password? [Y/n] y # 设置密码
New password: # 输入密码
Re-enter new password: # 再次确认密码
Password updated successfully!
Reloading privilege tables..
... Success!
By default, a MariaDB installation has an anonymous user, allowing anyone
to log into MariaDB without having to have a user account created for
them. This is intended only for testing, and to make the installation
go a bit smoother. You should remove them before moving into a
production environment.Remove anonymous users? [Y/n] y # 移除匿名用户
... skipping.Normally, root should only be allowed to connect from 'localhost'. This
ensures that someone cannot guess at the root password from the network.Disallow root login remotely? [Y/n] n # 是否禁止 root 远程登录
... Success!By default, MariaDB comes with a database named 'test' that anyone can
access. This is also intended only for testing, and should be removed
before moving into a production environment.Remove test database and access to it? [Y/n] y # 是否移除 test 默认数据库
- Dropping test database...
... Success!
- Removing privileges on test database...
... Success!Reloading the privilege tables will ensure that all changes made so far
will take effect immediately.Reload privilege tables now? [Y/n] y # 是否刷新授权表
... Success!Cleaning up...
All done! If you've completed all of the above steps, your MariaDB
installation should now be secure.Thanks for using MariaDB!
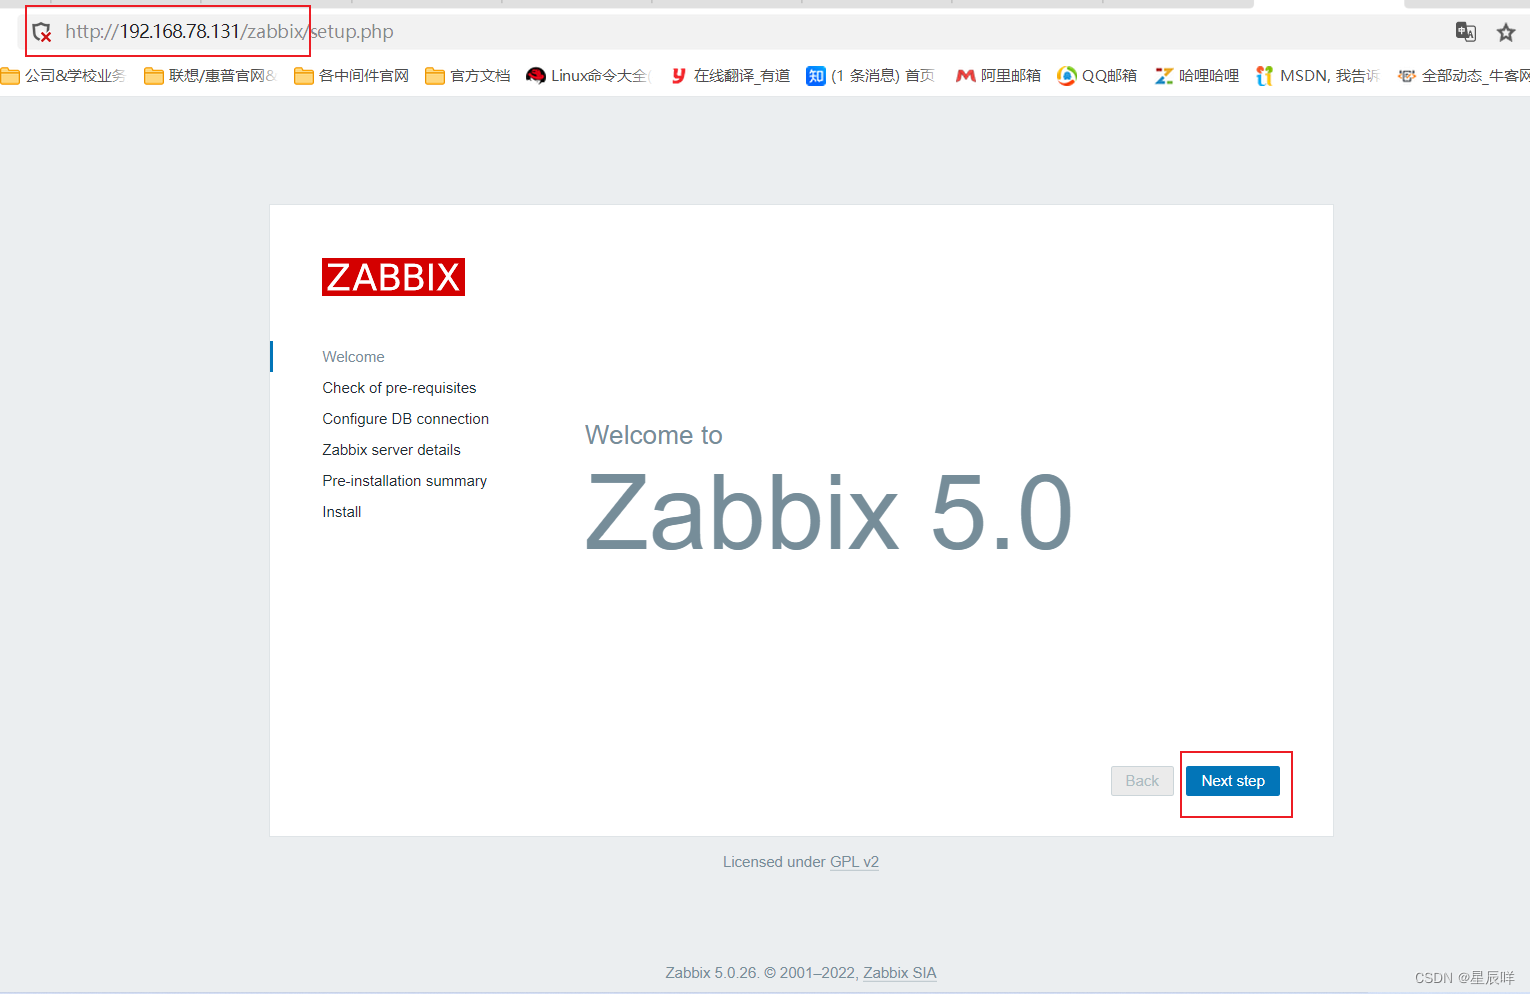
六、进入 zabbix 前端页面
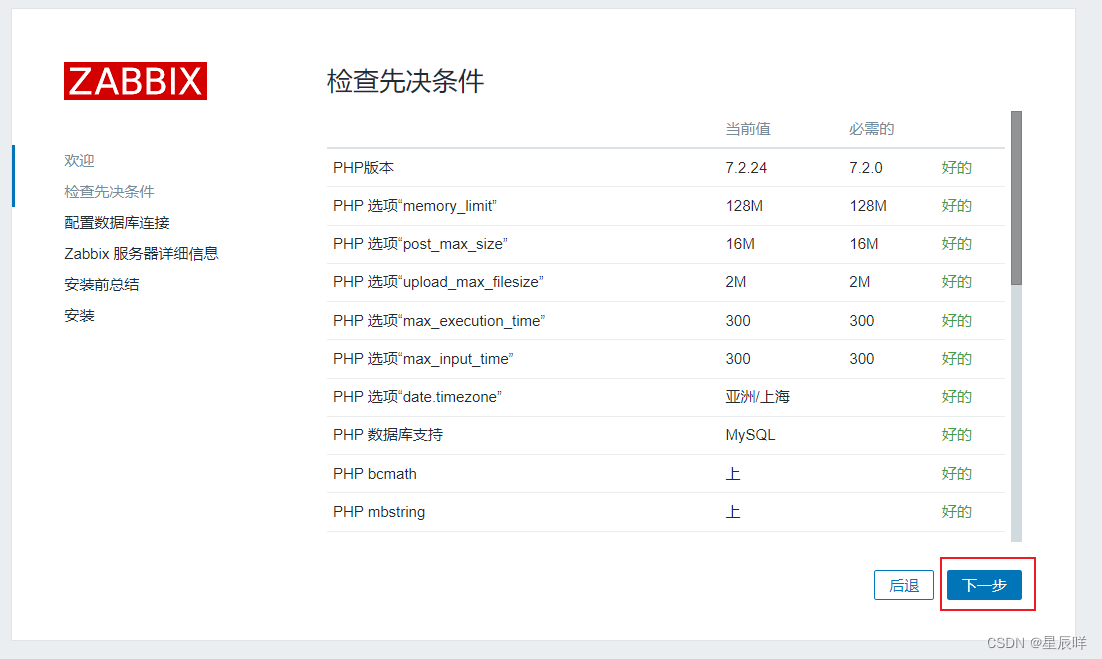
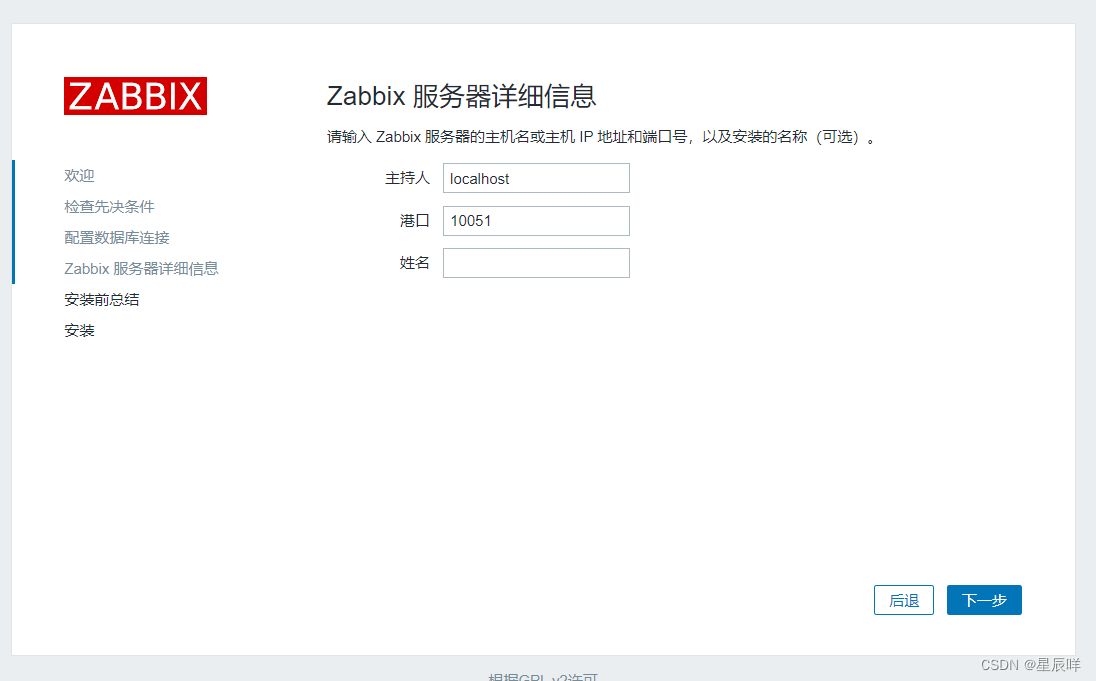
在浏览器输入 ip/zabbix 即可进入下图页面:
得都是“好的”或者 OK 才可以:


七、登录 zabbix
输入默认账号Admin 密码zabbix
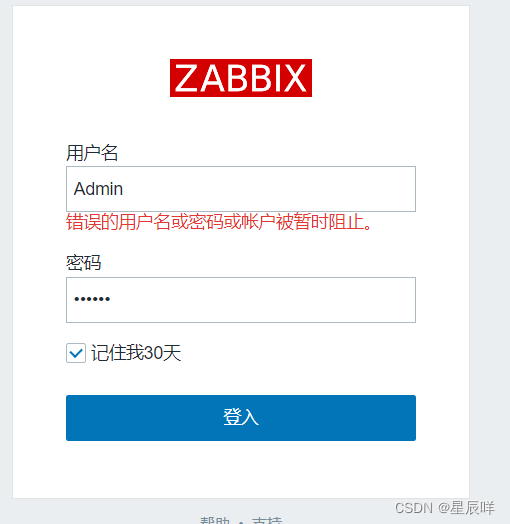
成功!!!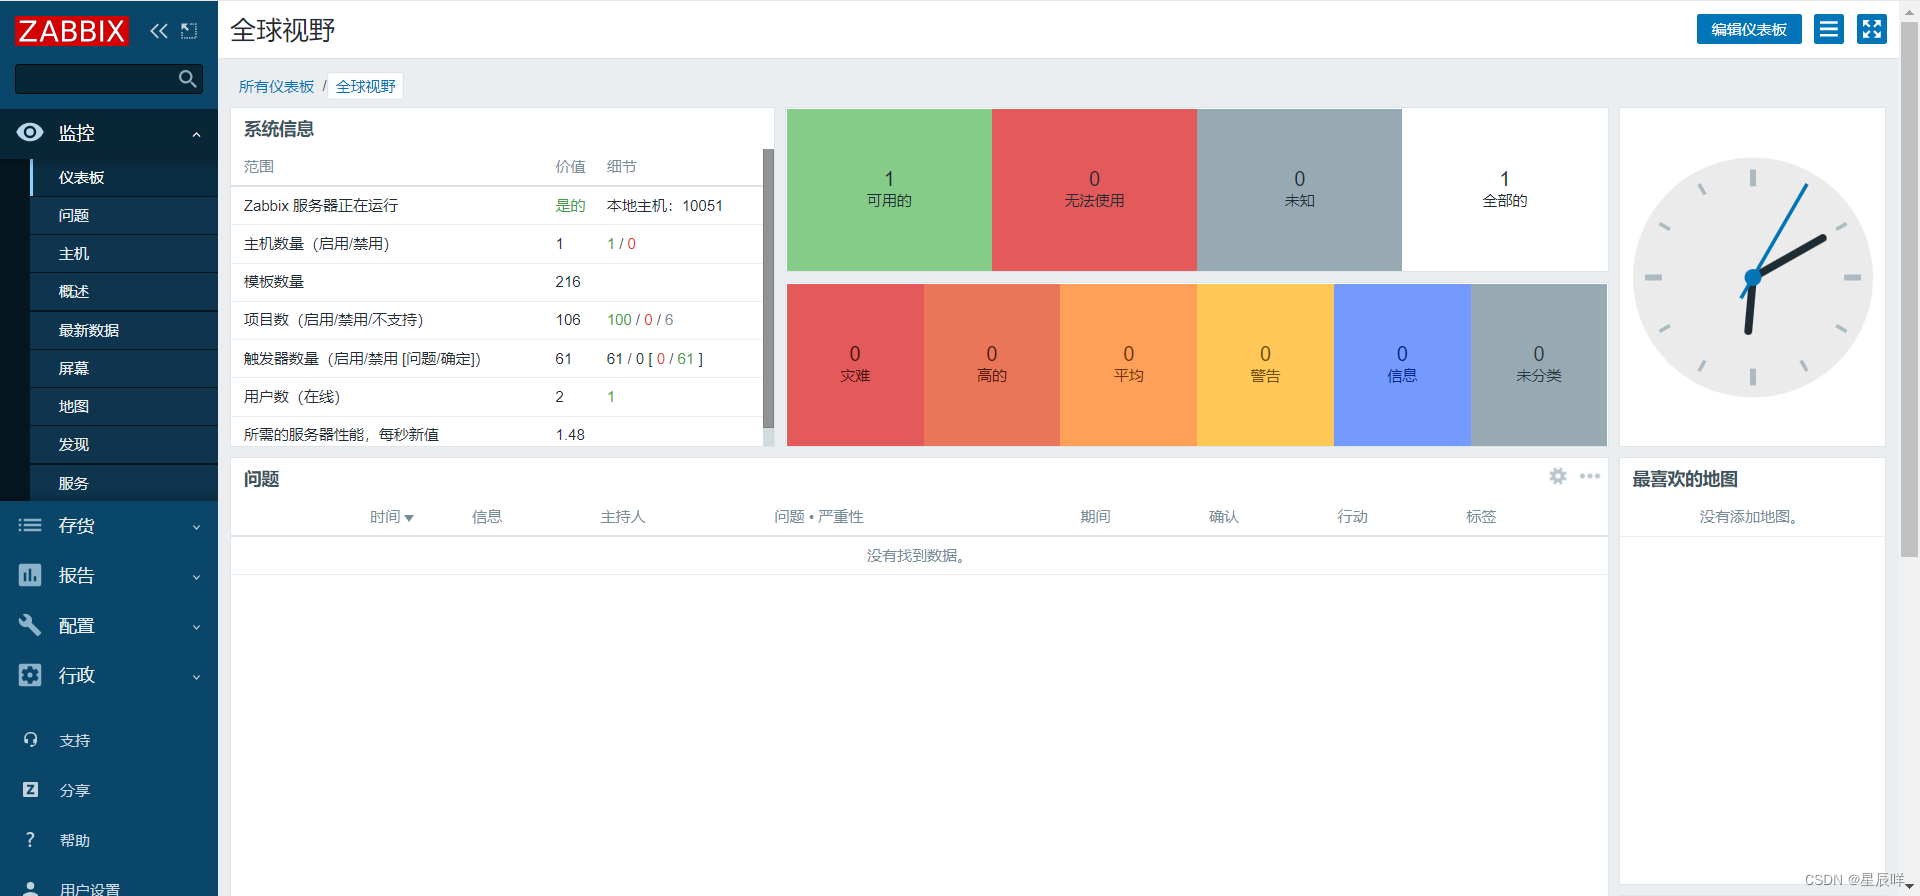
设置语言:


 1039
1039


 被折叠的 条评论
为什么被折叠?
被折叠的 条评论
为什么被折叠?
 到【灌水乐园】发言


