


自己利用闲暇时间搭建的一个小型的微服务项目
这是一个综合性的 B2B2C 平台,类似京东商城、天猫商城。网站采用商家入驻的模式,商家入驻平台提交申请,由平台进行资质审核,审核通过后,商家拥有独立的管理后台录入商品信息。商品经过平台审核后即可发布。
项目采用前后端分离方式
东易买网上商城主要分为网站前台(消费者)、运营商后台(平台管理员)、商家管理后台(商家)三个子系统。
技术架构:

数据库表结构:
| tb_brand | 品牌 |
| tb_specification | 规格 |
| tb_specification_option | 规格选项 |
| tb_type_template | 类型模板:用于关联品牌和规格 |
| tb_item_cat | 商品分类 |
| tb_seller | 商家 |
| tb_goods | 商品 |
| tb_goods_desc | 商品详情 |
| tb_item | 商品明细 |
| tb_content | 内容(广告) |
| tb_content_category | 内容(广告)类型 |
项目结构
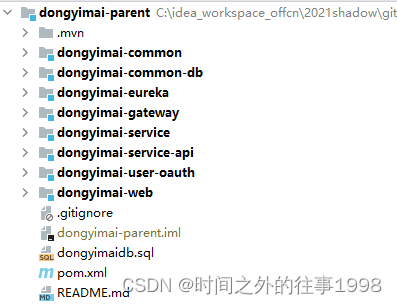
dongyimai-gateway :
- 网关模块,根据网站的规模和需要,可以将综合逻辑相关的服务用网关路由组合到一起。
在这里还可以做鉴权和限流相关操作
dongyimai-service :
- 微服务模块,该模块用于存放所有独立的微服务工程
dongyimai-service-api :
- 对应工程的JavaBean、Feign、以及Hystrix配置,该工程主要对外提供依赖。
dongyimai-transaction-fescar :
- 分布式事务模块,将分布式事务抽取到该工程中,任何工程如需要使用分布式事务,只需依赖该工程即可
dongyimai-web:
- web服务工程
主要核心代码
父工程:
    <packaging>pom</packaging>


    <parent>
        <groupId>org.springframework.boot</groupId>
        <artifactId>spring-boot-starter-parent</artifactId>
        <version>2.3.9.RELEASE</version>
        <relativePath/> <!-- lookup parent from repository -->
    </parent>

	// gav坐标
    <groupId>com.offcn</groupId>
    <artifactId>dongyimai-parent</artifactId>
    <version>1.0</version>


    // 参数
    <properties>
        <project.build.sourceEncoding>UTF-8</project.build.sourceEncoding>
        <project.reporting.outputEncoding>UTF-8</project.reporting.outputEncoding>
        <java.version>1.8</java.version>
        <spring-cloud.version>Hoxton.RELEASE</spring-cloud.version>

        <swagger.version>2.9.2</swagger.version>
        <fastjson.version>1.2.51</fastjson.version>
    </properties>

    <dependencyManagement>
        <dependencies>
            <!-- springCloud -->
            <dependency>
                <groupId>org.springframework.cloud</groupId>
                <artifactId>spring-cloud-dependencies</artifactId>
                <version>${spring-cloud.version}</version>
                <type>pom</type>
                <scope>import</scope>
            </dependency>
        </dependencies>
    </dependencyManagement>

    <dependencies>
        <dependency>
            <groupId>org.springframework.boot</groupId>
            <artifactId>spring-boot-starter-test</artifactId>
            <scope>test</scope>
            <exclusions>
                <exclusion>
                    <groupId>org.junit.vintage</groupId>
                    <artifactId>junit-vintage-engine</artifactId>
                </exclusion>
            </exclusions>
        </dependency>

        <!--fastjson-->
        <dependency>
            <groupId>com.alibaba</groupId>
            <artifactId>fastjson</artifactId>
            <version>${fastjson.version}</version>
        </dependency>

        <!--swagger-->
        <!-- https://mvnrepository.com/artifact/io.springfox/springfox-swagger2 -->
         <!--<dependency>
            <groupId>io.springfox</groupId>
            <artifactId>springfox-swagger2</artifactId>
            <version>${swagger.version}</version>
        </dependency>-->
        <!-- https://mvnrepository.com/artifact/io.springfox/springfox-swagger-ui -->
       	<!--<dependency>
            <groupId>io.springfox</groupId>
            <artifactId>springfox-swagger-ui</artifactId>
            <version>${swagger.version}</version>
        </dependency>-->

    </dependencies>
搭建Eureka注册中心
<project xmlns="http://maven.apache.org/POM/4.0.0"
         xmlns:xsi="http://www.w3.org/2001/XMLSchema-instance"
         xsi:schemaLocation="http://maven.apache.org/POM/4.0.0 http://maven.apache.org/xsd/maven-4.0.0.xsd">

    <parent>
        <artifactId>dongyimai-parent</artifactId>
        <groupId>com.offcn</groupId>
        <version>1.0</version>
    </parent>

    <modelVersion>4.0.0</modelVersion>

    <artifactId>dongyimai-eureka</artifactId>

    <dependencies>
        <dependency>
            <groupId>org.springframework.cloud</groupId>
            <artifactId>spring-cloud-starter-netflix-eureka-server</artifactId>
        </dependency>
    </dependencies>

</project>
application.yml配置
server:
  port: 8761
spring:
  application:
    name: eureka
eureka:
  instance:
    hostname: 127.0.0.1
  client:
    register-with-eureka: false   #是否将自己注册到eureka中
    fetch-registry: false         #是否从eureka中获取信息
    service-url:
      defaultZone: http://${eureka.instance.hostname}:${server.port}/eureka
  server:
    enable-self-preservation: false # 关闭自我保护
    eviction-interval-timer-in-ms: 5000 # 每隔5秒进行一次服务列表清理
注意:启动类加上@EnableEurekaServer
公共子模块 dongyimai-common:
<project xmlns="http://maven.apache.org/POM/4.0.0"
         xmlns:xsi="http://www.w3.org/2001/XMLSchema-instance"
         xsi:schemaLocation="http://maven.apache.org/POM/4.0.0 http://maven.apache.org/xsd/maven-4.0.0.xsd">
    <parent>
        <artifactId>dongyimai-parent</artifactId>
        <groupId>com.offcn</groupId>
        <version>1.0</version>
    </parent>

    <modelVersion>4.0.0</modelVersion>

    <artifactId>dongyimai-common</artifactId>

    <dependencies>
        <!--web起步依赖-->
        <dependency>
            <groupId>org.springframework.boot</groupId>
            <artifactId>spring-boot-starter-web</artifactId>
        </dependency>
        <!-- redis 使用-->
        <dependency>
            <groupId>org.springframework.boot</groupId>
            <artifactId>spring-boot-starter-data-redis</artifactId>
        </dependency>
        <!--eureka-client-->
        <dependency>
            <groupId>org.springframework.cloud</groupId>
            <artifactId>spring-cloud-starter-netflix-eureka-client</artifactId>
        </dependency>
        <!--openfeign-->
        <dependency>
            <groupId>org.springframework.cloud</groupId>
            <artifactId>spring-cloud-starter-openfeign</artifactId>
        </dependency>

        <dependency>
            <groupId>org.apache.httpcomponents</groupId>
            <artifactId>httpclient</artifactId>
            <version>4.2.1</version>
        </dependency>
        <dependency>
            <groupId>org.apache.httpcomponents</groupId>
            <artifactId>httpcore</artifactId>
            <version>4.2.1</version>
        </dependency>

        <dependency>
            <groupId>commons-lang</groupId>
            <artifactId>commons-lang</artifactId>
            <version>2.6</version>
        </dependency>
        <dependency>
            <groupId>org.eclipse.jetty</groupId>
            <artifactId>jetty-util</artifactId>
            <version>9.3.7.v20160115</version>
        </dependency>

    </dependencies>

</project>
创建返回状态码实体类
/**
 * 返回码
 */
public class StatusCode {

    public static final int OK = 20000;//成功
    public static final int ERROR = 20001;//失败
    public static final int LOGINERROR = 20002;//用户名或密码错误
    public static final int ACCESSERROR = 20003;//权限不足
    public static final int REMOTEERROR = 20004;//远程调用失败
    public static final int REPERROR = 20005;//重复操作
    public static final int NOTFOUNDERROR = 20006;//没有对应的抢购数据(秒杀)

}
建立类Result用于微服务返回结果给前端
/**
 * 返回结果实体类
 */
public class Result<T> implements Serializable {

    private boolean flag;//是否成功
    private Integer code;//返回码(StatusCode)
    private String message;//返回消息
    private T data;//返回数据

    public Result(boolean flag, Integer code, String message, T data) {
        this.flag = flag;
        this.code = code;
        this.message = message;
        this.data =  data;
    }

    public Result(boolean flag, Integer code, String message) {
        this.flag = flag;
        this.code = code;
        this.message = message;
    }

    public Result() {
        this.flag = true;
        this.code = StatusCode.OK;
        this.message = "操作成功!";
    }

    // 添加 getter and setter.....
}
分页结果实体类:
/**
 * 分页结果类
 */
public class PageResult<T> implements Serializable{

    private Long total;//总记录数
    private List<T> rows;//记录

    public PageResult(Long total, List<T> rows) {
        this.total = total;
        this.rows = rows;
    }

    public PageResult() {
    }

    //添加 getter and setter ......
}
创建公共模块 dongyimai-common-db:
<project xmlns="http://maven.apache.org/POM/4.0.0"
         xmlns:xsi="http://www.w3.org/2001/XMLSchema-instance"
         xsi:schemaLocation="http://maven.apache.org/POM/4.0.0 http://maven.apache.org/xsd/maven-4.0.0.xsd">
    <parent>
        <artifactId>dongyimai-parent</artifactId>
        <groupId>com.offcn</groupId>
        <version>1.0</version>
    </parent>
    <modelVersion>4.0.0</modelVersion>

    <artifactId>dongyimai-common-db</artifactId>

    <dependencies>
        <dependency>
            <groupId>com.offcn</groupId>
            <artifactId>dongyimai-common</artifactId>
            <version>1.0</version>
        </dependency>

        <dependency>
            <groupId>mysql</groupId>
            <artifactId>mysql-connector-java</artifactId>
            <version>5.1.32</version>
        </dependency>
        <!-- 连接池 -->
        <dependency>
            <groupId>com.alibaba</groupId>
            <artifactId>druid</artifactId>
            <version>1.1.14</version>
        </dependency>
        <!-- MyBatisPlus -->
        <dependency>
            <groupId>com.baomidou</groupId>
            <artifactId>mybatis-plus-boot-starter</artifactId>
            <version>3.4.2</version>
        </dependency>
    </dependencies>

</project>
随后依次创建个微服务过程子模块,并完成增删改查,再此就不做过多赘述。
接下来就是几个重要组件的搭建了
FastDFS搭建
拉取镜像 :docker pull morunchang/fastdfs
运行tracker docker run -id --name tracker --net=host morunchang/fastdfs sh tracker.sh
运行storage docker run -id --name storage --net=host -e TRACKER_IP=192.168.188.129:22122 -e GROUP_NAME=group1
Docker容器中已经集成了Nginx,我们需要修改nginx的配置,进入storage的容器内部,修改nginx.conf
添加以下内容(如果已经存在了,就不需要再去加了)
location ~ /M00 {
root /data/fast_data/data;
ngx_fastdfs_module;
}
文件存储微服务
<project xmlns="http://maven.apache.org/POM/4.0.0"
         xmlns:xsi="http://www.w3.org/2001/XMLSchema-instance"
         xsi:schemaLocation="http://maven.apache.org/POM/4.0.0 http://maven.apache.org/xsd/maven-4.0.0.xsd">
    <parent>
        <artifactId>dongyimai-service</artifactId>
        <groupId>com.offcn</groupId>
        <version>1.0</version>
    </parent>

    <modelVersion>4.0.0</modelVersion>

    <artifactId>dongyimai-file-service</artifactId>

   <dependencies>
       <dependency>
           <groupId>cn.bestwu</groupId>
           <artifactId>fastdfs-client-java</artifactId>
           <version>1.27</version>
       </dependency>
       <dependency>
           <groupId>com.offcn</groupId>
           <artifactId>dongyimai-common</artifactId>
           <version>1.0</version>
       </dependency>
   </dependencies>

</project>
Elasticsearch 安装
docker镜像下载 docker pull elasticsearch:7.7.0
将elasticsearch容器内部的elasticsearch.yml配置文件拷贝到宿主机的root目录下
docker cp dym_es:/usr/share/elasticsearch/config/elasticsearch.yml /root/
cluster.name: "my-application"
cluster.name: "my-application"
http.cors.enabled: true
http.cors.allow-origin: "*"
network.host: 0.0.0.0
进入容器安装ik分词器,注意是在plugins目录下进行安装


 5793
5793


 被折叠的 条评论
为什么被折叠?
被折叠的 条评论
为什么被折叠?
 到【灌水乐园】发言


