


###1.Zabbix部署###
(1)zabbix安装
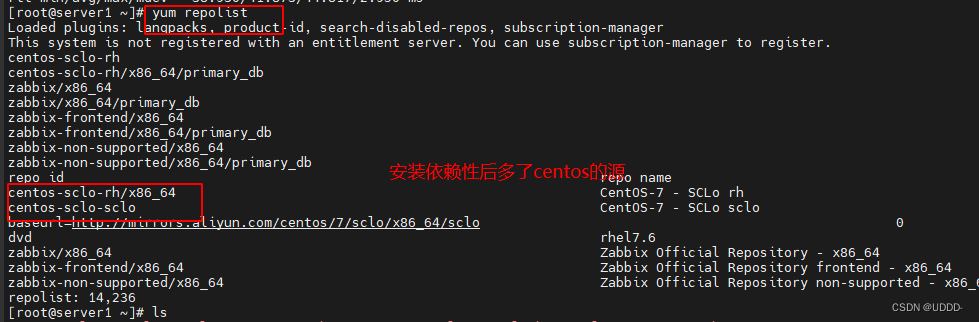
安装源
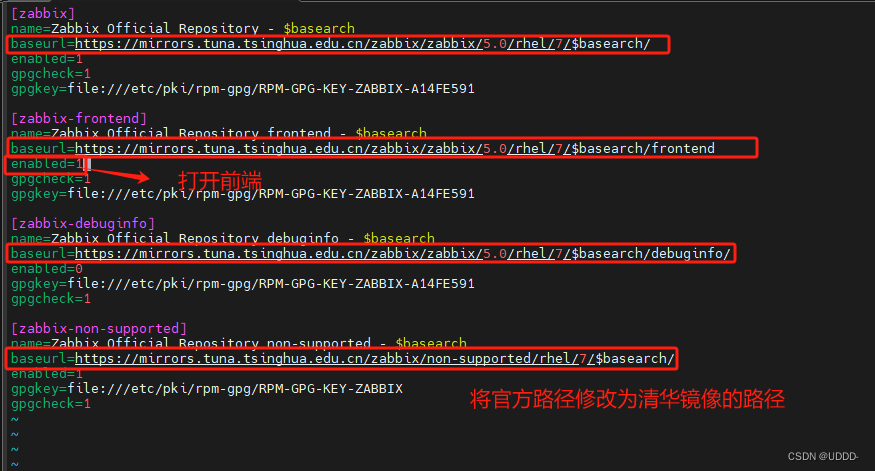
修改安装路径为清华镜像
[root@server1 zabbix]# cd /etc/yum.repos.d/
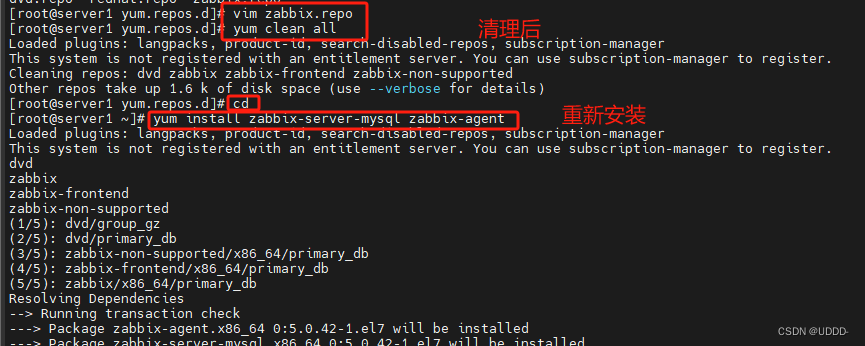
[root@server1 yum.repos.d]# vim zabbix.repo
[zabbix]
name=Zabbix Official Repository - $basearch
baseurl=https://mirrors.tuna.tsinghua.edu.cn/zabbix/zabbix/5.0/rhel/7/$basearch/
enabled=1
gpgcheck=0
[zabbix-frontend]
name=Zabbix Official Repository frontend - $basearch
baseurl=https://mirrors.tuna.tsinghua.edu.cn/zabbix/zabbix/5.0/rhel/7/$basearch/frontend
enabled=1
gpgcheck=0
[zabbix-non-supported]
name=Zabbix Official Repository non-supported - $basearch
baseurl=https://mirrors.tuna.tsinghua.edu.cn/zabbix/non-supported/rhel/7/$basearch/
enabled=1
gpgcheck=0
安装server和agent
[root@server1 yum.repos.d]# yum install zabbix-server-mysql zabbix-agent
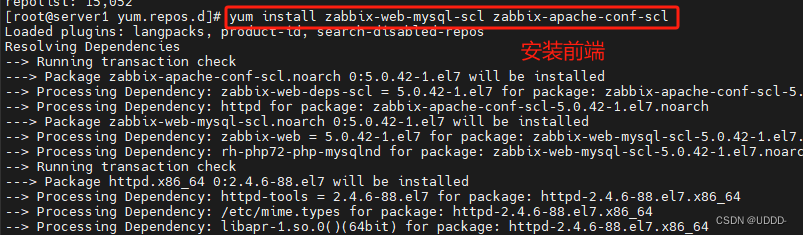
安装前端
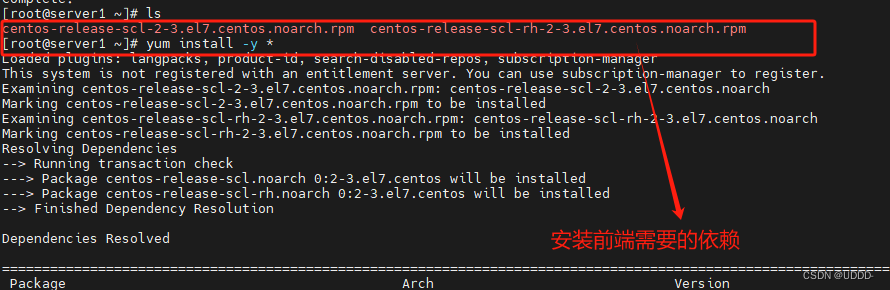
先安装依赖性
[root@server1 ~]# yum install -y centos-release-scl-2-3.el7.centos.noarch.rpm centos-release-scl-rh-2-3.el7.centos.noarch.rpm
再安装前端
[root@server1 ~]# yum install zabbix-web-mysql-scl zabbix-apache-conf-scl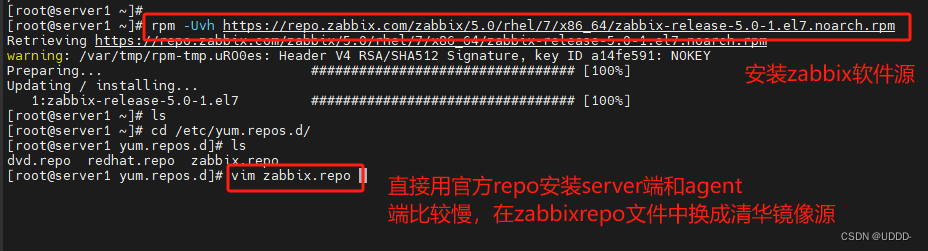
安装mysql数据库
[root@server1 ~]# tar xf mysql-5.7.33-1.el7.x86_64.rpm-bundle.tar
[root@server1 ~]# yum install -y mysql-community-client-5.7.33-1.el7.x86_64.rpm mysql-community-common-5.7.33-1.el7.x86_64.rpm mysql-community-libs-5.7.33-1.el7.x86_64.rpm mysql-community-libs-compat-5.7.33-1.el7.x86_64.rpm mysql-community-server-5.7.33-1.el7.x86_64.rpm
[root@server1 ~]# systemctl enable --now mysqld
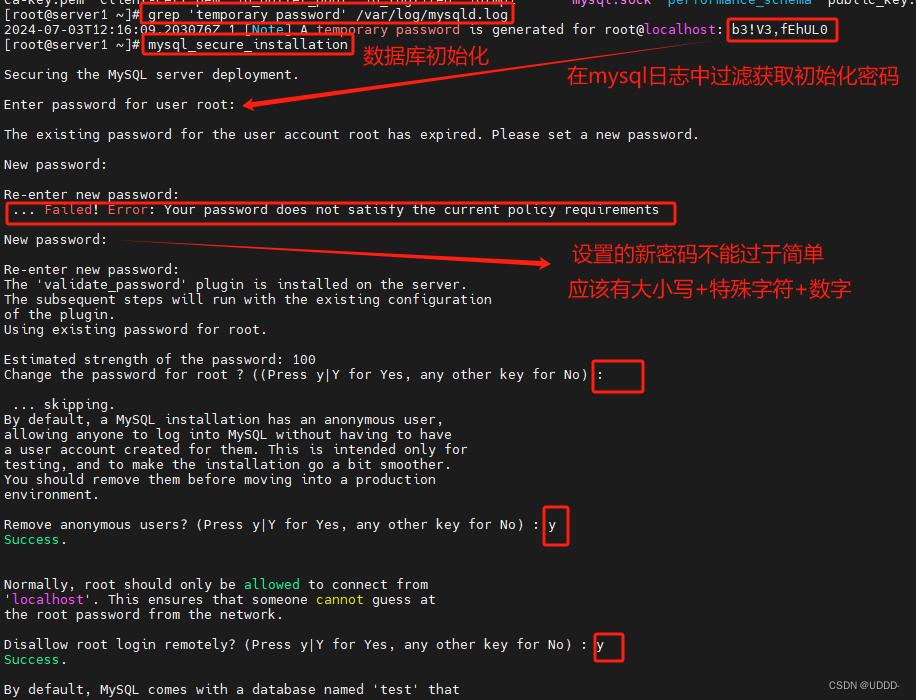
获取初始化密码
[root@server1 ~]# grep 'temporary password' /var/log/mysqld.log
2023-02-26T08:52:37.676190Z 1 [Note] A temporary password is generated for root@localhost: s!DOgafjt9+d
[root@server1 ~]# mysql_secure_installation
Securing the MySQL server deployment.
Enter password for user root:
The existing password for the user account root has expired. Please set a new password.
New password:
Re-enter new password:
... Failed! Error: Your password does not satisfy the current policy requirements
New password:
Re-enter new password:
The 'validate_password' plugin is installed on the server.
The subsequent steps will run with the existing configuration
of the plugin.
Using existing password for root.
Estimated strength of the password: 100
Change the password for root ? ((Press y|Y for Yes, any other key for No) :
... skipping.
By default, a MySQL installation has an anonymous user,
allowing anyone to log into MySQL without having to have
a user account created for them. This is intended only for
testing, and to make the installation go a bit smoother.
You should remove them before moving into a production
environment.
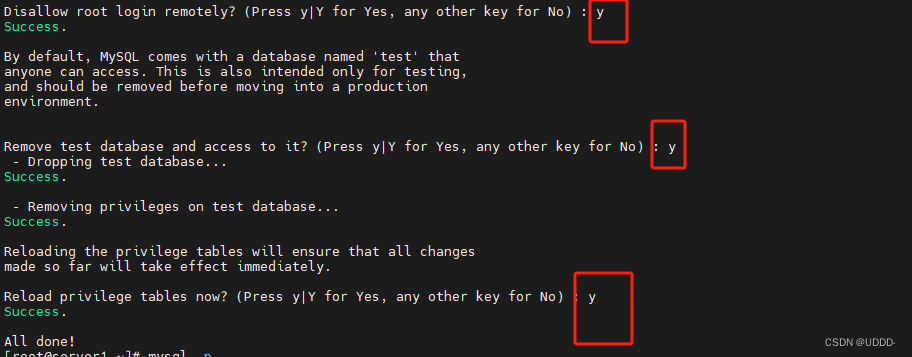
Remove anonymous users? (Press y|Y for Yes, any other key for No) : y
Success.
Normally, root should only be allowed to connect from
'localhost'. This ensures that someone cannot guess at
the root password from the network.
Disallow root login remotely? (Press y|Y for Yes, any other key for No) : y
Success.
By default, MySQL comes with a database named 'test' that
anyone can access. This is also intended only for testing,
and should be removed before moving into a production
environment.
Remove test database and access to it? (Press y|Y for Yes, any other key for No) : y
- Dropping test database...
Success.
- Removing privileges on test database...
Success.
Reloading the privilege tables will ensure that all changes
made so far will take effect immediately.
Reload privilege tables now? (Press y|Y for Yes, any other key for No) : y
Success.
All done!
创建zabbix数据库
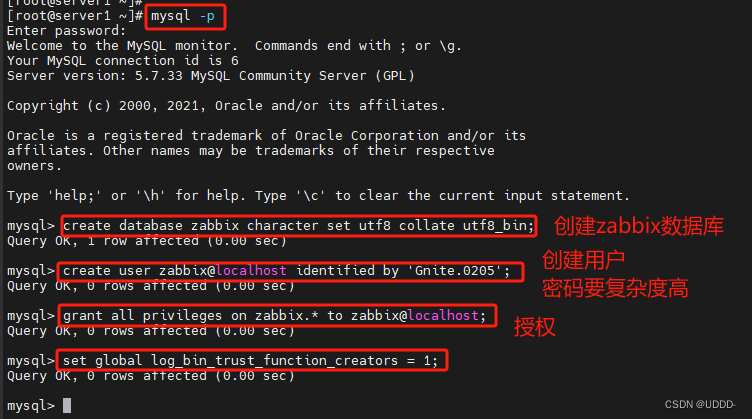
[root@server1 ~]# mysql -p
mysql> create database zabbix character set utf8 collate utf8_bin;
Query OK, 1 row affected (0.00 sec)
mysql> create user zabbix@localhost identified by 'Yakexi+007';
Query OK, 0 rows affected (0.00 sec)
mysql> grant all privileges on zabbix.* to zabbix@localhost;
Query OK, 0 rows affected (0.00 sec)
mysql> set global log_bin_trust_function_creators = 1;
Query OK, 0 rows affected (0.00 sec)
导入数据,数据量比较大,需要等待一下,不要中断
[root@server1 ~]# zcat /usr/share/doc/zabbix-server-mysql-5.0.31/create.sql.gz | mysql -uzabbix -pYakexi+007 zabbix
导入后再禁用数据库参数
[root@server1 ~]# mysql -p
mysql> set global log_bin_trust_function_creators = 0;
Query OK, 0 rows affected (0.00 sec)
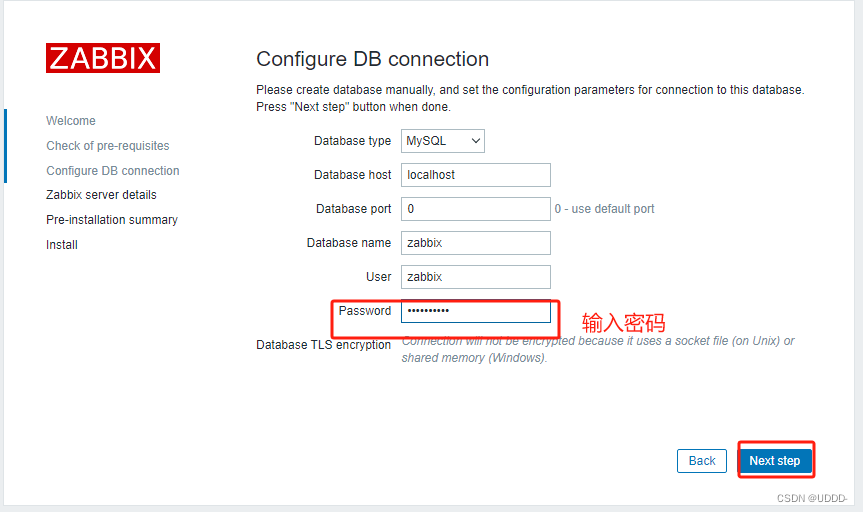
配置zabbix server
[root@server1 ~]# vim /etc/zabbix/zabbix_server.conf
#只需修改数据库密码
DBPassword=Yakexi+007
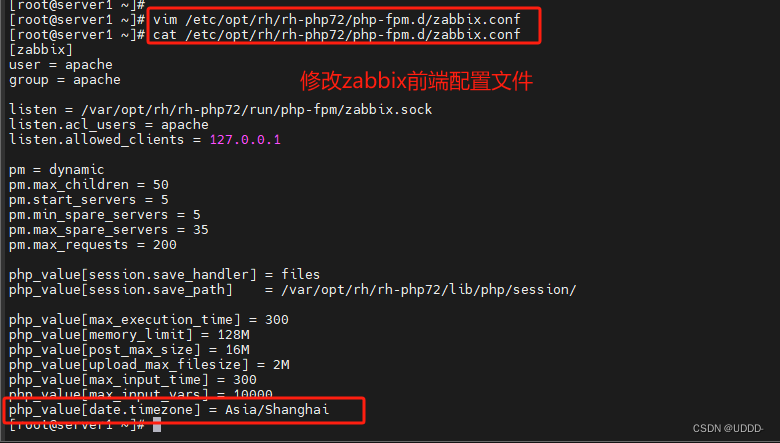
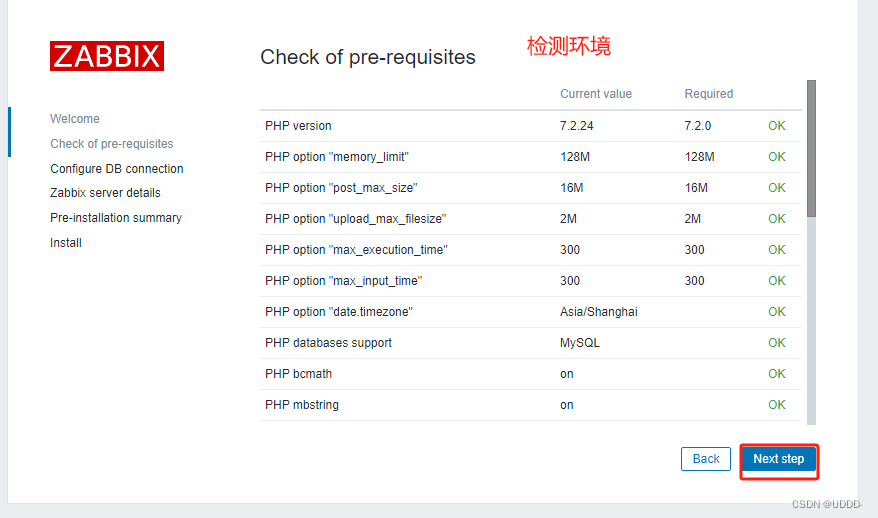
配置zabbix前端
[root@server1 zabbix]# vim /etc/opt/rh/rh-php72/php-fpm.d/zabbix.conf
#去掉此行的注释,并修改时区
php_value[date.timezone] = Asia/Shanghai
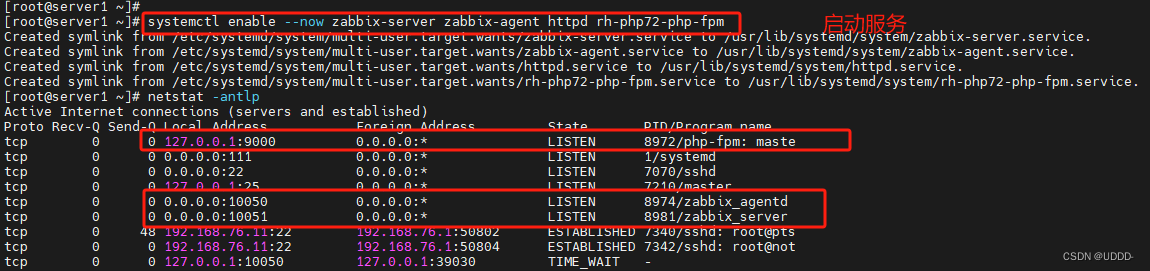
启动服务
[root@server1 zabbix]# systemctl enable --now zabbix-server zabbix-agent httpd rh-php72-php-fpm
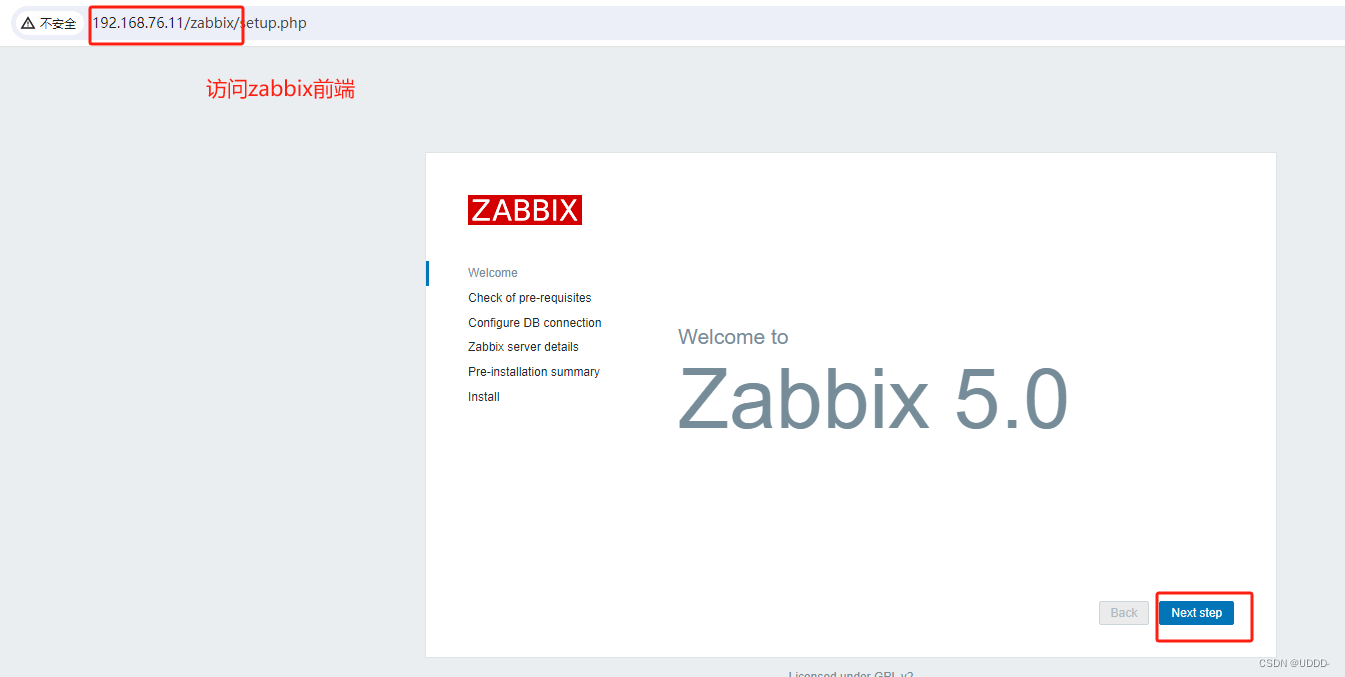
访问前端:http://192.168.56.11/zabbix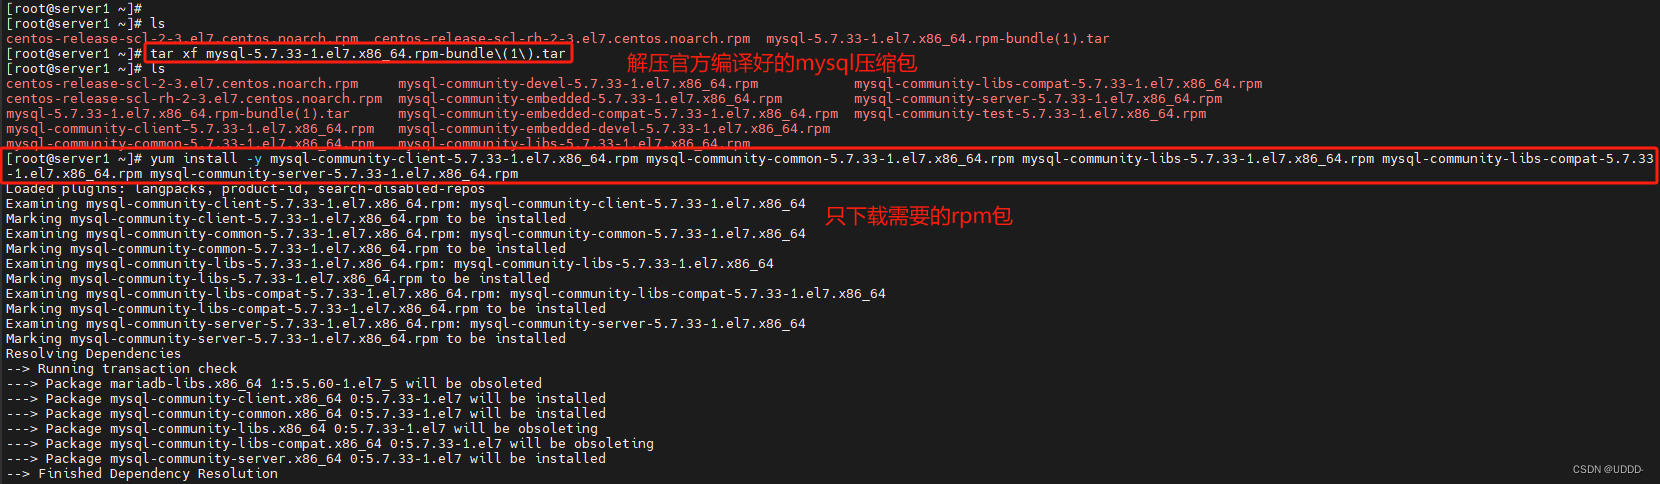


(2)前端操作
填写数据库连接信息
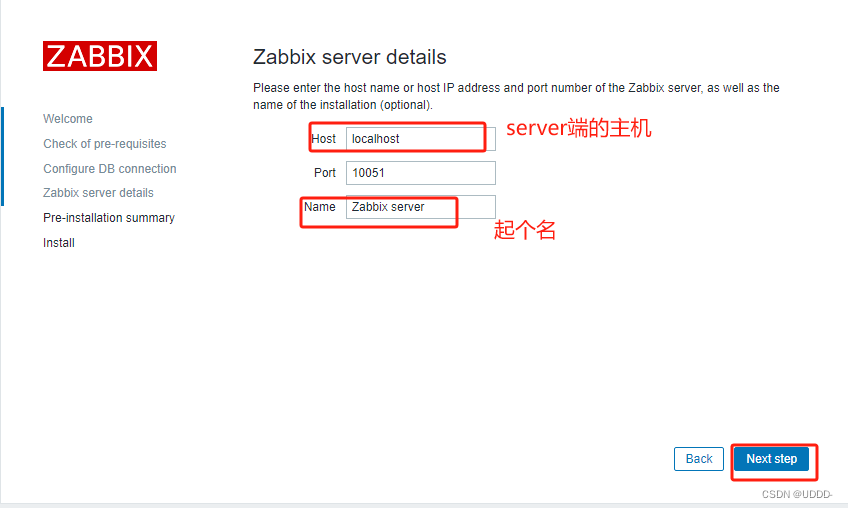
填写zabbix server 信息

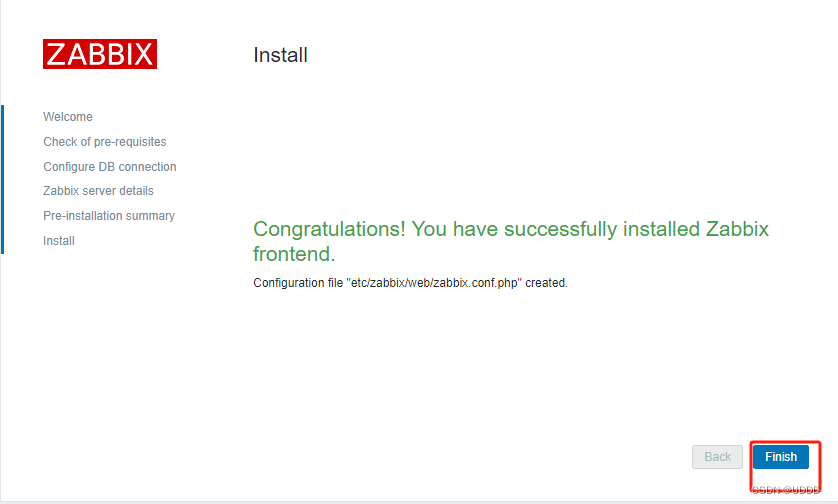
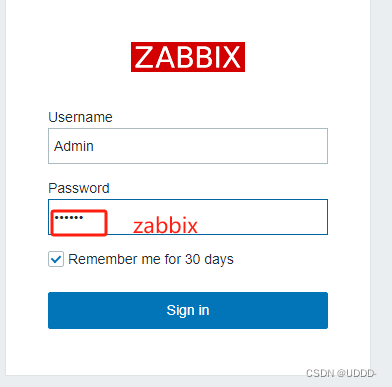
登录前端的用户密码是:Admin/zabbix
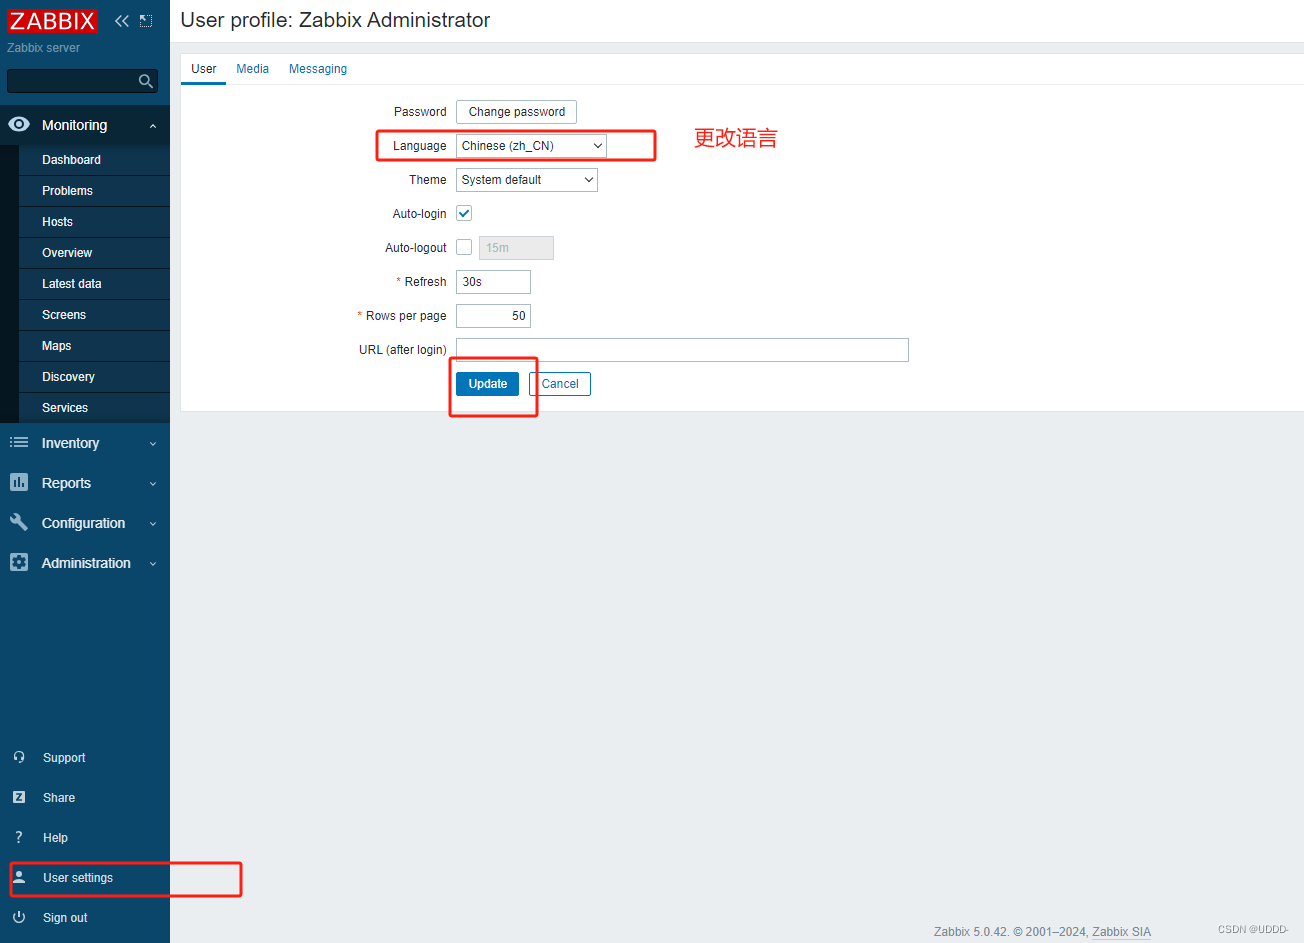
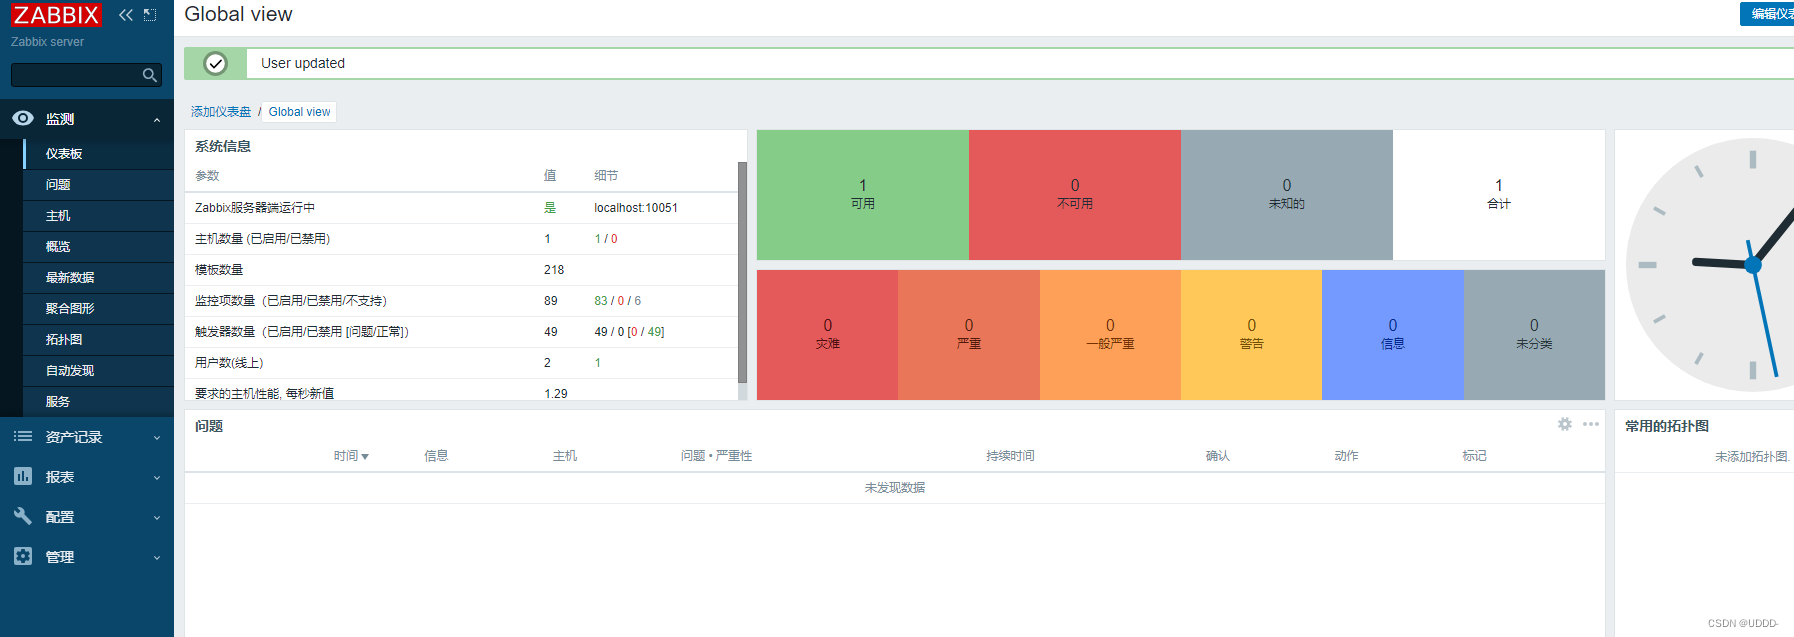
修改前端语言
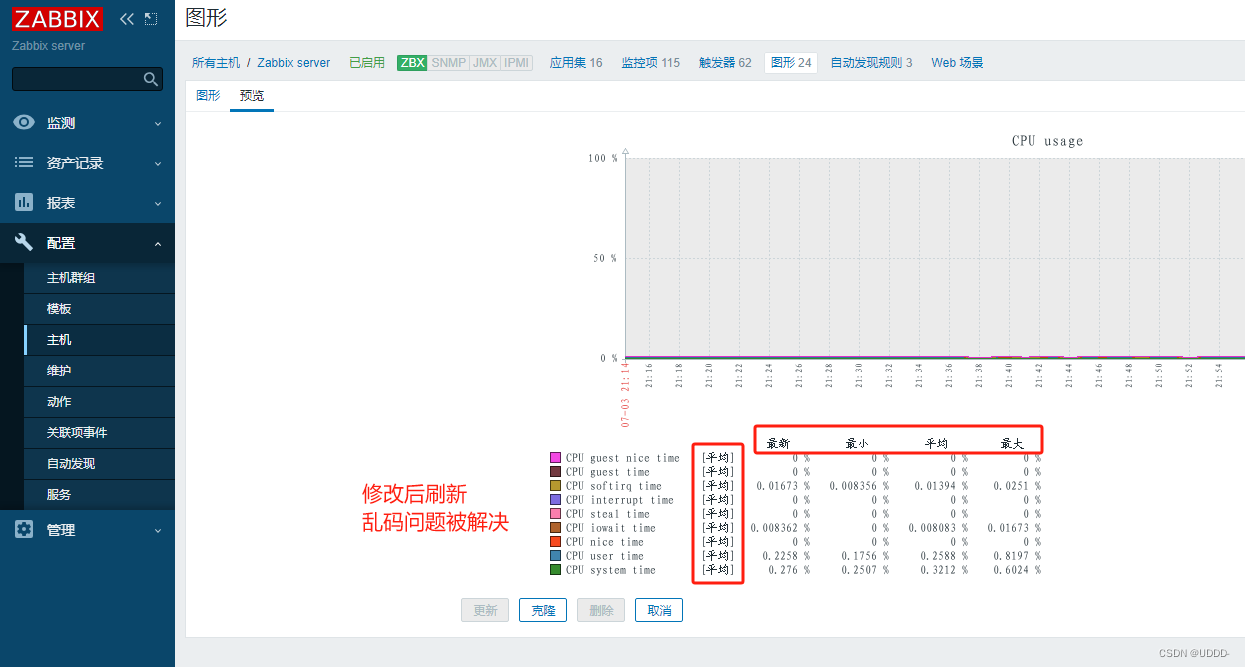
修改字体
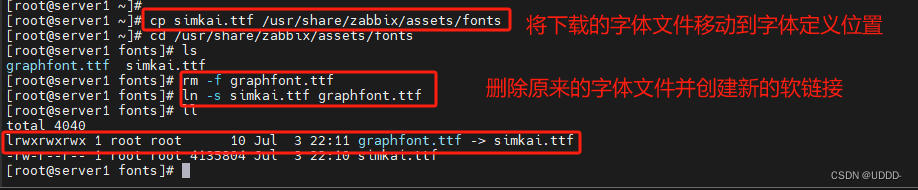
修改字体文件
cp simkai.ttf /usr/share/zabbix/assets/fonts
cd /usr/share/zabbix/assets/fonts
[root@server1 fonts]# rm -f graphfont.ttf
[root@server1 fonts]# ln -s simkai.ttf graphfont.ttf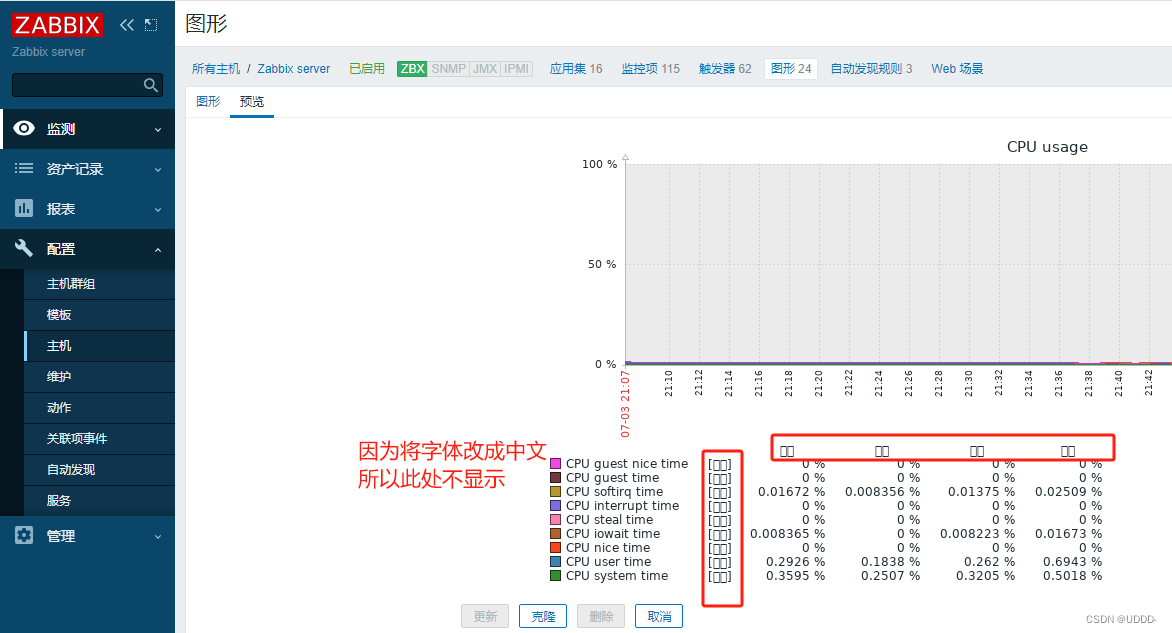
###2.添加agent###
(1)手动添加
①agent配置
从server1拷贝repo文件
[root@server1 yum.repos.d]# scp zabbix.repo server2:/etc/yum.repos.d/
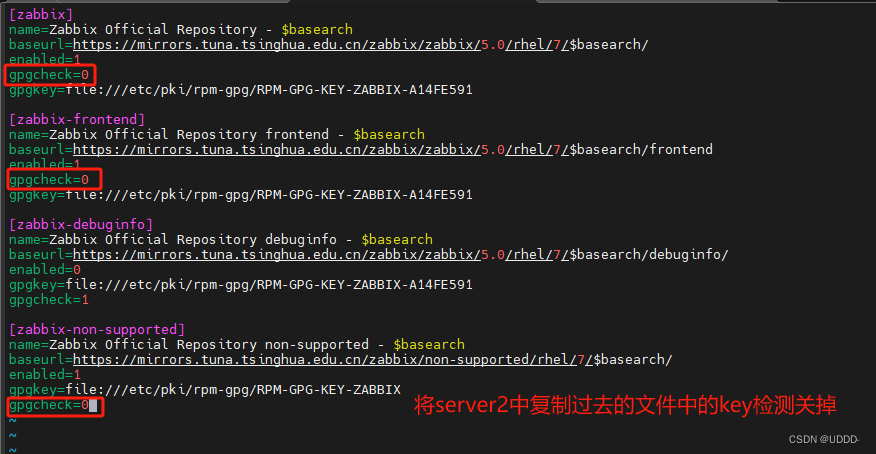
server2编辑拷贝过去的文件,禁掉key认证
[root@server2 ~]# vim /etc/yum.repos.d/zabbix.repo
...
gegcheck=0
...
[root@server2 yum.repos.d]# yum install -y zabbix-agent
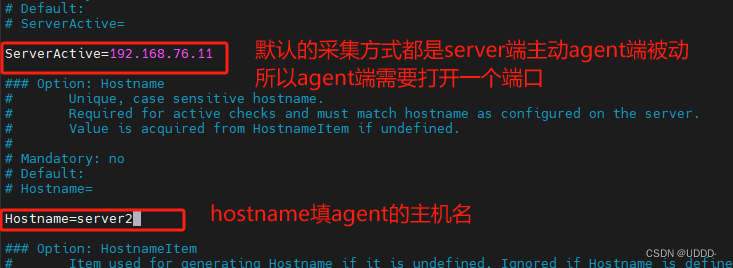
[root@server2 ~]# vim /etc/zabbix/zabbix_agentd.conf
...
Server=192.168.56.11
ServerActive=192.168.56.11
Hostname=server2
[root@server2 zabbix]# systemctl enable --now zabbix-agent.service
[root@server2 ~]# netstat -antlp |grep :10050
tcp 0 0 0.0.0.0:10050 0.0.0.0:* LISTEN 8336/zabbix_agentd


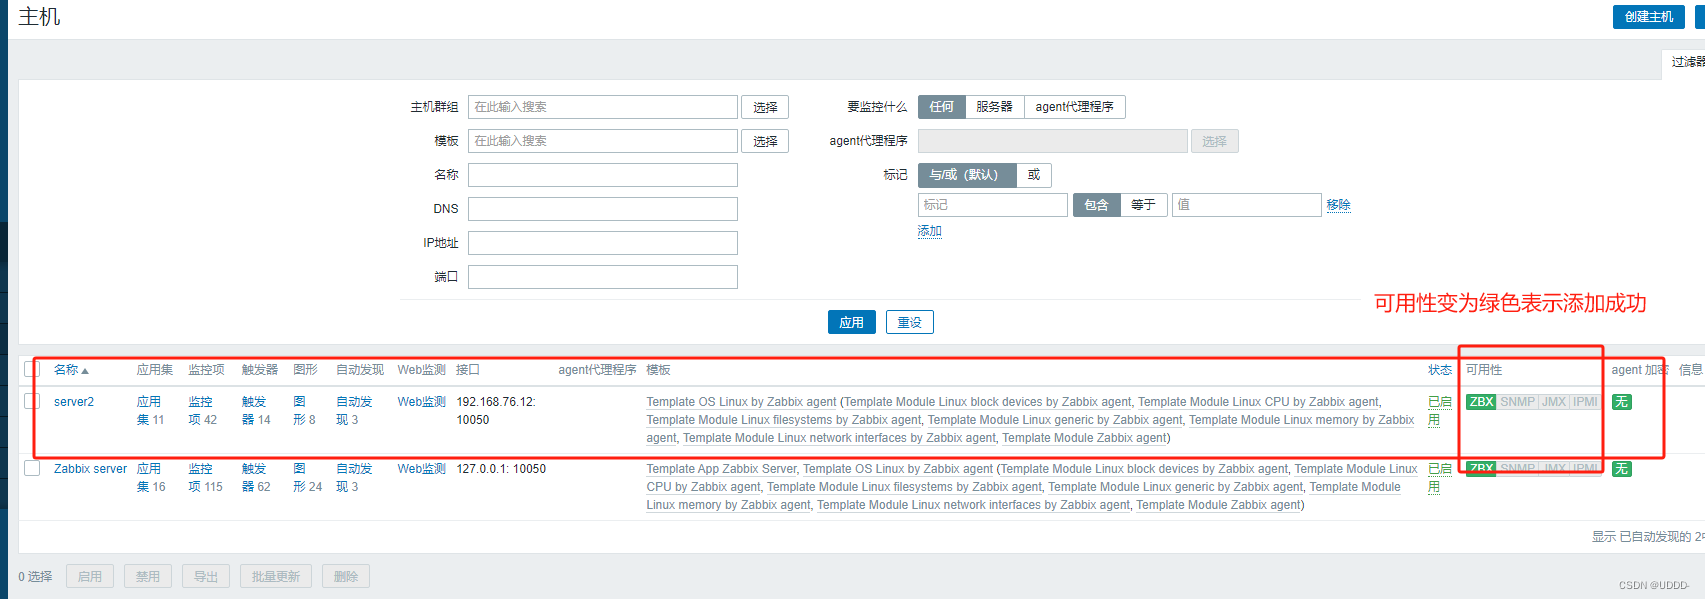
②server端配置
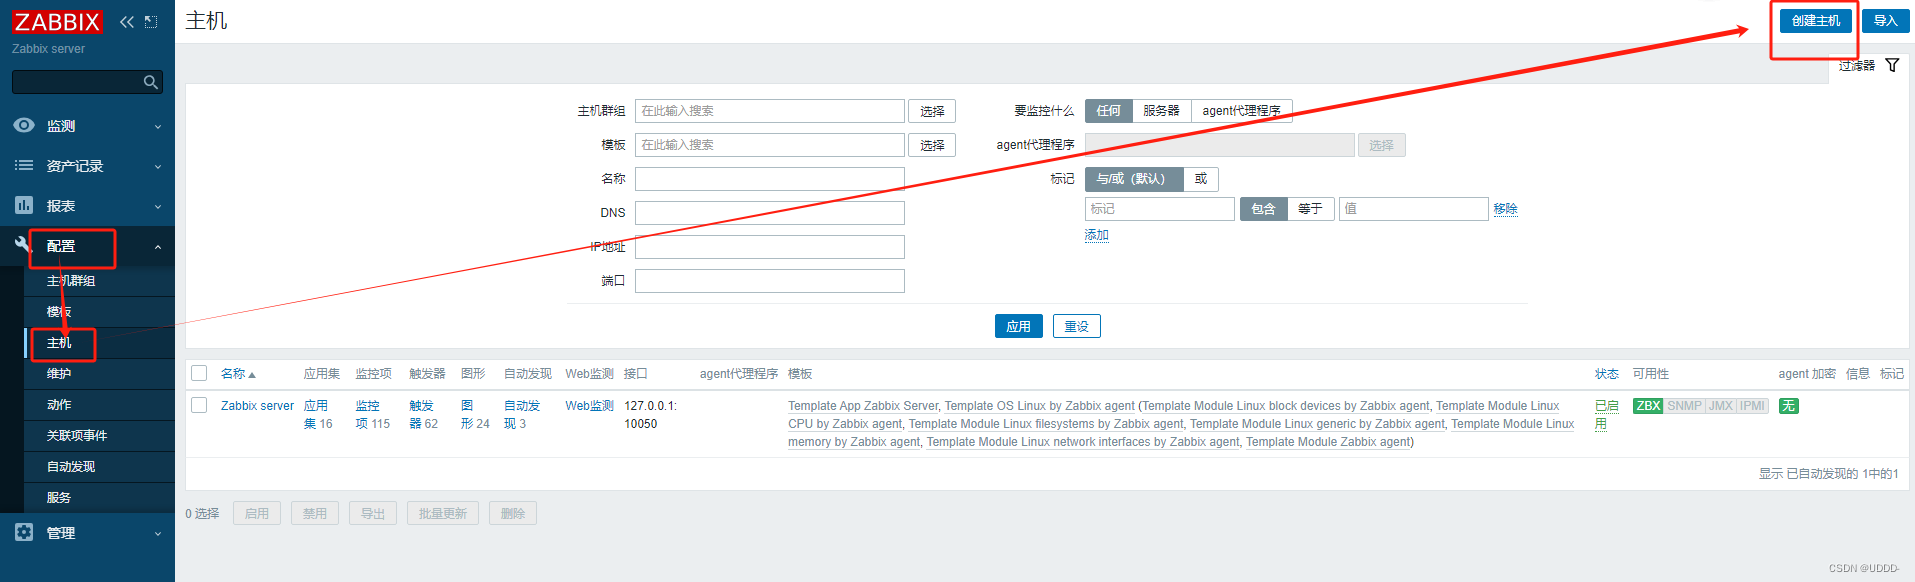
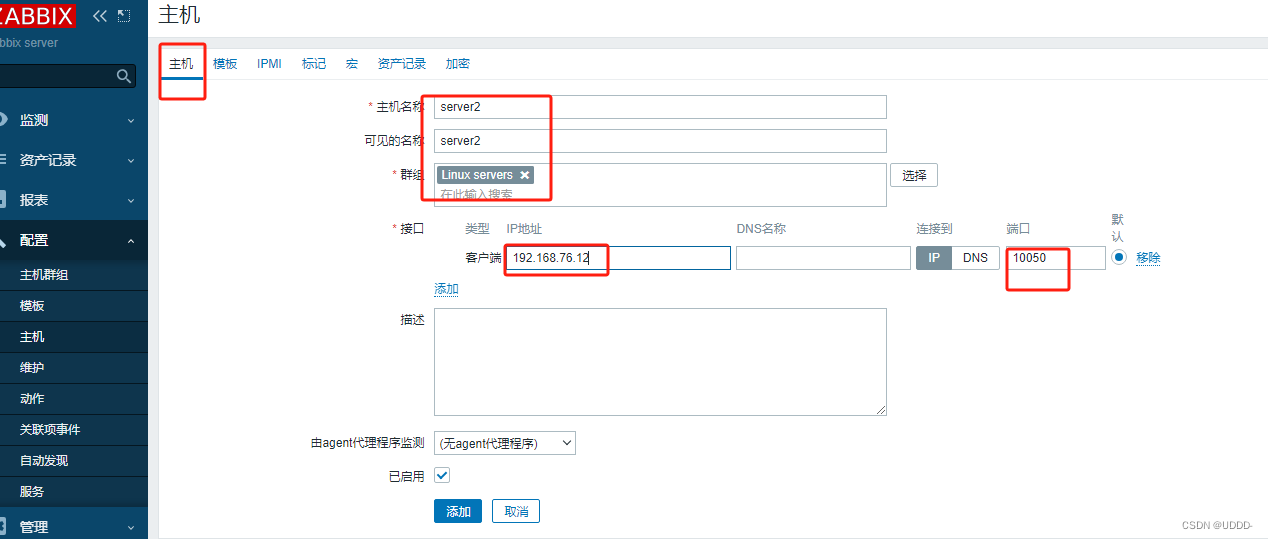
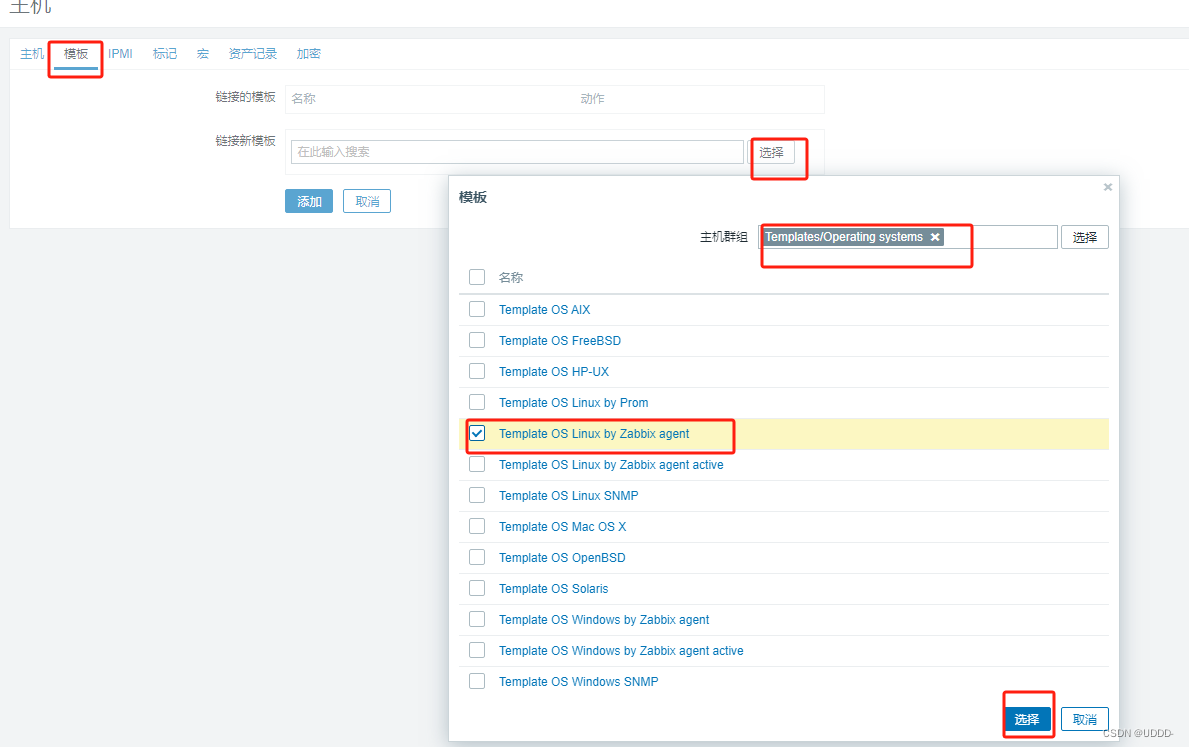

可用性变成绿色表示添加成功
(2)自动发现
①agent配置
从server2拷贝repo文件
[root@server1 yum.repos.d]# scp zabbix.repo server3:/etc/yum.repos.d/
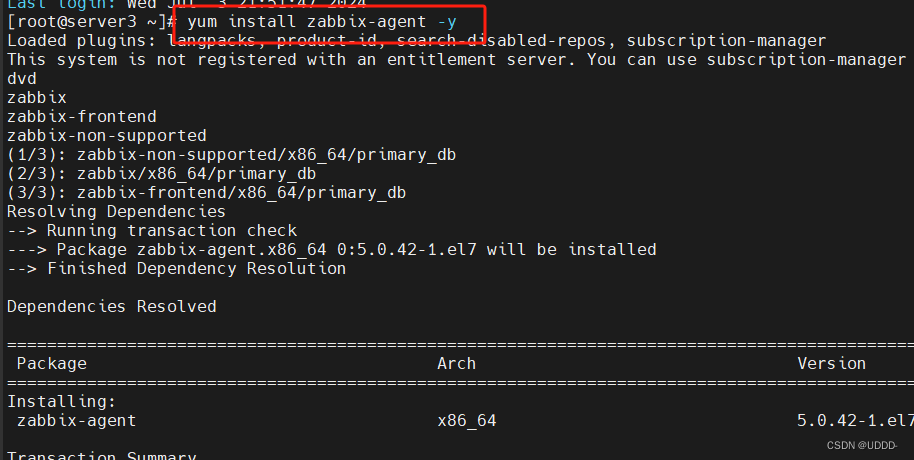
[root@server3 yum.repos.d]# yum install -y zabbix-agent
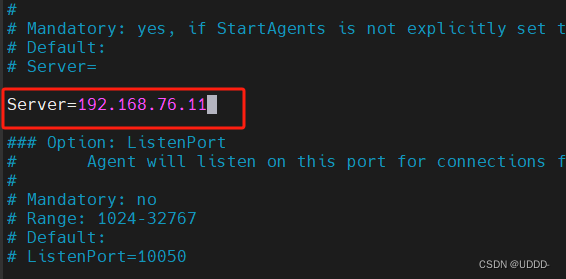
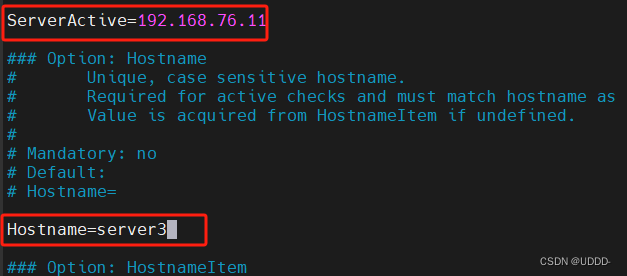
[root@server3 ~]# vim /etc/zabbix/zabbix_agentd.conf
...
Server=192.168.56.11
ServerActive=192.168.56.11
Hostname=server3
[root@server3 zabbix]# systemctl enable --now zabbix-agent.service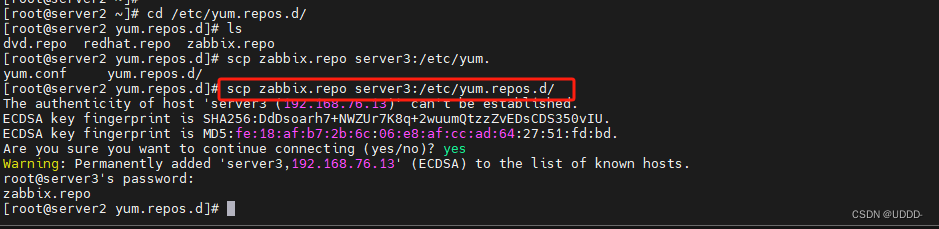

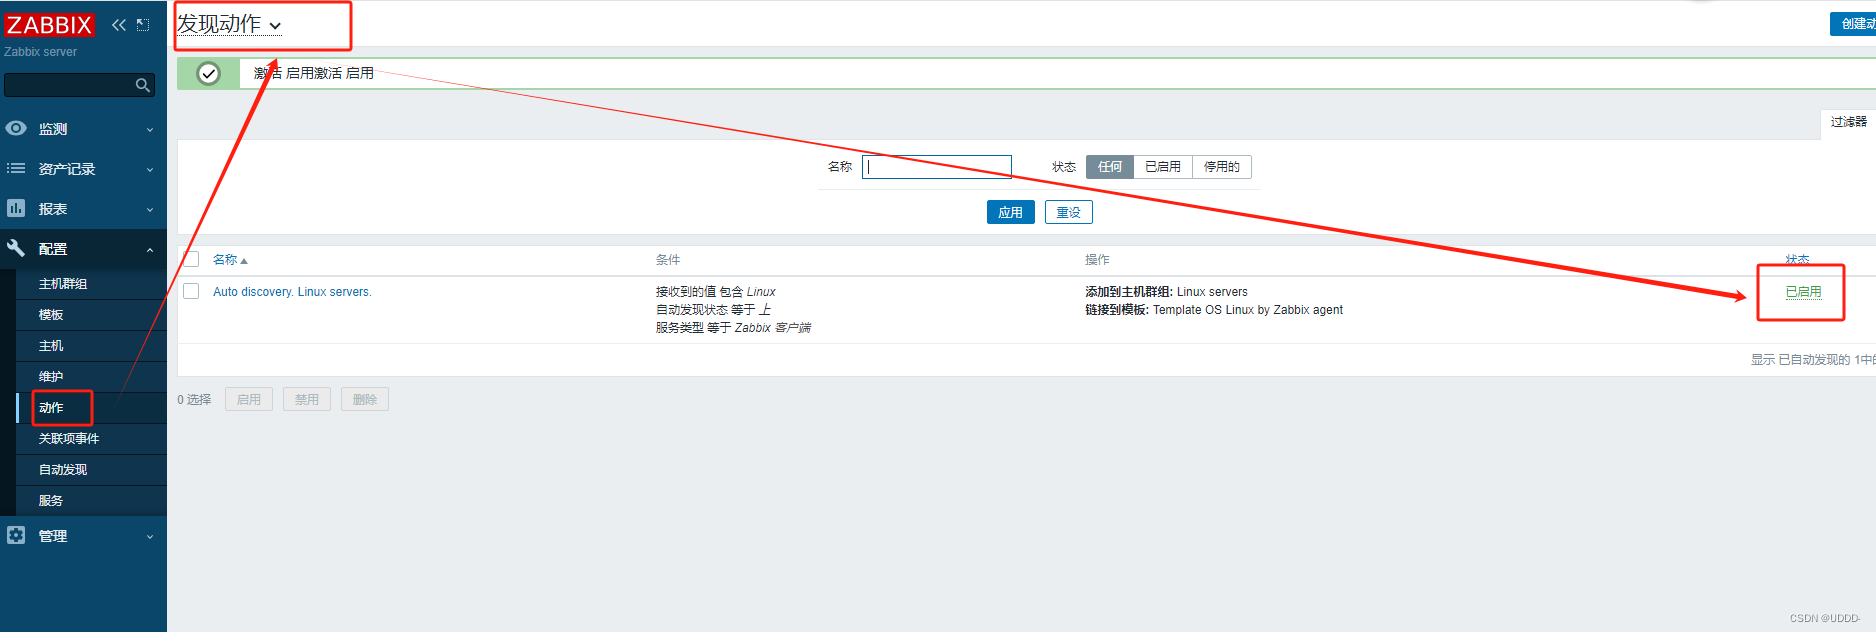
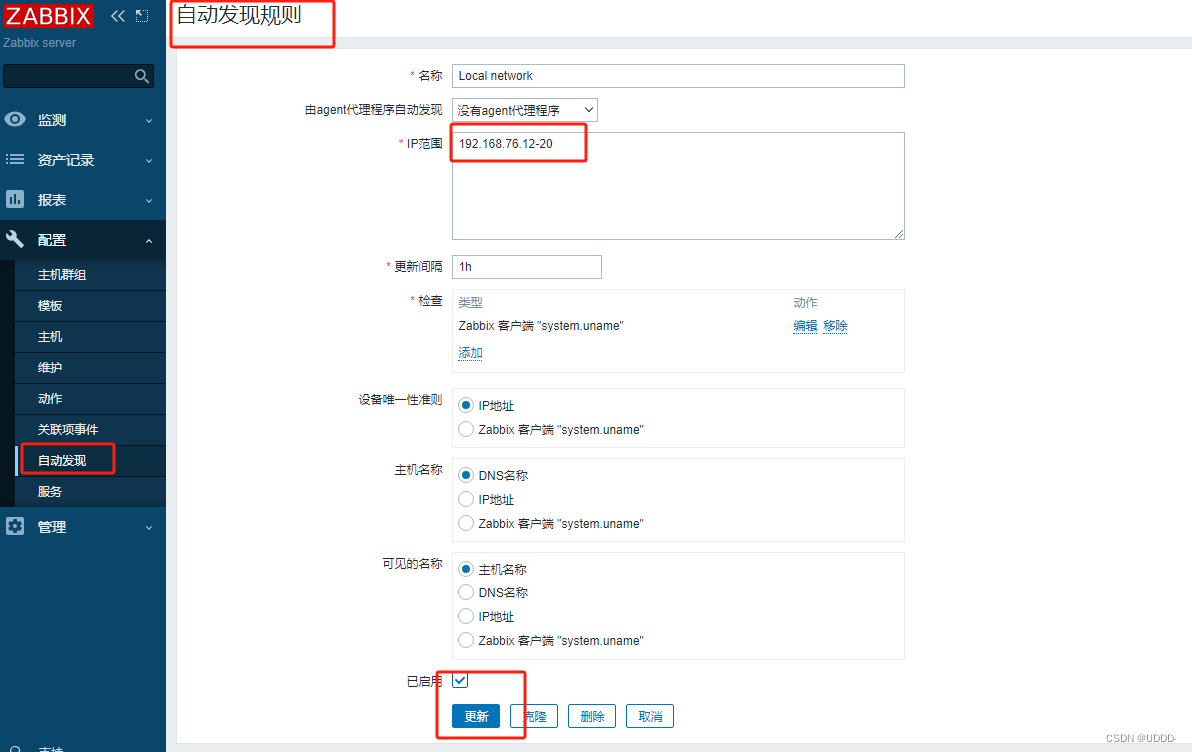
②server端配置
选择发现动作,并激活
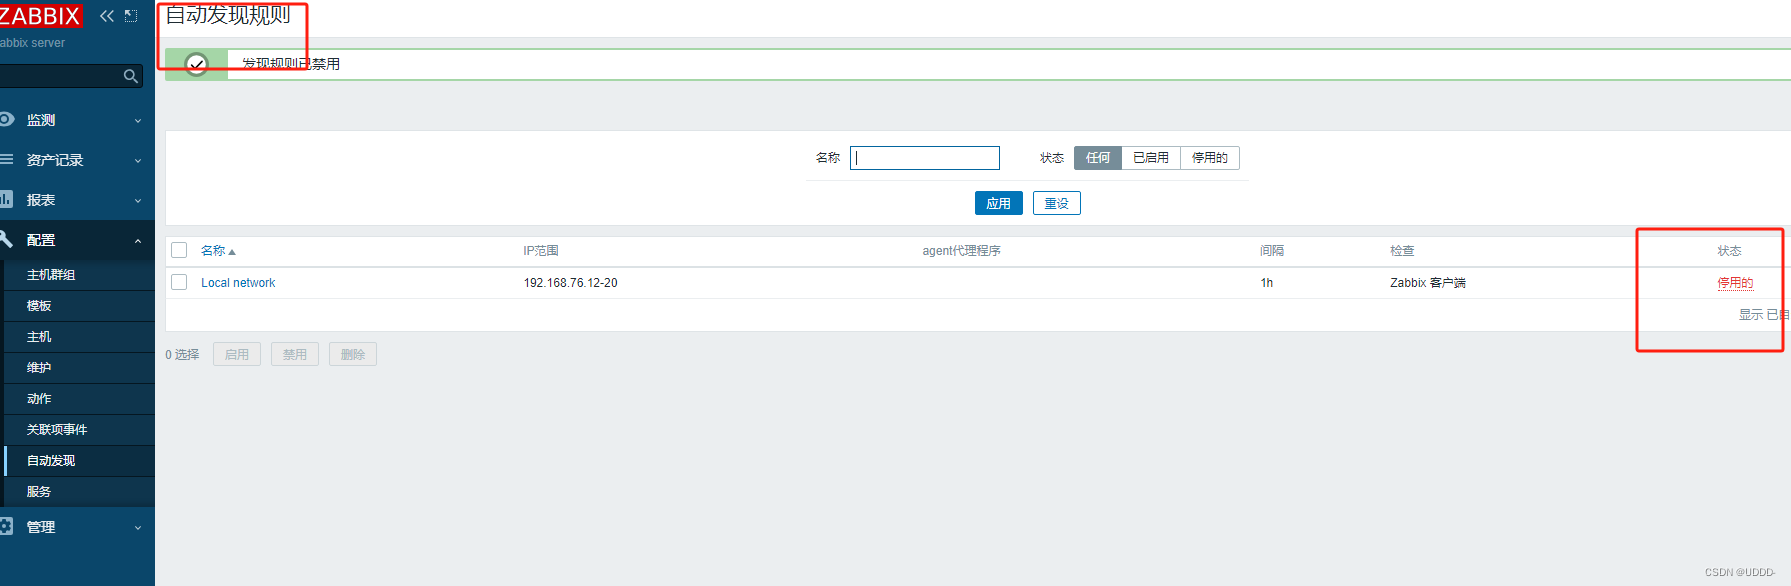
选择自动发现,修改实际的网络地址段,并激活


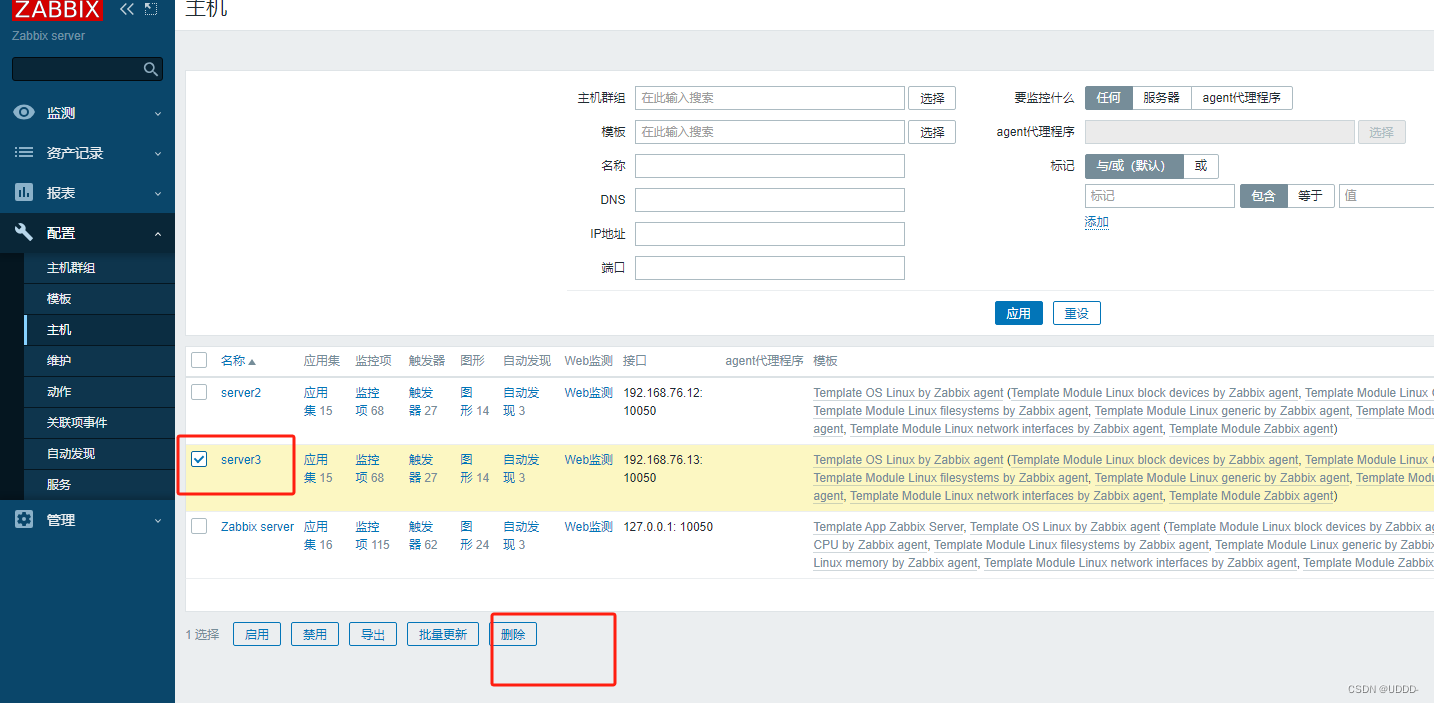
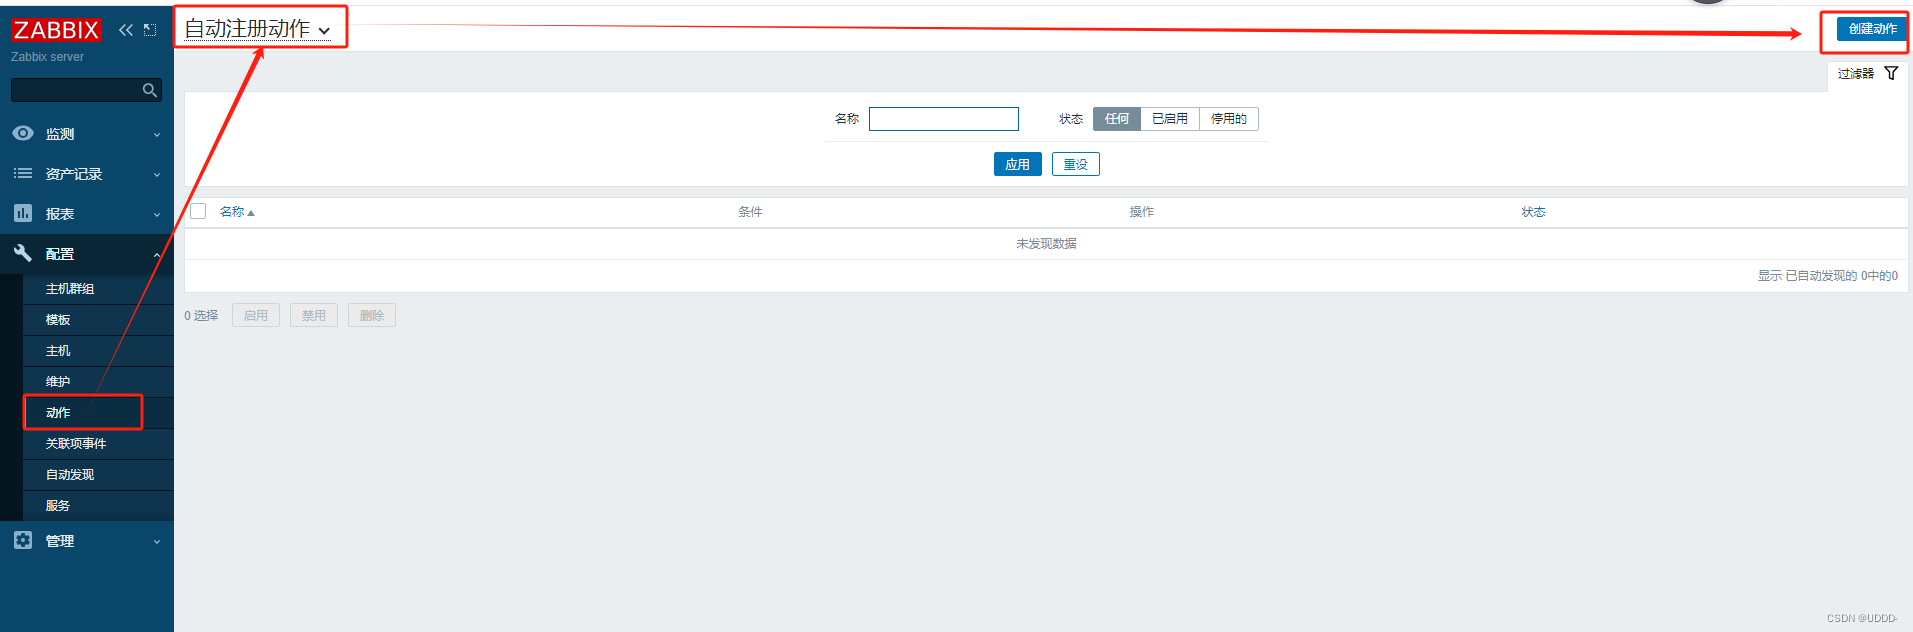
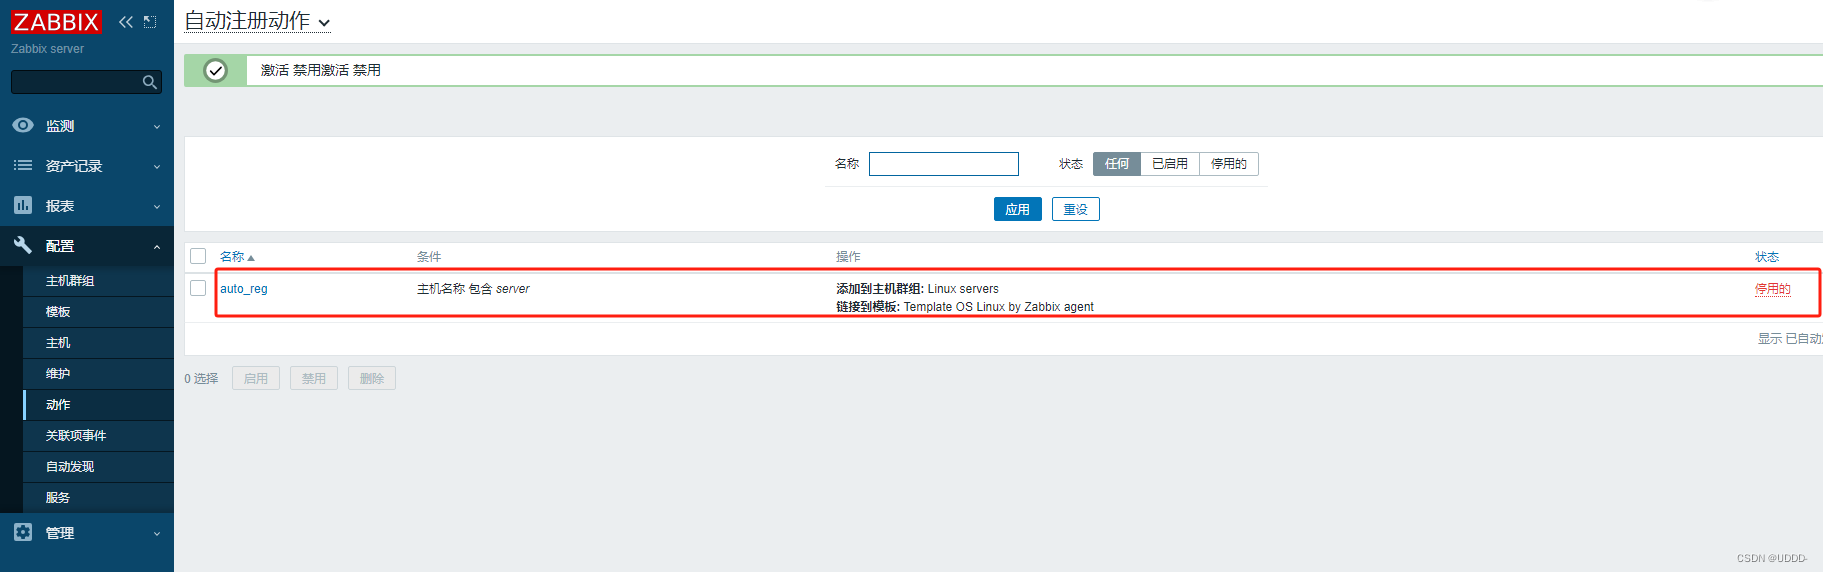
(3)自动注册
先删除server3主机
停用自动发现规则
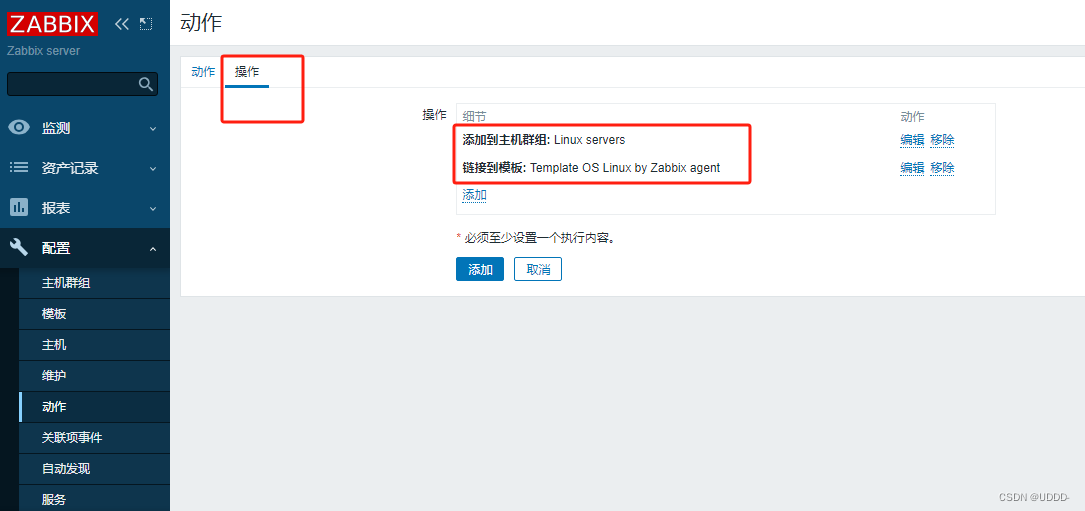
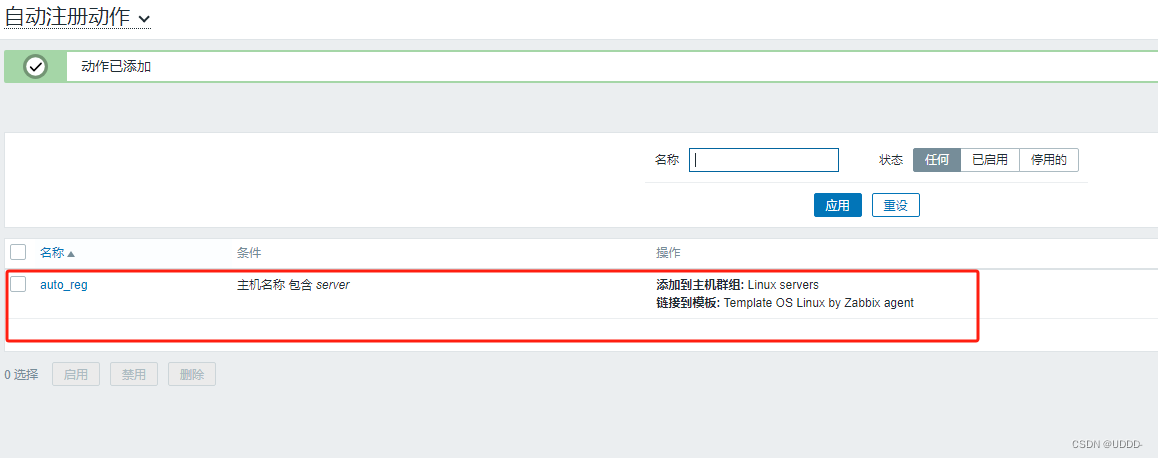
创建自动注册动作

agent端重启服务

(4)zabbix api
参考官方文档手册
https://www.zabbix.com/documentation/5.0/zh/manual/api
Zabbix API允许你以编程方式检索和修改Zabbix的配置,并提供对历史数据的访问。它广泛用于:
创建新的应用程序以使用Zabbix;
将Zabbix与第三方软件集成;
自动执行常规任务。大多数API至少包含四种方法: get, create, update 和 delete ,分别是检索,创建,更新和删除数据,但是某些API提供一套完全不同的一组方法。
①获取身份验证
在访问Zabbix中的任何数据之前,你需要登录并获取身份验证令牌。这可以使用该 user.login 方法完成。让我们假设你想要以标准Zabbix Admin用户身份登录。然后,你的JSON请求将如下所示:
响应对象又包含以下属性:
jsonrpc - JSON-RPC协议的版本;
result - 请求返回的数据;
id - 相应请求的id
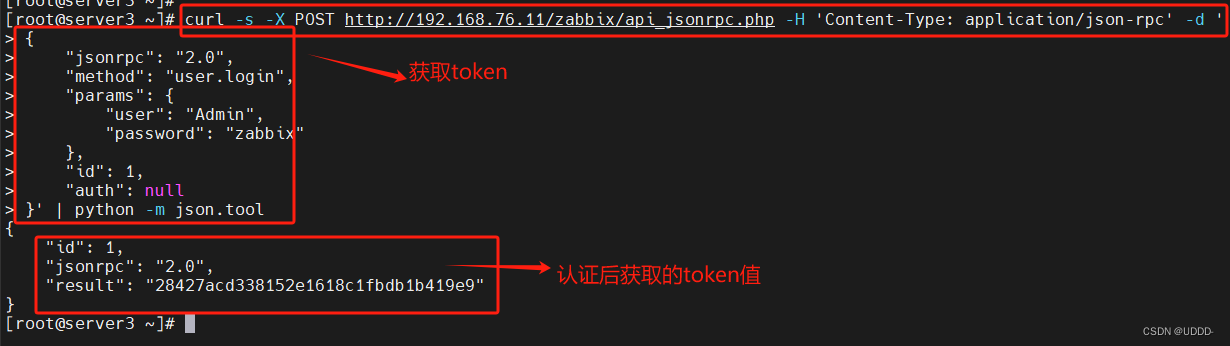
获取token
curl -s -X POST http://192.168.56.11/zabbix/api_jsonrpc.php -H 'Content-Type: application/json-rpc' -d '
{
    "jsonrpc": "2.0",
    "method": "user.login",
    "params": {
        "user": "Admin",
        "password": "zabbix"
    },
    "id": 1,
    "auth": null
}' | python -m json.tool

认证后获取的token值
{
    "id": 1,
    "jsonrpc": "2.0",
    "result": "2a1536963f6ba0eeed3d0c113b16dc50"
}
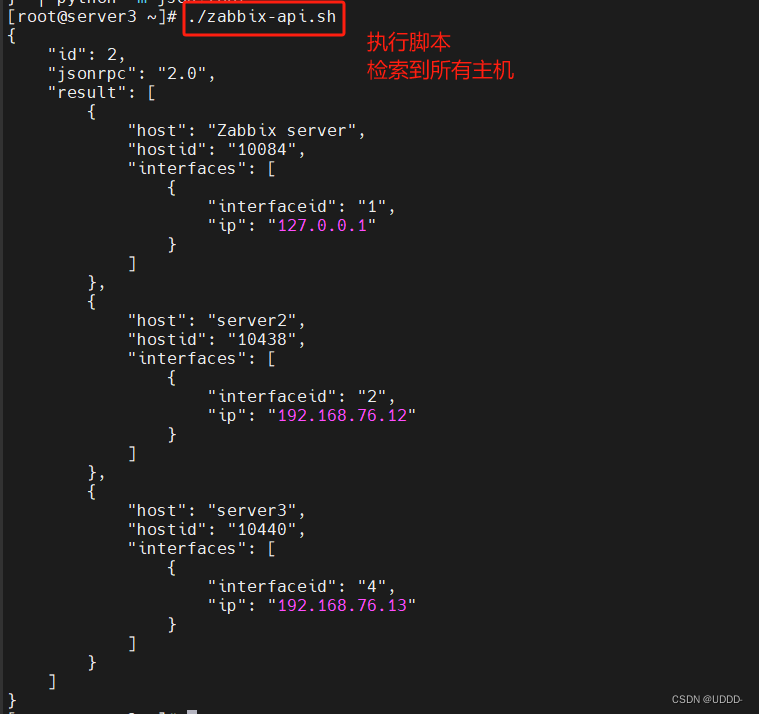
②检索主机
使用 host.get 方法检索所有已配置主机的ID,主机名和接口
检索主机
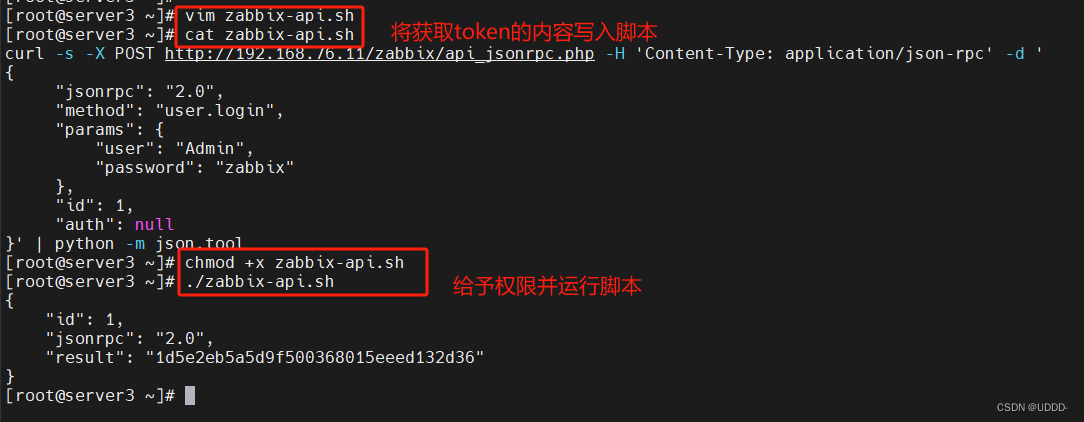
vim zabbix_api.sh
curl -s -X POST http://192.168.56.11/zabbix/api_jsonrpc.php -H 'Content-Type: application/json-rpc' -d '
{
"jsonrpc": "2.0",
"method": "host.get",
"params": {
"output": [
"hostid",
"host"
],
"selectInterfaces": [
"interfaceid",
"ip"
]
},
"id": 2,
"auth": "2a1536963f6ba0eeed3d0c113b16dc50"
}' | python -m json.tool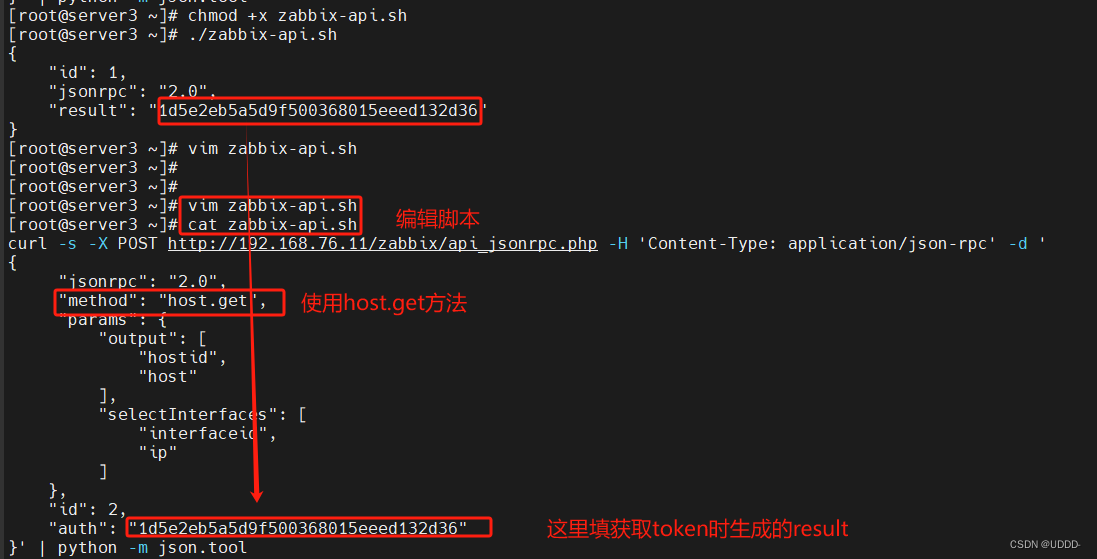
③删除主机
删除之前先将前端的自动注册动作禁用
根据hostid,将主机删除
删除主机
vim zabbix_api.sh
curl -s -X POST http://192.168.56.11/zabbix/api_jsonrpc.php -H 'Content-Type: application/json-rpc' -d '
{
    "jsonrpc": "2.0",
    "method": "host.delete",
    "params": [
        "10440"
    ],
    "id": 2,
    "auth": "2a1536963f6ba0eeed3d0c113b16dc50"
}' | python -m json.tool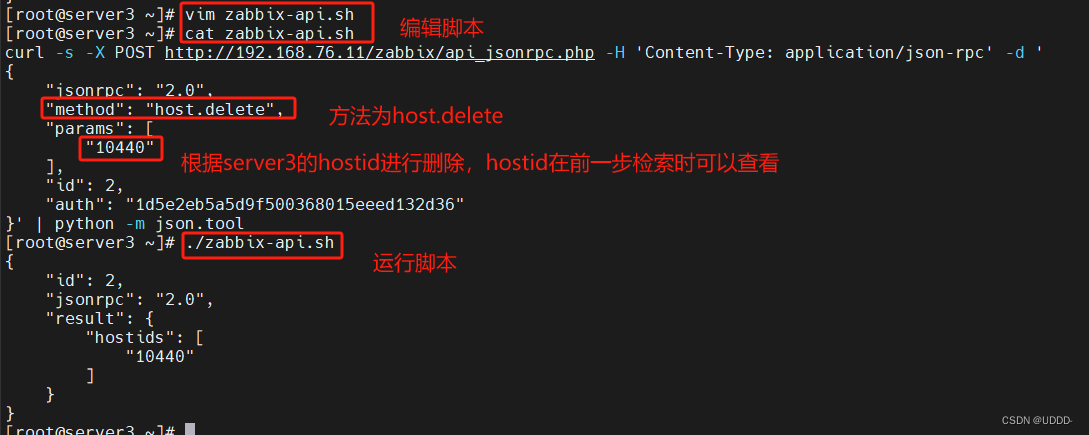

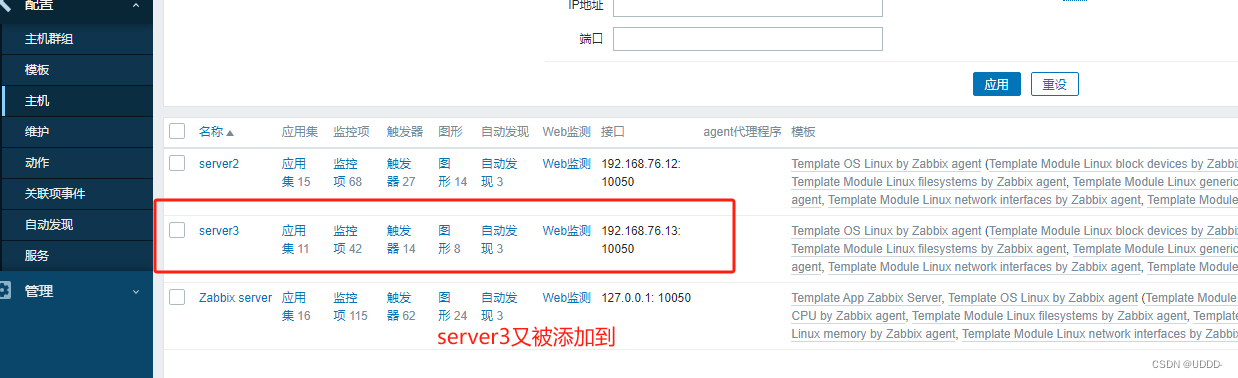
④创建主机
查看主机群组的id

查看模板的id
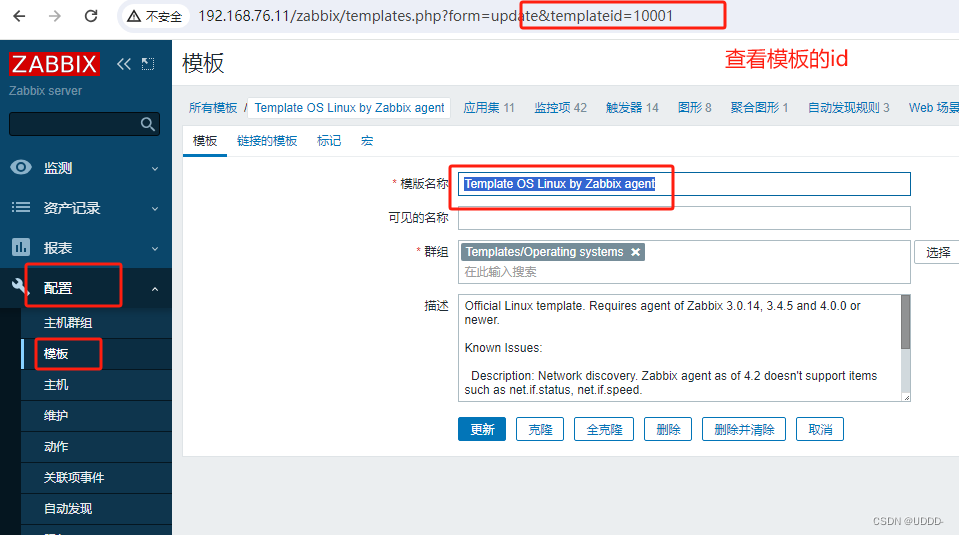
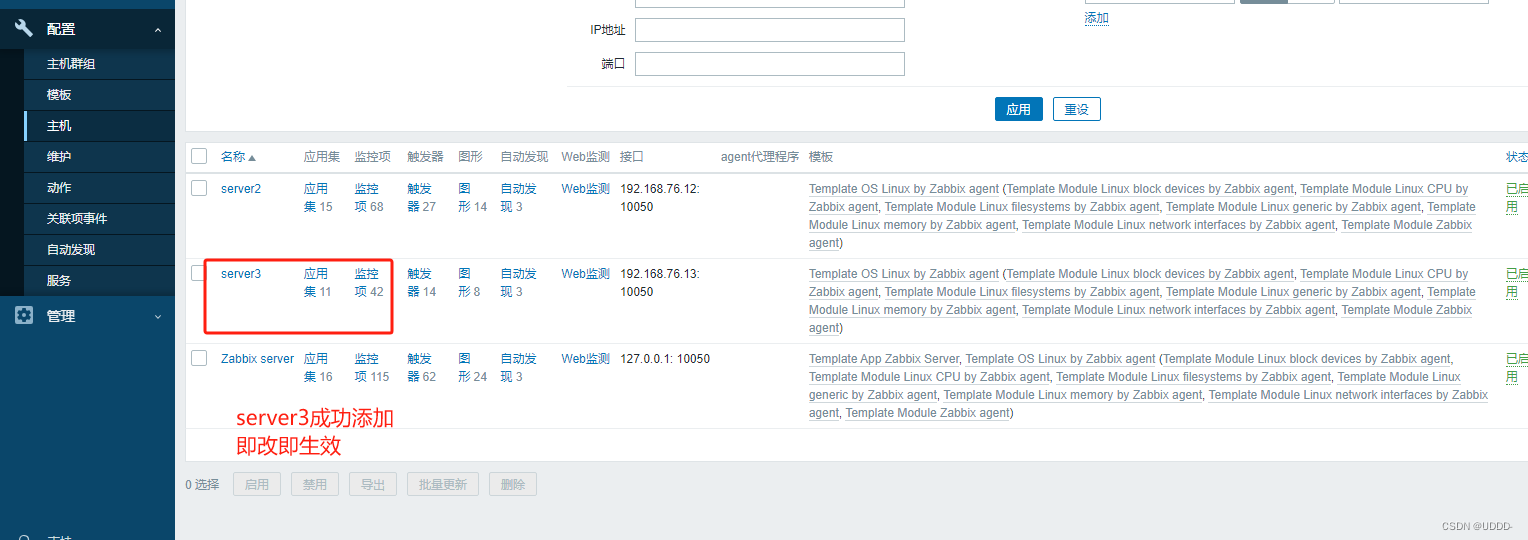
创建主机
vim zabbix_api.sh
curl -s -X POST http://192.168.56.11/zabbix/api_jsonrpc.php -H 'Content-Type: application/json-rpc' -d '
{
    "jsonrpc": "2.0",
    "method": "host.create",
    "params": {
        "host": "server3",
        "interfaces": [
            {
                "type": 1,
                "main": 1,
                "useip": 1,
                "ip": "192.168.56.13",
                "dns": "",
                "port": "10050"
            }
        ],
        "groups": [
            {
                "groupid": "2"
            }
        ],
        "tags": [
            {
                "tag": "Host name",
                "value": "server3"
            }
        ],
        "templates": [
            {
                "templateid": "10001"
            }
        ]
    },
    "id": 2,
    "auth": "2a1536963f6ba0eeed3d0c113b16dc50"
}' | python -m json.tool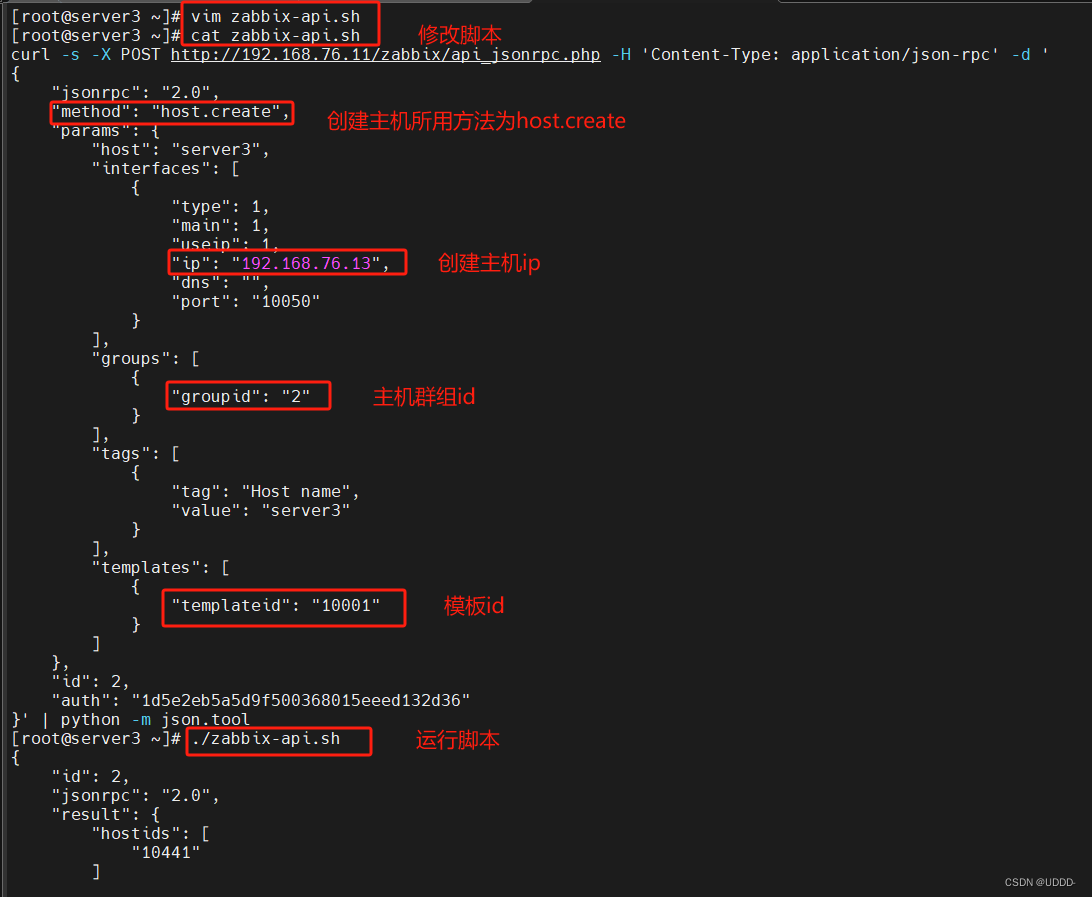
 ###3.Zabbix服务监控###
(1)nginx监控
①源码编译nginx
安装nginx
[root@server2 ~]# tar zxf nginx-1.23.3.tar.gz
[root@server2 ~]# cd nginx-1.23.3/
[root@server2 nginx-1.23.3]# yum install -y gcc make openssl-devel pcre-devel
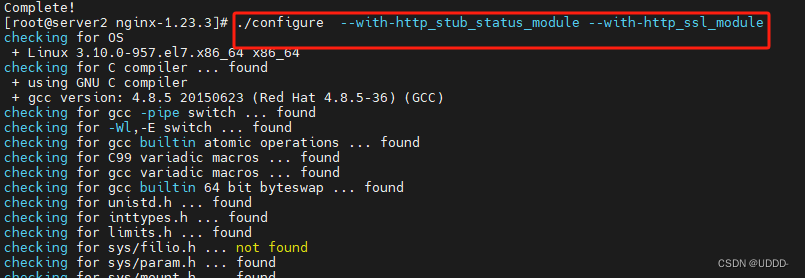
[root@server2 nginx-1.23.3]# ./configure --with-http_stub_status_module --with-http_ssl_module
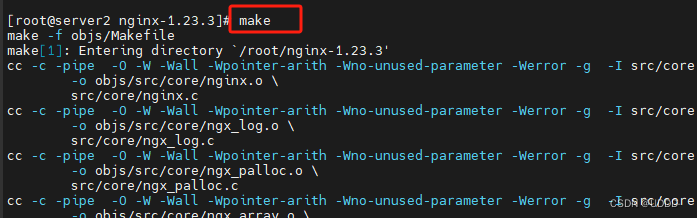
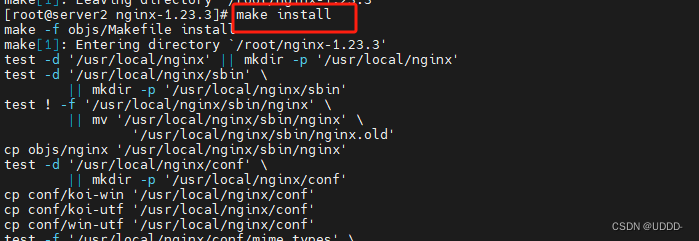
[root@server2 nginx-1.23.3]# make && make install
[root@server2 nginx]# ln -s /usr/local/nginx/sbin/nginx /usr/local/bin/
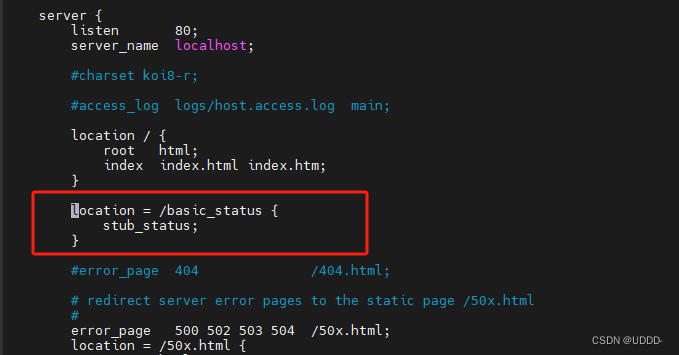
[root@server2 ~]# vim /usr/local/nginx/conf/nginx.conf
server {
listen 80;
server_name localhost;
...
location = /basic_status {
stub_status;
}
...
[root@server2 conf]# nginx
[root@server2 conf]# netstat -antlp|grep :80
tcp 0 0 0.0.0.0:80 0.0.0.0:* LISTEN 23962/nginx: master
[root@server2 conf]# curl localhost/basic_status
Active connections: 1
server accepts handled requests
3 3 3
Reading: 0 Writing: 1 Waiting: 0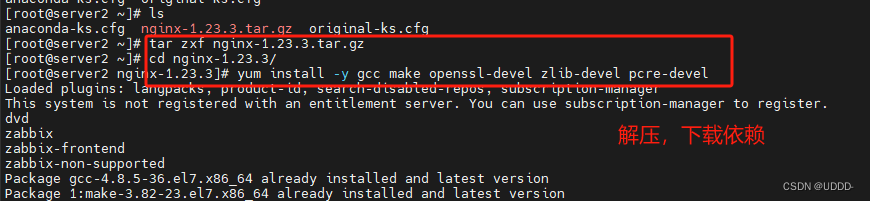
源码编译三部曲
开启服务,nginx监听80端口。修改配置文件,添加新的模块
Nginx 的 stub_status 模块用于查看 Nginx 的基本状态信息。


②前端关联模块
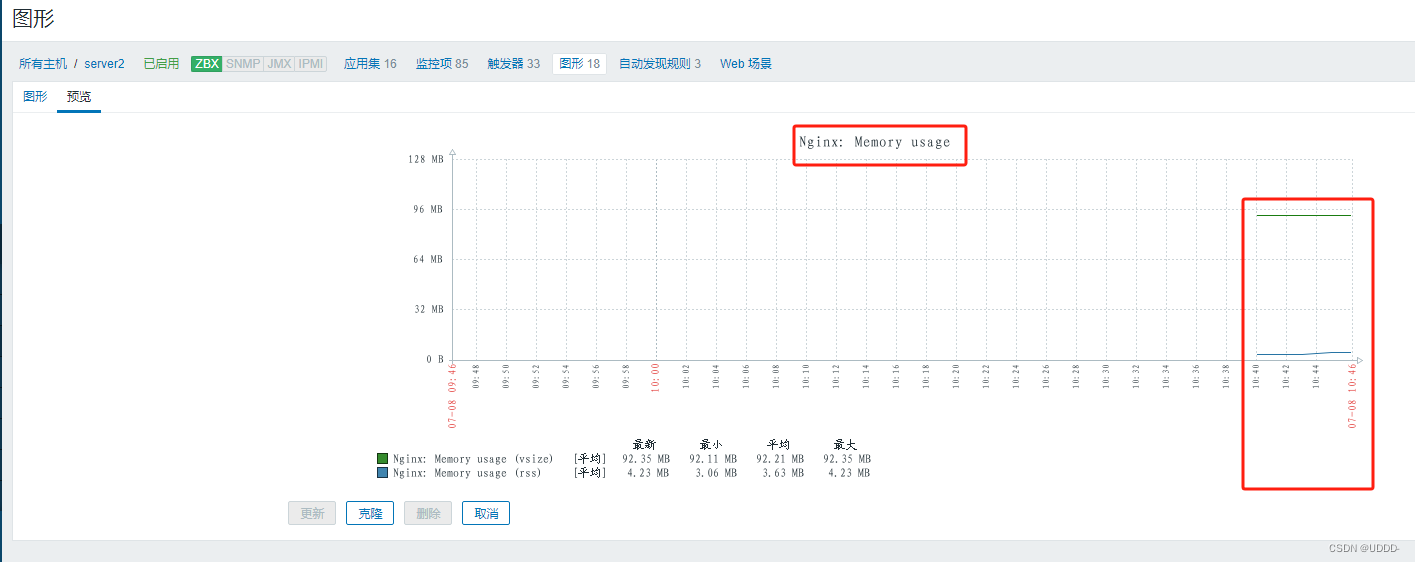
在server端为主机关联nginx服务监控模板

(2)MySQL监控
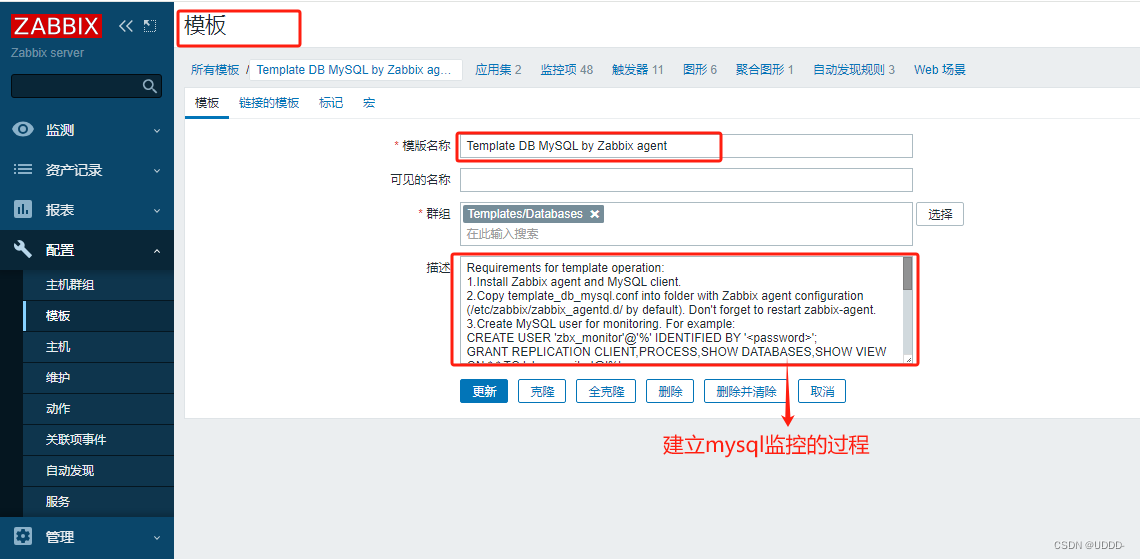
①添加模板
拷贝模板
[root@server1 ~]# cp /usr/share/doc/zabbix-agent-5.0.31/userparameter_mysql.conf /etc/zabbix/zabbix_agentd.d/

重启agent
[root@server1 zabbix_agentd.d]# systemctl  restart zabbix-agent.service
创建数据库连接用户
[root@server1 zabbix_agentd.d]# mysql -p
mysql> CREATE USER 'zbx_monitor'@'%' IDENTIFIED BY 'Yakexi+007';
Query OK, 0 rows affected (0.00 sec)

mysql> GRANT REPLICATION CLIENT,PROCESS,SHOW DATABASES,SHOW VIEW ON *.* TO 'zbx_monitor'@'%';
Query OK, 0 rows affected (0.00 sec)

mysql> flush privileges;
Query OK, 0 rows affected (0.00 sec)

创建数据库连接文件
[root@server1 ~]# mkdir /var/lib/zabbix/
[root@server1 ~]# vim /var/lib/zabbix/.my.cnf
[client]
user=zbx_monitor
password=Yakexi+007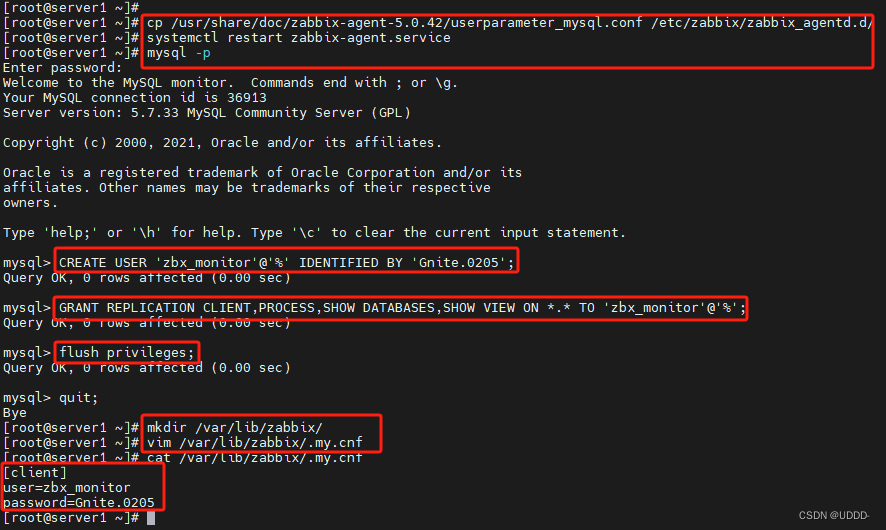
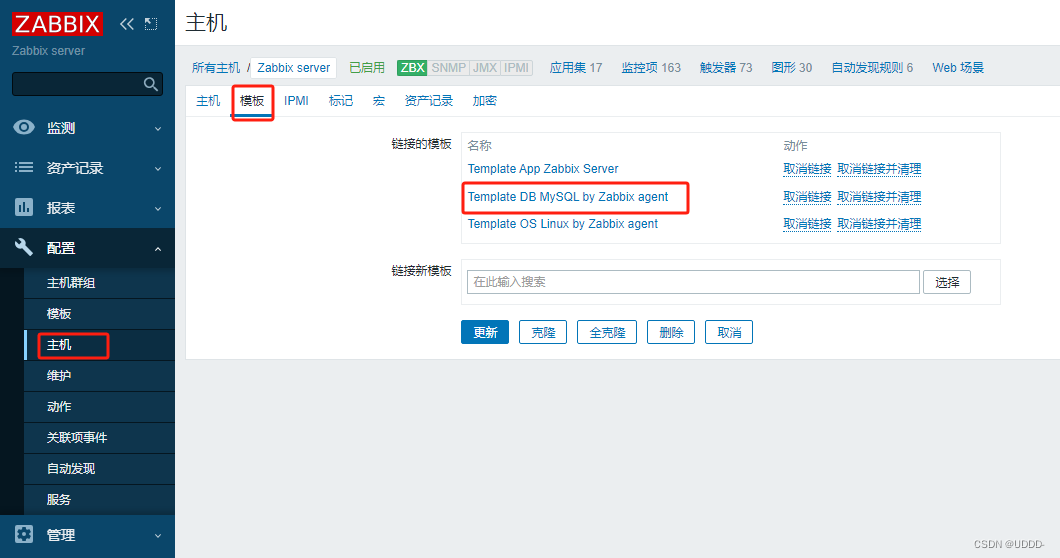
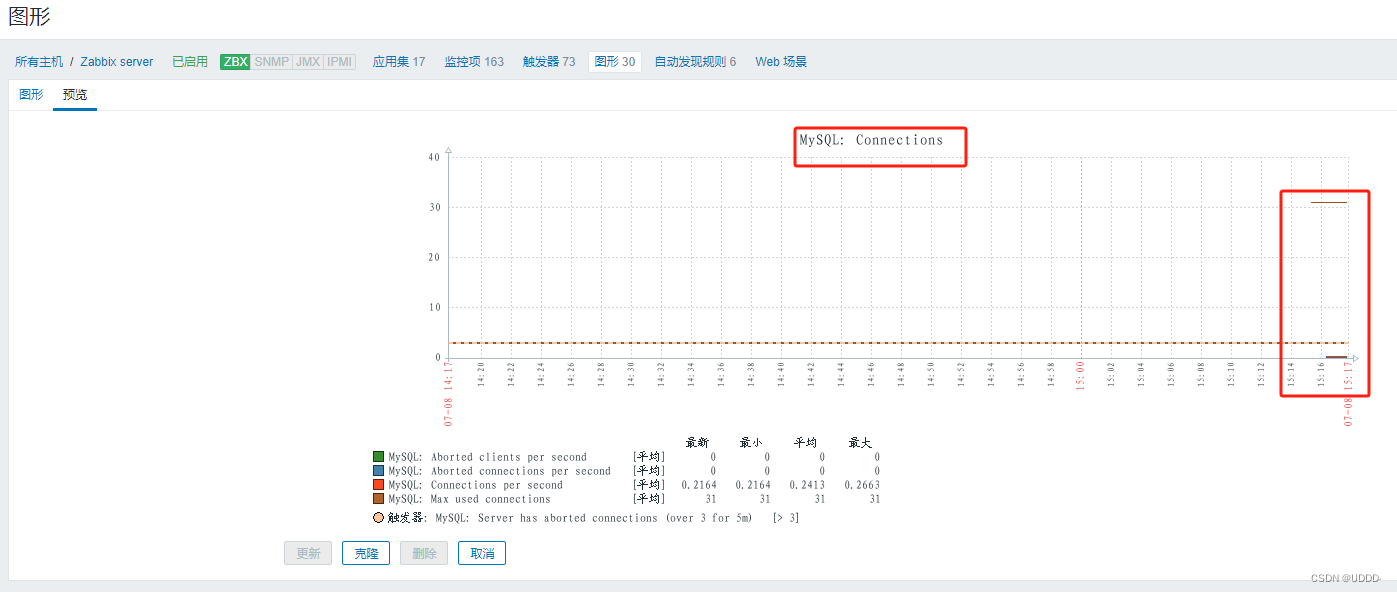
②前端关联模块
(3)percona数据库模板
zabbix自带的mysql模板比较简单,所以推荐使用percona的数据库模板
①添加模板
[root@server1 ~]# rpm -ivh percona-zabbix-templates-1.1.8-1.noarch.rpm

[root@server1 scripts]# cd /var/lib/zabbix/percona/templates
[root@server1 templates]# cp userparameter_percona_mysql.conf /etc/zabbix/zabbix_agentd.d/
[root@server1 templates]# systemctl  restart zabbix-agent.service

[root@server1 zabbix_agentd.d]# cd /var/lib/zabbix/percona/scripts/
[root@server1 scripts]# vim ss_get_mysql_stats.php
...
$mysql_user = 'root';
$mysql_pass = 'Yakexi+007';

测试脚本
[root@server1 scripts]# ln -s /opt/rh/rh-php72/root/usr/bin/php /usr/bin/php

[root@server1 scripts]#  /var/lib/zabbix/percona/scripts/get_mysql_stats_wrapper.sh gg
20
有数据显示就表示正常

删除tmp下的缓存文件
[root@server1 tmp]# rm -f localhost-mysql_cacti_stats.txt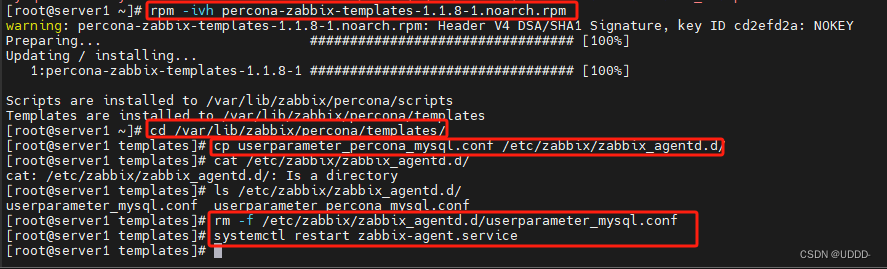


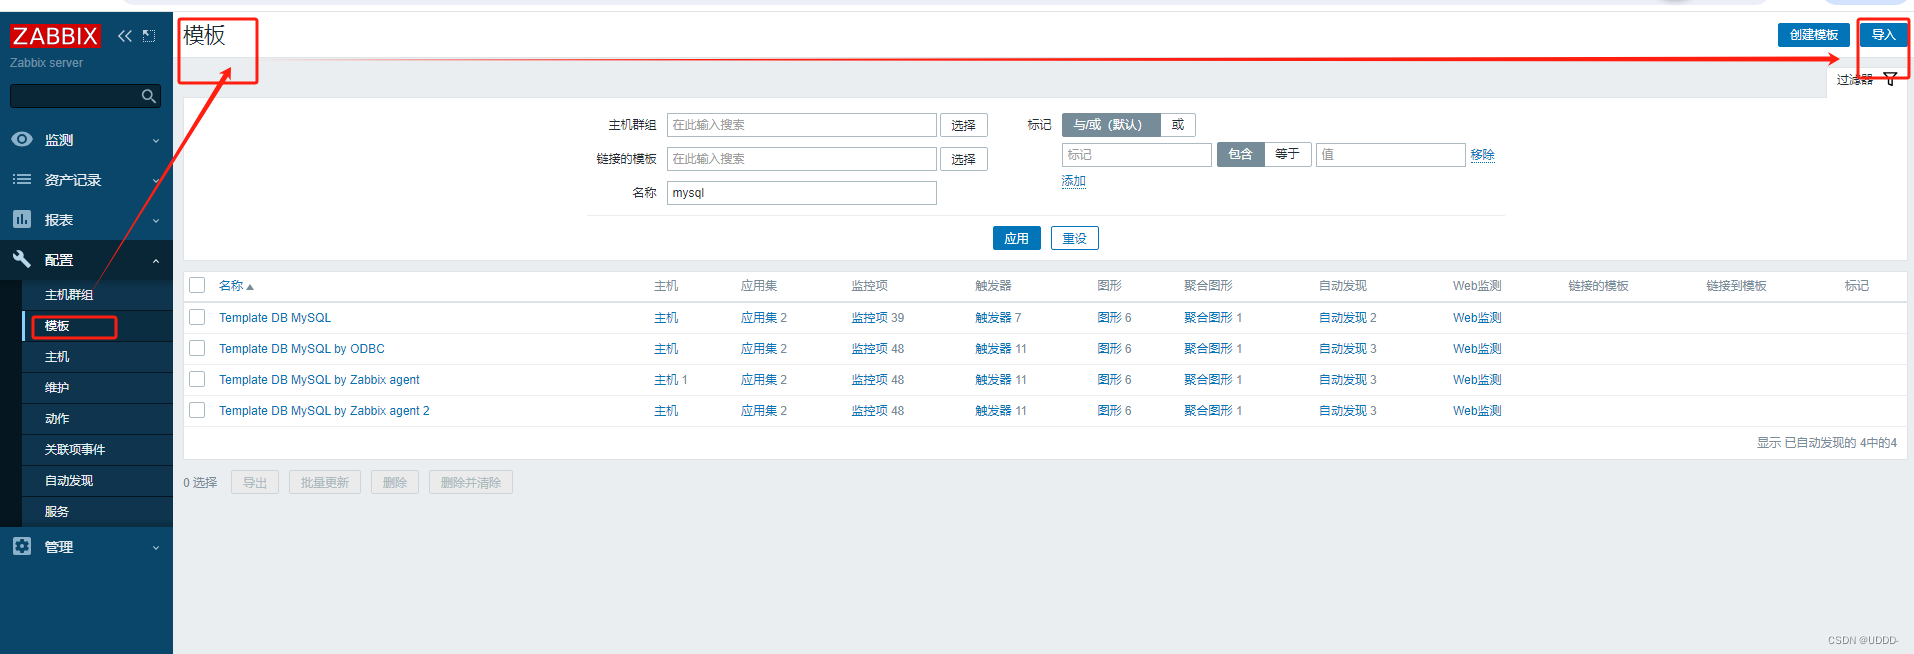
②前端编译模块
导入模板文件

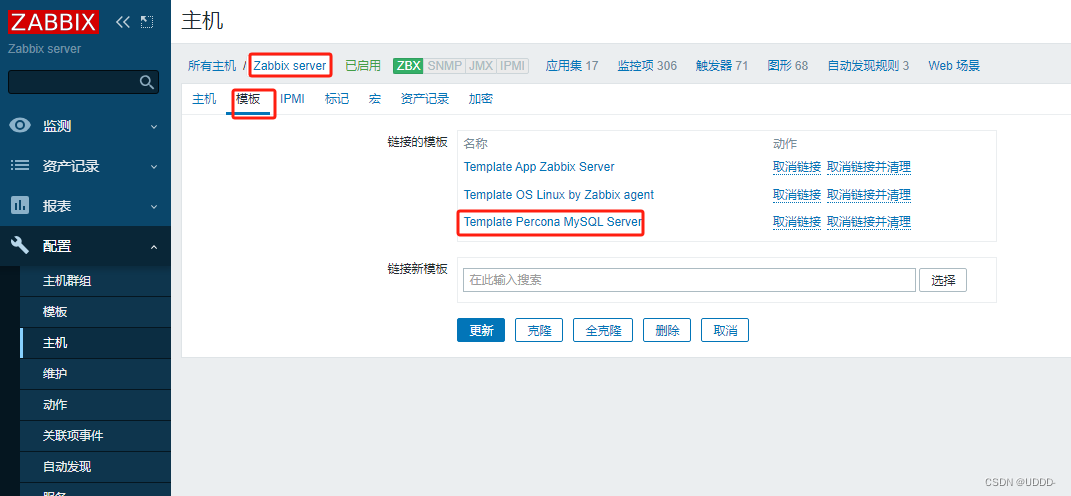
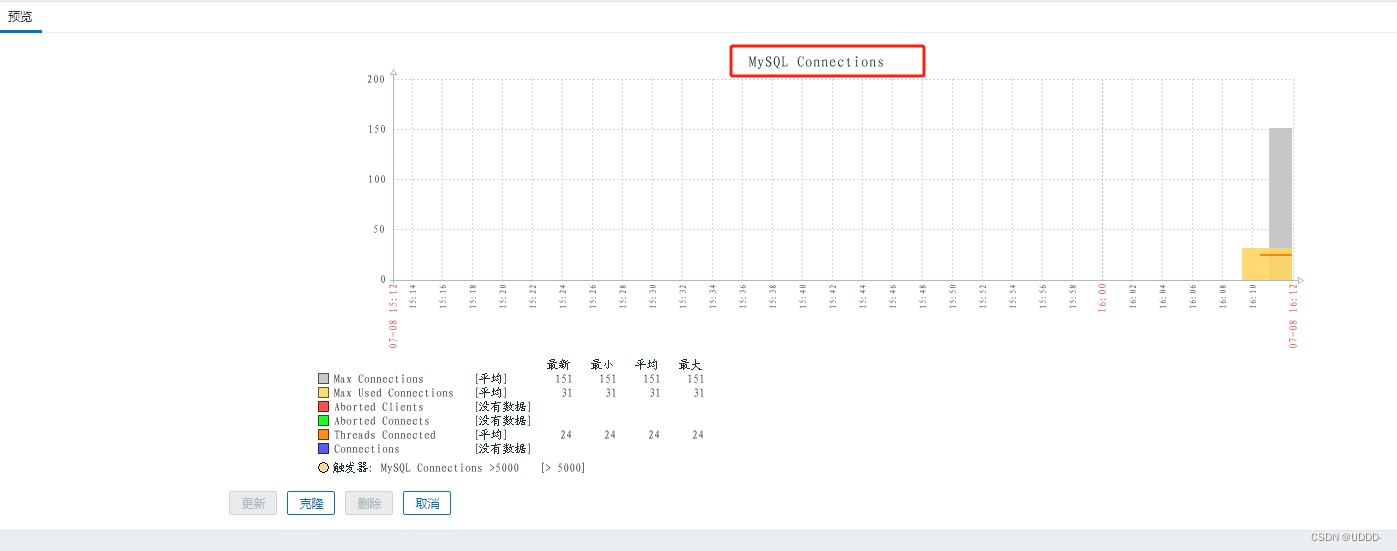
主机关联模板
[root@server1 tmp]# ls localhost-mysql_cacti_stats.txt
localhost-mysql_cacti_stats.txt
###4.tomcat监控+java网关###
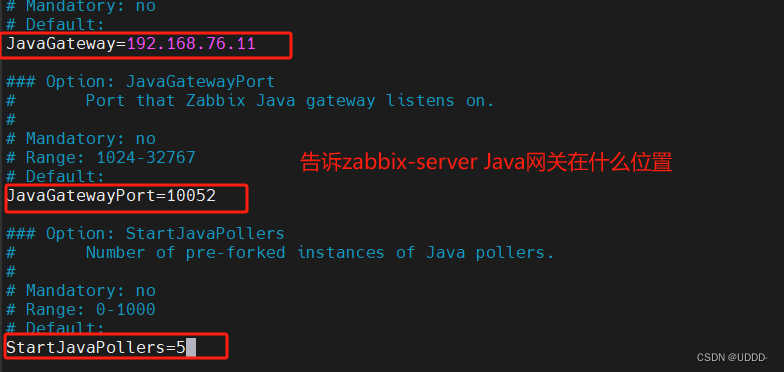
zabbix server通过Java网关(zabbix-java-gateway)监听tomcat:8888
(1) tomcat端
server3上安装java应用
[root@server3 ~]# yum install -y java-1.8.0-openjdk.x86_64
[root@server3 ~]# tar zxf apache-tomcat-7.0.37.tar.gz -C /usr/local/
[root@server3 ~]# cd /usr/local/
[root@server3 local]# ln -s apache-tomcat-7.0.37/ tomcat
[root@server3 local]# cd tomcat/
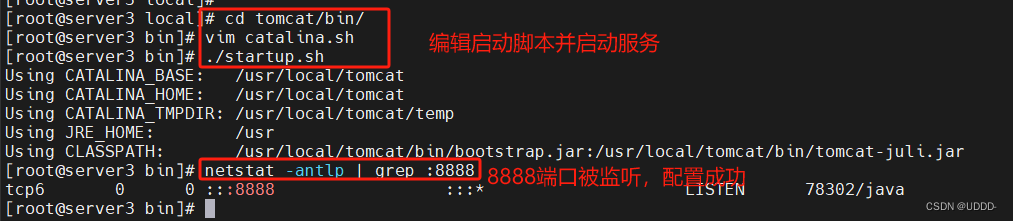
[root@server3 tomcat]# cd bin/
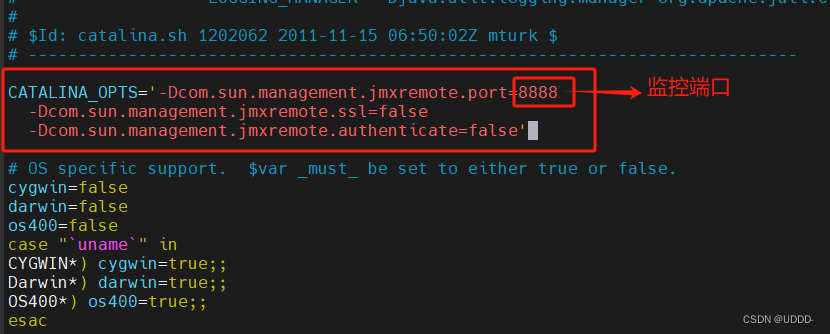
[root@server3 bin]# vim catalina.sh
...
CATALINA_OPTS='-Dcom.sun.management.jmxremote.port=8888
-Dcom.sun.management.jmxremote.ssl=false
-Dcom.sun.management.jmxremote.authenticate=false'
[root@server3 bin]# ./startup.sh
Using CATALINA_BASE: /usr/local/tomcat
Using CATALINA_HOME: /usr/local/tomcat
Using CATALINA_TMPDIR: /usr/local/tomcat/temp
Using JRE_HOME: /usr
Using CLASSPATH: /usr/local/tomcat/bin/bootstrap.jar:/usr/local/tomcat/bin/tomcat-juli.jar
[root@server3 bin]# netstat -antlp|grep :8888
tcp6 0 0 :::8888 :::* LISTEN 8025/java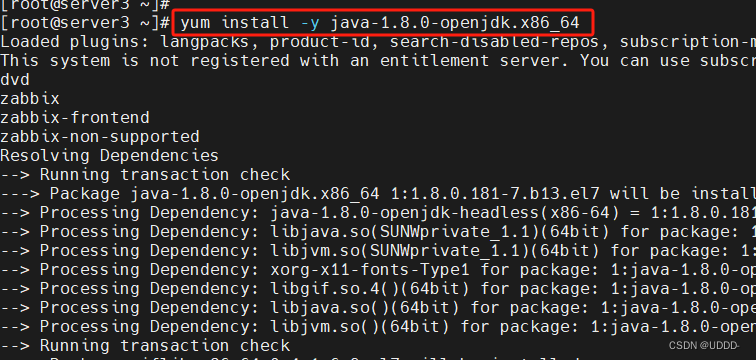

(2) zabbix server端
server---->jmx---->8888
安装zabbix-java-gateway
[root@server1 ~]# yum install -y zabbix-java-gateway
[root@server1 zabbix]# systemctl  enable --now zabbix-java-gateway.service
[root@server1 zabbix]# netstat -antlp|grep :10052
tcp6       0      0 :::10052                :::*                    LISTEN      15393/java

修改server配置
[root@server1 zabbix]# vim /etc/zabbix/zabbix_server.conf
...
JavaGateway=192.168.56.11
JavaGatewayPort=10052
StartJavaPollers=5

[root@server1 zabbix]# systemctl  restart zabbix-server.service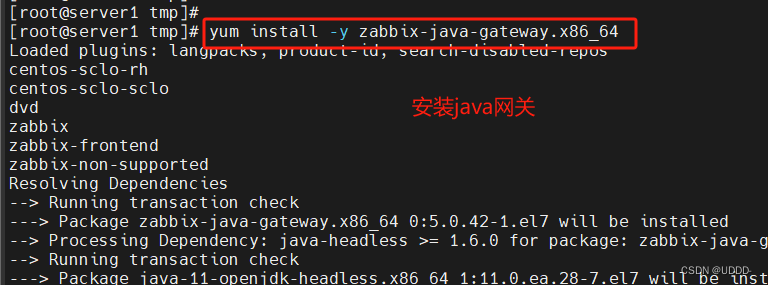


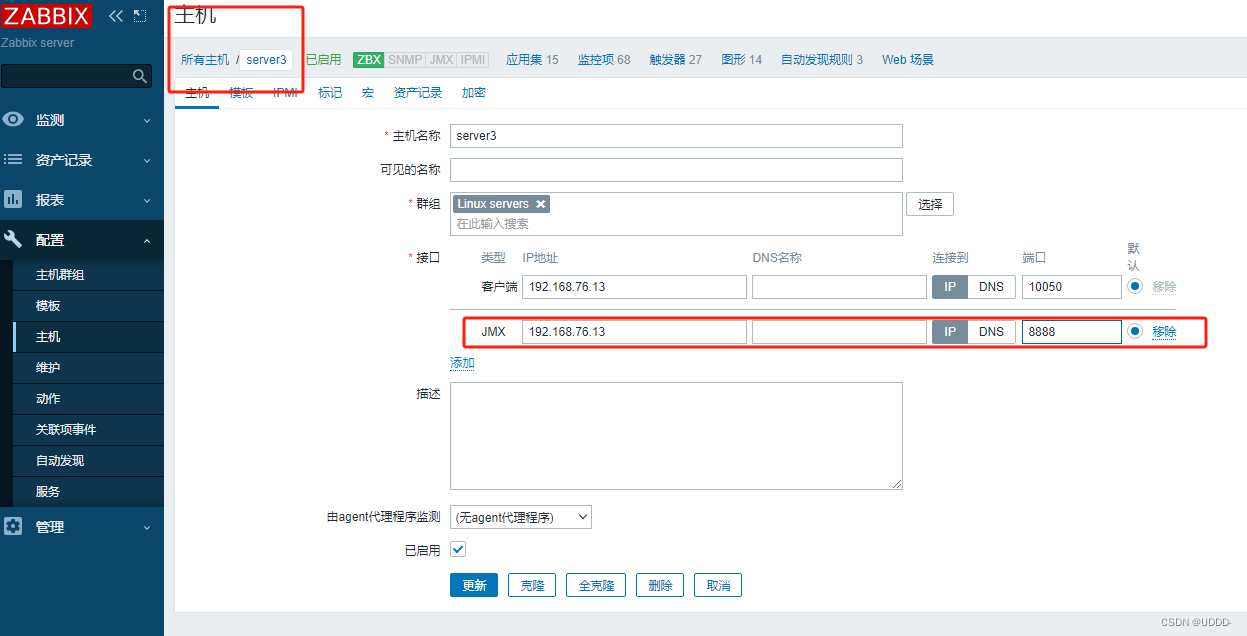
(3)前端配置
添加jmx接口
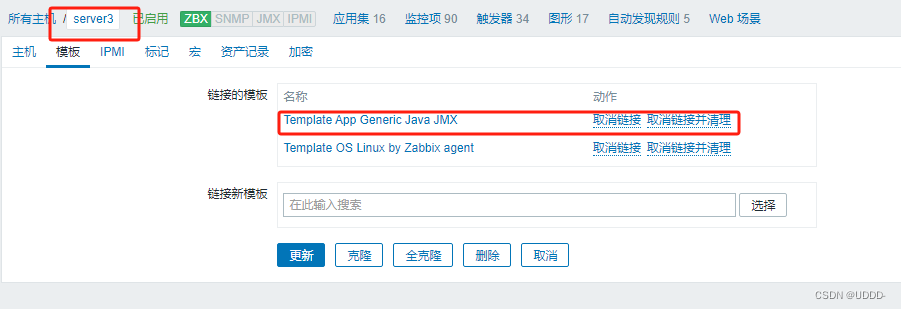
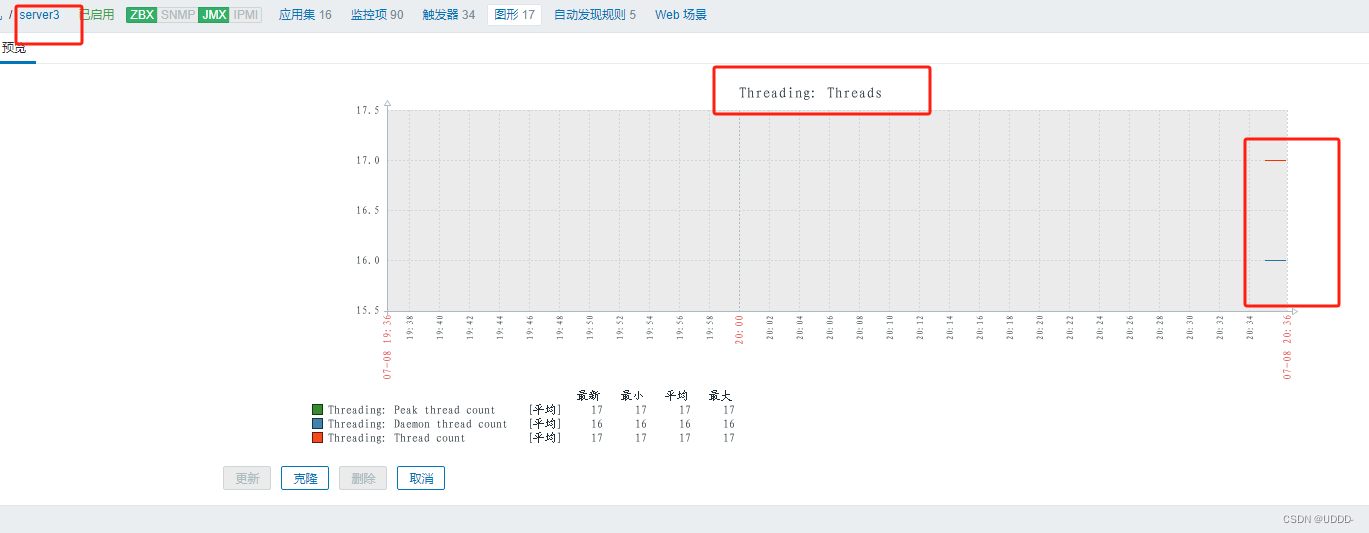
关联模板

###5.Zabbix告警###
使用睿象云告警平台
将睿象云告警平台与zabbix监控相结合
(1)告警平台部署
创建appkey
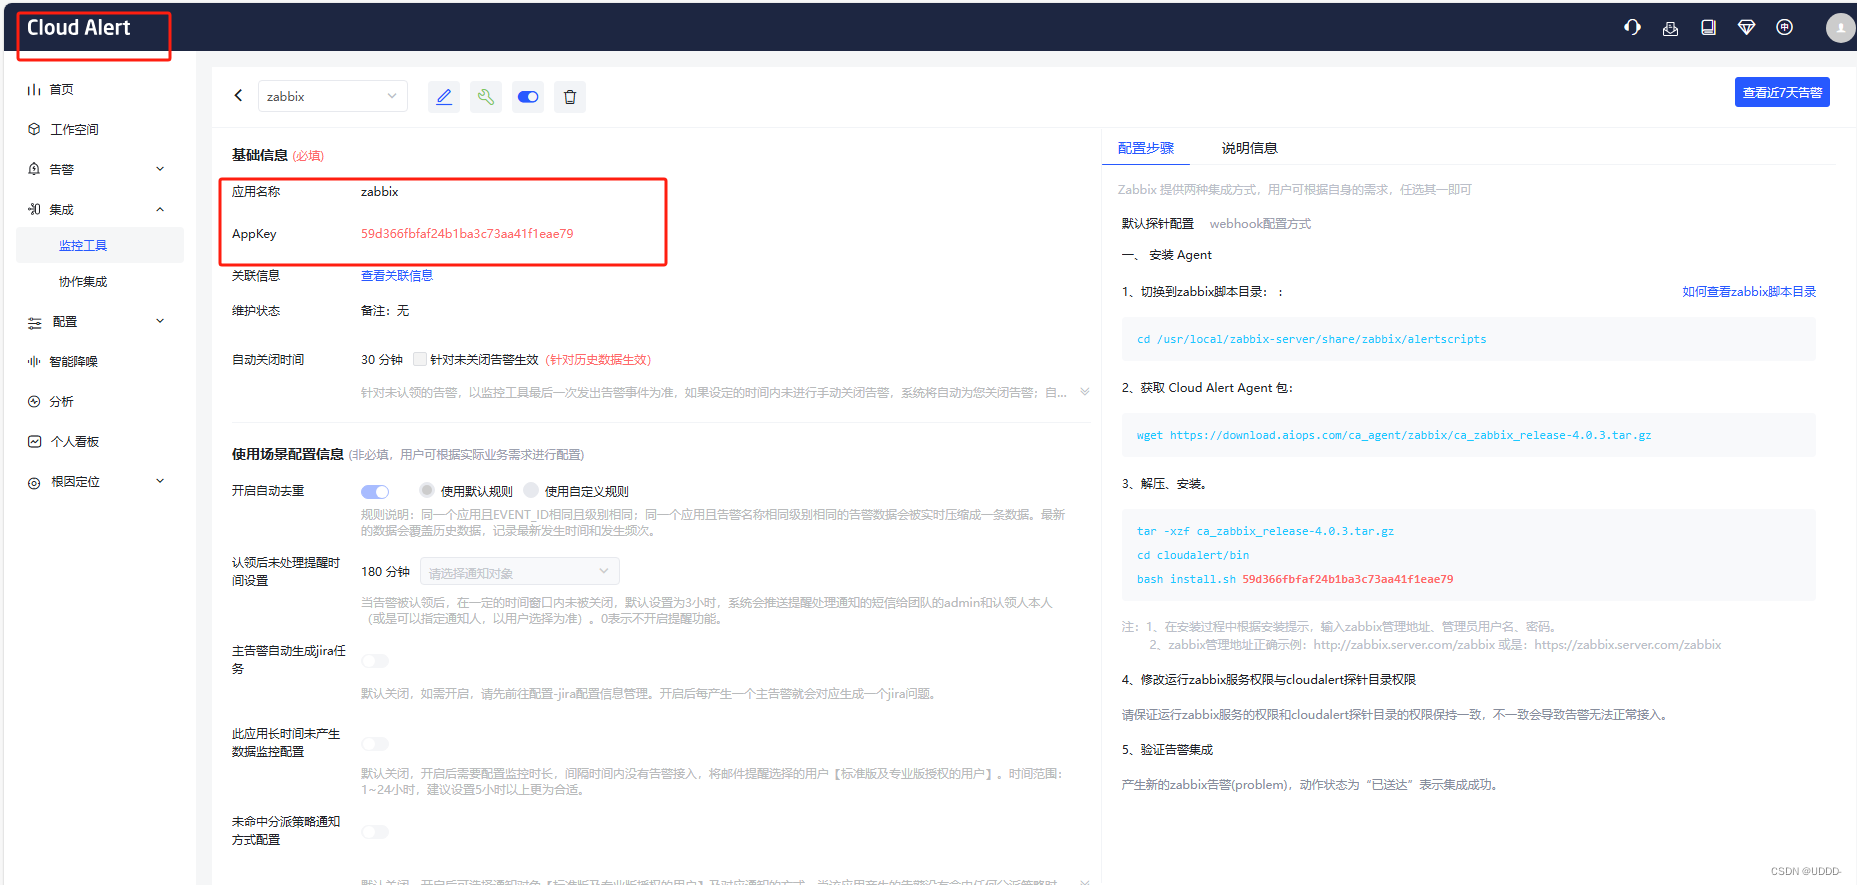
部署探针
部署探针
[root@server1 ~]# cd /usr/lib/zabbix/alertscripts
[root@server1 alertscripts]# tar xf ca_zabbix_release-4.0.1.tar.gz
[root@server1 alertscripts]# cd cloudalert/bin
[root@server1 bin]# ./install.sh 80521b7c-eb16-46d8-a0fd-6a621f4938e4
请输入Zabbix管理地址:http://192.168.56.11/zabbix
Check connection success!
请输入Zabbix管理员账号:Admin
请输入Zabbix管理员密码:  % Total    % Received % Xferd  Average Speed   Time    Time     Time  Current
                                 Dload  Upload   Total   Spent    Left  Speed
100   170    0    70  100   100    583    833 --:--:-- --:--:-- --:--:--   840
Authentication success!
  % Total    % Received % Xferd  Average Speed   Time    Time     Time  Current
                                 Dload  Upload   Total   Spent    Left  Speed
100   109    0    42  100    67   1067   1703 --:--:-- --:--:-- --:--:--  1717
Check api version success!
  % Total    % Received % Xferd  Average Speed   Time    Time     Time  Current
                                 Dload  Upload   Total   Spent    Left  Speed
100   314    0    57  100   257   1078   4862 --:--:-- --:--:-- --:--:--  4942
Create new media type success!
  % Total    % Received % Xferd  Average Speed   Time    Time     Time  Current
                                 Dload  Upload   Total   Spent    Left  Speed
100   192    0    54  100   138   1030   2632 --:--:-- --:--:-- --:--:--  2653
Create new group success!
  % Total    % Received % Xferd  Average Speed   Time    Time     Time  Current
                                 Dload  Upload   Total   Spent    Left  Speed
100   398    0    51  100   347    452   3076 --:--:-- --:--:-- --:--:--  3098
Create new user success!
  % Total    % Received % Xferd  Average Speed   Time    Time     Time  Current
                                 Dload  Upload   Total   Spent    Left  Speed
100  1660    0    51  100  1609    750  23676 --:--:-- --:--:-- --:--:-- 24014
Create new action success!
Install zabbix agent success!

[root@server1 alertscripts]# chown zabbix.zabbix cloudalert/ -R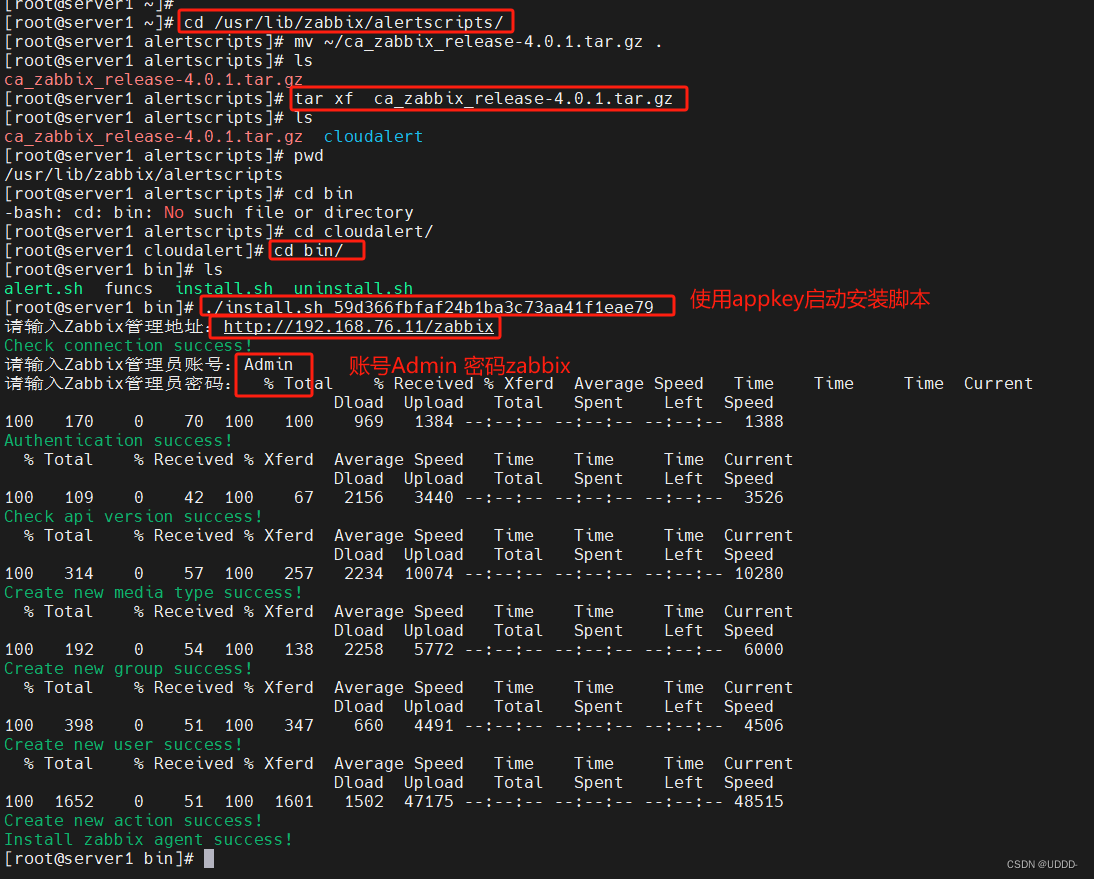

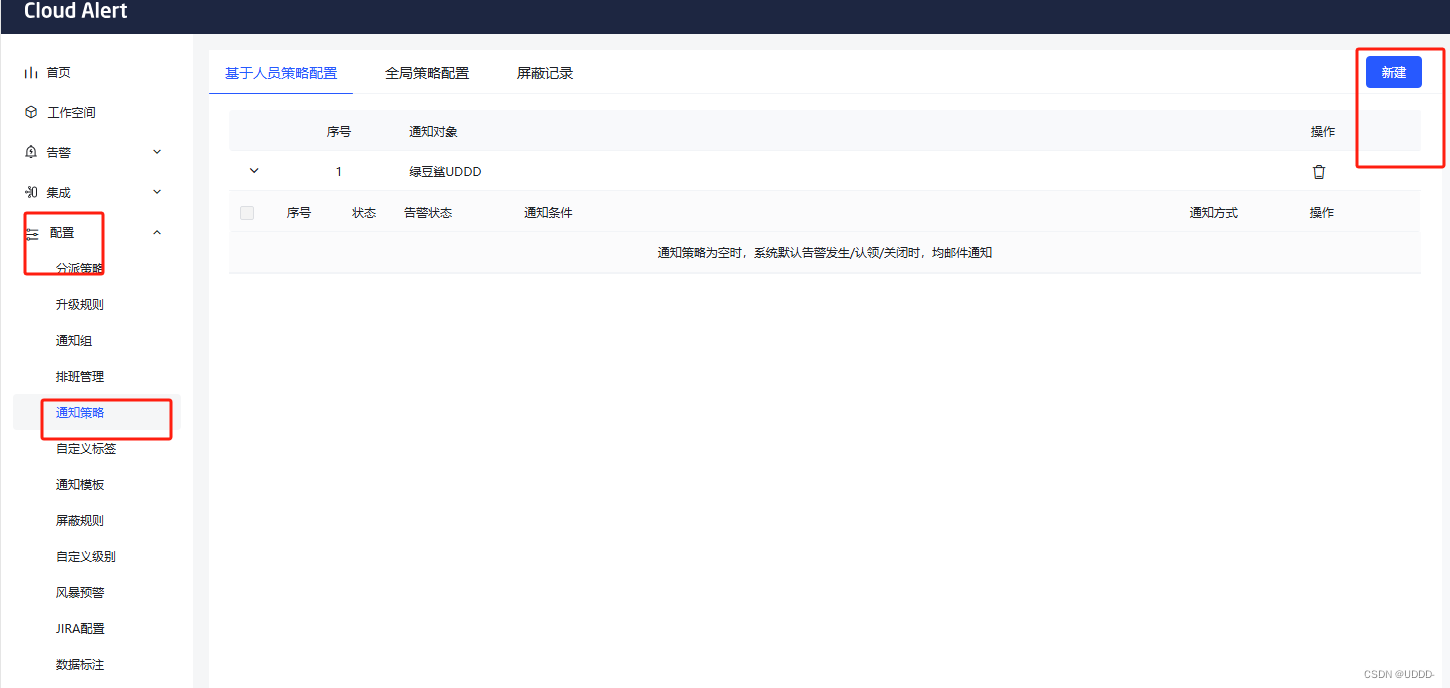
禁用其他的告警媒介,为了测试效果

配置通知策略


(2)测试
[root@server2 ~]# systemctl stop zabbix-agent.service 
等待片刻后会触发报警,并发送到外部告警平台
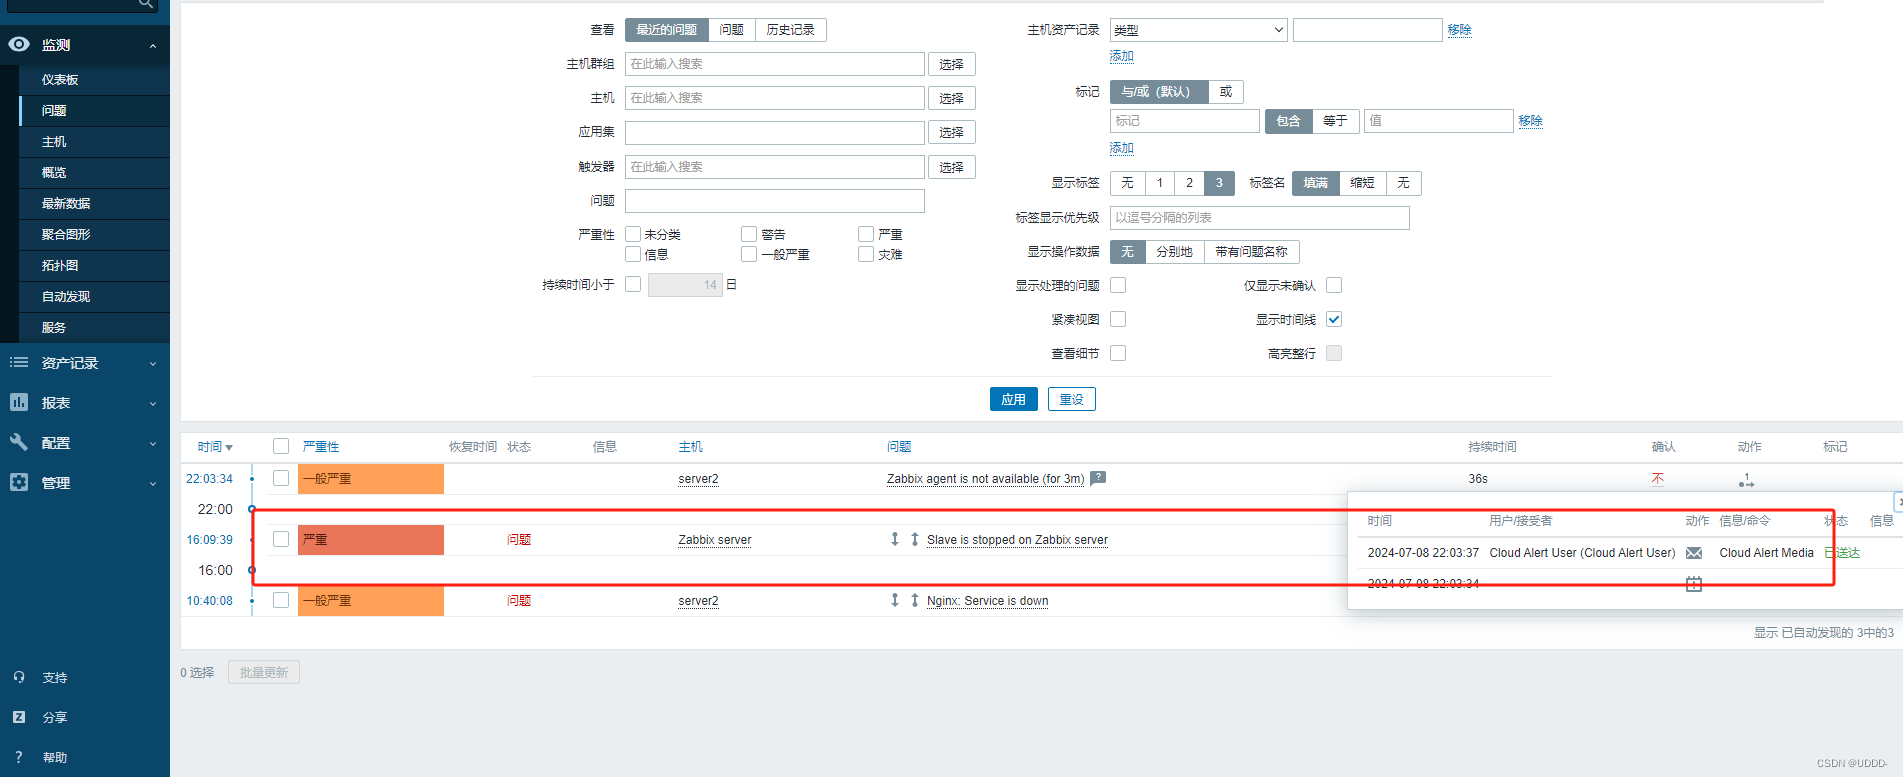
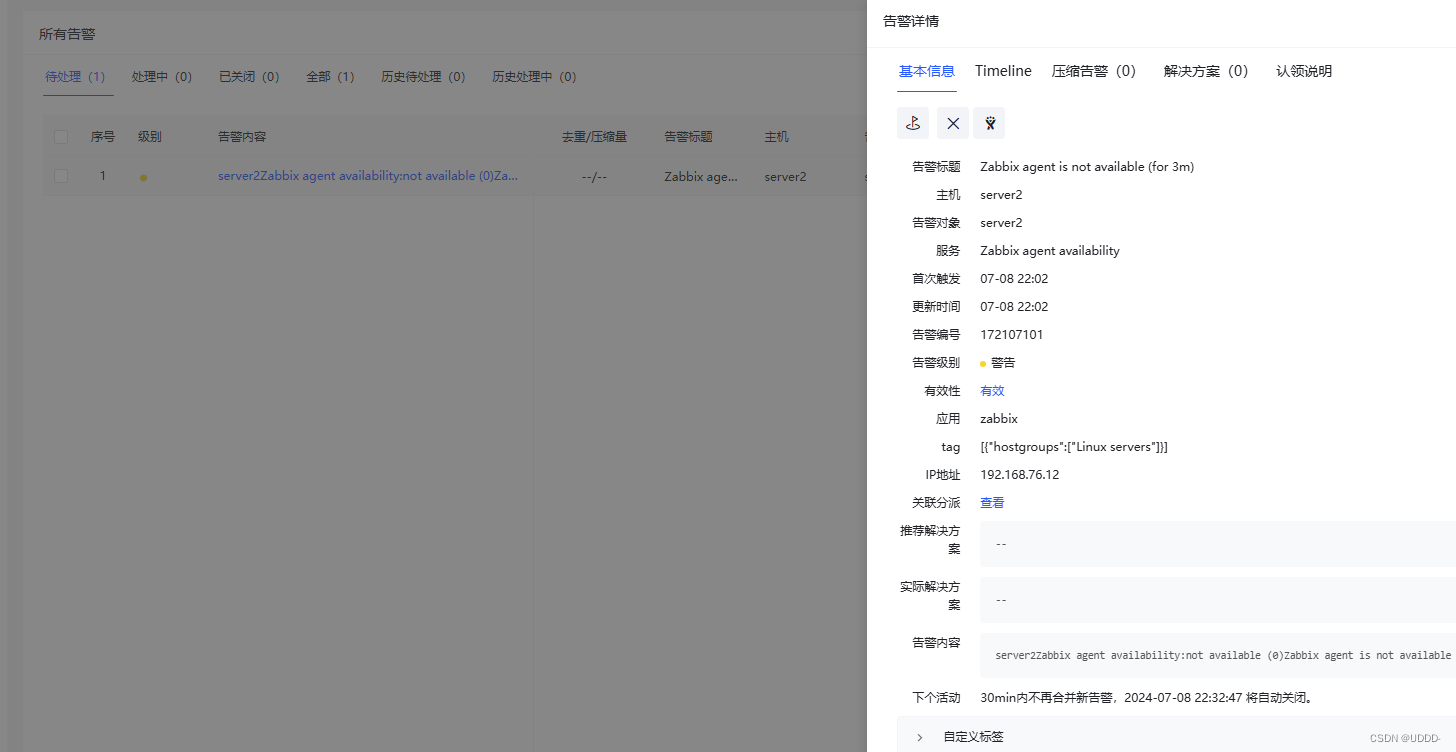
可以在告警平台查看到完整到处理流程

当问题被解决

问题解决后显示已解决,并发送给平台
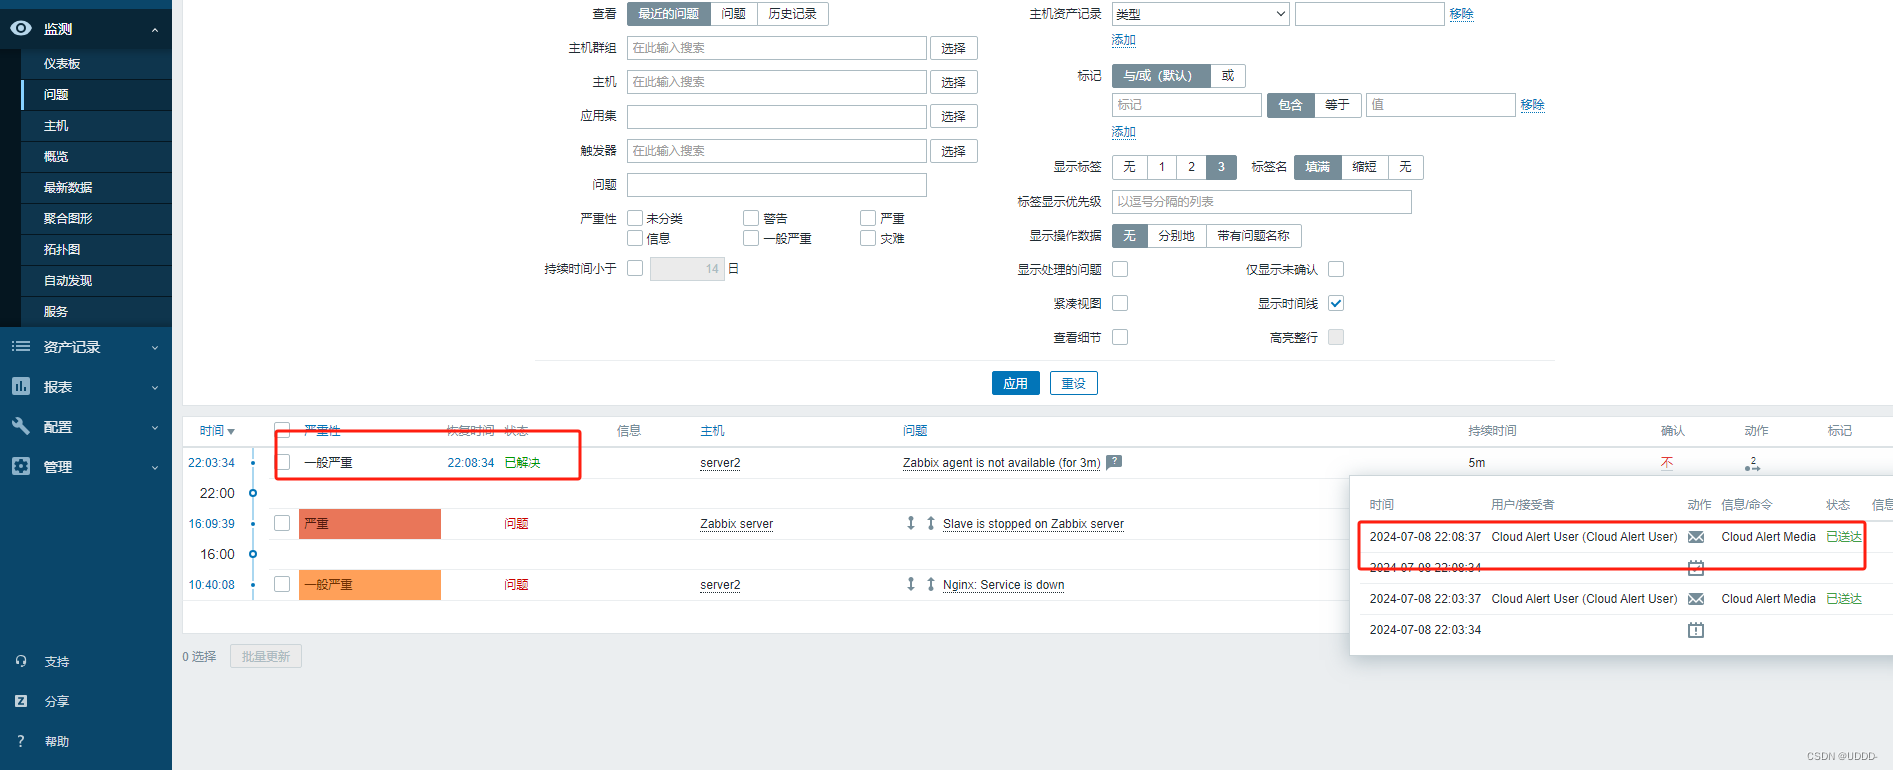
处理流程中显示已解决

###6.Zabbix+proxy分布式监控###
server——>agent:10050
agent——>server:10051(性能更高,server端更轻松)

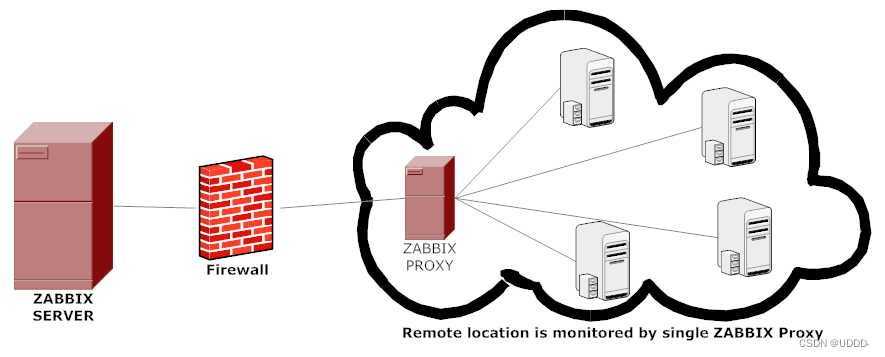
Zabbix proxy 可以代替 Zabbix server 收集性能和可用性数据,承担一些收集数据的负担,分担了 Zabbix server 的负荷。
此外,使用proxy是实现集中式和分布式监控的最简单方法,所有 agents 和 proxies 发送给一个 Zabbix server,从而集中收集所有数据。
Zabbix proxy 使用场景:
监控远程区域设备
监控本地网络不稳定区域
监控上千设备时,减轻 zabbix server 的负荷
简化分布式监控的维护
Zabbix proxy到 Zabbix server 只需要一条 tcp 连接,仅在防火墙上配置一条规则即可。
编辑

新建proxy节点,删除server2 agent作为proxy节点
[root@server2 ~]# systemctl disable --now zabbix-agent.service
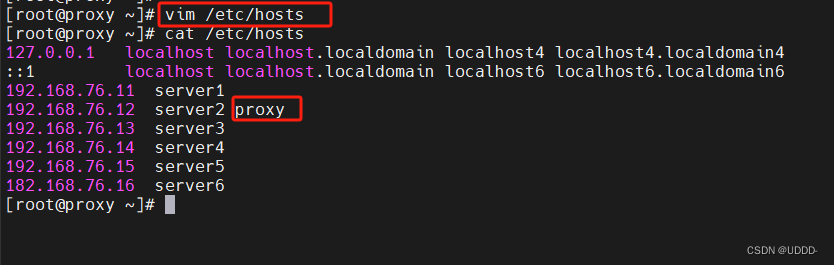
[root@server2 ~]# hostnamectl set-hostname proxy
[root@proxy ~]# vim /etc/hosts
192.168.56.12 server2 proxy
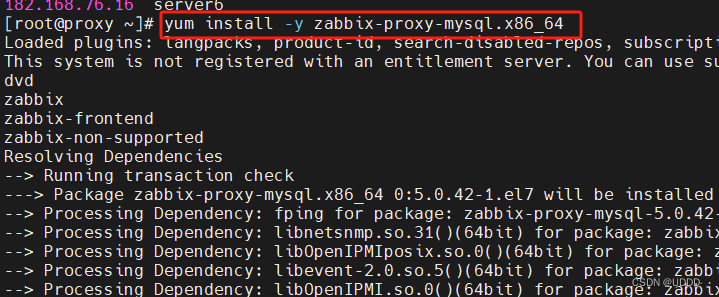
安装proxy软件
[root@proxy ~]# yum install zabbix-proxy-mysql 前端删除server2,server2作为proxy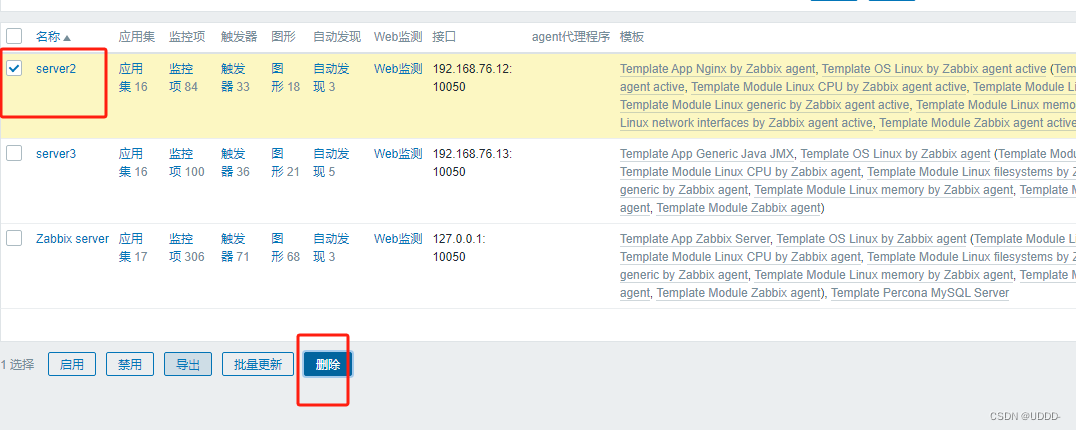

server1作为server端
在server1上创建proxy数据库
[root@server1 ~]# mysql -p
mysql> create database zabbix_proxy character set utf8 collate utf8_bin;
Query OK, 1 row affected (0.00 sec)

mysql> create user 'zabbix'@'%' identified by 'Yakexi+007';
Query OK, 0 rows affected (0.01 sec)

mysql> grant all privileges on zabbix_proxy.* to 'zabbix'@'%';
Query OK, 0 rows affected (0.00 sec)
修改server2配置
从proxy拷贝数据库文件
[root@proxy ~]# cd /usr/share/doc/zabbix-proxy-mysql-5.0.31/
[root@proxy zabbix-proxy-mysql-5.0.31]# scp schema.sql.gz server1:
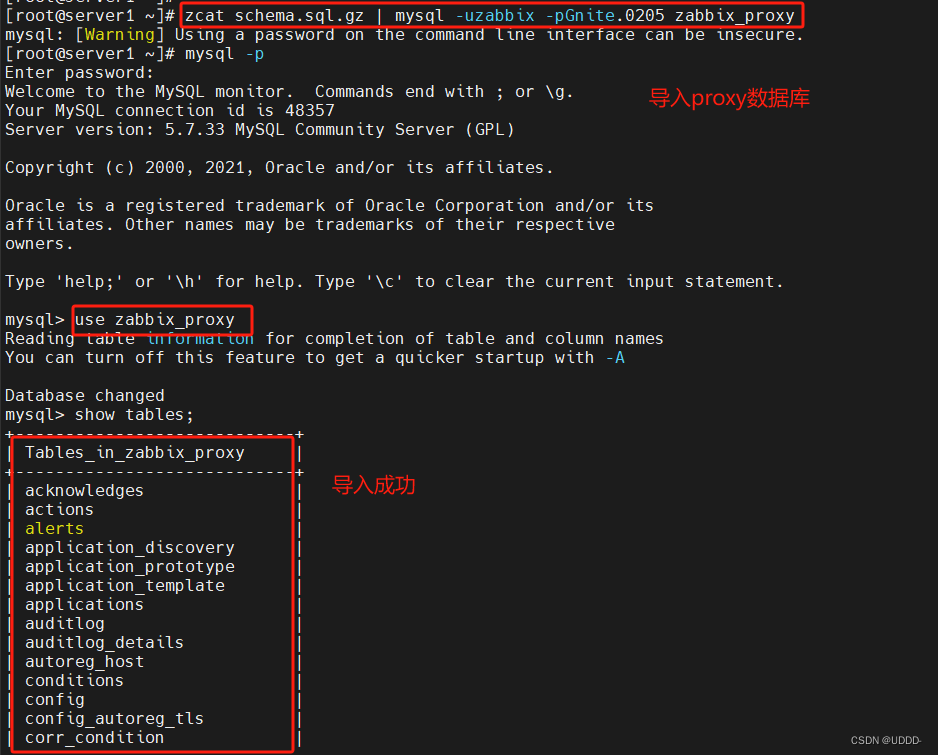
导入proxy数据库
[root@server1 ~]# zcat schema.sql.gz | mysql -uzabbix -pYakexi+007 zabbix_proxy
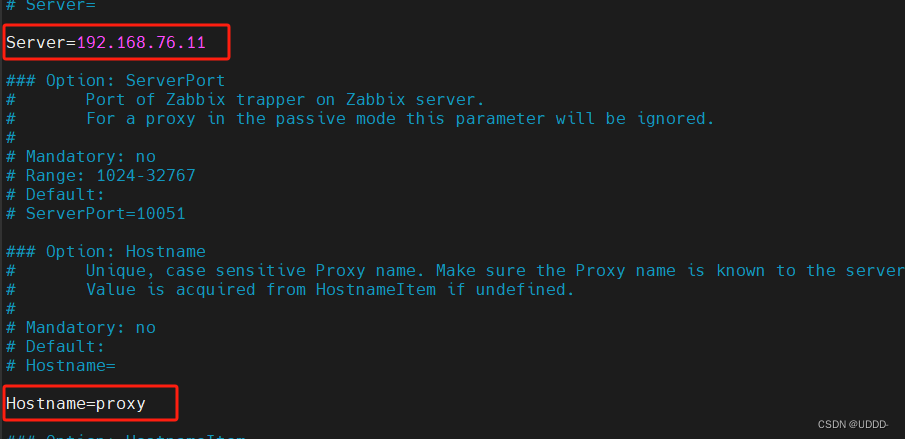
修改proxy配置
[root@proxy ~]# vim /etc/zabbix/zabbix_proxy.conf
Server=192.168.56.11 #指向zabbix_server
Hostname=proxy #主机名
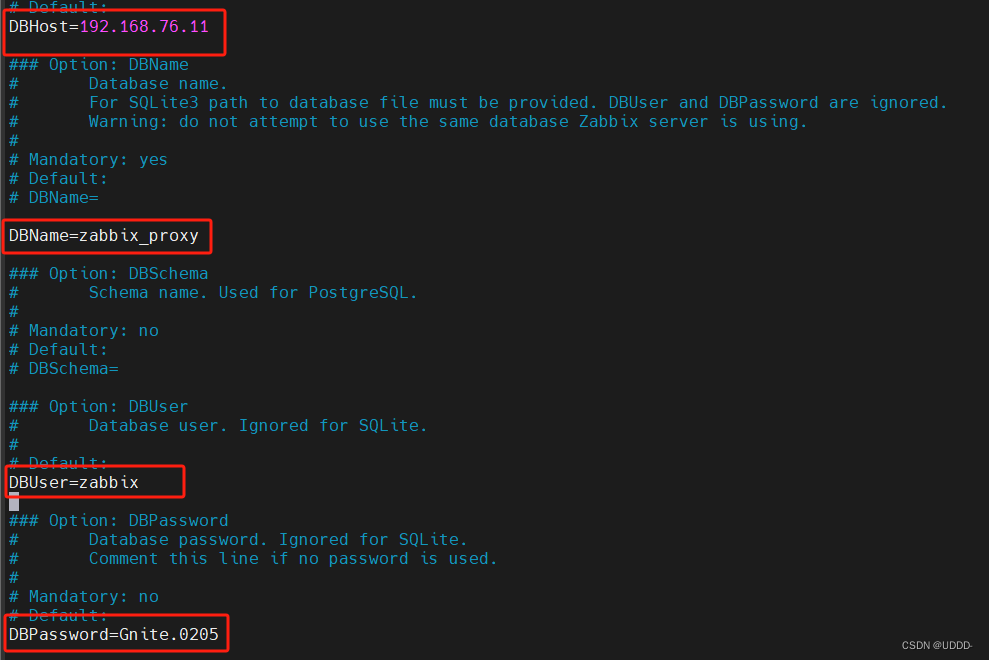
DBHost=192.168.56.11 #proxy数据库配置
DBName=zabbix_proxy
DBUser=zabbix
DBPassword=Yakexi+007
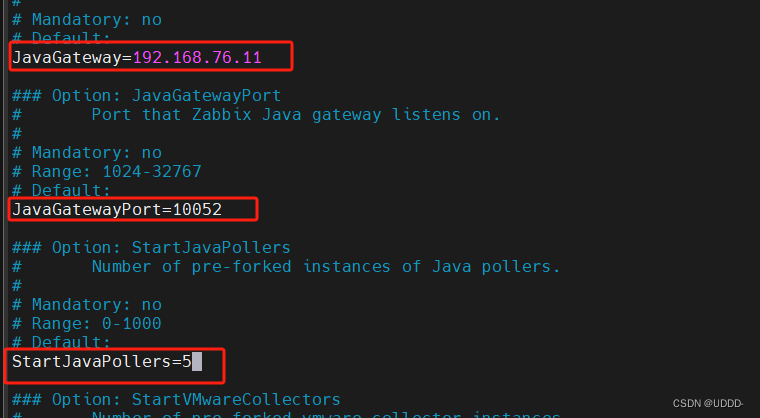
JavaGateway=192.168.56.11 #jmx配置
JavaGatewayPort=10052
StartJavaPollers=5
[root@proxy ~]# systemctl restart zabbix-proxy.service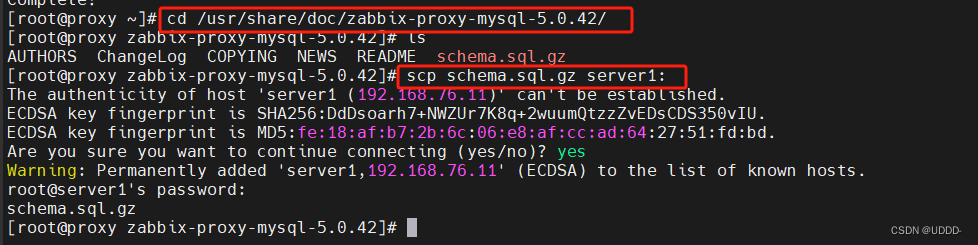

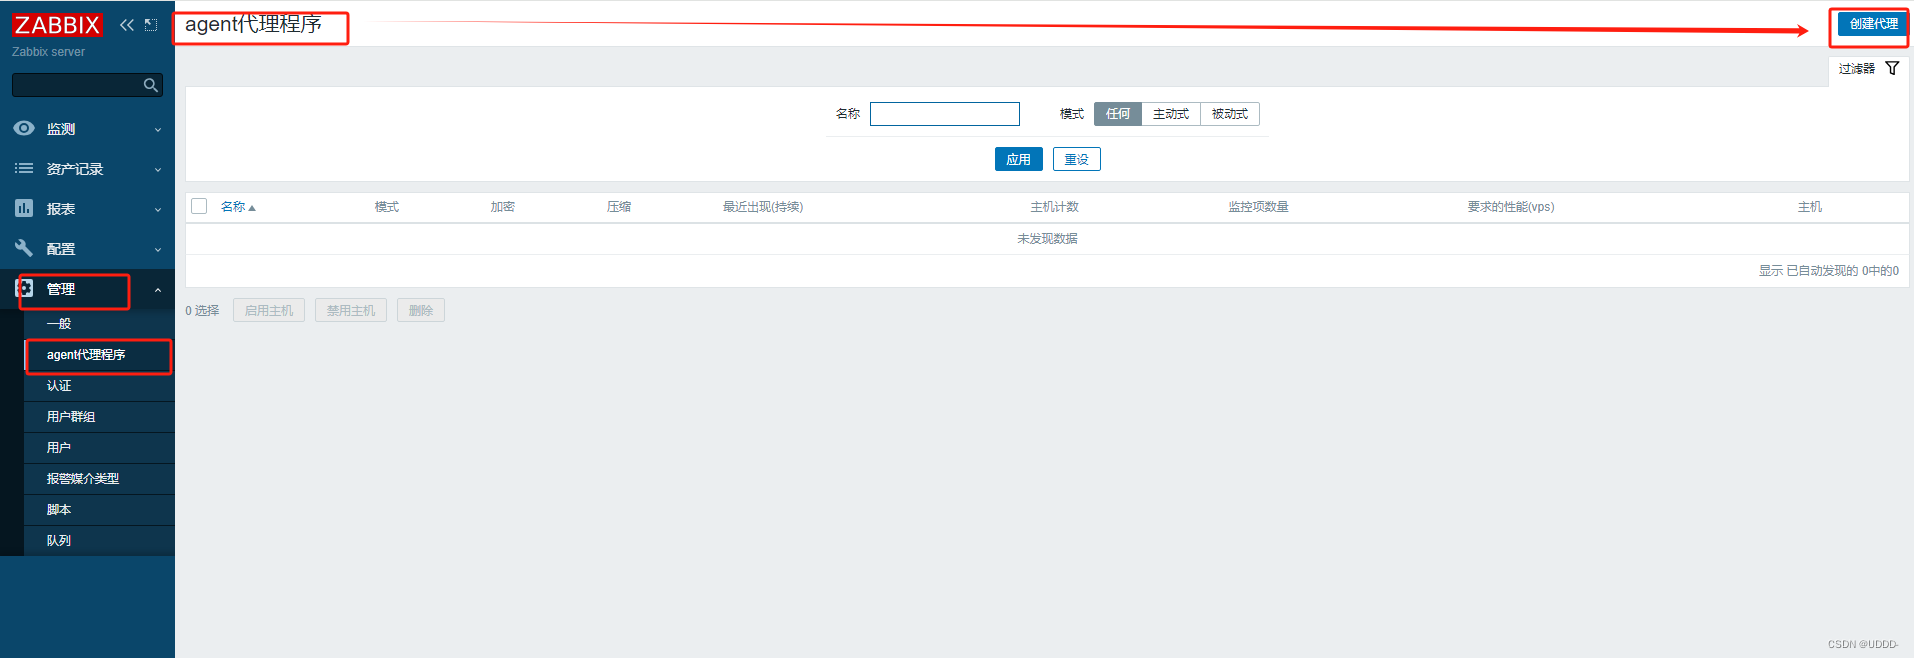
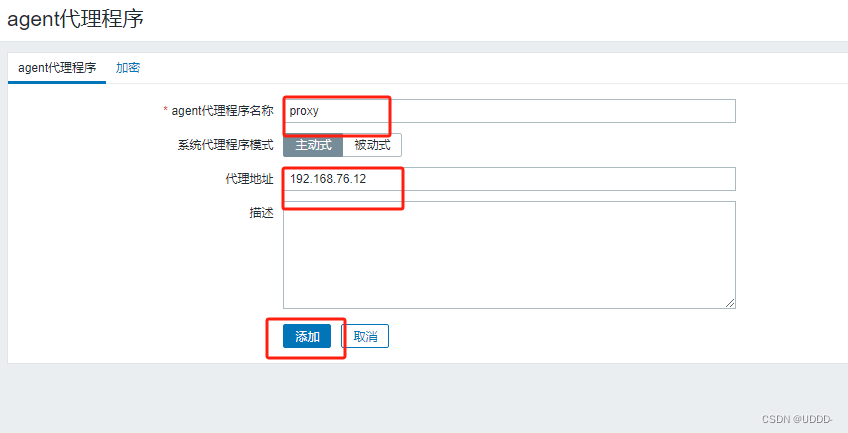
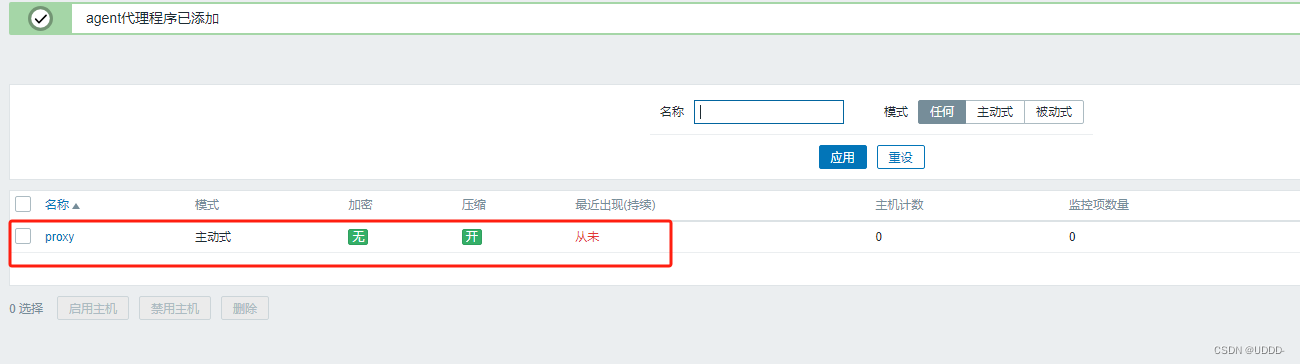
前端创建proxy
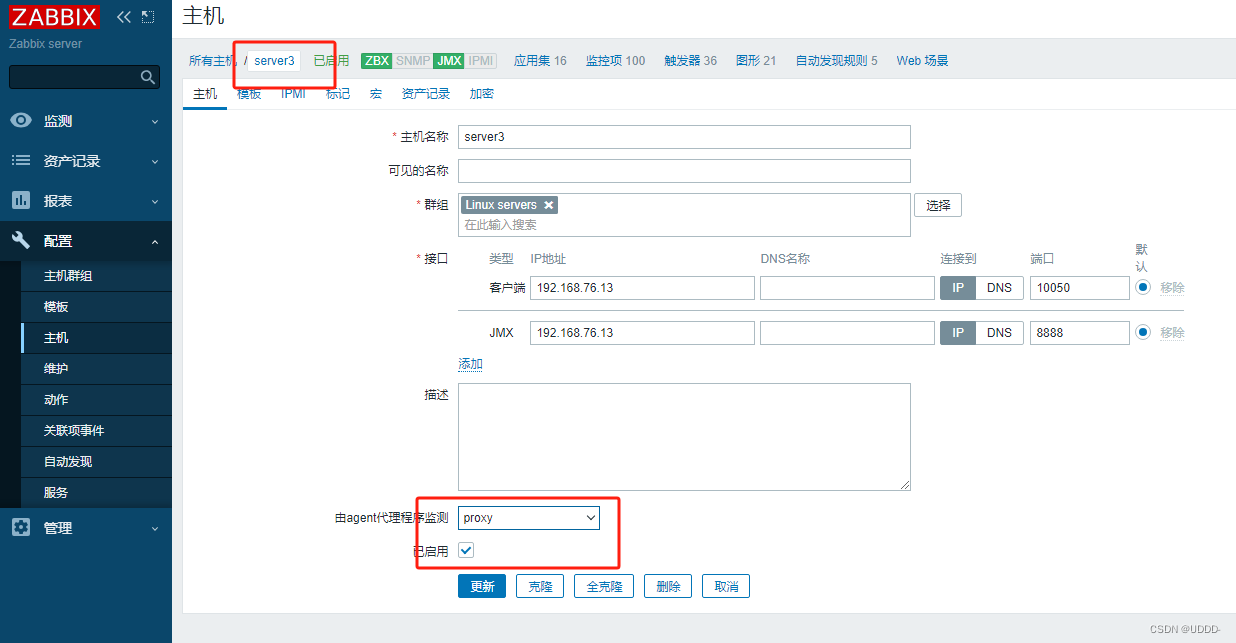
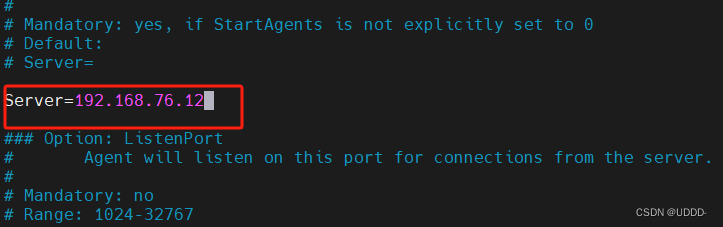
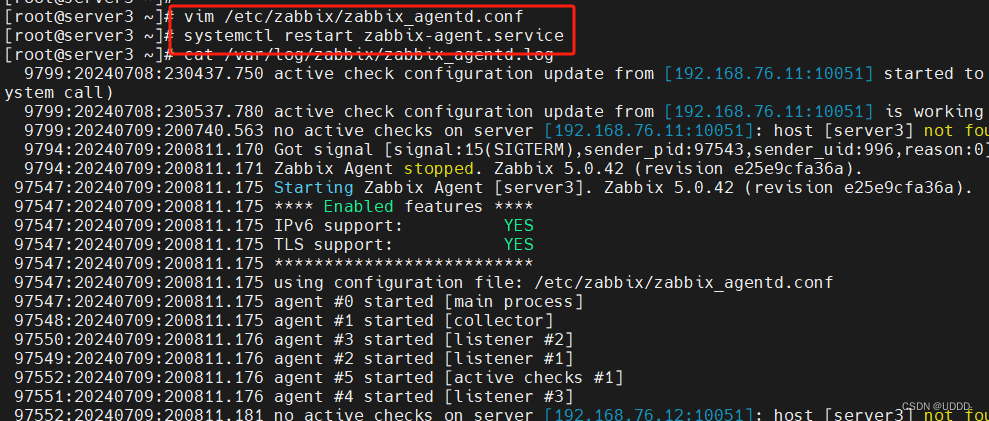
[root@server3 ~]# vim /etc/zabbix/zabbix_agentd.conf
Server=192.168.56.12
ServerActive=192.168.56.12

[root@server3 ~]# systemctl  restart zabbix-agent.service

查看日志,没有报错就表示成功
[root@server3 ~]# cat /var/log/zabbix/zabbix_agentd.log


 87
87

 被折叠的 条评论
为什么被折叠?
被折叠的 条评论
为什么被折叠?
 到【灌水乐园】发言


