


交互平台:
Interactive Tutorial - Creating a Cluster | Kubernetes
使用以下命令启动k8s
minikube start
使用kubectl get nodes 和 kubectl cluster-info查看节点和集群信息

基本操作:
部署应用:
kubectl create deployment kubernetes-bootcamp \
     --image=docker.io/jocatalin/kubernetes-bootcamp:v1 --port=8080
暴露端口:
kubectl expose deployment.apps/kubernetes-bootcamp \
     --type="NodePort" --port 8080
查看映射的端口并访问:

设置副本数:
kubectl scale deployment.apps/kubernetes-bootcamp --replicas=3
版本升级:
kubectl set image deployment.apps/kubernetes-bootcamp \
kubernetes-bootcamp=jocatalin/kubernetes-bootcamp:v2
查看Pod:
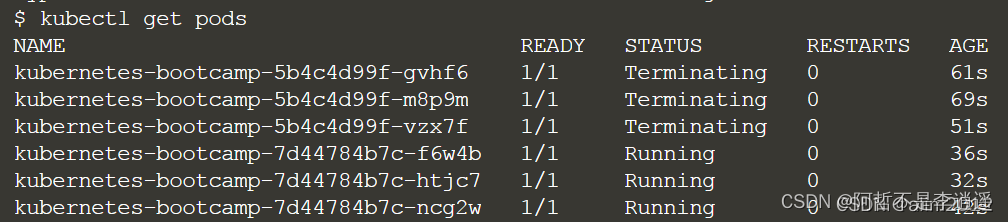
版本回滚:
kubectl rollout undo deployments/kubernetes-bootcamp
访问服务的方法:
使用vi将下面的配置信息粘贴过去即可
配置bootcamp1.yml:
apiVersion: apps/v1
kind: Deployment
metadata:
  name: bootcamp1
spec:
  replicas: 2
  selector:
    matchLabels:
      app: bootcamp
  template:
    metadata:
      labels:
        app: bootcamp
    spec:
      containers:
      - name: bootcamp1
        image: docker.io/jocatalin/kubernetes-bootcamp:v1
        ports:
        - containerPort: 8080
配置 bootcamp2.yml
apiVersion: apps/v1
kind: Deployment
metadata:
  name: bootcamp2
spec:
  replicas: 2
  selector:
    matchLabels:
      app: bootcamp
  template:
    metadata:
      labels:
        app: bootcamp
    spec:
      containers:
      - name: bootcamp2
        image: docker.io/jocatalin/kubernetes-bootcamp:v2
        ports:
        - containerPort: 8080
配置svc.yml
apiVersion: v1
kind: Service
metadata:
  name: svc
spec:
  type: NodePort
  selector:
    app: bootcamp
  ports:
  - name: bootcamp
    protocol: TCP
    port: 80
    targetPort: 8080
    nodePort: 30000
启动pod和service:
kubectl create -f bootcamp1.yml
kubectl create -f bootcamp2.yml
kubectl create -f svc.yml
如果要删除对应的pod或者service,只需要kubectl delete 命令即可,例如:
kubectl delete svc/svc
kubectl delete -f svc.yml
获取pod的IP地址:
kubectl get pods -l app=bootcamp -o yaml | grep podIP

查看svc:

通过podIP访问服务:

通过clusterIP访问服务:

通过NodePort访问服务:

如果安装kube-dns组件的话,可以通过域名的形式直接访问服务。
数据持久化(PVC):
PV静态供给
使用vi将下面的配置信息粘贴过去即可
pv.yml
apiVersion: v1
kind: PersistentVolume
metadata:
  name: pv
spec:
  capacity:
    storage: 1Gi
  accessModes:
  - ReadWriteOnce
  persistentVolumeReclaimPolicy: Retain
  storageClassName: local-storage
  local:
    path: /home/disk
  nodeAffinity:
    required:
      nodeSelectorTerms:
      - matchExpressions:
        - key: kubernetes.io/hostname
          operator: In
          values:
          - minikube
pvc.yml
apiVersion: v1
kind: PersistentVolumeClaim
metadata:
  name: pvc
spec:
  resources:
    requests:
      storage: 1Gi
  accessModes:
  - ReadWriteOnce
  storageClassName: local-storage
运行命令:
kubectl apply -f pv.yml
kubectl apply -f pvc.yml
使用命令查看pv和pvc:

配置pod.yml
apiVersion: v1
kind: Pod
metadata:
  name: mypod1
spec:
  containers:
    - name: mypod1
      image: docker.io/jocatalin/kubernetes-bootcamp:v1
      volumeMounts:
        - mountPath: "/mydata"
          name: mydata
  volumes:
    - name: mydata
      persistentVolumeClaim:
        claimName: pvc
运行命令:
mkidr /home/disk
kubectl apply -f pod.yml
查看Pod状态:

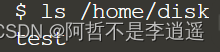
在挂载目录下写入文件:
kubectl exec mypod1 -- touch /mydata/test
查看文件:
PV动态供给
查看StorageClass:
kubectl get storageclass.storage.k8s.io
minikube有一个默认的StorageClass为standard

配置pvc.yml
apiVersion: v1
kind: PersistentVolumeClaim
metadata:
  name: pvc
spec:
  resources:
    requests:
      storage: 1Gi
  accessModes:
  - ReadWriteMany
  storageClassName: standard
查看pv,pvc

配置并启动mypod1,mypod2,同上,其中将mypod2配置文件的metadata的name改为mypod2,再执行下次命令:
kubectl exec mypod1 --  touch  /mydata/test
kubectl exec mypod2 -- ls /mydata
结果如图所示,这样就实现了mypod1和mypod2的数据共享

Secret & ConfigMap
创建secret:
kubectl create secret generic mysecret --from-literal=password=123456
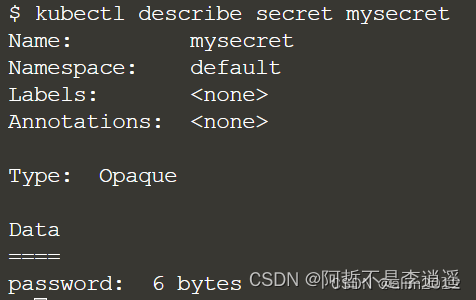
查看secret:
kubectl describe secret mysecret
创建configmap:
kubectl create configmap myconfmap --from-literal=user=admin
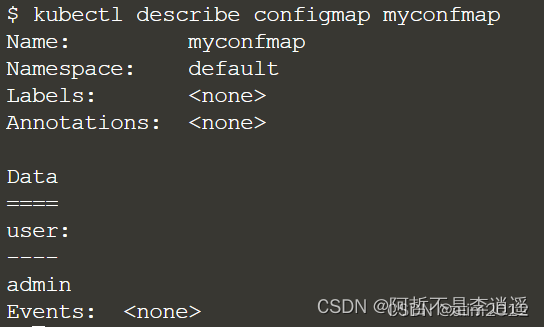
查看configmap:
kubectl describe configmap myconfmap
将Secret和ConfigMap应用到容器中:
apiVersion: v1
kind: Pod
metadata:
  name: mypod1
spec:
  containers:
    - name: mypod1
      image: docker.io/jocatalin/kubernetes-bootcamp:v1
      volumeMounts:
        - mountPath: "/mysecret"
          name: mysecret
        - mountPath: "/myconf"
          name: myconf
  volumes:
    - name: mysecret
      secret:
        secretName: mysecret
        items:
        - key: password
          path: pass
    - name: myconf
      configMap:
        name: myconfmap
        items:
        - key: user
          path: user
从容器中查看Secret和ConfigMap信息:
kubectl exec mypod1 -- cat /mysecret/pass
kubectl exec mypod1 -- cat /myconf/user

健康检查:
Liveness探测:
apiVersion: v1
kind: Pod
metadata:
  name: mypod1
spec:
  restartPolicy: OnFailure
  containers:
    - name: mypod1
      image: docker.io/jocatalin/kubernetes-bootcamp:v1
      args:
      - /bin/sh
      - -c
      - touch /tmp/healthy; sleep 10; rm -rf /tmp/healthy; sleep 100
      livenessProbe:
        exec:
          command:
          - cat
          - /tmp/healthy
        initialDelaySeconds: 5
        periodSeconds: 3
使用kubectl describe pod/mypod1查看Liveness事件

Readiness探测:
apiVersion: v1
kind: Pod
metadata:
  name: mypod2
spec:
  restartPolicy: OnFailure
  containers:
    - name: mypod2
      image: docker.io/jocatalin/kubernetes-bootcamp:v1
      args:
      - /bin/sh
      - -c
      - touch /tmp/healthy; sleep 10; rm -rf /tmp/healthy; sleep 100
      readinessProbe:
        exec:
          command:
          - cat
          - /tmp/healthy
        initialDelaySeconds: 5
        periodSeconds: 3
使用kubectl describe pod/mypod2查看Readiness事件

参考资料:
k8s–五种控制器类型解析_长恋离亭的博客-CSDN博客_k8s kind 类型
k8s的持久化存储PV&&PVC - benjamin杨 - 博客园
k8s之PV、PVC、StorageClass详解 - 知乎
K8S-PD Pod 处于 Pending 状态 - 简书
Kubernetes K8S之存储PV-PVC详解_踏歌行的专栏-CSDN博客_k8s pv
Minikube体验 - Cocowool - 博客园
1 node(s) had volume node affinity conflict. - KubeSphere 开发者社区


 6772
6772


 被折叠的 条评论
为什么被折叠?
被折叠的 条评论
为什么被折叠?
 到【灌水乐园】发言


