


1. 前言
- 本篇文章是基于vue 2.6.11版本源码进行的分析
- vue源码目录概述
├─dist # 项目构建后的文件
├─scripts # 与项目构建相关的脚本和配置文件
├─flow # flow的类型声明文件
├─src # 项目源代码
│ ├─complier # 与模板编译相关的代码
│ ├─core # 通用的、与运行平台无关的运行时代码
│ │ ├─observe # 实现变化侦测的代码
│ │ ├─vdom # 实现virtual dom的代码
│ │ ├─instance # Vue.js实例的构造函数和原型方法
│ │ ├─global-api # 全局api的代码
│ │ └─components # 内置组件的代码
│ ├─server # 与服务端渲染相关的代码
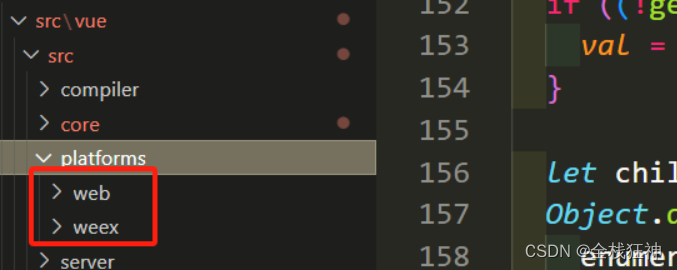
│ ├─platforms # 特定运行平台的代码,如weex
│ ├─sfc # 单文件组件的解析代码
│ └─shared # 项目公用的工具代码
└─test # 项目测试代码
2.数据观测
1.前言
1.1 vue中的核心就是通过数据触发视图的更新,那么是怎么实现的呢?下面将会介绍
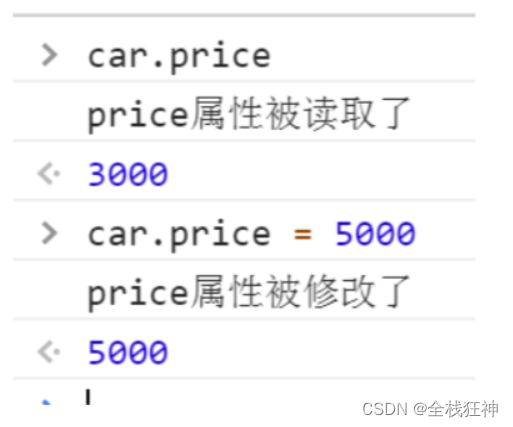
1.2 js中的Object原型上用一个definedProperty属性方法,这个方法可以实现对对象属性的读取与设置进行方法的劫持,因此通过该属性方法就可以实现对数据的检测与数据更新触发视图更新
下面是举例:
let car = {}
let val = 3000
Object.defineProperty(car, 'price', {
  enumerable: true,
  configurable: true,
  get(){
    console.log('price属性被读取了')
    return val
  },
  set(newVal){
    console.log('price属性被修改了')
    val = newVal
  }
})
通过Object.defineProperty()方法给car定义了一个price属性,并把这个属性的读和写分别使用get()和set()进行拦截,每当该属性进行读或写操作的时候就会触发get()和set()。如下图
1.3 vue中将数据变为可观测的响应式数据,主要涉及三个对象类 ,Observer、Dep、Watcher
2. 数据变为可观测 Observer
2.1. 在Vue实例化使用是,我们会传入一个options参数,options中的data就是我们需要观测的数据源
2.2. Vue中是如何实现这一个过程的呢?
由上面截图可知
由上面截图可知
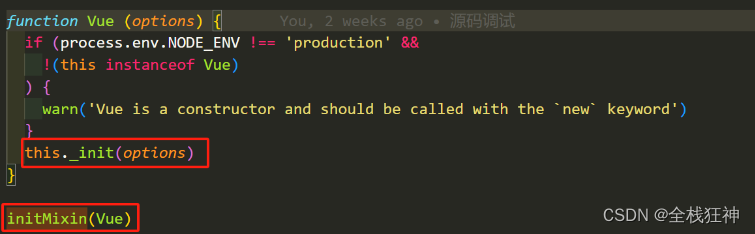
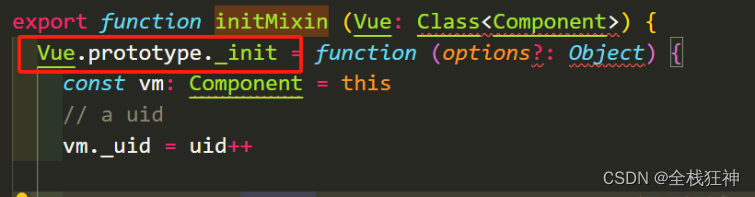
1.在vue入口调用了initMixin方法,该方法主要实现了往vue原型上挂载了_init方法
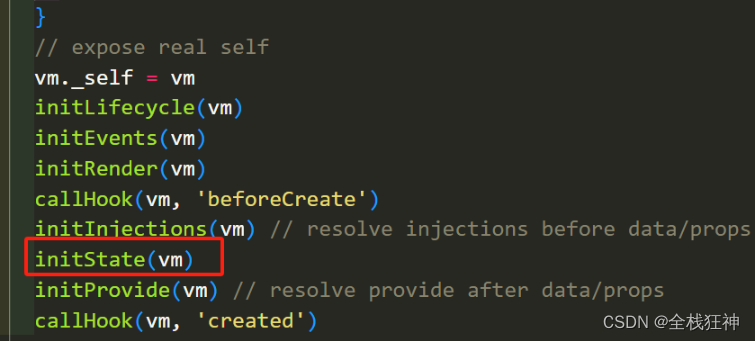
2.在vue实例化时调用_init方法,在_init方法内又初始化了initState 方法,该方法主要对options对象的data数据进行初始观测
3.下面接着分析Observer
2.3. Observer 实现
1.observer的实现主要是对传入的data 进行代理,将data代理到vue实例的_data上
2.对data的key进行遍历,将每个key通过Object.definedProperty挂载到vm实例上
// 代码位置 vue\src\core\observer\index.js
export class Observer {
value: any;
dep: Dep;
vmCount: number; // number of vms that have this object as root $data
constructor (value: any) {
this.value = value
this.dep = new Dep()
this.vmCount = 0
def(value, '__ob__', this)
if (Array.isArray(value)) {
if (hasProto) {
protoAugment(value, arrayMethods)
} else {
copyAugment(value, arrayMethods, arrayKeys)
}
this.observeArray(value)
} else {
this.walk(value)
}
}
/**
* Walk through all properties and convert them into
* getter/setters. This method should only be called when
* value type is Object.
*/
walk (obj: Object) {
const keys = Object.keys(obj)
for (let i = 0; i < keys.length; i++) {
defineReactive(obj, keys[i])
}
}
/**
* Observe a list of Array items.
*/
observeArray (items: Array<any>) {
for (let i = 0, l = items.length; i < l; i++) {
observe(items[i])
}
}
}
export function defineReactive (
obj: Object,
key: string,
val: any,
customSetter?: ?Function,
shallow?: boolean
) {
const dep = new Dep()
const property = Object.getOwnPropertyDescriptor(obj, key)
if (property && property.configurable === false) {
return
}
// cater for pre-defined getter/setters
const getter = property && property.get
const setter = property && property.set
if ((!getter || setter) && arguments.length === 2) {
val = obj[key]
}
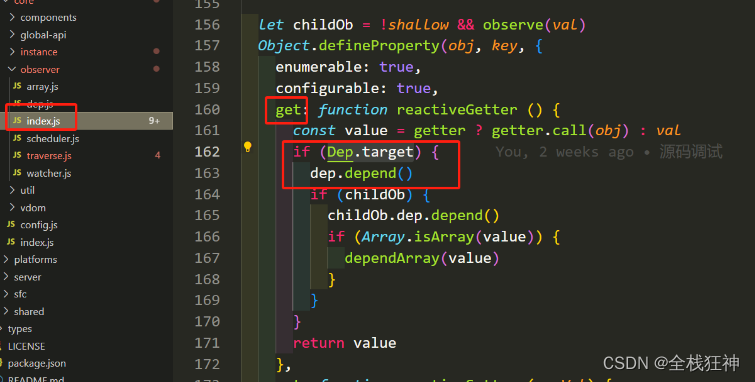
let childOb = !shallow && observe(val)
Object.defineProperty(obj, key, {
enumerable: true,
configurable: true,
get: function reactiveGetter () {
const value = getter ? getter.call(obj) : val
if (Dep.target) {
dep.depend()
if (childOb) {
childOb.dep.depend()
if (Array.isArray(value)) {
dependArray(value)
}
}
}
return value
},
set: function reactiveSetter (newVal) {
const value = getter ? getter.call(obj) : val
/* eslint-disable no-self-compare */
if (newVal === value || (newVal !== newVal && value !== value)) {
return
}
/* eslint-enable no-self-compare */
if (process.env.NODE_ENV !== 'production' && customSetter) {
customSetter()
}
// #7981: for accessor properties without setter
if (getter && !setter) return
if (setter) {
setter.call(obj, newVal)
} else {
val = newVal
}
childOb = !shallow && observe(newVal)
dep.notify()
}
})
}
根据上述代码可知
1.在Observer实例化时会调用walk函数
2.在walk函数内,主要主要对obj的可以进行遍历,调用defineReactive方法
3.defineReactive 函数实现对数据观测,在get中实现对数据依赖的收集,在set中通过收集的依赖取触发通知
3. 依赖收集 Dep
3.1. 在vue数据get获取中,谁读取了该数据,就把它收集起来,所以dep是一个集合,在数据set时,通过遍历dep去触发每个dep的notify方法通过视图更新
3.2. dep的主要功能是只作为收集,那在收集了依赖后,如何使视图更新呢
3.3. 所以需要定义一个新的Watcher类,改类是会实现对视图的更新
3.4. dep每收集的一个依赖实际就是一个Watcher
export default class Dep {
static target: ?Watcher;
id: number;
subs: Array<Watcher>;
constructor () {
this.id = uid++
this.subs = []
}
addSub (sub: Watcher) {
this.subs.push(sub)
}
removeSub (sub: Watcher) {
remove(this.subs, sub)
}
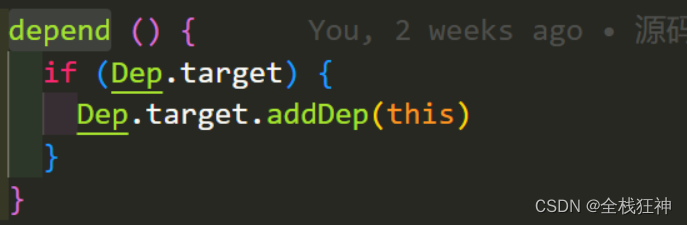
depend () {
if (Dep.target) {
Dep.target.addDep(this)
}
}
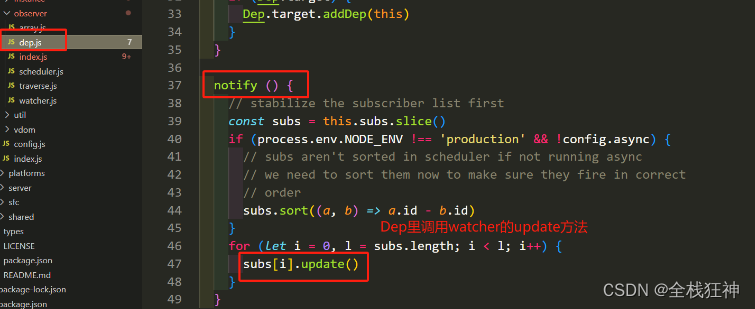
notify () {
// stabilize the subscriber list first
const subs = this.subs.slice()
if (process.env.NODE_ENV !== 'production' && !config.async) {
// subs aren't sorted in scheduler if not running async
// we need to sort them now to make sure they fire in correct
// order
subs.sort((a, b) => a.id - b.id)
}
for (let i = 0, l = subs.length; i < l; i++) {
subs[i].update()
}
}
}
- 由代码可以知道
- 在dep类中subs就是收集Watcher的一个集合
- addSub 为添加依赖的方法
- notify 为依赖通知的方法
- depend 该方法为主要的方法,在Observer的get中将会调用该方法进行收集 (该方法中的Dep.target是一个判断依赖收集标识,Dep.target将会在模板挂载时,实例化一个Watcher,在Watcher实例化时会调用getter,会给Dep.target赋值为当前实例的this,因此在对数获取触发get时,Dep.target是存在的,所以Watcher就不收集了)

至此,Dep实现功能解析完毕
4. 数据检测 Watcher
4.1. Watcher的功能主要是接口到Dep的通知,然后调用update方法更新视图
4.2. 在update方法中会触发回调,回调函数实际就是已生成render函数

4.3. 在调用render函数是,函数里的值就会获取到已经更改后值,所以就会生成新的vnode
4.4. 新的vnode生成后,就是patch的过程,用新的vnode与旧的vnode进行比对,最终将比对后的vnode转换为实际的dom添加到模板挂载节点上
4.5.新的模板挂载后,将旧的模板删除,这样视图就更新完成
// 代码位置 vue\src\core\observer\watcher.js
export default class Watcher {
vm: Component;
expression: string;
cb: Function;
id: number;
deep: boolean;
user: boolean;
lazy: boolean;
sync: boolean;
dirty: boolean;
active: boolean;
deps: Array<Dep>;
newDeps: Array<Dep>;
depIds: SimpleSet;
newDepIds: SimpleSet;
before: ?Function;
getter: Function;
value: any;
constructor (
vm: Component,
expOrFn: string | Function,
cb: Function,
options?: ?Object,
isRenderWatcher?: boolean
) {
this.vm = vm
if (isRenderWatcher) {
vm._watcher = this
}
vm._watchers.push(this)
// options
if (options) {
this.deep = !!options.deep
this.user = !!options.user
this.lazy = !!options.lazy
this.sync = !!options.sync
this.before = options.before
} else {
this.deep = this.user = this.lazy = this.sync = false
}
this.cb = cb
this.id = ++uid // uid for batching
this.active = true
this.dirty = this.lazy // for lazy watchers
this.deps = []
this.newDeps = []
this.depIds = new Set()
this.newDepIds = new Set()
this.expression = process.env.NODE_ENV !== 'production'
? expOrFn.toString()
: ''
// parse expression for getter
if (typeof expOrFn === 'function') {
this.getter = expOrFn
} else {
this.getter = parsePath(expOrFn)
if (!this.getter) {
this.getter = noop
process.env.NODE_ENV !== 'production' && warn(
`Failed watching path: "${expOrFn}" ` +
'Watcher only accepts simple dot-delimited paths. ' +
'For full control, use a function instead.',
vm
)
}
}
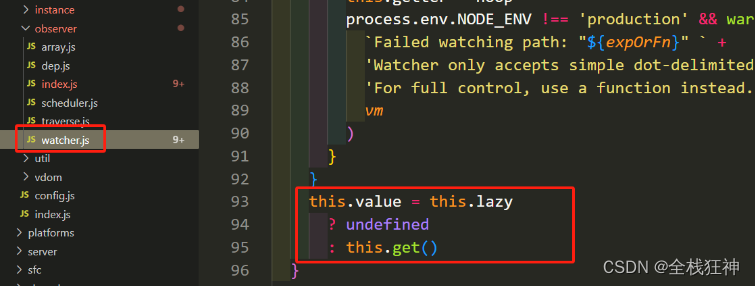
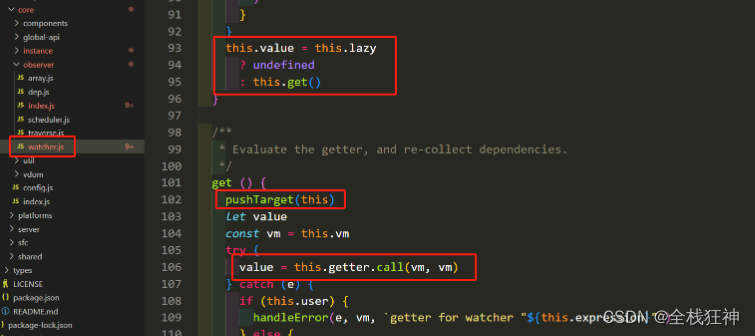
this.value = this.lazy
? undefined
: this.get()
}
/**
* Evaluate the getter, and re-collect dependencies.
*/
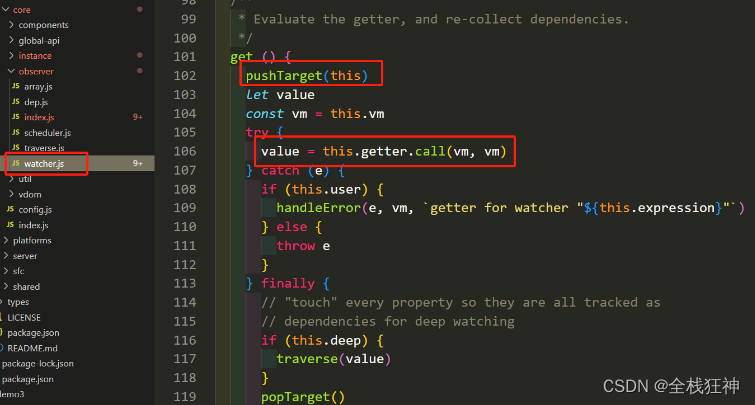
get () {
pushTarget(this)
let value
const vm = this.vm
try {
value = this.getter.call(vm, vm)
} catch (e) {
if (this.user) {
handleError(e, vm, `getter for watcher "${this.expression}"`)
} else {
throw e
}
} finally {
// "touch" every property so they are all tracked as
// dependencies for deep watching
if (this.deep) {
traverse(value)
}
popTarget()
this.cleanupDeps()
}
return value
}
/**
* Add a dependency to this directive.
*/
addDep (dep: Dep) {
const id = dep.id
if (!this.newDepIds.has(id)) {
this.newDepIds.add(id)
this.newDeps.push(dep)
if (!this.depIds.has(id)) {
dep.addSub(this)
}
}
}
/**
* Clean up for dependency collection.
*/
cleanupDeps () {
let i = this.deps.length
while (i--) {
const dep = this.deps[i]
if (!this.newDepIds.has(dep.id)) {
dep.removeSub(this)
}
}
let tmp = this.depIds
this.depIds = this.newDepIds
this.newDepIds = tmp
this.newDepIds.clear()
tmp = this.deps
this.deps = this.newDeps
this.newDeps = tmp
this.newDeps.length = 0
}
/**
* Subscriber interface.
* Will be called when a dependency changes.
*/
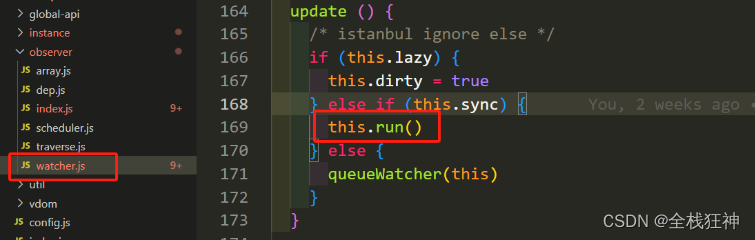
update () {
/* istanbul ignore else */
if (this.lazy) {
this.dirty = true
} else if (this.sync) {
this.run()
} else {
queueWatcher(this)
}
}
/**
* Scheduler job interface.
* Will be called by the scheduler.
*/
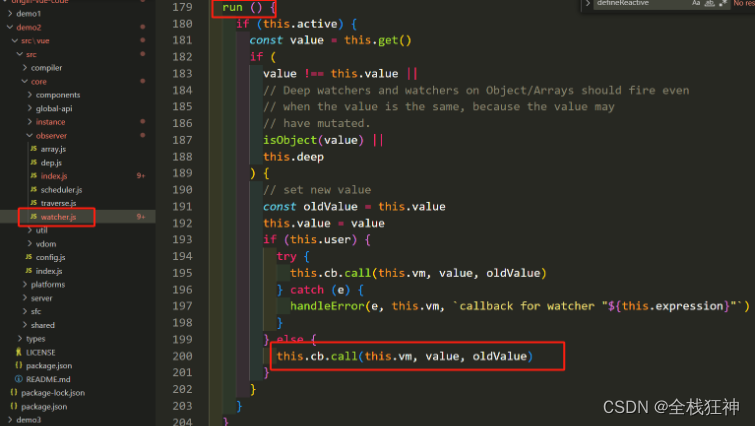
run () {
if (this.active) {
const value = this.get()
if (
value !== this.value ||
// Deep watchers and watchers on Object/Arrays should fire even
// when the value is the same, because the value may
// have mutated.
isObject(value) ||
this.deep
) {
// set new value
const oldValue = this.value
this.value = value
if (this.user) {
try {
this.cb.call(this.vm, value, oldValue)
} catch (e) {
handleError(e, this.vm, `callback for watcher "${this.expression}"`)
}
} else {
this.cb.call(this.vm, value, oldValue)
}
}
}
}
/**
* Evaluate the value of the watcher.
* This only gets called for lazy watchers.
*/
evaluate () {
this.value = this.get()
this.dirty = false
}
/**
* Depend on all deps collected by this watcher.
*/
depend () {
let i = this.deps.length
while (i--) {
this.deps[i].depend()
}
}
/**
* Remove self from all dependencies' subscriber list.
*/
teardown () {
if (this.active) {
// remove self from vm's watcher list
// this is a somewhat expensive operation so we skip it
// if the vm is being destroyed.
if (!this.vm._isBeingDestroyed) {
remove(this.vm._watchers, this)
}
let i = this.deps.length
while (i--) {
this.deps[i].removeSub(this)
}
this.active = false
}
}
}
由代码可以看出
1.在Watcher实例构造函数执行时,会触发get
2.触发了get后就会该Watcher实例进行收集
3.update为接到Dep通知时触发的方法
4.update内会调用run方法
5.在run方法内会调用cb回调方法
6.cb回到方法实际就是模板编译时render方法
3.虚拟DOM
3.1. vue中的虚拟DOM,实际就是通过定义一个Vnode类,在该类上添加了dom的一些属性来标识一个dom
3.2. 主要的作用是降低对实际dom的操作,来减轻对浏览器性能的耗费
// 源码位置:src/core/vdom/vnode.js

export default class VNode {
  constructor (
    tag?: string,
    data?: VNodeData,
    children?: ?Array<VNode>,
    text?: string,
    elm?: Node,
    context?: Component,
    componentOptions?: VNodeComponentOptions,
    asyncFactory?: Function
  ) {
    this.tag = tag                                /*当前节点的标签名*/
    this.data = data        /*当前节点对应的对象,包含了具体的一些数据信息,是一个VNodeData类型,可以参考VNodeData类型中的数据信息*/
    this.children = children  /*当前节点的子节点,是一个数组*/
    this.text = text     /*当前节点的文本*/
    this.elm = elm       /*当前虚拟节点对应的真实dom节点*/
    this.ns = undefined            /*当前节点的名字空间*/
    this.context = context          /*当前组件节点对应的Vue实例*/
    this.fnContext = undefined       /*函数式组件对应的Vue实例*/
    this.fnOptions = undefined
    this.fnScopeId = undefined
    this.key = data && data.key           /*节点的key属性,被当作节点的标志,用以优化*/
    this.componentOptions = componentOptions   /*组件的option选项*/
    this.componentInstance = undefined       /*当前节点对应的组件的实例*/
    this.parent = undefined           /*当前节点的父节点*/
    this.raw = false         /*简而言之就是是否为原生HTML或只是普通文本,innerHTML的时候为true,textContent的时候为false*/
    this.isStatic = false         /*静态节点标志*/
    this.isRootInsert = true      /*是否作为跟节点插入*/
    this.isComment = false             /*是否为注释节点*/
    this.isCloned = false           /*是否为克隆节点*/
    this.isOnce = false                /*是否有v-once指令*/
    this.asyncFactory = asyncFactory
    this.asyncMeta = undefined
    this.isAsyncPlaceholder = false
  }

  get child (): Component | void {
    return this.componentInstance
  }
}
4.模板编译
4.1. 模板编译就是将template里的代码通过正则匹配,转化为ast
4.2. 将ast转换为render函数
4.3. vue编译代码分为weex和web
本文主要介绍的是web下的模板编译
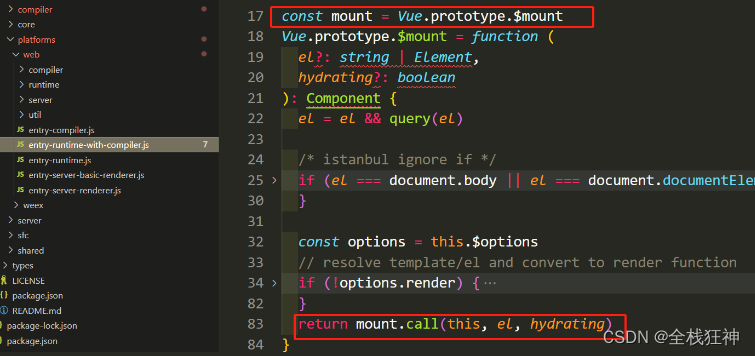
4.3.1.vue模板编译的相关代码为 entry-runtime-with-compiler.js
Vue.prototype.$mount = function (
  el?: string | Element,
  hydrating?: boolean
): Component {
  el = el && query(el)

  /* istanbul ignore if */
  if (el === document.body || el === document.documentElement) {
    process.env.NODE_ENV !== 'production' && warn(
      `Do not mount Vue to <html> or <body> - mount to normal elements instead.`
    )
    return this
  }

  const options = this.$options
  // resolve template/el and convert to render function
  if (!options.render) {
    let template = options.template
    if (template) {
      if (typeof template === 'string') {
        if (template.charAt(0) === '#') {
          template = idToTemplate(template)
          /* istanbul ignore if */
          if (process.env.NODE_ENV !== 'production' && !template) {
            warn(
              `Template element not found or is empty: ${options.template}`,
              this
            )
          }
        }
      } else if (template.nodeType) {
        template = template.innerHTML
      } else {
        if (process.env.NODE_ENV !== 'production') {
          warn('invalid template option:' + template, this)
        }
        return this
      }
    } else if (el) {
      template = getOuterHTML(el)
    }
    if (template) {
      /* istanbul ignore if */
      if (process.env.NODE_ENV !== 'production' && config.performance && mark) {
        mark('compile')
      }

      const { render, staticRenderFns } = compileToFunctions(template, {
        outputSourceRange: process.env.NODE_ENV !== 'production',
        shouldDecodeNewlines,
        shouldDecodeNewlinesForHref,
        delimiters: options.delimiters,
        comments: options.comments
      }, this)
      options.render = render
      this._render = render
      options.staticRenderFns = staticRenderFns

      /* istanbul ignore if */
      if (process.env.NODE_ENV !== 'production' && config.performance && mark) {
        mark('compile end')
        measure(`vue ${this._name} compile`, 'compile', 'compile end')
      }
    }
  }
  return mount.call(this, el, hydrating)
}
4.3.1.1. 通过分析代码,在$mount函数内,前面主要是对条件的判断不重要,直接跳过
4.3.1.2. 重要的是compileToFunctions函数的调用,改函数执行完会返回一个render方法和staticRenderFns,然后将这两方法赋值到vm实例的options上,并给vm实例赋值上_render方法(该方法主要会在模板挂载时调用)
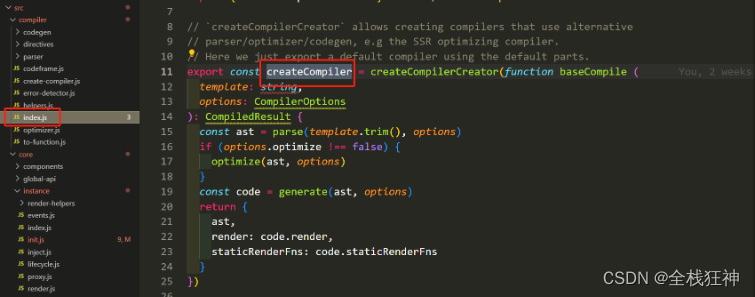
4.3.1.3. compileToFunctions 函数为路径为 vue\src\compiler\index.js 下声明的函数
4.3.1.4. 然后调用createCompilerCreator,该函数在vue\src\compiler\create-compiler.js 中声明
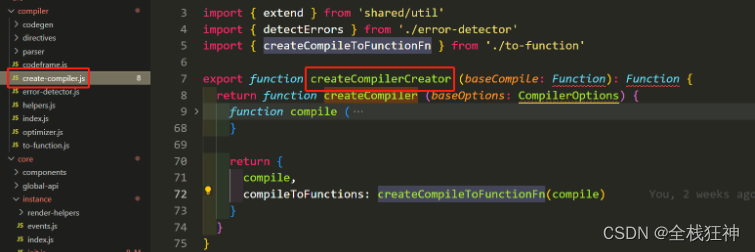
4.3.1.5. 然后调用 createCompileToFunctionFn, 该函数在 vue\src\compiler\to-function.js 中声明,在此函数中会调用 compile 方法
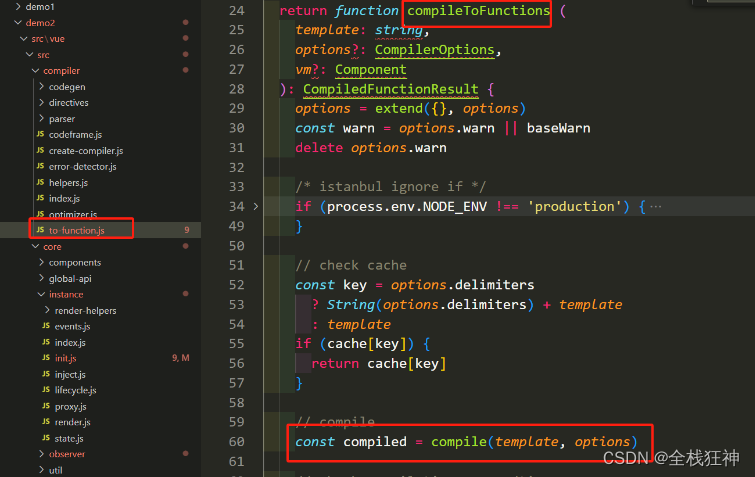
4.3.1.6. compile 方法 是在 createCompilerCreator 方法中定义的,然后在compile调用 baseCompile 方法
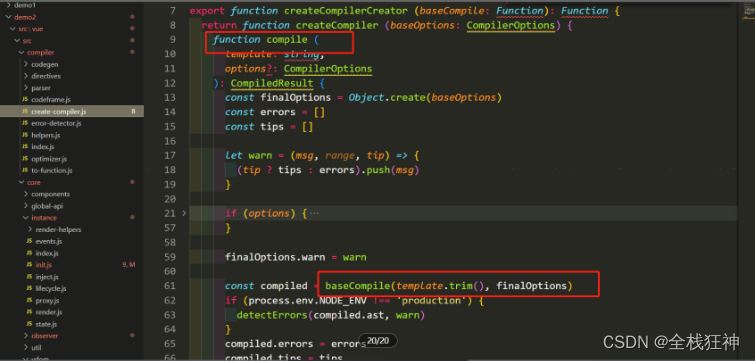
4.3.1.7. baseCompile 方法是在 createCompiler 方法中定义的,然后在该方法中回调用parse函数进行模板编译解析,转换成ast

4.3.1.7.1. parse函数为实际的模板解析实现函数
4.3.1.7.1.1. parse内的主要函数为 parseHTML 函数,该函数实现了对模板解析
4.3.1.7.1.2. 解析分为五中类型 文档声明、 条件注释、普通注释、(标签、标签属性)、文本
export function parse(template, options) {
   // ...
  parseHTML(template, {
    warn,
    expectHTML: options.expectHTML,
    isUnaryTag: options.isUnaryTag,
    canBeLeftOpenTag: options.canBeLeftOpenTag,
    shouldDecodeNewlines: options.shouldDecodeNewlines,
    shouldDecodeNewlinesForHref: options.shouldDecodeNewlinesForHref,
    shouldKeepComment: options.comments,
    // 当解析到开始标签时,调用该函数
    start (tag, attrs, unary) {

    },
    // 当解析到结束标签时,调用该函数
    end () {

    },
    // 当解析到文本时,调用该函数
    chars (text) {

    },
    // 当解析到注释时,调用该函数
    comment (text) {

    }
  })
  return root
}
function parseHTML(html, options) {
	var stack = [];
	var expectHTML = options.expectHTML;
	var isUnaryTag$$1 = options.isUnaryTag || no;
	var canBeLeftOpenTag$$1 = options.canBeLeftOpenTag || no;
	var index = 0;
	var last, lastTag;

	// 开启一个 while 循环,循环结束的条件是 html 为空,即 html 被 parse 完毕
	while (html) {
		last = html;
		// 确保即将 parse 的内容不是在纯文本标签里 (script,style,textarea)
		if (!lastTag || !isPlainTextElement(lastTag)) {
		   let textEnd = html.indexOf('<')
              /**
               * 如果html字符串是以'<'开头,则有以下几种可能
               * 开始标签:<div>
               * 结束标签:</div>
               * 注释:<!-- 我是注释 -->
               * 条件注释:<!-- [if !IE] --> <!-- [endif] -->
               * DOCTYPE:<!DOCTYPE html>
               * 需要一一去匹配尝试
               */
            if (textEnd === 0) {
                // 解析是否是注释
        		if (comment.test(html)) {

                }
                // 解析是否是条件注释
                if (conditionalComment.test(html)) {

                }
                // 解析是否是DOCTYPE
                const doctypeMatch = html.match(doctype)
                if (doctypeMatch) {

                }
                // 解析是否是结束标签
                const endTagMatch = html.match(endTag)
                if (endTagMatch) {

                }
                // 匹配是否是开始标签
                const startTagMatch = parseStartTag()
                if (startTagMatch) {

                }
            }
            // 如果html字符串不是以'<'开头,则解析文本类型
            let text, rest, next
            if (textEnd >= 0) {

            }
            // 如果在html字符串中没有找到'<',表示这一段html字符串都是纯文本
            if (textEnd < 0) {
                text = html
                html = ''
            }
            // 把截取出来的text转化成textAST
            if (options.chars && text) {
                options.chars(text)
            }
		} else {
			// 父元素为script、style、textarea时,其内部的内容全部当做纯文本处理
		}

		//将整个字符串作为文本对待
		if (html === last) {
			options.chars && options.chars(html);
			if (!stack.length && options.warn) {
				options.warn(("Mal-formatted tag at end of template: \"" + html + "\""));
			}
			break
		}
	}

	// Clean up any remaining tags
	parseEndTag();
	//parse 开始标签
	function parseStartTag() {

	}
	//处理 parseStartTag 的结果
	function handleStartTag(match) {

	}
	//parse 结束标签
	function parseEndTag(tagName, start, end) {

	}
}
4.3.1.7.1.3. 在parseHTML 内主要对模版字符进行递增的截取匹配,在while函数内主要对字符是否包含 < 的位置做了三个判断处理
1.位置为0时表示的可能性为 文档声明,条件注释,普通注释,标签 等
2.位置 > 0 时解析为文本类型
3.位置 < 0 时解析为纯文本
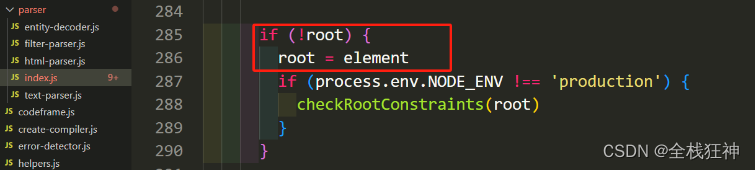
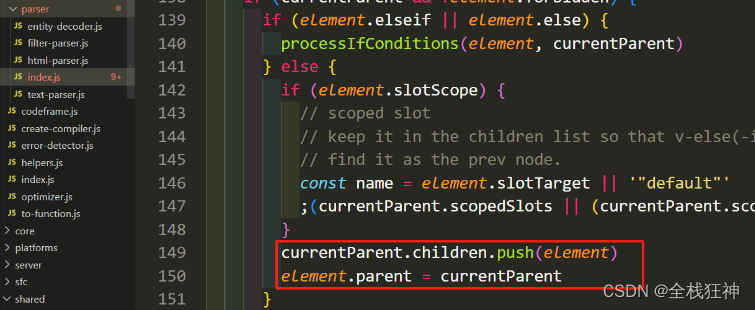
4.3.1.7.1.4.start
- start函数主要处理parseHTML内解析开始标签,接受传过来的标签名,标签属性
- 调用创建生成ast方法,生成一个标签节点
- 判断根节点是否存在,不存在时将该节点作为根节点
- 设置当前节点,并把节点添加到定义的栈中(收集到栈中主要用于解析到结束标签时,判断该模版是否合法)

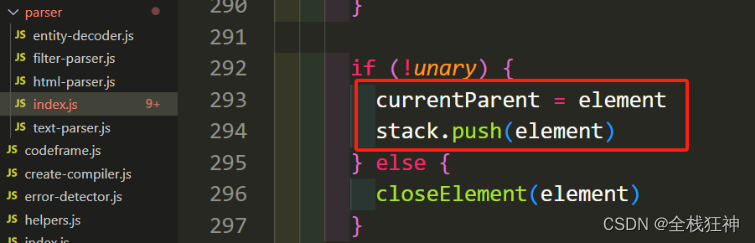
4.3.1.7.1.5.end
1.end方法用于解析标签结束,接受标签名,开始位置索引,结束位置索引
2.将收集栈的最后一项移除,取到父级元素
3.调用closeElement处理方法1.给父级节点children添加子集
2.给当前节点赋值 parent 属性值
– 这样就可以生成一个树形的ast了–

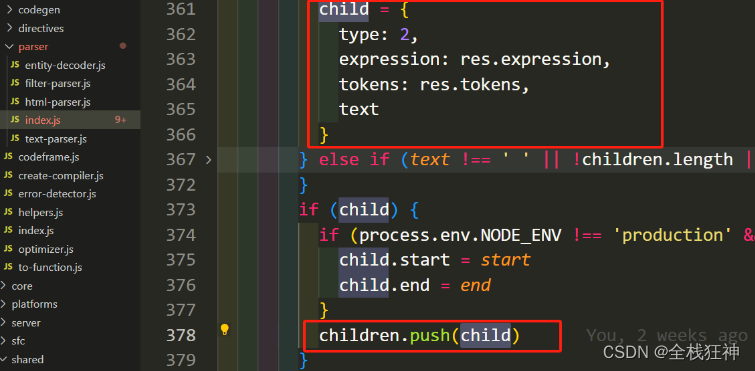
4.3.1.7.1.6.chars
1.chars的实现功能主要是定义一个文本节点
2.向父级children添加
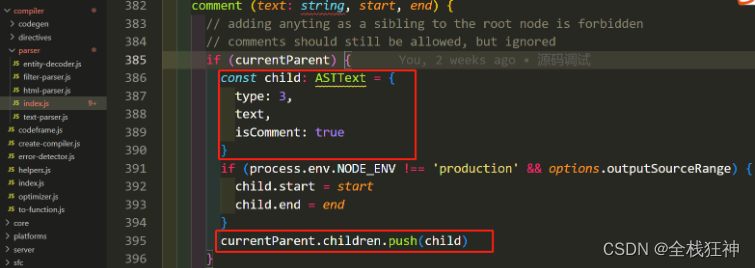
4.3.1.7.1.7.comment
1.comment 内主要也是定义了一个文本节点,只是把该文本节点标识成了一个注释
2.向父级children 添加
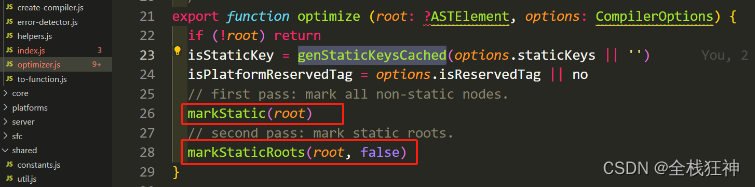
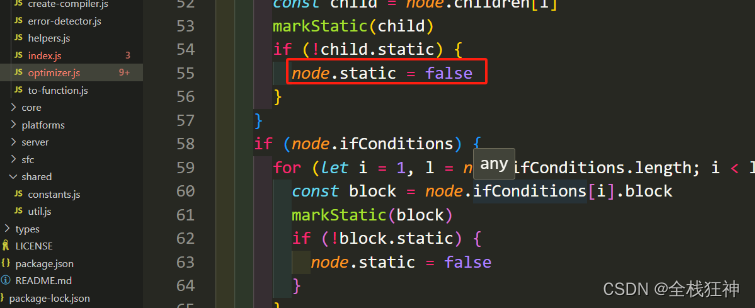
4.3.1.8.转换成ast后对ast进行优化处理(静态节点设置等)
1.标记静态节点和静态根节点(在标记为静态属性后,patch比对的时候就会忽略进行比对 操作,提高效率)
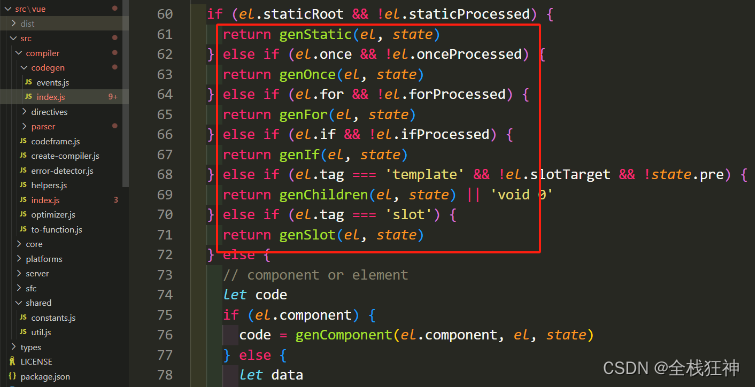
4.3.1.9.调用generate方法将ast转换成render函数
1.genElement 会将ast转换生成渲染函数
2.genElement 会针对不同的节点类型,调用不同的内部render函数

5.模板挂载
5.1. 模版挂载的入口为,在$mount函数内完成模版的编译后,生成了render函数,然后在调用之前申明的mount变量函数,将render函数转换为对应的vnode节点
5.2. 定义变量的mount为运行入口里定义的$mount函数,该函数内实现模版的挂载
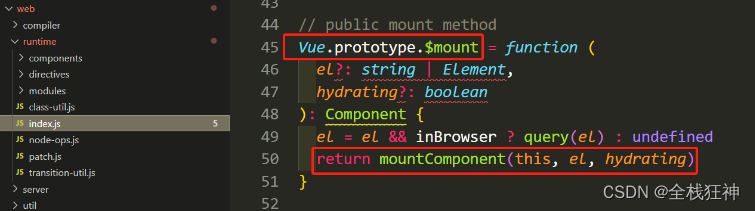
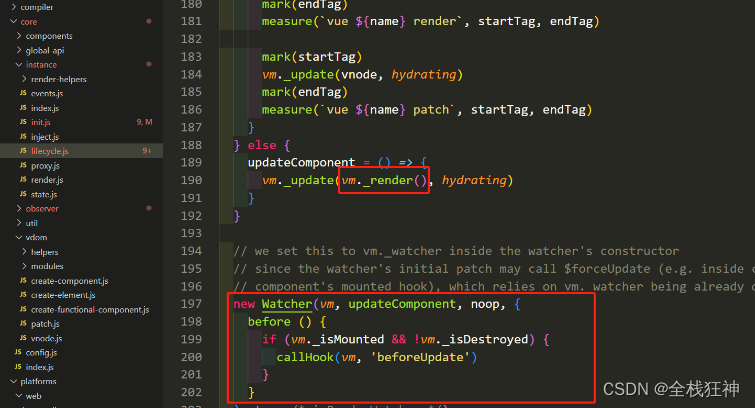
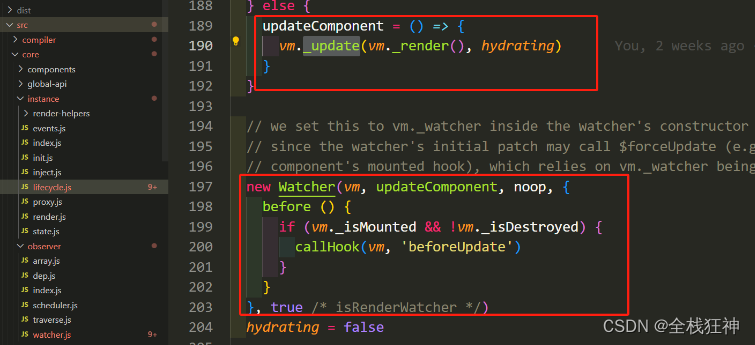
5.3. 在mountComponent 函数内主要实例化一个Watcher,watcher实例化时会调用updateComponent, 在updateComponent函数内会调用_update和render函数,在_update内会再调用 patch完成新元素与旧元素的比对,然后为vnode节点的el属性创建实际的dom元素,完成所有的元素比对后,会将dom树添加到挂载节点上
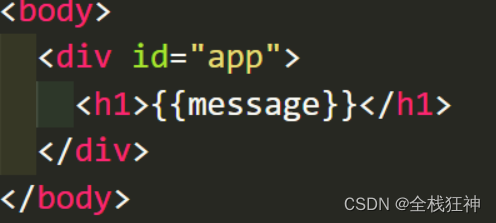
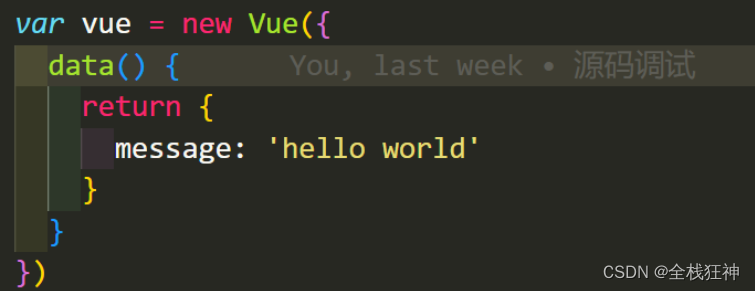
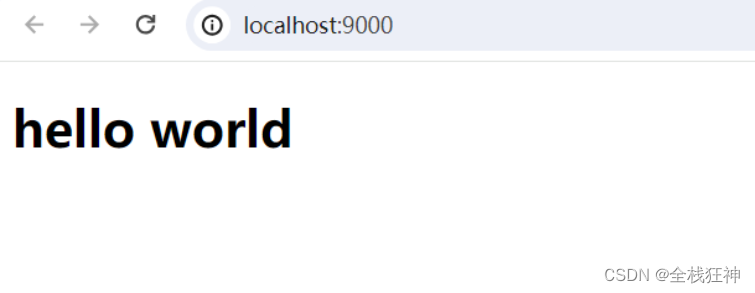
5.1.4. 展现结果


 1265
1265


 被折叠的 条评论
为什么被折叠?
被折叠的 条评论
为什么被折叠?
 到【灌水乐园】发言


