


Elastic-job 分布式调度
常见应用场景 :
- 某电商平台需要每天上午10点,下午3点,晚上8点发放一批优惠券
- 某银行系统需要在信用卡到期还款日的前三天进行短信提醒
- 某财务系统需要在每天凌晨0:10分结算前一天的财务数据,统计汇总
1.2 为什么需要分布式调度
感觉Spring给我们提供的这个注解可以完成任务调度的功能,好像已经完美解决问题了,为什么还需要分布式呢?
主要有如下这几点原因:
1.单机处理极限:原本1分钟内需要处理1万个订单,但是现在需要1分钟内处理10万个订单;原来一个统计需要1小时,现在业务方需要10分钟就统计出来。你也许会说,你也可以多线程、单机多进程处理。的确,多线程并行处理可以提高单位时间的处理效率,但是单机能力毕竟有限(主要是CPU、内存和磁盘),始终会有单机处理不过来的情况。
2.高可用:单机版的定式任务调度只能在一台机器上运行,如果程序或者系统出现异常就会导致功能不可用。虽然可以在单机程序实现的足够稳定,但始终有机会遇到非程序引起的故障,而这个对于一个系统的核心功能来说是不可接受的。
3.防止重复执行: 在单机模式下,定时任务是没什么问题的。但当我们部署了多台服务,同时又每台服务又有定时任务时,若不进行合理的控制在同一时间,只有一个定时任务启动执行,这时,定时执行的结果就可能存在混乱和错误了
这个时候就需要分布式的任务调度来实现了。
分布式Elastic-Job的快速入门
2.1 环境搭建
2.1.1 版本要求
- JDK 要求1.7以上保本
- Maven 要求3.0.4及以上版本
- Zookeeper 要求采取3.4.6以上版本
SpringBoot集成Elastic-Job
添加Maven依赖
 <groupId>cn.wolfcode</groupId>
    <artifactId>elastic-job-springboot</artifactId>
    <version>1.0.0</version>
    <parent>
        <groupId>org.springframework.boot</groupId>
        <artifactId>spring-boot-starter-parent</artifactId>
        <version>2.1.5.RELEASE</version>
    </parent>
    <properties>
        <project.build.sourceEncoding>UTF-8</project.build.sourceEncoding>
        <project.reporting.outputEncoding>UTF-8</project.reporting.outputEncoding>
        <java.version>1.8</java.version>
    </properties>
    <dependencies>
        <dependency>
            <groupId>org.springframework.boot</groupId>
            <artifactId>spring-boot-starter-web</artifactId>
        </dependency>
        <dependency>
            <groupId>com.dangdang</groupId>
            <artifactId>elastic-job-lite-spring</artifactId>
            <version>2.1.5</version>
        </dependency>
        <dependency>
            <groupId>org.projectlombok</groupId>
            <artifactId>lombok</artifactId>
        </dependency>
    </dependencies>
相关配置
elasticjob:
  zookeeper-url: localhost:2181
  group-name: elastic-job-group

server:
  port: 8080 //可以通过改变端口来启动多份
配置定时任务
@Component
public class MyElasticJob implements SimpleJob {

    public void execute(ShardingContext shardingContext) {
        System.out.println("定时任务开始====>"+new Date());
    }
}
注册中心配置
@Configuration //注册中心的配置
public class RegistryCenterConfig {
    @Bean(initMethod = "init")
    public CoordinatorRegistryCenter createRegistryCenter(@Value("${elasticjob.zookeeper-url}") String zookeeperUrl, @Value("${elasticjob.group-name}") String groupName) {
        //zk的配置
        ZookeeperConfiguration zookeeperConfiguration = new ZookeeperConfiguration(zookeeperUrl,groupName);
        //设置zk超时时间
        zookeeperConfiguration.setSessionTimeoutMilliseconds(100);
        //创建注册中心
        CoordinatorRegistryCenter zookeeperRegistryCenter = new ZookeeperRegistryCenter(zookeeperConfiguration);
        return zookeeperRegistryCenter;
    }
}
任务调度配置类
@Configuration //任务调度配置类
public class ElasticJobConfig {
    @Autowired
    private MyElasticJob myElasticJob;
    @Autowired
    private CoordinatorRegistryCenter registryCenter;

    private static LiteJobConfiguration createJobConfiguration(final Class<? extends SimpleJob> jobClass,
                                                               final String cron,
                                                               final int shardingTotalCount,
                                                               final String shardingItemParameters) {
        // 定义作业核心配置
        JobCoreConfiguration.Builder jobCoreConfigurationBuilder = JobCoreConfiguration.newBuilder(jobClass.getSimpleName(), cron, shardingTotalCount);
        if(!StringUtils.isEmpty(shardingItemParameters)){
            jobCoreConfigurationBuilder.shardingItemParameters(shardingItemParameters);
        }
        // 定义SIMPLE类型配置
        SimpleJobConfiguration simpleJobConfig = new SimpleJobConfiguration(jobCoreConfigurationBuilder.build(), MyElasticJob.class.getCanonicalName());
        // 定义Lite作业根配置
        LiteJobConfiguration simpleJobRootConfig = LiteJobConfiguration.newBuilder(simpleJobConfig).overwrite(true).build();
        return simpleJobRootConfig;
    }
    @Bean(initMethod = "init")
    public SpringJobScheduler initSimpleElasticJob(){
        SpringJobScheduler springJobScheduler = new SpringJobScheduler(myElasticJob,registryCenter,createJobConfiguration(MyElasticJob.class,"0/3 * * * * ?",1,null));
        return springJobScheduler;
    }
案例 数据备份
案例需求
需求:数据库中有一些列的数据,需要对这些数据进行备份操作,备份完之后,修改数据的状态,标记已经备份了.
4.1 初始化数据
在数据库中导入elastic-job-demo.sql数据
4.2 集成Druid&MyBatis
4.2.1 添加依赖
        <dependency>
            <groupId>com.alibaba</groupId>
            <artifactId>druid</artifactId>
            <version>1.1.10</version>
        </dependency>
        <dependency>
            <groupId>org.mybatis.spring.boot</groupId>
            <artifactId>mybatis-spring-boot-starter</artifactId>
            <version>1.2.0</version>
        </dependency>
        <!--mysql驱动-->
        <dependency>
            <groupId>mysql</groupId>
            <artifactId>mysql-connector-java</artifactId>
        </dependency>
4.2.2 添加配置
spring:
  datasource:
    url: jdbc:mysql://localhost:3306/elastic-job-demo?serverTimezone=GMT%2B8
    driverClassName: com.mysql.jdbc.Driver
    type: com.alibaba.druid.pool.DruidDataSource
    username: root
    password: admin
4.2.3 添加实体类
@Data
public class FileCustom {
    //唯一标识
    private Long id;
    //文件名
    private String name;
    //文件类型
    private String type;
    //文件内容
    private String content;
    //是否已备份
    private Boolean backedUp = false;
    public FileCustom(){}
    public FileCustom(Long id, String name, String type, String content){
        this.id = id;
        this.name = name;
        this.type = type;
        this.content = content;
    }
}
4.2.4 添加Mapper处理类
@Mapper
public interface FileCustomMapper {
    @Select("select * from t_file_custom where backedUp = 0")
    List<FileCustom> selectAll();
    @Update("update t_file_custom set backedUp = #{state} where id = #{id}")
    int changeState(@Param("id") Long id, @Param("state")int state);
}
4.3 业务功能实现
4.3.1 添加任务类
@Component
public class FileCustomElasticJob implements SimpleJob {
    @Autowired
    private FileCustomMapper fileCustomMapper;
    @Override
    public void execute(ShardingContext shardingContext) {
        doWork();
    }
    private void doWork(){
        List<FileCustom> fileList = fileCustomMapper.selectAll();
        System.out.println("需要备份文件个数:"+fileList.size());
        for(FileCustom fileCustom:fileList){
            backUpFile(fileCustom);
        }
    }
    private void backUpFile(FileCustom fileCustom){
        try {
            //模拟备份动作
            TimeUnit.SECONDS.sleep(1);
        } catch (InterruptedException e) {
            e.printStackTrace();
        }
        System.out.println("执行文件备份====>"+fileCustom);
        fileCustomMapper.changeState(fileCustom.getId(),1);
    }
}
4.3.2 添加任务调度配置
在配置类中新增这个Bean
@Bean(initMethod = "init") public SpringJobScheduler initFileCustomElasticJob(FileCustomElasticJob fileCustomElasticJob){ SpringJobScheduler springJobScheduler = new SpringJobScheduler(fileCustomElasticJob,registryCenter,createJobConfiguration(FileCustomElasticJob.class,"0 0/1 * * * ?",1,null)); return springJobScheduler; }
//任务拆分 , 分布式任务实例分别执行
分片概念
作业分片是指任务的分布式执行,需要将一个任务拆分为多个独立的任务项,然后由分布式的应用实例分别执行某一个或者几个分布项。
例如:Elastic-Job快速入门中文件备份的案例,现有两台服务器,每台服务器分别跑一个应用实例。为了快速执行作业,那么可以讲任务分成4片,每个应用实例都执行两片。作业遍历数据逻辑应为:实例1查找text和image类型文件执行备份,实例2查找radio和vedio类型文件执行备份。如果由于服务器拓容应用实例数量增加为4,则作业遍历数据的逻辑应为: 4个实例分别处理text,image,radio,video类型的文件。
可以看到,通过对任务的合理分片化,从而达到任务并行处理的效果.
分片项与业务处理解耦
Elastic-Job并不直接提供数据处理的功能,框架只会将分片项分配至各个运行中的作业服务器,开发者需要自行处理分片项与真实数据的对应关系
最大限度利用资源
将分片项设置大于服务器的数据,最好是大于服务器倍数的数量,作业将会合理利用分布式资源,动态的分配分片项.
例如: 3台服务器,分成10片,则分片项结果为服务器A=0,1,2;服务器B=3,4,5;服务器C=6,7,8,9.如果 服务器C奔溃,则分片项分配结果为服务器A=0,1,2,3,4;服务器B=5,6,7,8,9.在不丢失分片项的情况下,最大限度利用现有的资源提高吞吐量.
案例改造成任务分片
6.1 配置类修改
在任务配置类中增加分片个数以及分片参数.
@Bean(initMethod = "init")
    public SpringJobScheduler initFileCustomElasticJob(FileCustomElasticJob fileCustomElasticJob){
        SpringJobScheduler springJobScheduler = new SpringJobScheduler(
                fileCustomElasticJob,
                registryCenter,
                createJobConfiguration(FileCustomElasticJob.class,"0 0/1 * * * ?",4,"0=text,1=image,2=radio,3=vedio"));
        return springJobScheduler;
    }
6.2 新增作业分片逻辑
@Component
public class FileCustomElasticJob implements SimpleJob {
    @Autowired
    private FileCustomMapper fileCustomMapper;
    @Override
    public void execute(ShardingContext shardingContext) {
        doWork(shardingContext.getShardingParameter());
    }
    private void doWork(String fileType){
        List<FileCustom> fileList = fileCustomMapper.selecByType(fileType);
        System.out.println("类型为:"+fileType+",文件,需要备份个数:"+fileList.size());
        for(FileCustom fileCustom:fileList){
            backUpFile(fileCustom);
        }
    }
    private void backUpFile(FileCustom fileCustom){
        try {
            //模拟备份动作
            TimeUnit.SECONDS.sleep(1);
        } catch (InterruptedException e) {
            e.printStackTrace();
        }
        System.out.println("执行文件备份====>"+fileCustom);
        fileCustomMapper.changeState(fileCustom.getId(),1);
    }
}
6.3 Mapper类修改
@Mapper
public interface FileCustomMapper {
    @Select("select * from t_file_custom where backedUp = 0")
    List<FileCustom> selectAll();
    @Select("select * from t_file_custom where backedUp = 0 and type=#{fileType}")
    List<FileCustom> selecByType(String fileType);
    @Update("update t_file_custom set backedUp = #{state} where id = #{id}")
    int changeState(@Param("id") Long id, @Param("state")int state);
}
用于抓取(fetchData)和处理(processData)数据
Dataflow类型调度任务
Dataflow类型的定时任务需要实现Dataflowjob接口,该接口提供2个方法供覆盖,分别用于抓取(fetchData)和处理(processData)数据,我们继续对例子进行改造。
Dataflow类型用于处理数据流,他和SimpleJob不同,它以数据流的方式执行,调用fetchData抓取数据,知道抓取不到数据才停止作业。
7.1 任务类
@Component
public class FileDataflowJob implements DataflowJob<FileCustom> {
    @Autowired
    private FileCustomMapper fileCustomMapper;
    @Override
    public List<FileCustom> fetchData(ShardingContext shardingContext) {
        List<FileCustom> fileCustoms = fileCustomMapper.fetchData(2);
        System.out.println("抓取时间:"+new Date()+",个数"+fileCustoms.size());
        return fileCustoms;
    }
    @Override
    public void processData(ShardingContext shardingContext, List<FileCustom> data) {
        for(FileCustom fileCustom:data){
            backUpFile(fileCustom);
        }
    }
    private void backUpFile(FileCustom fileCustom){
        try {
            //模拟备份动作
            TimeUnit.SECONDS.sleep(1);
        } catch (InterruptedException e) {
            e.printStackTrace();
        }
        System.out.println("执行文件备份====>"+fileCustom);
        fileCustomMapper.changeState(fileCustom.getId(),1);
    }
}
7.2 配置类
@Configuration
public class ElasticJobConfig {
    @Autowired
    private MyElasticJob myElasticJob;
    @Autowired
    private CoordinatorRegistryCenter registryCenter;
    private static LiteJobConfiguration createJobConfiguration(final Class<? extends ElasticJob> jobClass,
                                                               final String cron,
                                                               final int shardingTotalCount,
                                                               final String shardingItemParameters,
                                                               boolean dataflowType) {
        // 定义作业核心配置
        JobCoreConfiguration.Builder jobCoreConfigurationBuilder = JobCoreConfiguration.newBuilder(jobClass.getSimpleName(), cron, shardingTotalCount);
        if(!StringUtils.isEmpty(shardingItemParameters)){
            jobCoreConfigurationBuilder.shardingItemParameters(shardingItemParameters);
        }
        JobTypeConfiguration jobConfig = null;
        if(dataflowType){
            jobConfig = new DataflowJobConfiguration(jobCoreConfigurationBuilder.build(),jobClass.getCanonicalName(),true);
        }else{
            // 定义SIMPLE类型配置
            jobConfig = new SimpleJobConfiguration(jobCoreConfigurationBuilder.build(), jobClass.getCanonicalName());
        }
        // 定义Lite作业根配置
        LiteJobConfiguration simpleJobRootConfig = LiteJobConfiguration.newBuilder(jobConfig).overwrite(true).build();
        return simpleJobRootConfig;
    }
    /*@Bean(initMethod = "init")
    public SpringJobScheduler initSimpleElasticJob(){
        SpringJobScheduler springJobScheduler = new SpringJobScheduler(myElasticJob,registryCenter,createJobConfiguration(MyElasticJob.class,"0/3 * * * * ?",1,null));
        return springJobScheduler;
    }*/
    /*@Bean(initMethod = "init")
    public SpringJobScheduler initFileCustomElasticJob(FileCustomElasticJob fileCustomElasticJob){
        SpringJobScheduler springJobScheduler = new SpringJobScheduler(
                fileCustomElasticJob,
                registryCenter,
                createJobConfiguration(FileCustomElasticJob.class,"0 0/1 * * * ?",4,"0=text,1=image,2=radio,3=vedio",false));
        return springJobScheduler;
    }*/
    @Bean(initMethod = "init")
    public SpringJobScheduler iniDataflowElasticJob(FileDataflowJob fileDataflowJob){
        SpringJobScheduler springJobScheduler = new SpringJobScheduler(
                fileDataflowJob,
                registryCenter,
                createJobConfiguration(FileDataflowJob.class,"0 0/1 * * * ?",1,null,true));
        return springJobScheduler;
    }
}
@Select("select * from t_file_custom where backedUp = 0 limit 0,#{size}")
    List<FileCustom> fetchData(int size);
运维管理
8.1 事件追踪
Elastic-Job-Lite在配置中提供了JobEventConfiguration,支持数据库方式配置,会在数据库中自动创建JOB_EXECUTION_LOG和JOB_STATUS_TRACE_LOG两张表以及若干索引来近路作业的相关信息。
8.1.1 修改Elastic-Job配置类
在ElasticJobConfig配置类中注入DataSource
@Configuration
public class ElasticJobConfig {
    @Autowired
    private DataSource dataSource;
	......
}
在任务配置中增加事件追踪配置
@Bean(initMethod = "init")
    public SpringJobScheduler initFileCustomElasticJob(FileCustomElasticJob fileCustomElasticJob){
        //增加任务事件追踪配置
        JobEventConfiguration jobEventConfiguration = new JobEventRdbConfiguration(dataSource);
        SpringJobScheduler springJobScheduler = new SpringJobScheduler(
                fileCustomElasticJob,
                registryCenter,
                createJobConfiguration(FileCustomElasticJob.class,"0 0/1 * * * ?",4,"0=text,1=image,2=radio,3=vedio",false),
                jobEventConfiguration);
        return springJobScheduler;
    }
8.1.2 日志信息表
启动后会发现在elastic-job-demo数据库中新增以下两张表
job_execution_log

记录每次作业的执行历史,分为两个步骤:
1.作业开始执行时间向数据库插入数据.
2.作业完成执行时向数据库更新数据,更新is_success,complete_time和failure_cause(如果任务执行失败)
job_status_trace_log
记录作业状态变更痕迹表,可通过每次作业运行的task_id查询作业状态变化的生命轨迹和运行轨迹.
8.2 运维控制台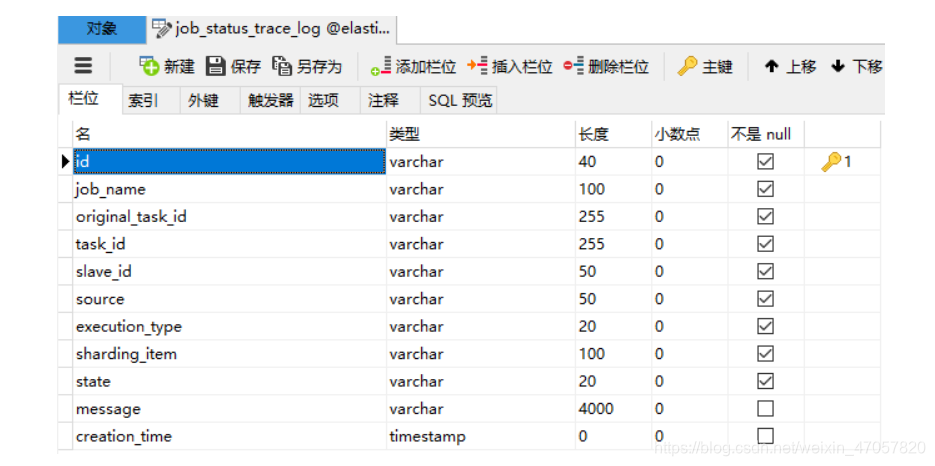
elastic-job中提供了一个elastic-job-lite-console控制台
设计理念
1.本 控制台和Elastic-Job并无直接关系,是通过读取Elastic-Job的注册中心数据展示作业状态,或更新注册中心数据修改全局配置。
2.控制台只能控制任务本身是否运行,但不能控制作业进程的启停,因为控制台和作业本身服务器是完全分布式的,控制台并不能控制作业服务器。
主要功能:
1.查看作业以及服务器状态
2.快捷的修改以及删除作业配置
3.启用和禁用作业
4.跨注册中心查看作业
5.查看作业运行轨迹和运行状态
不支持项
1.添加作业,因为作业都是在首次运行时自动添加,使用控制台添加作业并无必要.直接在作业服务器启动包含Elasitc-Job的作业进程即可。
8.2.1 搭建步骤
-
解压缩
elastic-job-lite-console-2.1.5.tar -
进入bin目录,并执行:
bin\start.bat -
打开浏览器访问
http://localhost:8899用户名: root 密码: root,进入之后界面如下:

提供两种用户:管理员和访客,管理员拥有全部操作权限,访客仅拥有查看权限。默认管理员账号和面膜是root/root,访客用户名和密码是guest/guest,通过conf\auth.properties可以修改管理员以及访客用户名及密码
8.2.2 配置及使用
-
配置注册中心地址
先启动zookeeper然后再注册中心配置界面,点添加

点击提交后,然后点连接(zookeeper必须处于启动状态)

连接成功后,在作业纬度下可以显示该命名空间作业名称,分片数量及该作业的cron表达式等信息
在服务器纬度可以查看到服务器ip,当前运行的是实例数,作业总数等信息。

添加数据库连接之后可以查看任务的执行结果

然后在作业历史中就可以看到任务执行历史了。
后界面如下:
![[外链图片转存中...(img-5SKh9m0A-1599022874939)]](https://i-blog.csdnimg.cn/blog_migrate/d7b12873040656f63ad1a7116109ed4e.png)


 5132
5132

 被折叠的 条评论
为什么被折叠?
被折叠的 条评论
为什么被折叠?
 到【灌水乐园】发言


