


NDK开发学习笔记。
1、在Java代码里写native方法。可以在Activity中写native方法,也可以重新创建一个Java类写。我这里是重新创建一个Java类写的。
public class GetString {
    //native方法
    public native String getString();
}
2、在main目录下创建一个jni目录。用于存放头文件(.h)和源文件(.c)。

右击jni目录 -> New -> C/C++ Source File创建头文件和源文件

在弹出的弹窗中填写头文件和源文件的名称,勾选Create an associated header 可以同时生成头文件和源文件,如果不勾选,就只创建源文件。创建完,就可以在这两个文件中写C代码了。个人不是很喜欢这种方式创建头文件和源文件。

下面是第二种创建方式。
创建好jni目录后,打开Terminal,输入cd app/src/main/java 命令回车,
再输入 javah com.example.ndkdemo.GetString 回车。其中com.example.ndkdemo.GetString为你写native方法的类的全路径。
 cd app/src/main/java

 javah com.example.ndkdemo.GetString
稍等片刻,会在app/src/main/java路径下生成一个头文件

把这个文件移动到jni目录下,打开该文件。
/* DO NOT EDIT THIS FILE - it is machine generated */
#include <jni.h>
/* Header for class com_example_ndkdemo_GetString */

#ifndef _Included_com_example_ndkdemo_GetString
#define _Included_com_example_ndkdemo_GetString
#ifdef __cplusplus
extern "C" {
#endif
/*
 * Class:     com_example_ndkdemo_GetString
 * Method:    getString
 * Signature: ()Ljava/lang/String;
 */
JNIEXPORT jstring JNICALL Java_com_example_ndkdemo_GetString_getString
  (JNIEnv *, jobject);

#ifdef __cplusplus
}
#endif
#endif
JNIEXPORT jstring JNICALL Java_com_example_ndkdemo_GetString_getString
(JNIEnv *, jobject);就是native方法在jni层生成的对应的方法。注意Java_com_example_ndkdemo_GetString_getString这个方法名不要修改。这个方法的命名格式为:Java_类的全路径名_方法名,中间用_隔开。使用第一种方式创建头文件和源文件,需要自己写方法名,很容易出错。
然后,右击jni目录 -> New -> C/C++ Source File创建源文件,只要不勾选Create an associated header就可以了。
3、将头文件中的方法 JNIEXPORT jstring JNICALL Java_com_example_ndkdemo_GetString_getString
(JNIEnv *, jobject);复制到源文件中,去掉JNIEXPORT和JNICALL就可以去实现这个方法了。注意,这里需要将头文件引进来 #include "GetString.h"。
#include "GetString.h"
jstring Java_com_example_ndkdemo_GetString_getString
(JNIEnv *env, jobject jobj) {
return (*env)->NewStringUTF(env, "asdfghjkl");
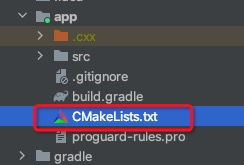
}4、在app目录下创建CMakeLists.txt
CMakeList.txt的内容如下
# For more information about using CMake with Android Studio, read the
# documentation: https://d.android.com/studio/projects/add-native-code.html

# Sets the minimum version of CMake required to build the native library.

cmake_minimum_required(VERSION 3.4.1)

# Creates and names a library, sets it as either STATIC
# or SHARED, and provides the relative paths to its source code.
# You can define multiple libraries, and CMake builds them for you.
# Gradle automatically packages shared libraries with your APK.
add_library( # Sets the name of the library.
        GetString

        # Sets the library as a shared library.
        SHARED

        # Provides a relative path to your source file(s).
        src/main/jni/GetString.c
        src/main/jni/GetString.h
        )

# Searches for a specified prebuilt library and stores the path as a
# variable. Because CMake includes system libraries in the search path by
# default, you only need to specify the name of the public NDK library
# you want to add. CMake verifies that the library exists before
# completing its build.

#这个函数的意思是给系统的log库起个别名,命名为log-lib
find_library( # Sets the name of the path variable.
        log-lib

        # Specifies the name of the NDK library that
        # you want CMake to locate.
        log)

# Specifies libraries CMake should link to your target library. You
# can link multiple libraries, such as libraries you define in this
# build script, prebuilt third-party libraries, or system libraries.

#这个函数的意思是刚刚之前的命名的库一起link进去
target_link_libraries( # Specifies the target library.
        #        Hello
        #        JavaCallC
        GetString

        # Links the target library to the log library
        # included in the NDK.
        ${log-lib})
5、在build.gradle(app)的android->defaultConfig节点下添加ndk配置信息
ndk {
            abiFilters "armeabi-v7a" //cpu类型,会生成对应cpu的so文件
        }
在android节点下配置CMakeLists信息
externalNativeBuild {
        cmake {
            path "CMakeLists.txt"
        }
    }

ndkVersion '21.4.7075529'
6、加载动态链接库
public class GetString {

    //加载动态链接库
    static {
        System.loadLibrary("GetString");
    }

    //native 方法
    public native String getString();
}
7、使用
public class MainActivity extends AppCompatActivity {
    private static final String TAG = "MainActivity";

    @Override
    protected void onCreate(Bundle savedInstanceState) {
        super.onCreate(savedInstanceState);
        setContentView(R.layout.activity_main);

        GetString getString = new GetString();
        findViewById(R.id.btnGetString).setOnClickListener(new View.OnClickListener() {
            @Override
            public void onClick(View v) {
                String string = getString.getString();
                Log.d(TAG, "string -> " + string);
            }
        });
    }
}


 4423
4423


 被折叠的 条评论
为什么被折叠?
被折叠的 条评论
为什么被折叠?
 到【灌水乐园】发言


