Springboot邮件发送

Springboot邮件发送

1.参数配置

pom.xml

<dependency>
    <groupId>org.springframework.boot</groupId>
    <artifactId>spring-boot-starter-mail</artifactId>
</dependency>

application.properties

SMTP授权码获取方式(qq邮箱)

  1. 设置
  2. 账户
  3. POP3/IMAP/SMTP/Exchange/CardDAV/CalDAV下
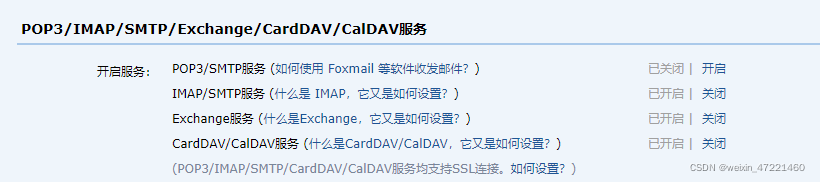
    在这里插入图片描述
    开启服务,按照要求即可获取授权码
#SMTP服务
spring.mail.host=smtp.exmail.qq.com
#发信人邮箱
spring.mail.username=****@**.**
#授权码
spring.mail.password=*********

发送邮件

		@Autowired
    	private JavaMailSenderImpl mailSender;
    	//application.properties配置的参数
    	@Value("${spring.mail.username}")
    	private String mailSendUsername;
    	
    	public void send() throws MessagingException {
    		
        	MimeMessage mimeMessage = mailSender.createMimeMessage();
        	MimeMessageHelper helper = new MimeMessageHelper(mimeMessage, true);
        	helper.setSubject("标题");
        	//正文可以使用HTML模板设置样式
        	helper.setText("正文");
        	//收件人
        	helper.setTo("**@*******.com");
        	//发送人
        	helper.setFrom(mailSendUsername);
        	mailSender.send(mimeMessage);
      	}
  • 0
    点赞
  • 0
    收藏
    觉得还不错? 一键收藏
  • 打赏
    打赏
  • 0
    评论
你好!关于Spring Boot邮件发送,你可以按照以下步骤进行操作: 1. 添加相关依赖:在你的Spring Boot项目的pom.xml文件中,添加以下依赖: ```xml <dependency> <groupId>org.springframework.boot</groupId> <artifactId>spring-boot-starter-mail</artifactId> </dependency> ``` 2. 配置邮件服务器:在你的application.properties或者application.yml文件中,添加以下邮件服务器配置信息: ```properties spring.mail.host=your-smtp-hostname spring.mail.port=your-smtp-port spring.mail.username=your-username spring.mail.password=your-password ``` 确保将上述配置信息替换为你自己的邮件服务器的相关信息。 3. 创建邮件发送服务类:创建一个邮件发送服务类,用于构建和发送邮件。你可以使用Spring Boot提供的JavaMailSender接口来完成这个任务。以下是一个简单的示例: ```java import org.springframework.beans.factory.annotation.Autowired; import org.springframework.mail.SimpleMailMessage; import org.springframework.mail.javamail.JavaMailSender; import org.springframework.stereotype.Service; @Service public class EmailService { @Autowired private JavaMailSender mailSender; public void sendEmail(String to, String subject, String text) { SimpleMailMessage message = new SimpleMailMessage(); message.setTo(to); message.setSubject(subject); message.setText(text); mailSender.send(message); } } ``` 4. 调用邮件发送服务:在需要发送邮件的地方,注入邮件发送服务类,并调用sendEmail方法发送邮件。以下是一个简单的示例: ```java import org.springframework.beans.factory.annotation.Autowired; import org.springframework.web.bind.annotation.GetMapping; import org.springframework.web.bind.annotation.RestController; @RestController public class EmailController { @Autowired private EmailService emailService; @GetMapping("/sendEmail") public String sendEmail() { String to = "recipient@example.com"; String subject = "Test Email"; String text = "This is a test email."; emailService.sendEmail(to, subject, text); return "Email sent successfully!"; } } ``` 请根据你的实际需求进行适当的修改和扩展。希望能对你有所帮助!如果还有其他问题,请随时提问。

“相关推荐”对你有帮助么?

  • 非常没帮助
  • 没帮助
  • 一般
  • 有帮助
  • 非常有帮助
提交
评论
添加红包

请填写红包祝福语或标题

红包个数最小为10个

红包金额最低5元

当前余额3.43前往充值 >
需支付:10.00
成就一亿技术人!
领取后你会自动成为博主和红包主的粉丝 规则
hope_wisdom
发出的红包

打赏作者

雨言yyds

你的鼓励将是我创作的最大动力

¥1 ¥2 ¥4 ¥6 ¥10 ¥20
扫码支付:¥1
获取中
扫码支付

您的余额不足,请更换扫码支付或充值

打赏作者

实付
使用余额支付
点击重新获取
扫码支付
钱包余额 0

抵扣说明:

1.余额是钱包充值的虚拟货币,按照1:1的比例进行支付金额的抵扣。
2.余额无法直接购买下载,可以购买VIP、付费专栏及课程。

余额充值