


 本文介绍了在Vue2项目中安装和使用Cesium库的详细过程,包括解决webpack5以上版本缺少polyfill的问题,以及安装cesium的步骤和vue.config.js的配置。同时,文章提到了如何处理依赖和配置VueCLI服务来避免报错。
本文主要对vue项目中使用cesium依赖包的安装做详细的介绍,也是自己在研究安装cesium过程中遇到的一些问题以及解决方案提供一些参考。
1.版本问题
很多人在选择安装时按照vue-cli安装的默认vue2/vue3,这里主要对vue2版本的cesium安装做详细介绍,vue3目前项目使用的比较少,但是安装的原理也是大同小异。其次时webpack的版本,这个是重中之重,由于webpack>5的版本为了减小打包大小不在提供polyfill的自动引入,需要自己按需添加,同时也需要安装一些相关依赖,依赖名称根据报错提示,手动添加,例如:
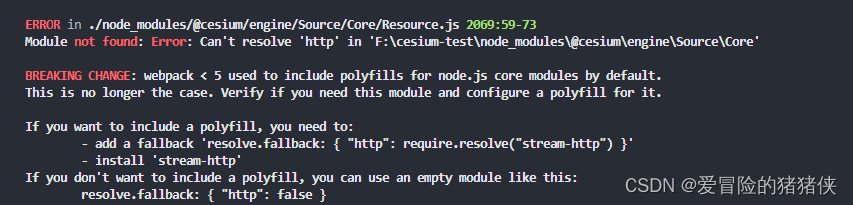
按照提示内容照做就ok,其他缺失依赖就不再说明了
If you want to include a polyfill, you need to:
        - add a fallback 'resolve.fallback: { "http": require.resolve("stream-http") }'
        - install 'stream-http'
If you don't want to include a polyfill, you can use an empty module like this:
        resolve.fallback: { "http": false }
说到这里可能有的人就要问了,每个依赖都要单独安装,webpack为什么要去掉这个依赖呢?问的好,我也想这么问,真*****。其实这些依赖并不是必须的,你不需要的就都给false就好了,需要哪个再安装那个依赖呗😒。
2.安装
首先安装vue2,vue2安装就不介绍啦,package.json附上
{
  "name": "cesium-test",
  "version": "0.1.0",
  "private": true,
  "scripts": {
    "serve": "vue-cli-service serve",
    "build": "vue-cli-service build",
    "lint": "vue-cli-service lint"
  },
  "dependencies": {
    "cesium": "^1.102.0",
    "core-js": "^3.8.3",
    "stream-http": "^3.2.0",
    "vue": "^2.6.14",
    "vue-router": "^3.5.1",
    "vuex": "^3.6.2"
  },
  "devDependencies": {
    "@babel/core": "^7.12.16",
    "@babel/eslint-parser": "^7.12.16",
    "@vue/cli-plugin-babel": "~5.0.0",
    "@vue/cli-plugin-eslint": "~5.0.0",
    "@vue/cli-plugin-router": "~5.0.0",
    "@vue/cli-plugin-vuex": "~5.0.0",
    "@vue/cli-service": "~5.0.0",
    "copy-webpack-plugin": "^11.0.0",
    "eslint": "^7.32.0",
    "eslint-plugin-vue": "^8.0.3",
    "sass": "^1.58.1",
    "sass-loader": "^13.2.0",
    "webpack": "^5.75.0"
  },
}
相关依赖都在里面了只需要执行一次
npm i就大功告成了
3.vue.config.js配置
这里就少废话了
const CopyWebpackPlugin = require("copy-webpack-plugin");
const webpack = require("webpack");
const path = require("path");
// let cesiumSource = "./node_modules/cesium/Source";

module.exports = {
  publicPath: "./",
  outputDir: "dist",
  productionSourceMap: false, // 生产环境是否生成 sourceMap 文件,
  filenameHashing: true, // 文件hash
  lintOnSave: false, // eslint在保存时检查
  devServer: {
    open: process.platform === "darwin",
    host: "0.0.0.0",
    port: 8089,
    https: false,
    //配置代理,防止跨域请求
    proxy: {
      // 示例,可以配置多个代理
      "/api": {
        // target: `${process.env.VUE_APP_BASE_API}/api/`, // 测试地址,这里用的是环境地址
        target: `http://192.168.1.250:88/api/`, //服务器地址
        ws: true,
        changeOrigin: true,
        secure: false,
        pathRewrite: {
          "^/api": "",
        },
      },
      "/tiles": {
        // target: "http://xxx.xxx.xx.xxx:xxxx/", // 开发地址及端口号
        // target: `${process.env.VUE_APP_BASE_API}/tiles/`, // 测试地址,这里用的是环境地址
        target: `http://192.168.1.250:88/tiles/`, //服务器地址
        ws: true,
        changeOrigin: true,
        secure: false,
        pathRewrite: {
          "^/tiles": "",
        },
      },
    },
  },
  css: {
    // 添加sass-loader
    loaderOptions: {
      sass: {
        sassOptions: {
          outputStyle: "expanded",
        },
      },
    },
  },

  configureWebpack: {
    output: {
      sourcePrefix: " ",
    },
    amd: {
      toUrlUndefined: true,
    },
    resolve: {
      // 解析文件的扩展名
      extensions: [".js", ".vue", ".json"],
      // webpack5缺少的polyfill按需引入
      fallback: {
        http: require.resolve("stream-http"),
        https: false,
        url: false,
        zlib: false,
      },
      // 文件路径别名,这里有些问题,还没有解决!!!
      // alias: {
      //   vue$: "vue/dist/vue.esm.js",
      //   "@": path.resolve("src"),
      //   cesium: path.resolve(__dirname, '../node_modules/cesium/Source'),
      // },
    },
    plugins: [
      //这里是在执行打包命令时把cesium相关包拷贝成静态文件并放在最外层目录下
      new CopyWebpackPlugin({
        patterns: [
          {
            from: "node_modules/cesium/Build/Cesium/Workers",
            to: "Workers",
          },
          {
            from: "node_modules/cesium/Build/Cesium/ThirdParty",
            to: "ThirdParty",
          },
          {
            from: "node_modules/cesium/Build/Cesium/Assets",
            to: "Assets",
          },
          {
            from: "node_modules/cesium/Build/Cesium/Widgets",
            to: "Widgets",
          },
        ],
      }),
      new webpack.DefinePlugin({
      // 这里时打包或者开发文件包的地址,打包后需要注意添加新的路径地址,需要根据环境判断路径
      // 会经常出现的问题时在项目部署上线时,会报错提示缺少相关依赖,注意判断环境添加对应路径即可
        CESIUM_BASE_URL: JSON.stringify("/"),
      }),
    ],
    module: {
      unknownContextCritical: /^.\/.*$/,
      // eslint-disable-next-line no-dupe-keys
      unknownContextCritical: false,
      unknownContextRegExp:
        /\/cesium\/cesium\/Source\/Core\/buildModuleUrl\.js/,
    },
  },
};
4.运行测试
在HelloWorld.vue中测试如下代码
<template>
  <div id="cesiumContainer"></div>
</template>

<script>
import "cesium/Build/Cesium/Widgets/widgets.css";
import * as Cesium from "cesium";

export default {
  name: "TestMap",
  data() {
    return {
      viewer: null,
    };
  },
  mounted() {
    const viewer = new Cesium.Viewer('cesiumContainer');
  },
};
</script>

<!-- Add "scoped" attribute to limit CSS to this component only -->
<style scoped lang="scss">
#cesiumContainer {
  position: relative;
  width: 100vw;
  height: 100vh;
  margin: 0;
  padding: 0;
  overflow: hidden;
}
</style>
输入npm run serve命令,地球出来就大功告成了
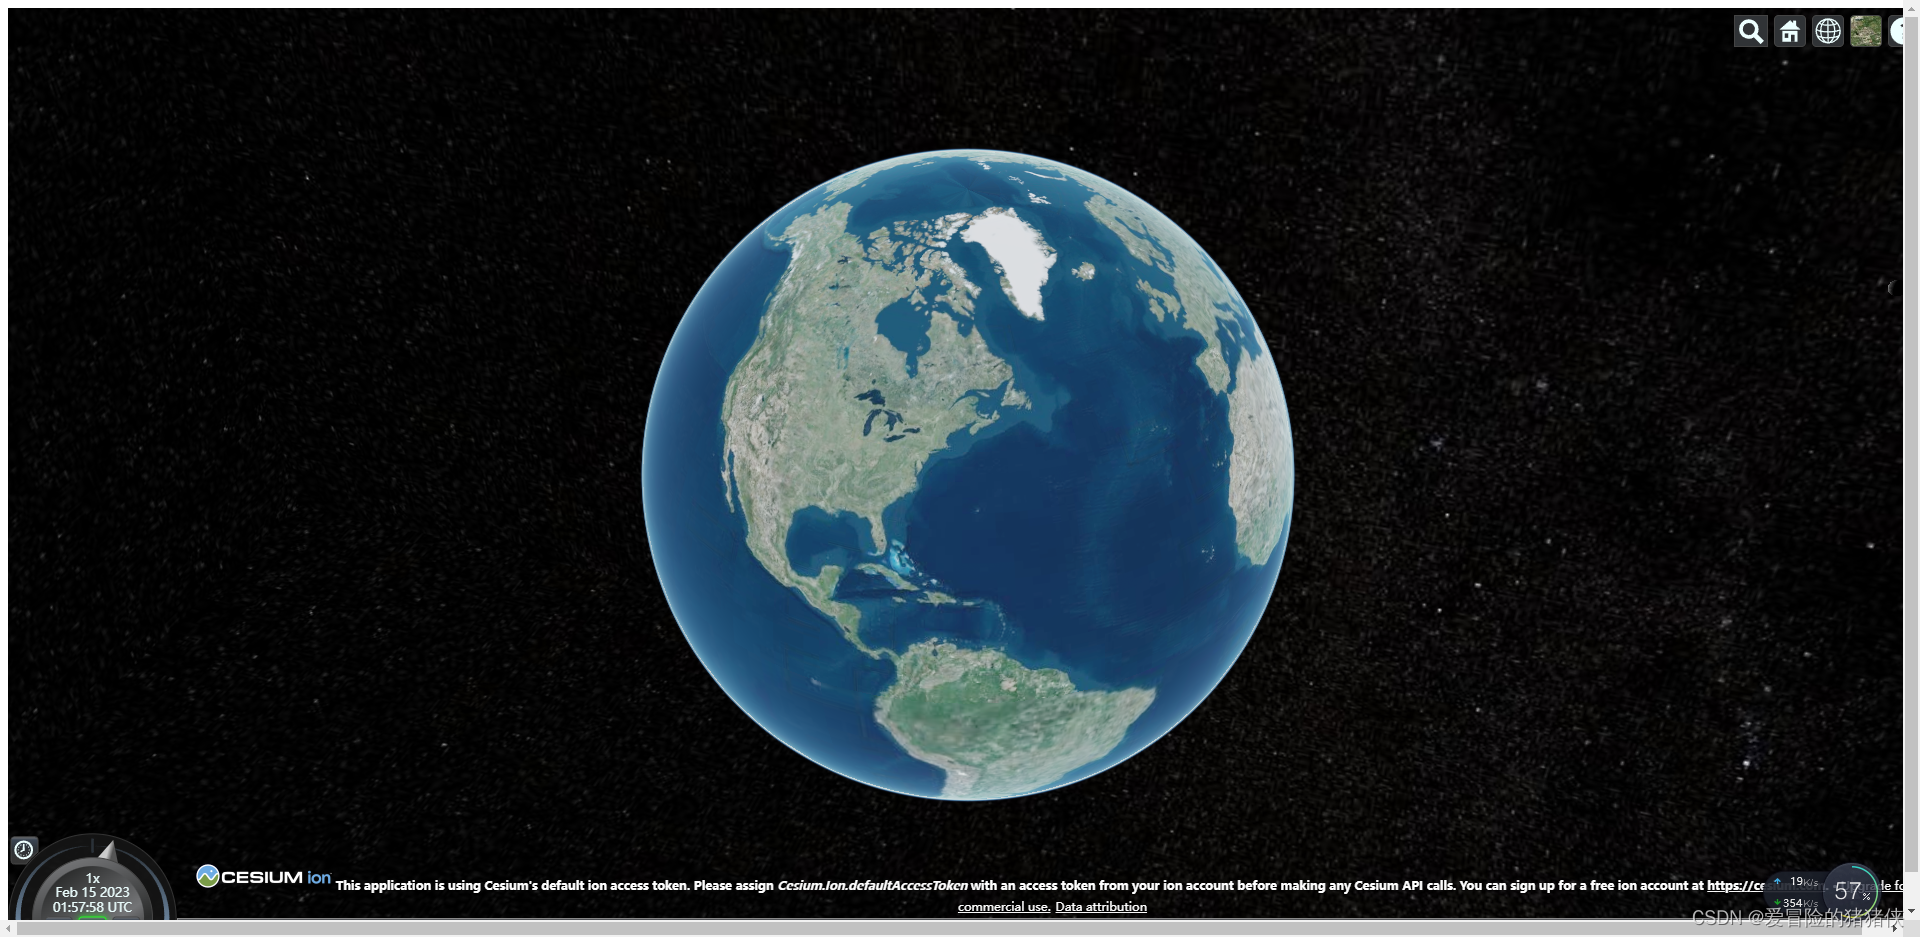
如果本文对您有帮助的话,不要忘记点赞关注收藏哦!


 139
139

 被折叠的 条评论
为什么被折叠?
被折叠的 条评论
为什么被折叠?
 到【灌水乐园】发言


